How to Set Up the Elementor Weather Widget
The Xpro Weather Widget for Elementor is a powerful FREE widget designed to display real-time, hyper-local weather data directly on your website. By leveraging the Google Weather API and built-in server-side caching, this widget ensures accurate reporting without compromising your site’s loading speed. You can choose from multiple responsive layouts, customize condition icons, and toggle specific metrics to create a clean, professional weather display that matches your brand.
How to Install Elementor Weather Widget
You must have the Free version of Xpro Elementor Addons installed and active.
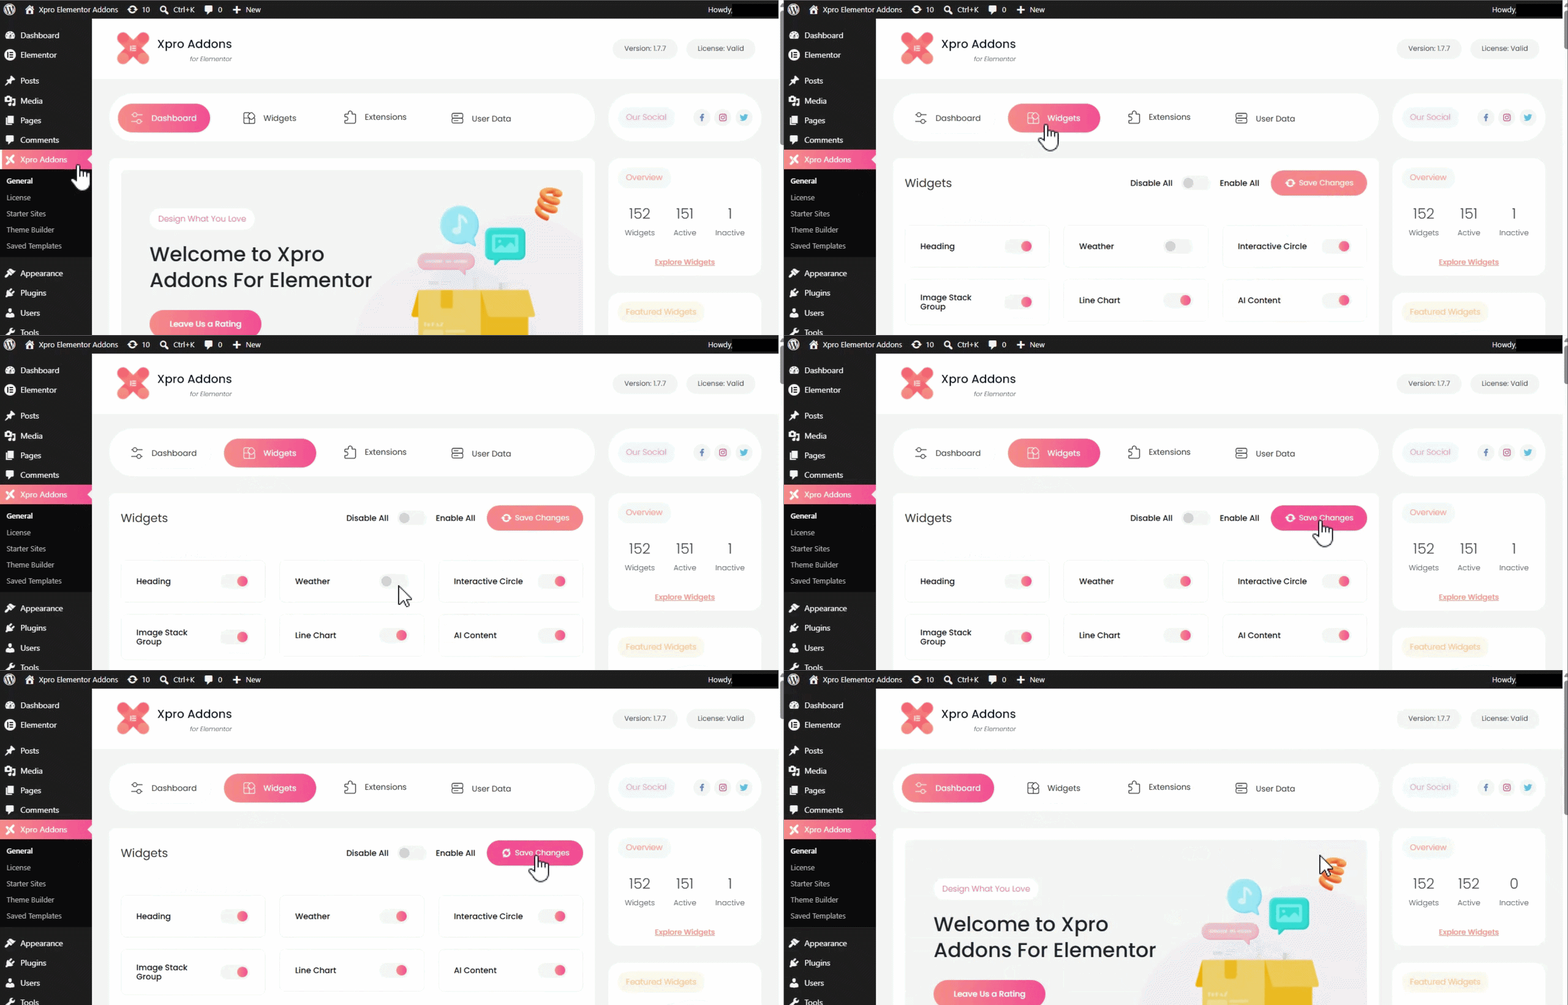
- Navigate to Xpro Addons in your WordPress Dashboard.
- In the Widgets Tab, find the Weather widget and toggle the button ON.
How to Use Xpro Elementor Weather Widget
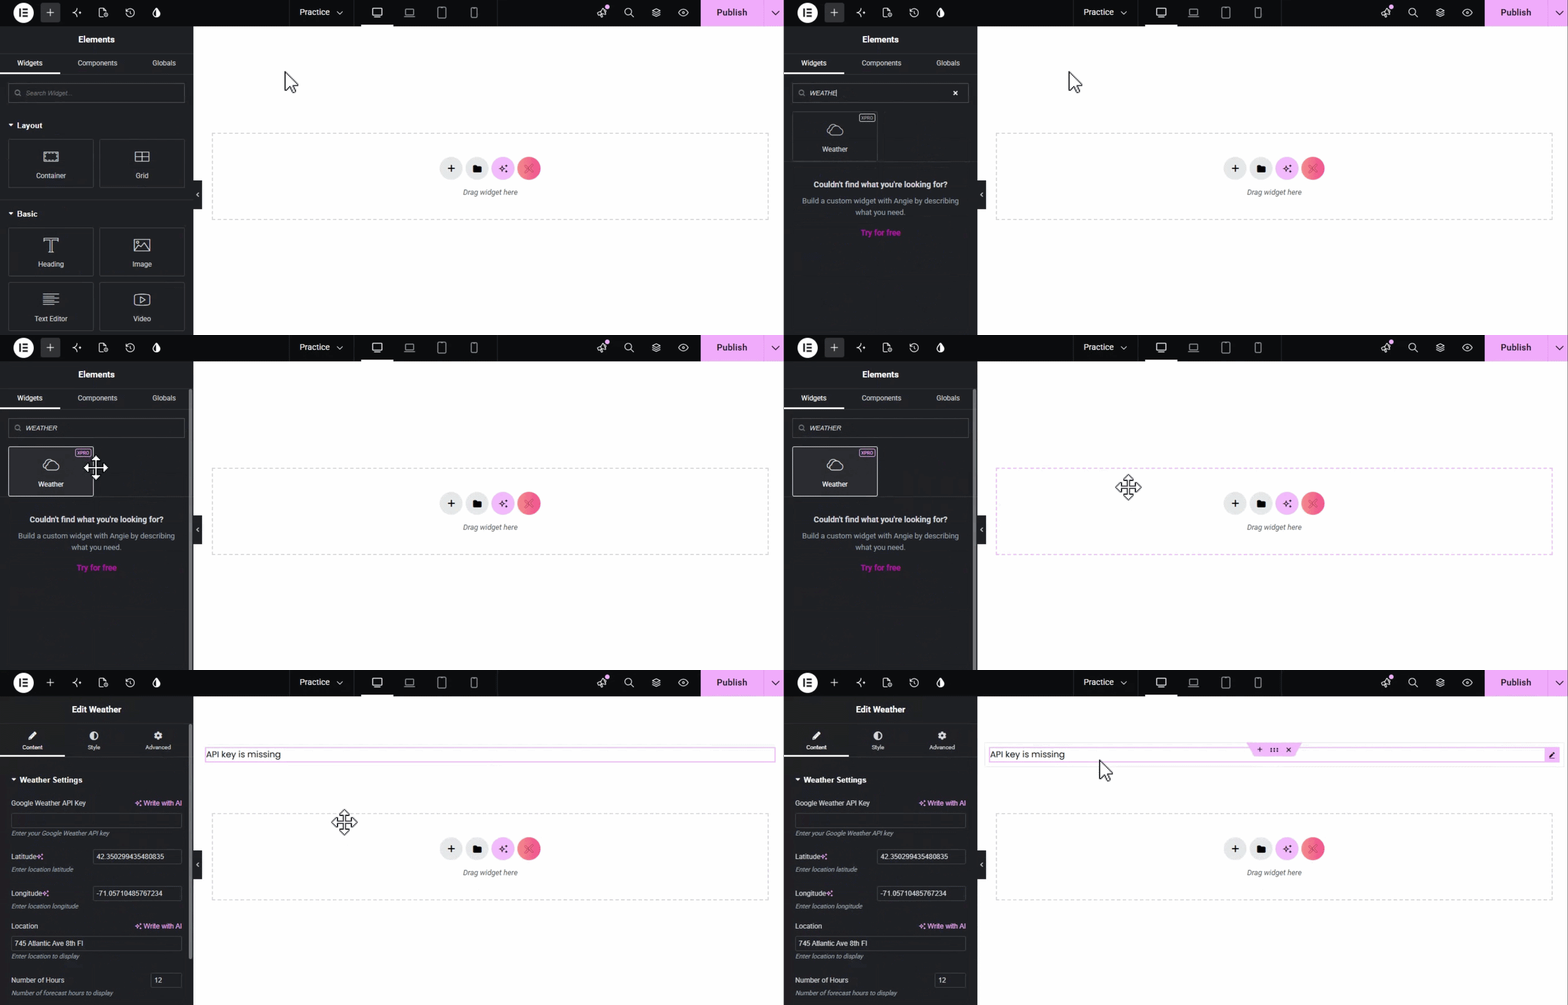
Step 1: Search for Weather in the Elementor sidebar.
Step 2: Simply drag and drop the widget onto your desired page location.
How to Configure Your Weather Settings
The Content Section is where you establish your data source and core information:
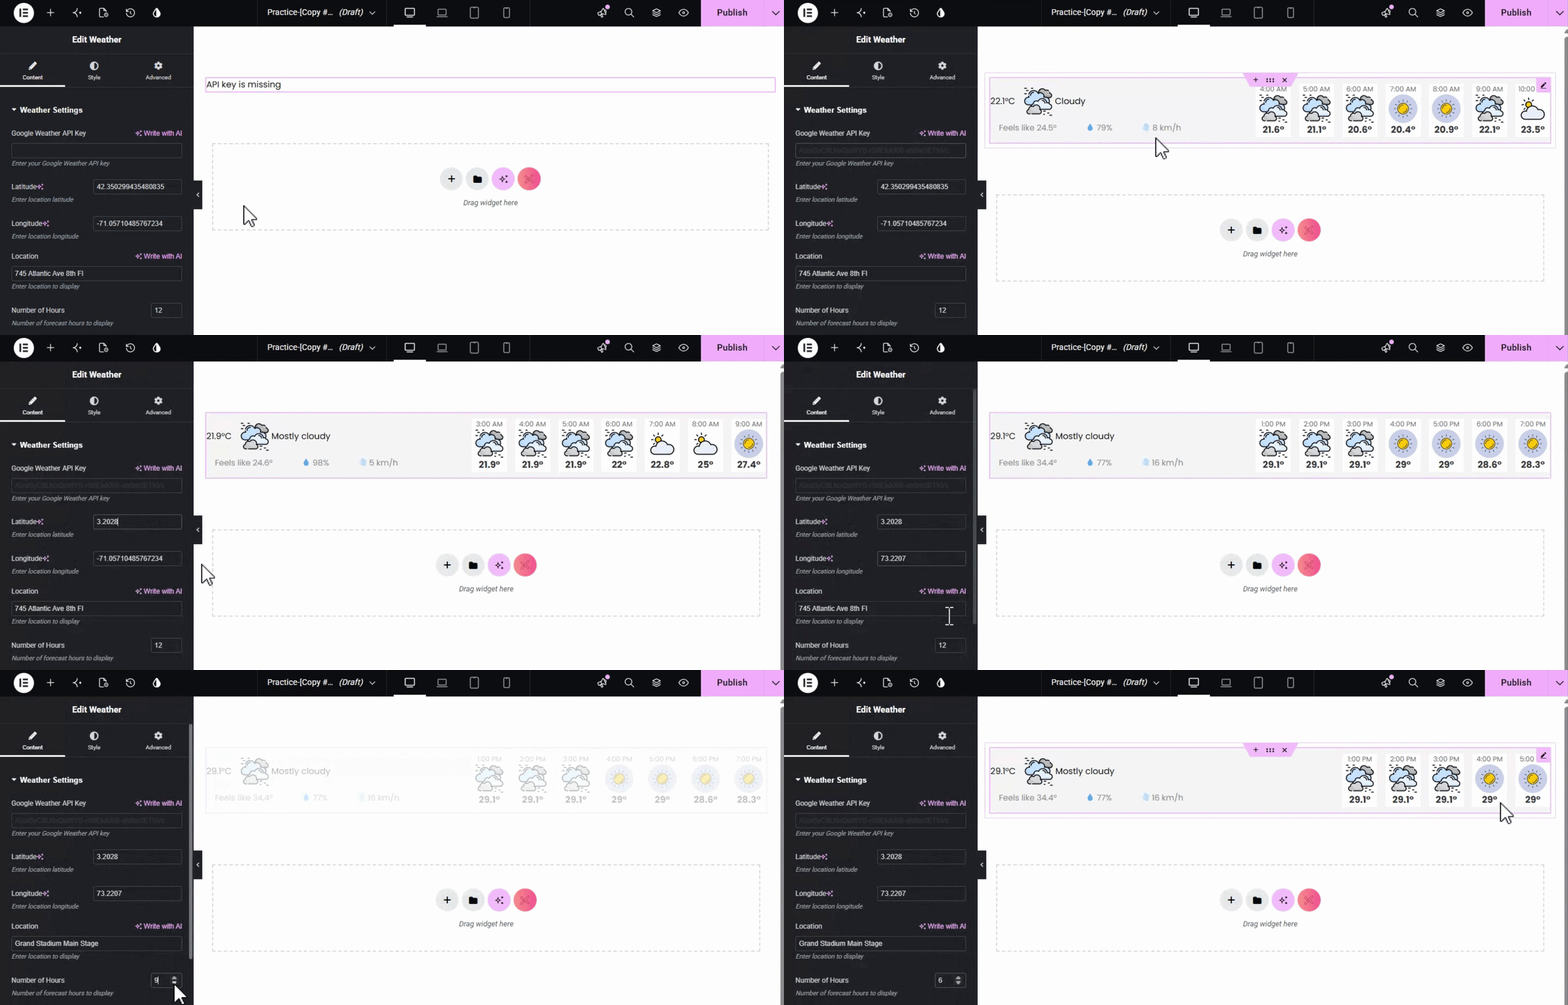
- Google Weather API Key: Enter your secure key to fetch live global data.
- Read our detailed guide on: How to get a Free API key for a Weather Widget in Elementor
- Precise Targeting: Input exact Latitude and Longitude coordinates for surgical accuracy, which is more reliable than standard city-name strings.
- Branded Location: Use the Location field to display a friendly name like “Our Main Stage” or “Corporate Office.”
- SEO-Friendly Titles: Customize the widget card’s heading and select the appropriate Title HTML Tag (H1–H6, div, span, p) to maintain a perfect site-wide SEO structure.
- Forecast Window: Define the Number of Hours for your localized trendline display.
Choosing Your Layout and Icons
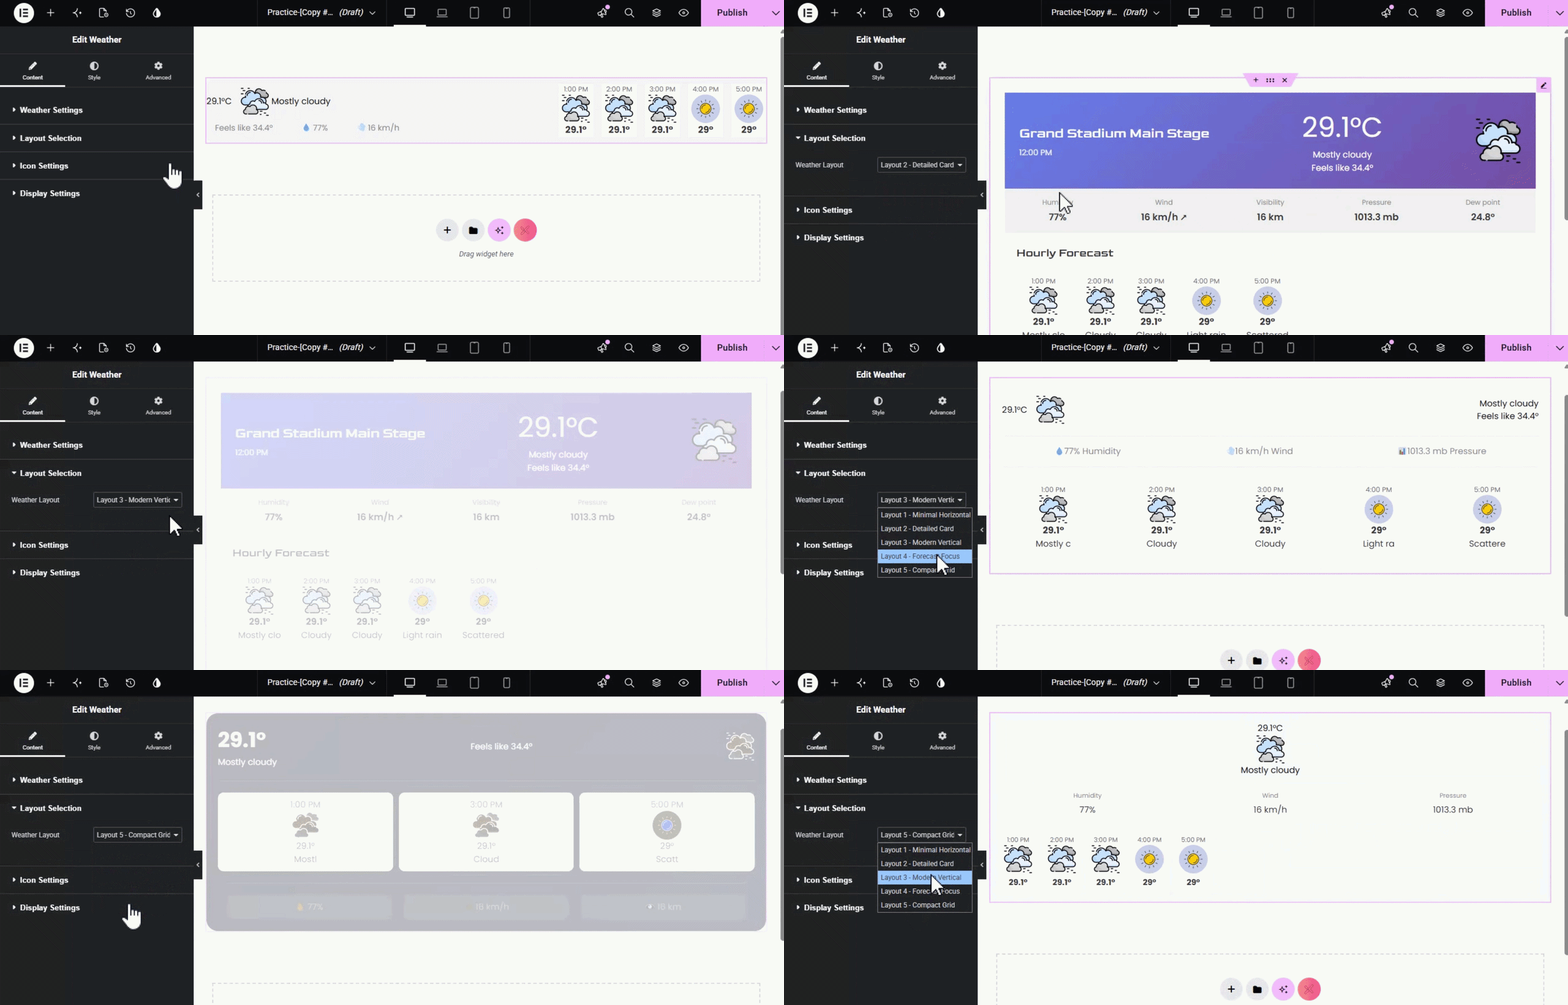
- Layout Selection: Select from 5 versatile templates: Minimal Horizontal, Detailed Card, Modern Vertical, Forecast Focus, or Compact Grid.
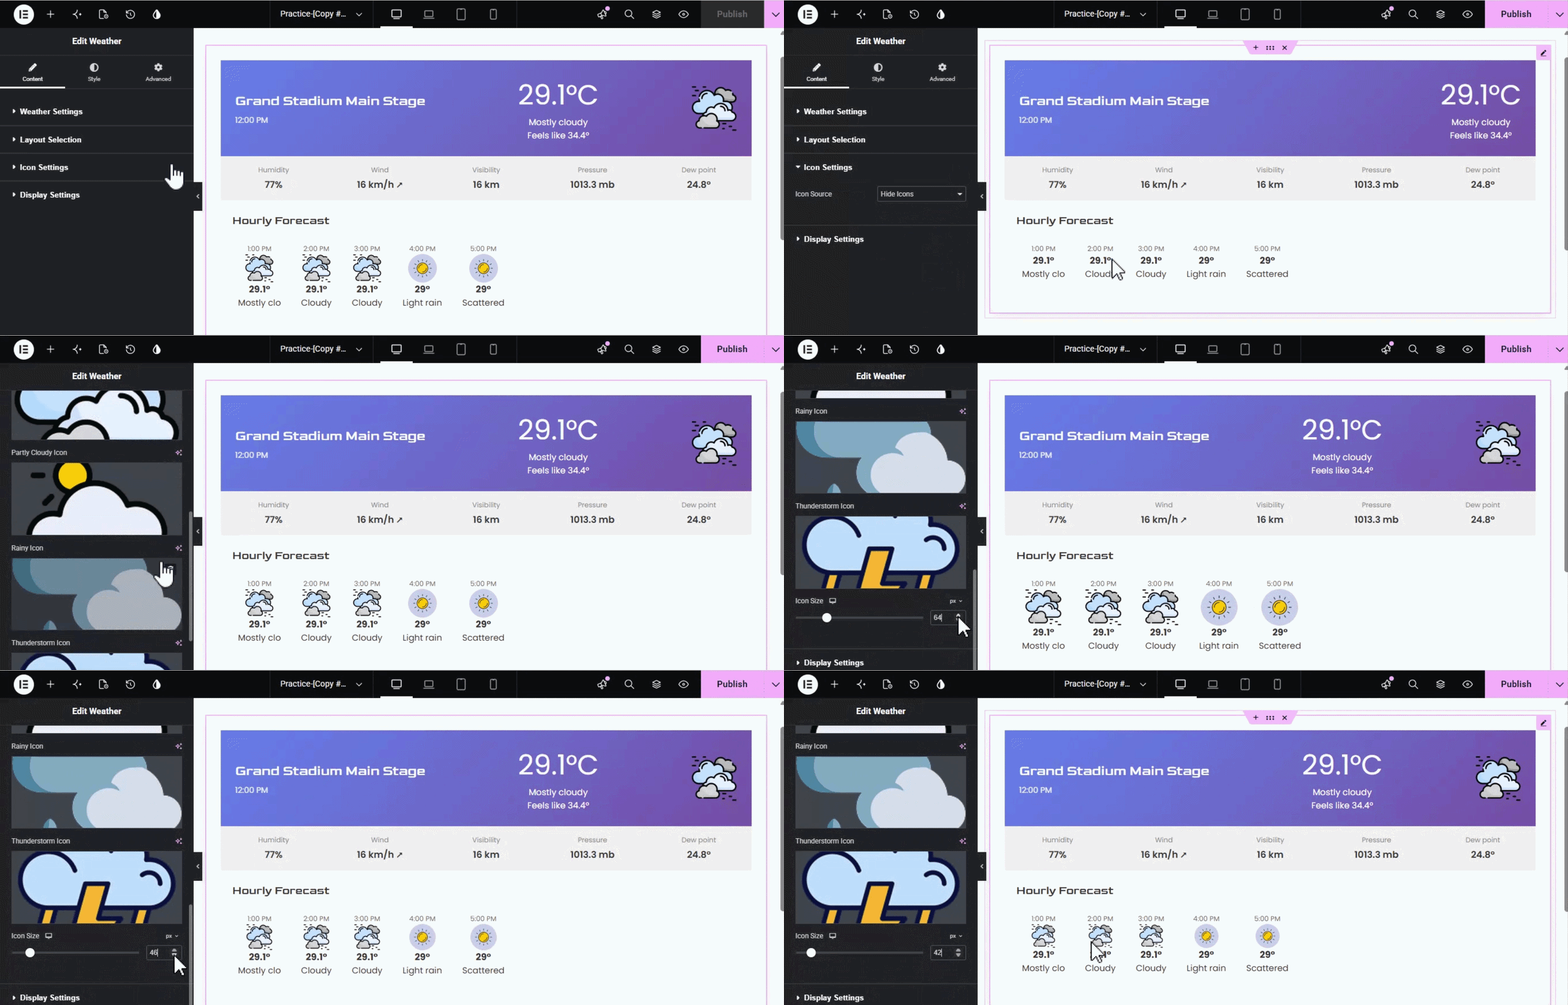
- Custom Icon Sources: Choose between API-provided icons, hide them, or use Custom Icons. You can upload your own unique SVG or image files for conditions such as Sunny, Cloudy, Rainy, and Thunderstorm to perfectly match your brand’s iconography.
- Responsive Icon Size: Adjust icon dimensions in pixels using the responsive slider for a clean look on mobile, tablet, and desktop.
Display Settings
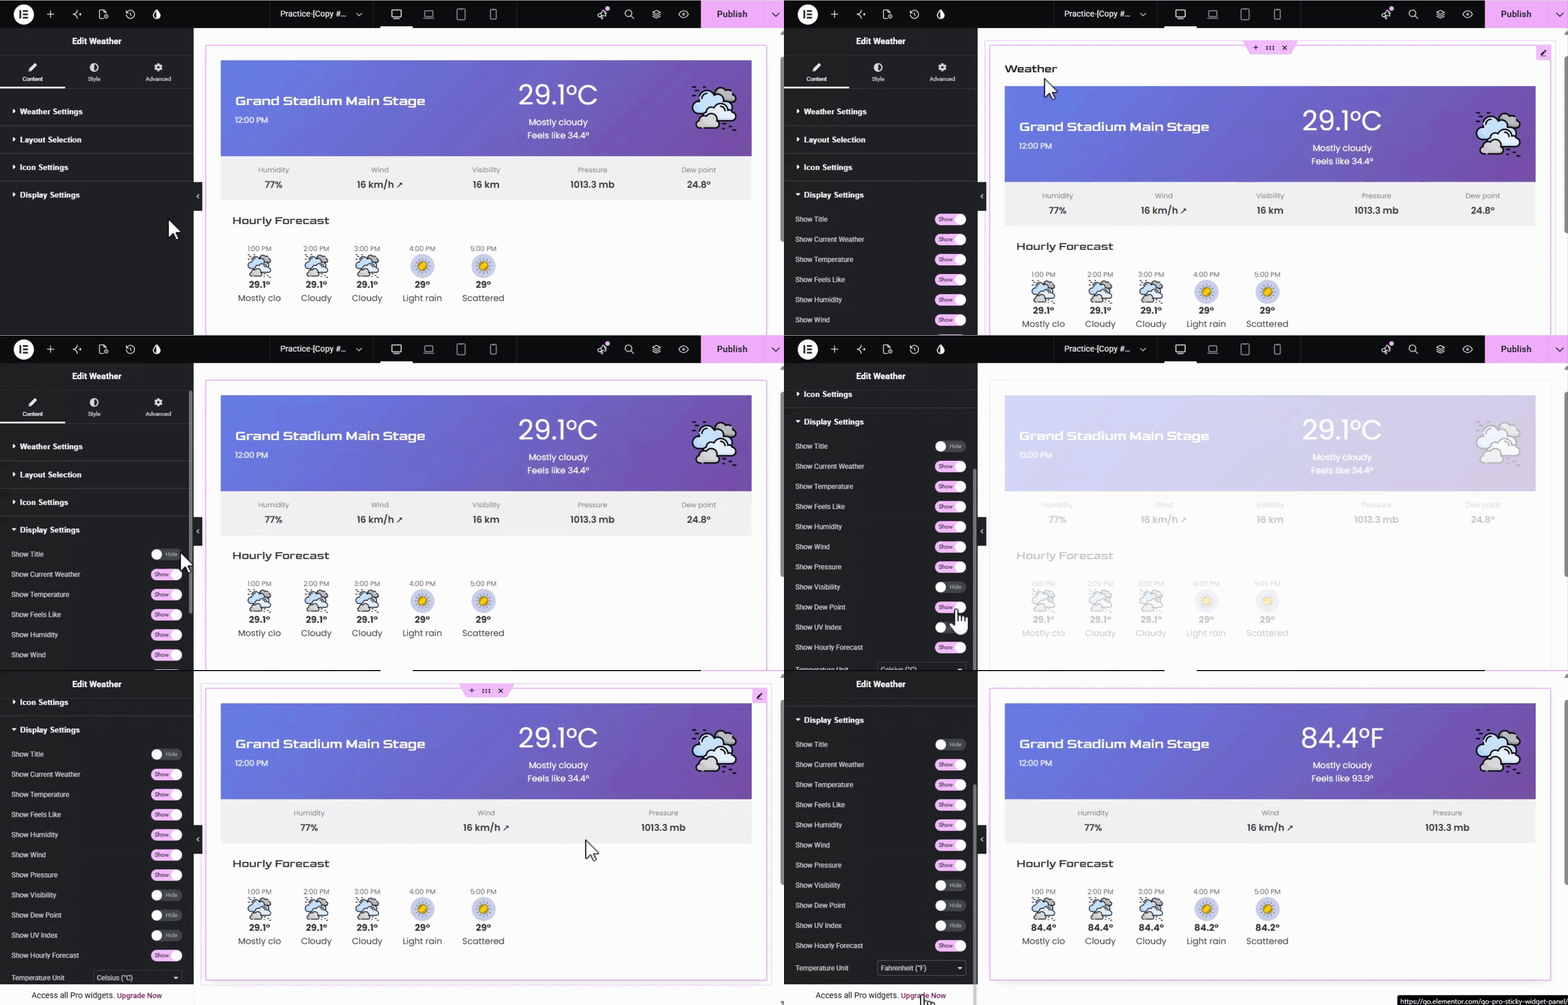
Immediately following the icon configuration, use these toggles to declutter your layout and show only the metrics your visitors need:
- Visibility Toggles: Individually show or hide the Title, Current Weather, Temperature, Feels Like, Humidity, Wind, Pressure, Visibility, Dew Point, UV Index, and Hourly Forecast.
- Temperature Unit: Instantly swap the entire widget between Celsius (°C) and Fahrenheit (°F).
Advanced Styling Options
The Style Tab gives you total design freedom within the native Elementor interface:
Dynamic Styling System
The Style Tab now automatically adapts to your selected layout. This ensures your workspace remains decluttered, showing only the design parameters relevant to your current configuration.
- Layout 1 (Minimal Horizontal): Optimized for clean, wide displays with global background controls, image overlays, and precise padding for horizontal alignment.
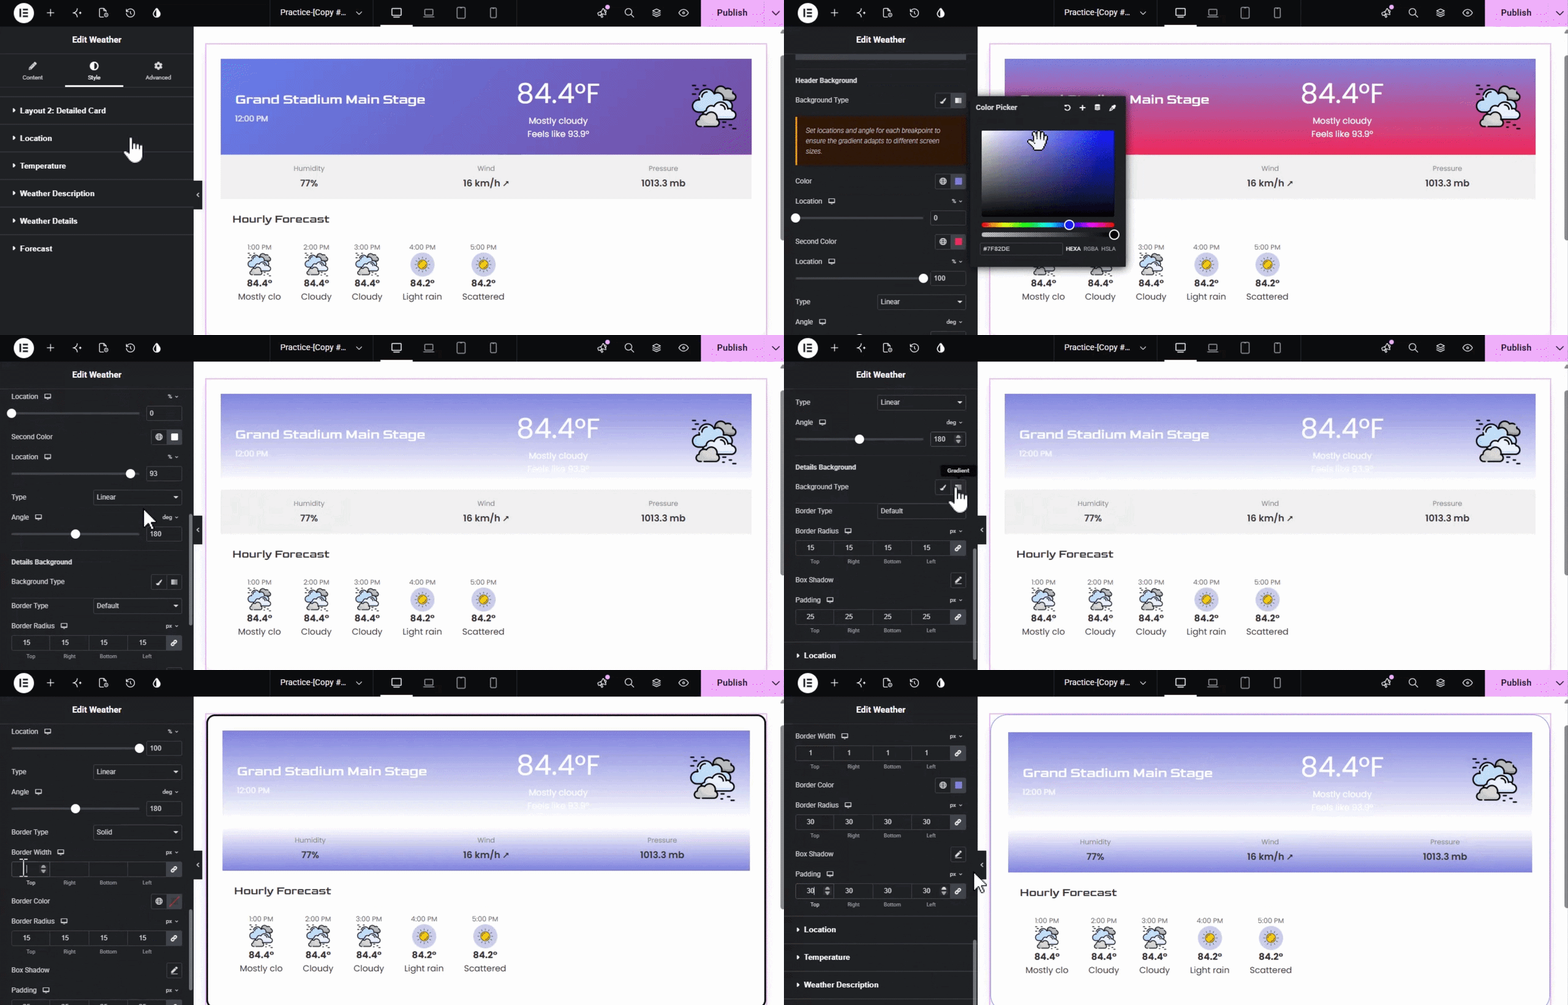
- Layout 2 (Detailed Card): Features a Multi-Layer Background System. You can independently style the Main Background, the Header Background, and the Details Background to create high-contrast, professional-grade cards.
- Layout 3 (Modern Vertical): Provides a streamlined vertical control set with dedicated border and radius parameters to fit narrow sidebars.
- Layout 4 (Forecast Focus): Introduces a Global Text Color override at the layout level, allowing you to instantly unify the look of your extended forecast trends.
- Layout 5 (Compact Grid): Offers a dedicated Grid Container styling section to manage the spacing and background of the miniaturized data points.
Location & Current Time:
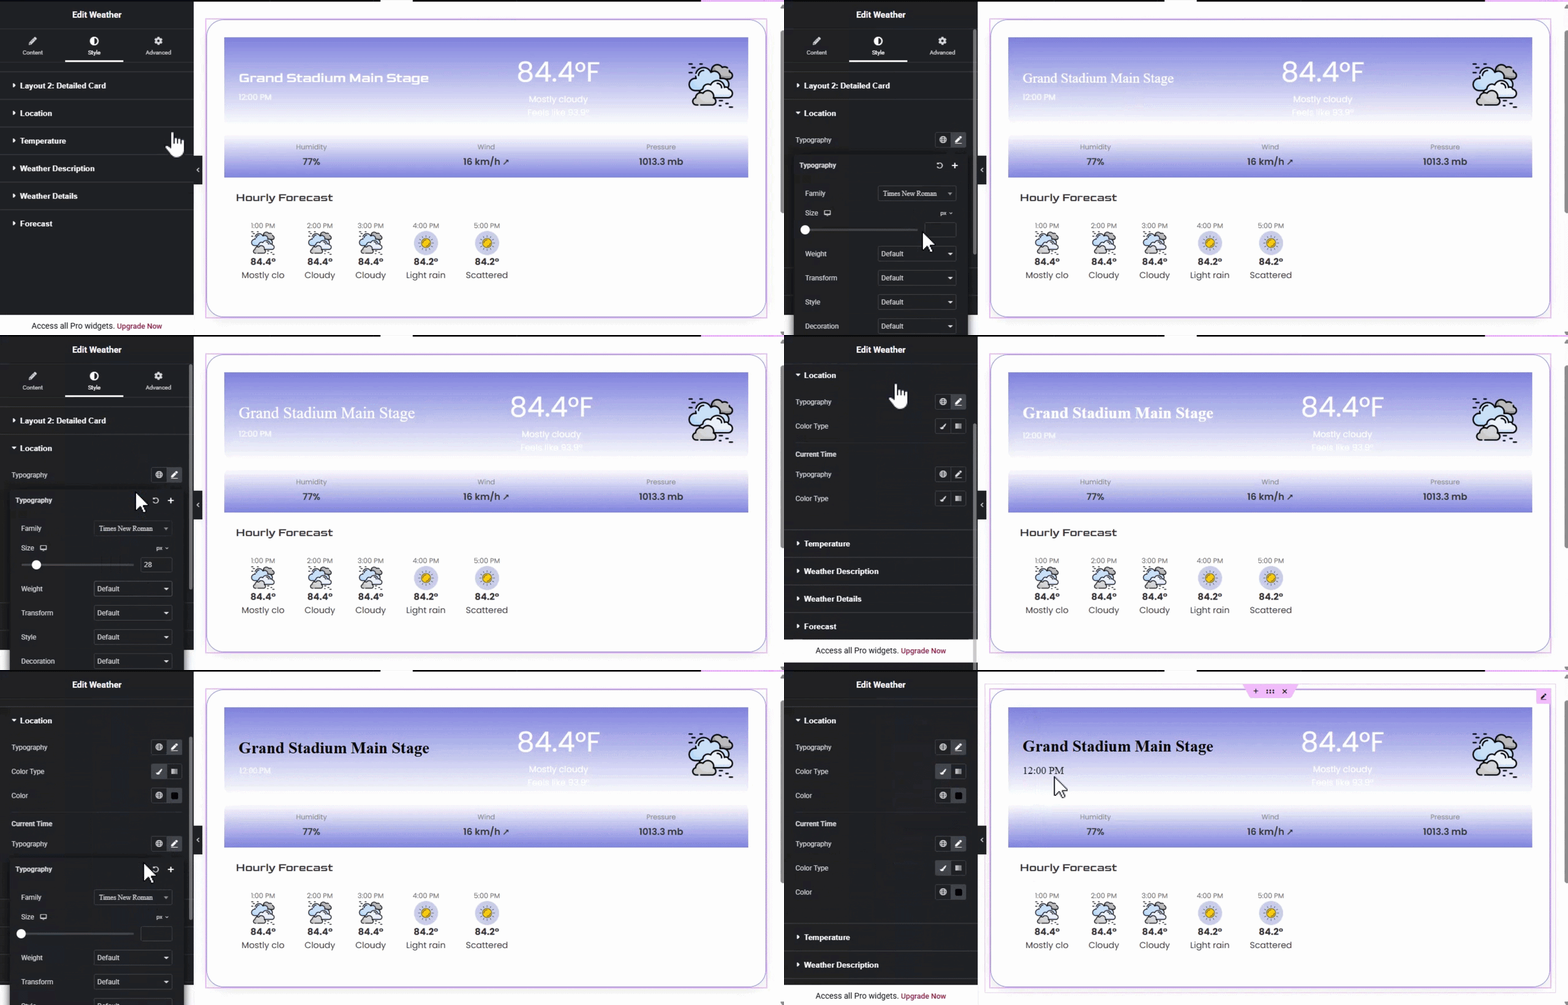
You can independently style the Location Name and the Current Time with distinct Typography, Color Type (Classic or Gradient), and specific hex colors.
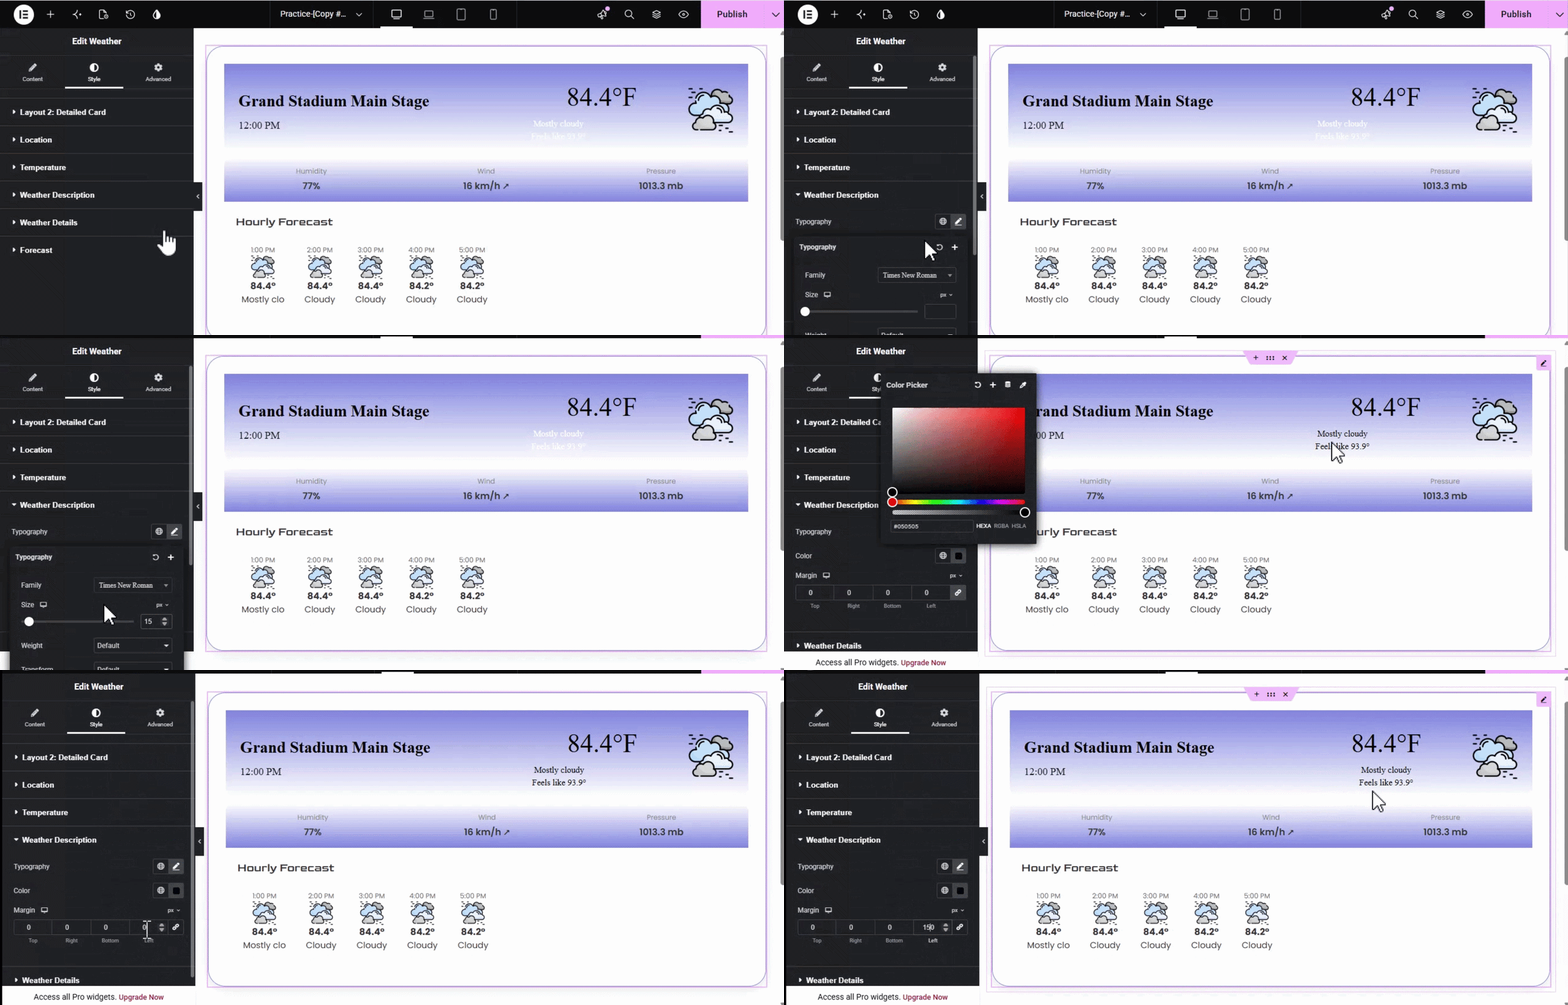
Temperature & Description:
Both the Main Temperature display and the Weather Description (e.g., “Partly Cloudy”) have dedicated sections for Typography, Color, and Margin adjustments.
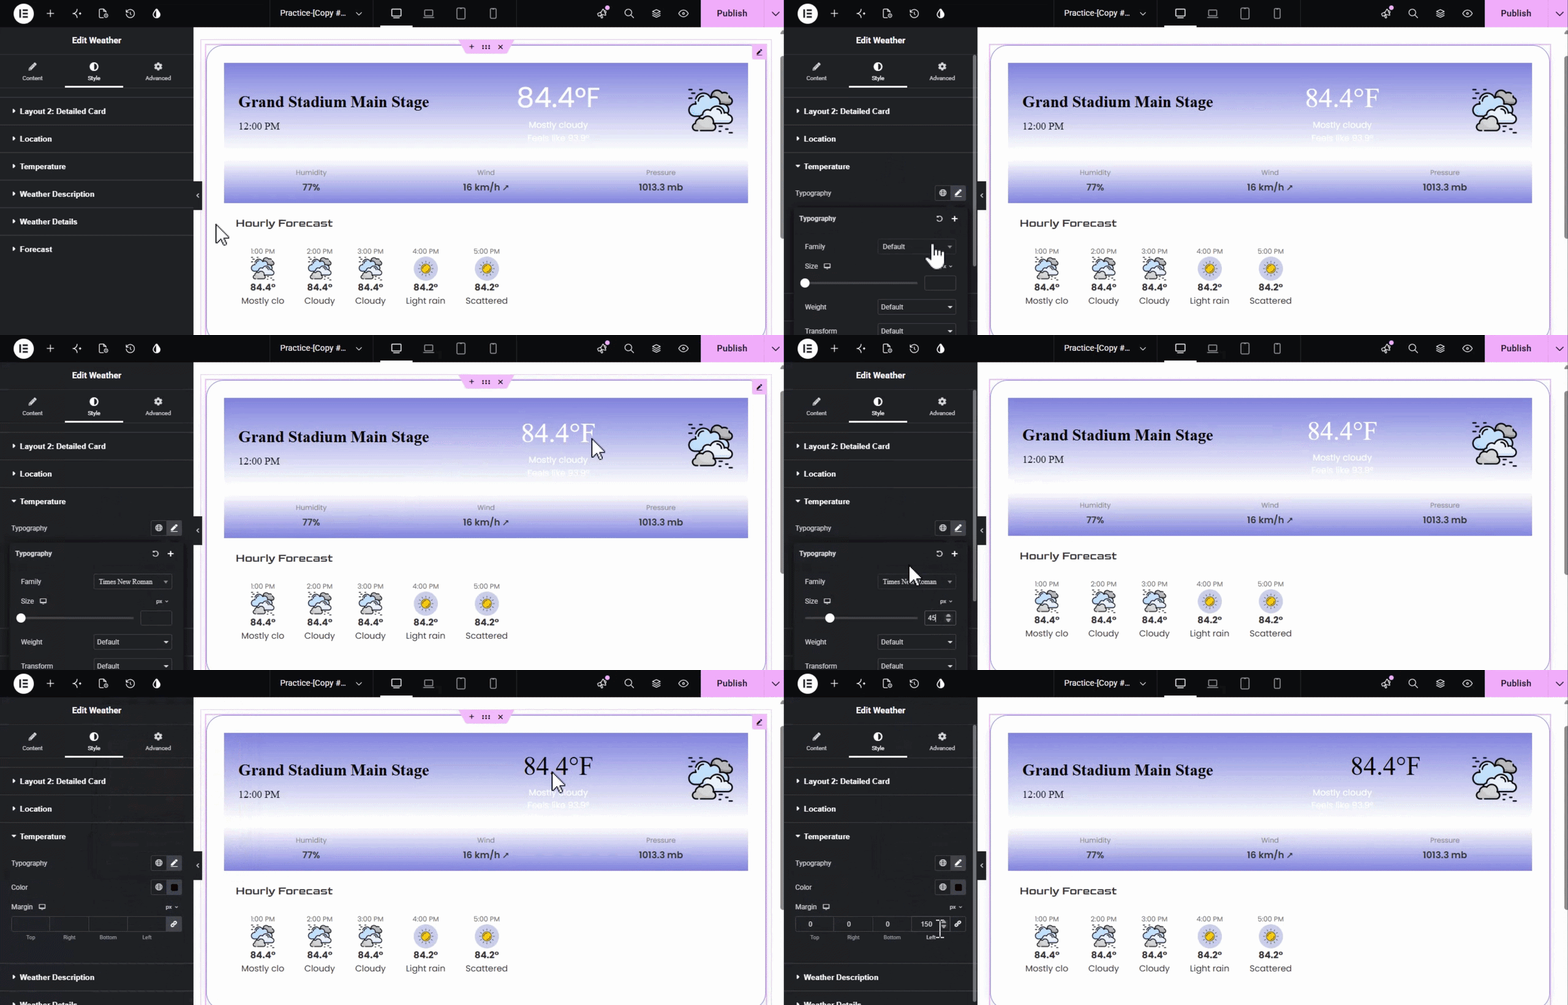
Weather Details (Metric Independence):
This section allows for a Label vs. Value styling split. You can assign different fonts and colors to labels (e.g., “Humidity”) versus their corresponding values (e.g., “65%”).
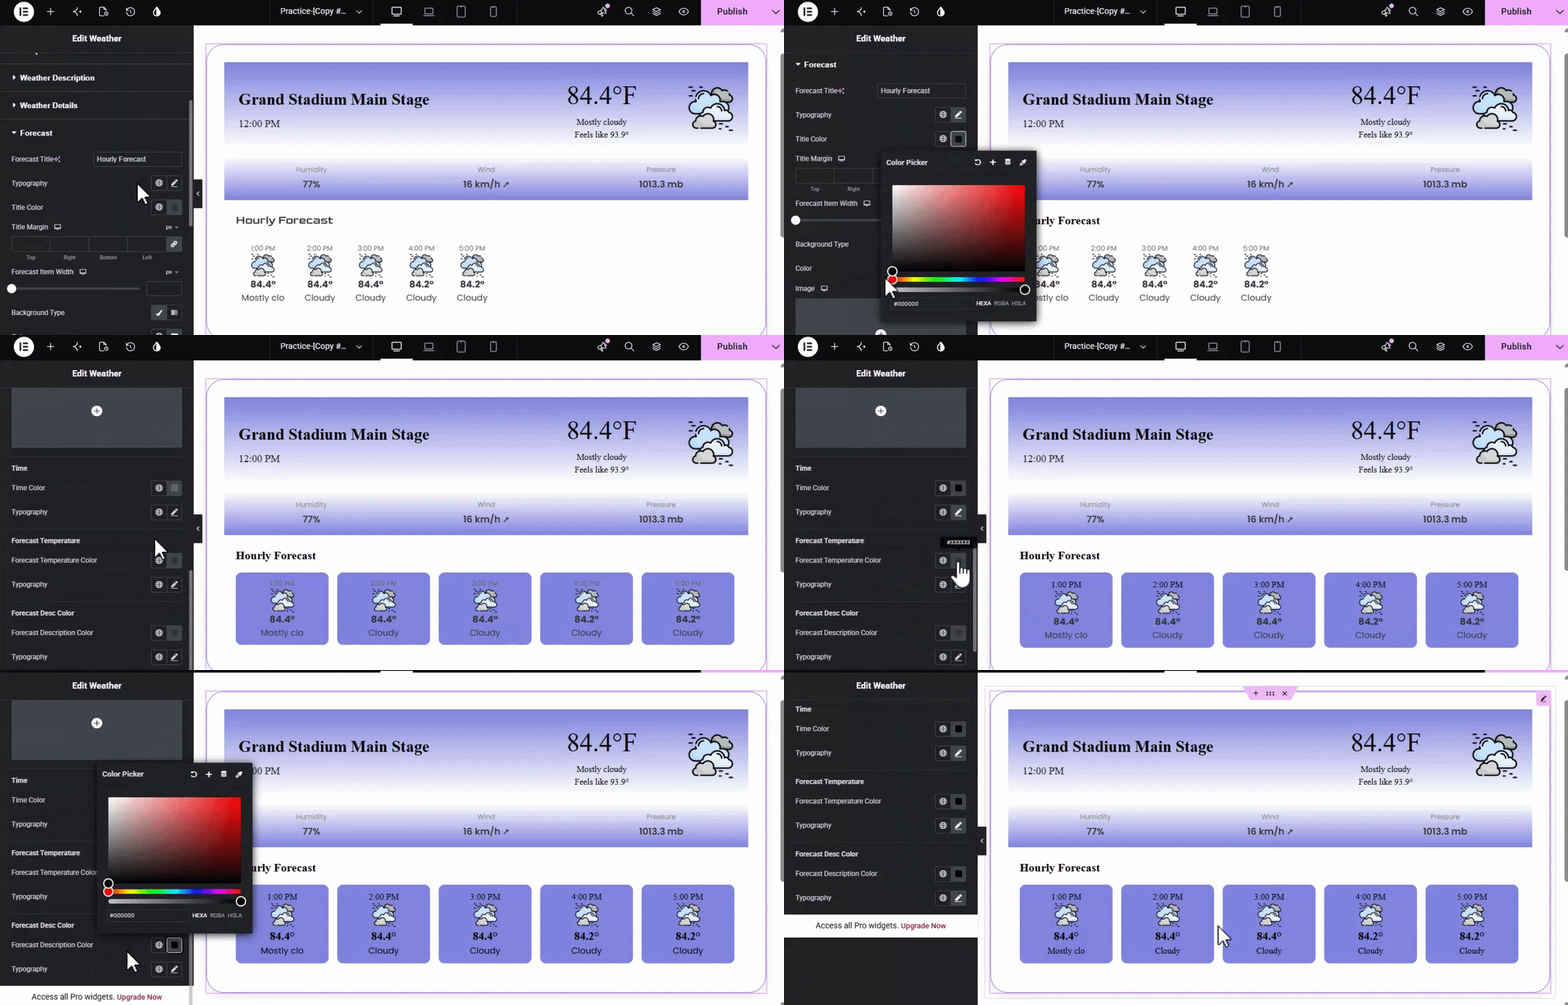
Forecast Detailing:
This comprehensive section controls the trendline display. It includes a slider for Forecast Item Width, options for a Background Image on forecast cards, and independent Typography and Color settings for the Time, Forecast Temperature, and Forecast Description.
That’s it! You have now successfully integrated a high-speed, Google-powered FREE Elementor weather widget into your website. Explore more creative possibilities with the Xpro Elementor Advanced Heading Widget or check out our full library of 150+ Elementor Widgets.