OpenAI Feature for Elementor
Xpro Elementor has recently introduced a powerful OpenAI feature to make your task easier with the help of an AI assistant. The Elementor ChatGPT AI assistant will answer any of your questions in real time and make your tasks quicker. The best function of this feature is that it can generate content for your website in a natural language.
Artificial intelligence has taken over the world and anyone who is not using this is lacking behind. AI makes our work more efficient and effective. Xpro Elementor Addon understands this necessity and provides this powerful feature for FREE.
The Xpro OpenAI Feature for Elementor includes a highly interactive AI assistant for real-time responses as well as an Auto Content widget that can generate text content for your website.
Here is a step-by-step instruction on how you can activate and utilize the feature.
Requirements
You need to install and activate the Free version of Xpro Elementor Addons to use our Xpro OpenAI for your WordPress websites.
Step 1
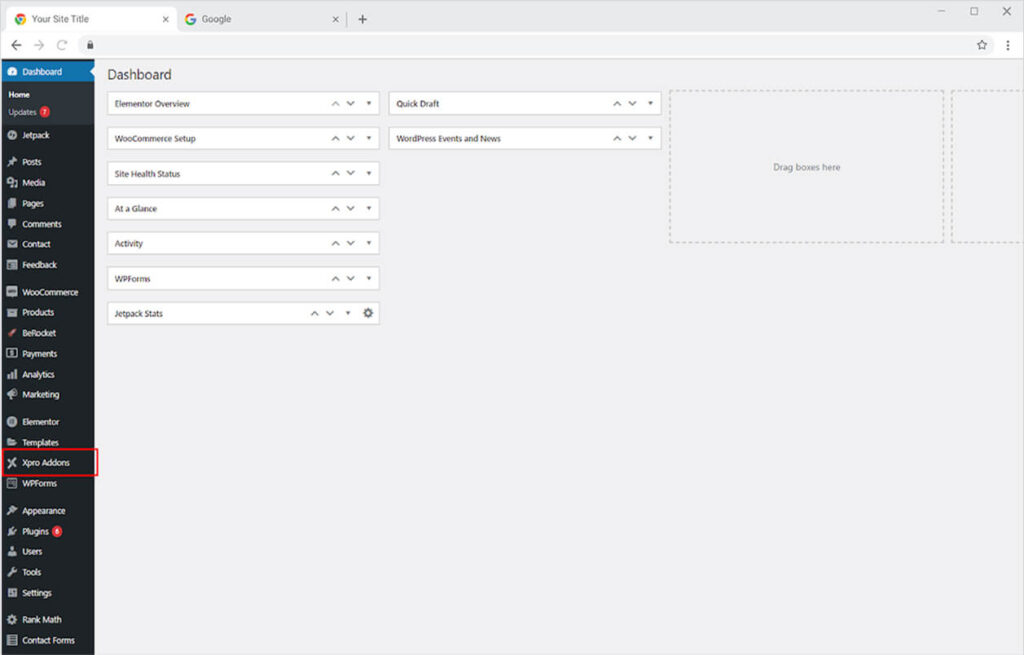
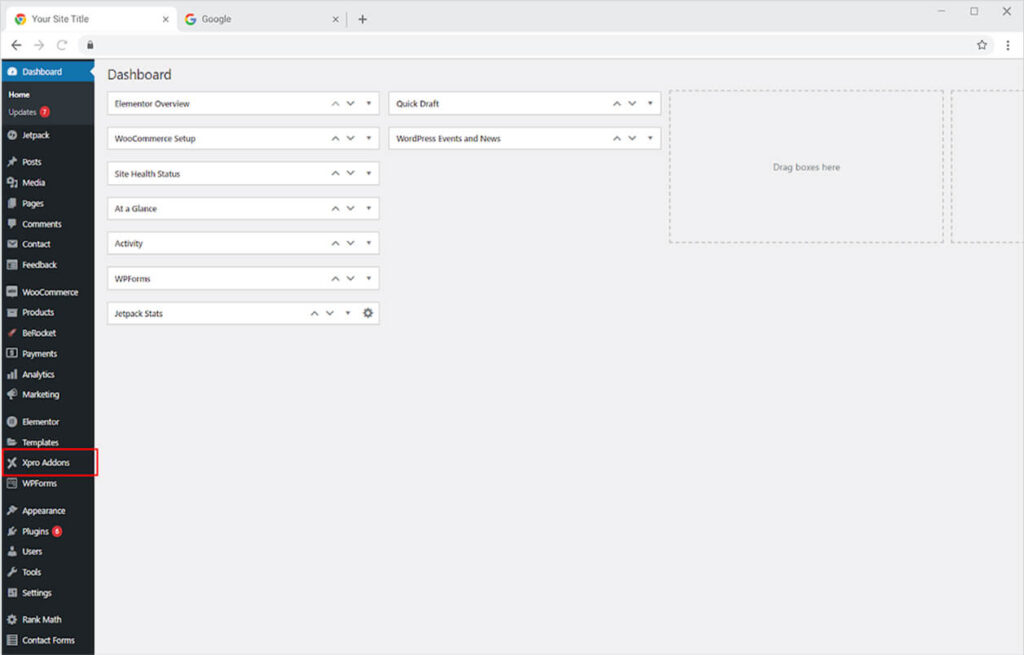
Go to the Xpro Addon option available in the WordPress Dashboard Menu.
Step 2
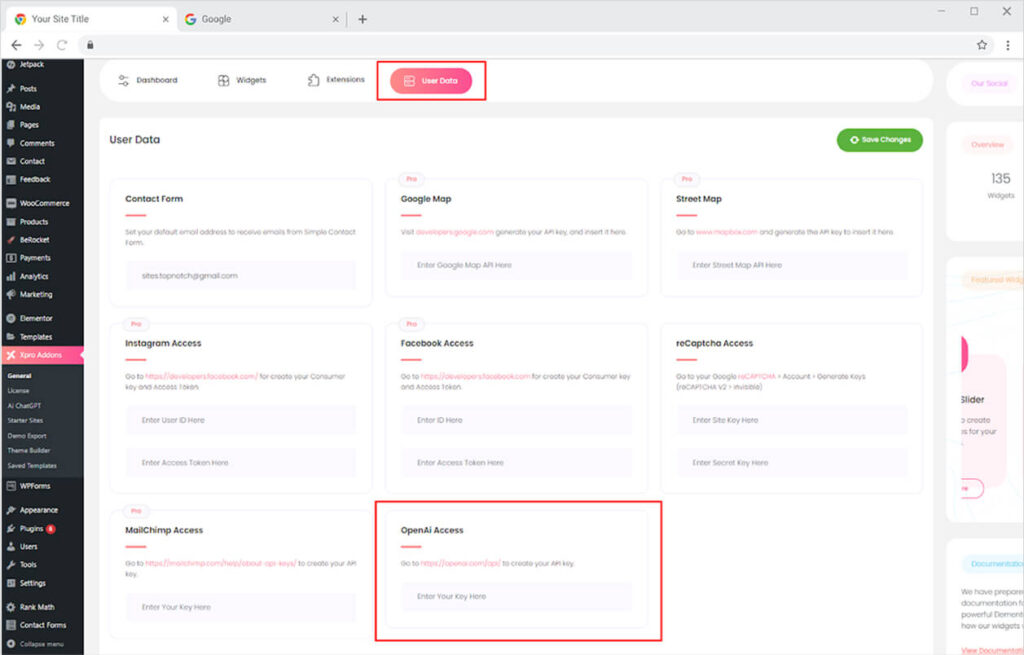
From the Xpro dashboard, click on the User Data tab and click on the link provided in the OpenAI box.
Step 3
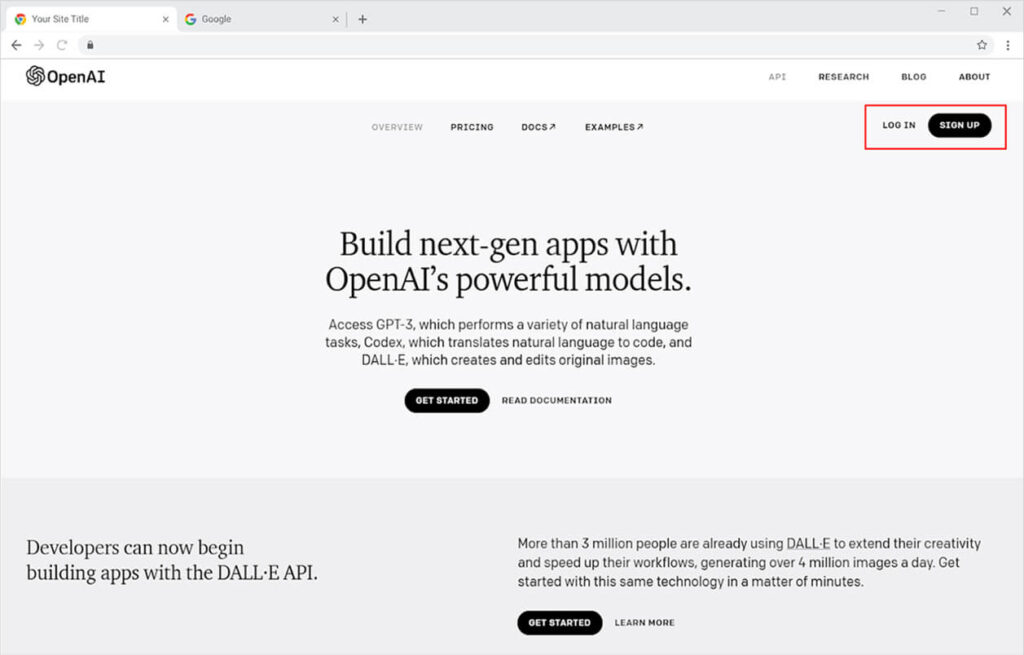
Open the link https://openai.com/api/ and create an account or sign in on the platform to generate a key and use our feature.
Step 4
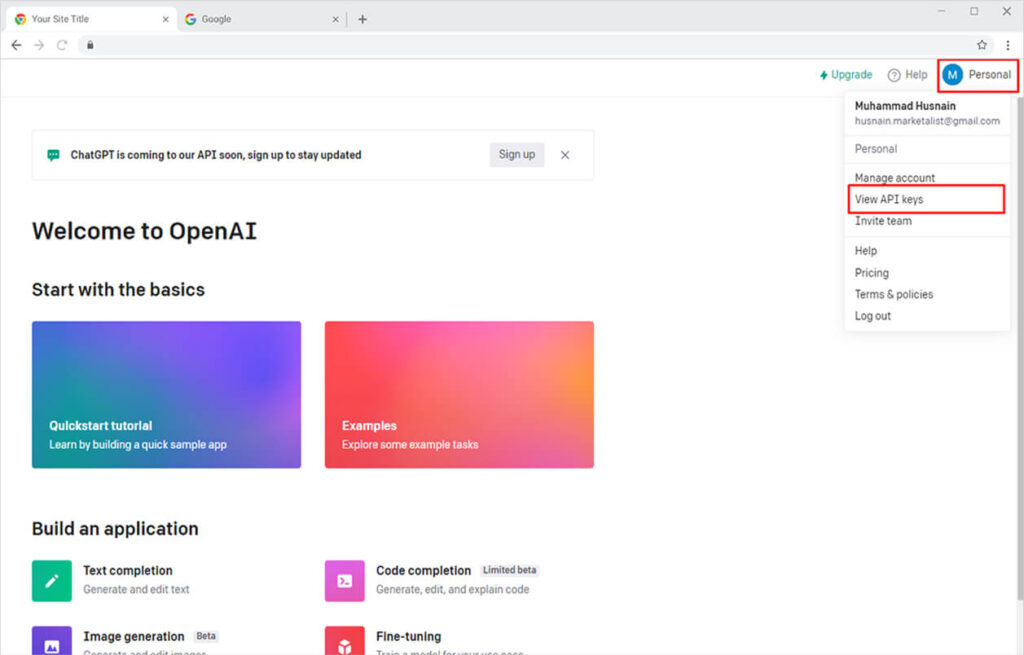
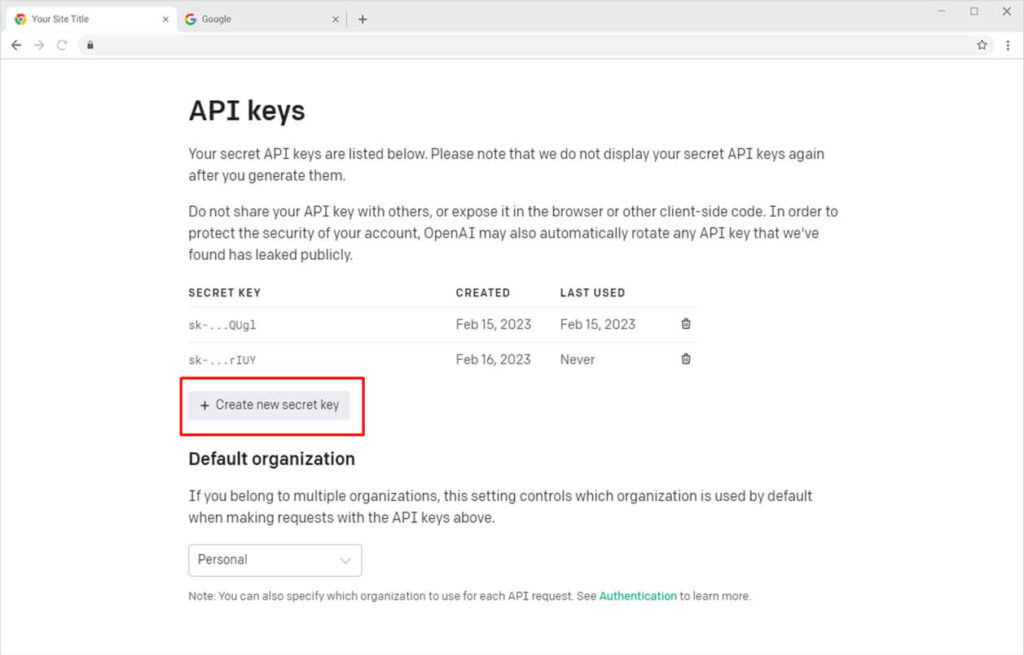
After you sign up or log in, click on your profile at the top right corner to open a drop-down menu and select View API keys.
Step 5
Open the API key page and click on “Create new secret key” and copy the key from there.
Step 6
Open your WordPress again and paste the key into the OpenAI bar box. Click on the “Save Changes” button above to activate the feature.
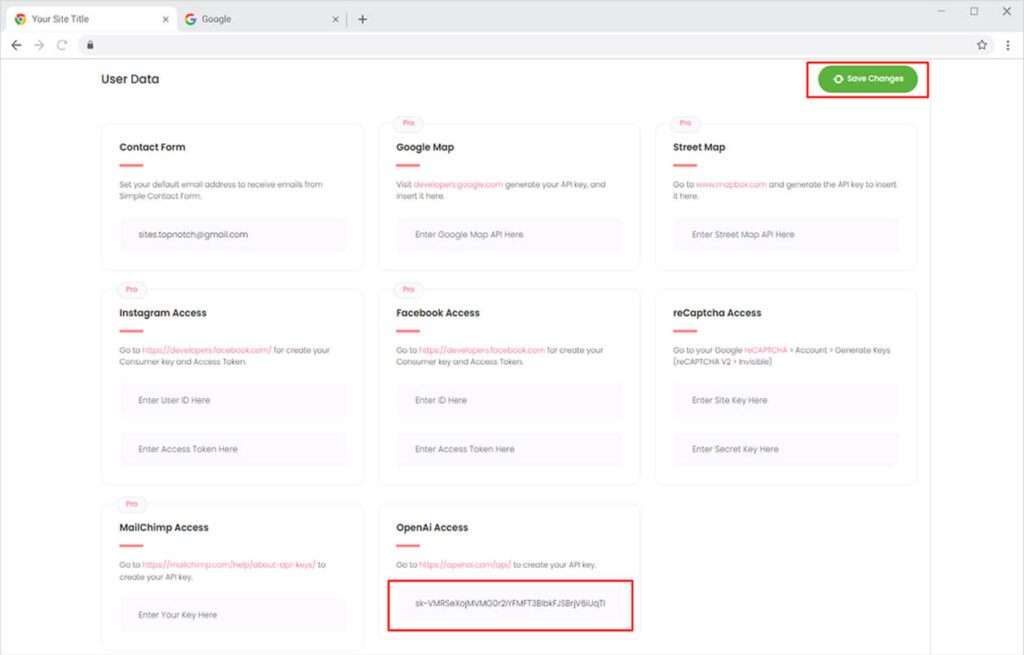
Now you have successfully activated OpenAI and can begin to use it.
How to Use Xpro OpenAI Feature for Elementor
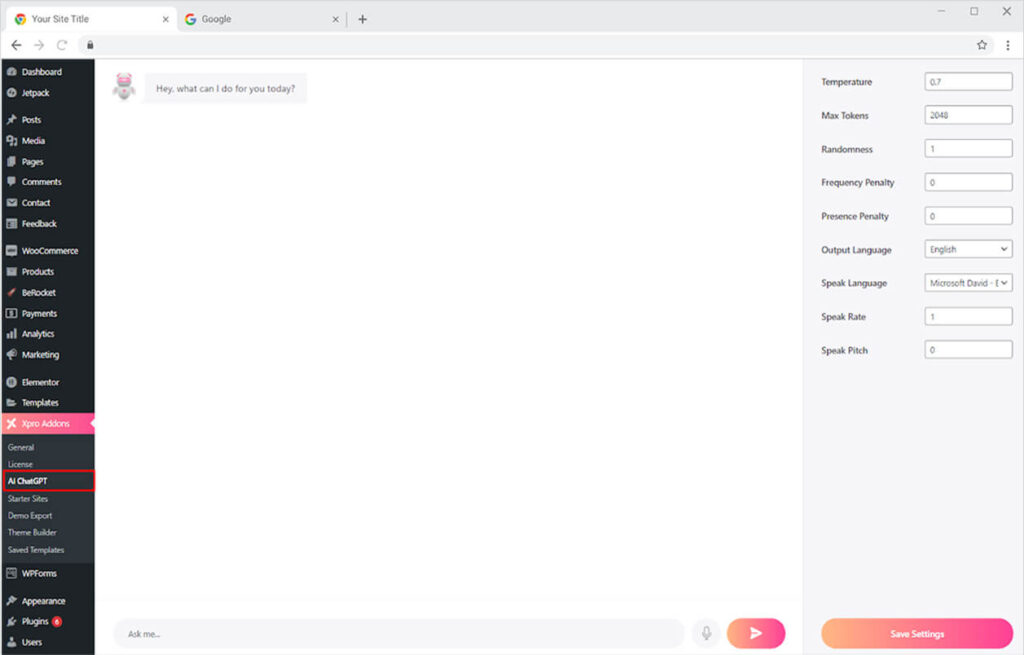
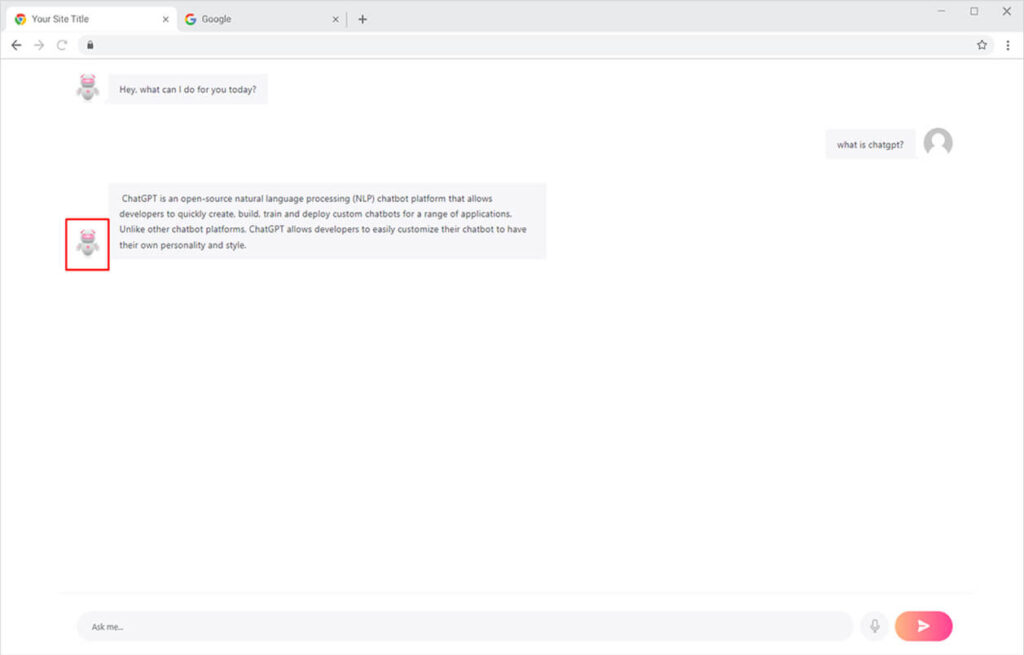
To access your virtual assistant, click on the AI ChatGPT option under the Xpro Addons in WordPress.
Ask anything to the virtual assistant by typing in the bar below or speak by clicking on the mic button. Click on the send button to generate answers or content.
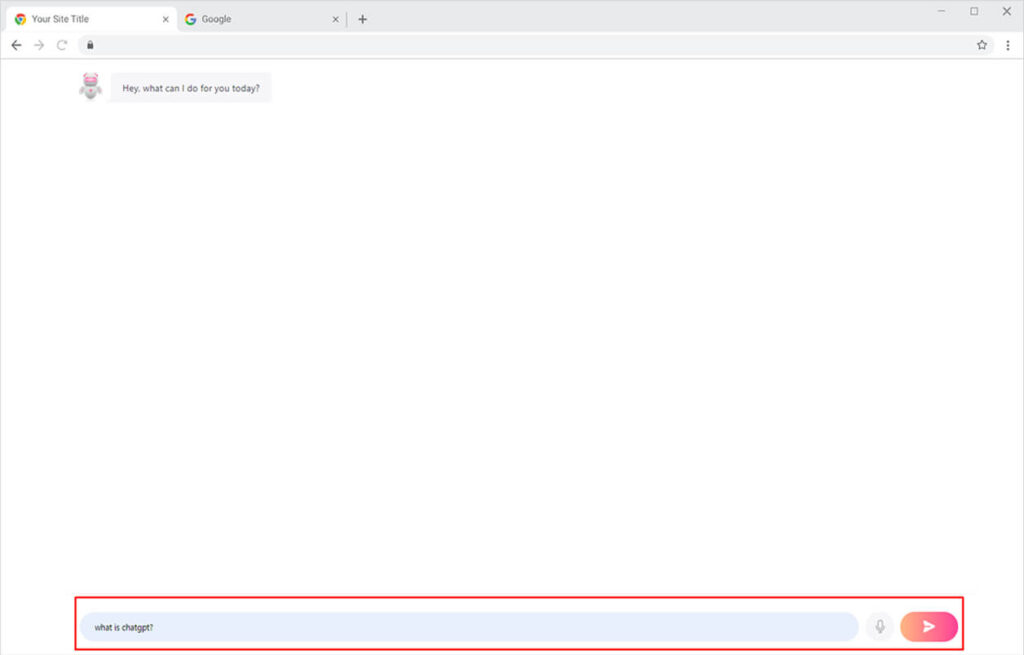
The powerful AI will integrate content in real time by writing back the answer in the text. However, you can make the system speak the answer by clicking on the Xpro Assistant Avatar.
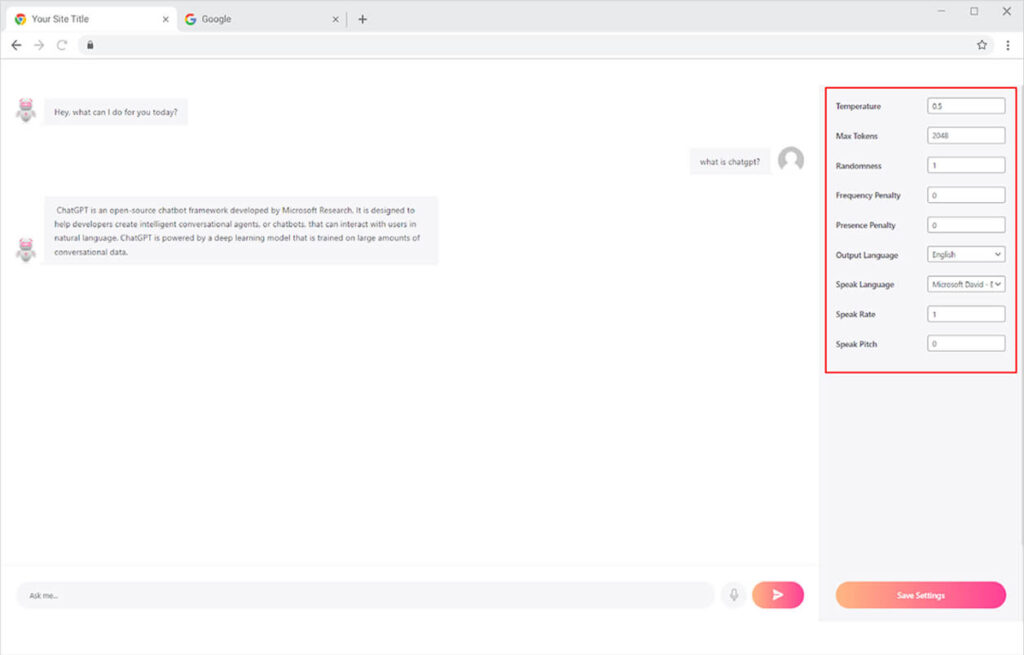
Furthermore, you can customize the type of content and voice of your AI assistant from the following settings
Temperature: Temperature is scaled from 0 to 1, with a lower value generating output with fewer resources and a higher value taking a risk to develop the more creative text.
Max Token: Maximum number of tokens to generate in the completion. For example, 1 token is approximately 4 characters or 0.75 words for English text.
Randomness: Control the randomness of the output.
Penalty Frequency: It reduces the likelihood of the same thing or phrase repeating, which drags down the content.
Penalty Presence: Penalty presence controls the retention of the topic and generates new ideas.
Output Language: Choose one of the 21 available languages to receive results in that language.
Speak Language: Select a dialect in that language.
Speak Rate: Adjust the pace at which the AI assistant speaks.
Speak Pitch: Adjust the tone of the AI assistant’s voice.
How to Use Auto Content Widget for Elementor
Xpro includes an Auto Content widget in its free Elementor Addons collection. The Elementor Auto Content Widget is powered by the Elementor ChatGPT feature which can generate highly engaging and unique content for your website. The widget is rich with AI that dynamically generates content for your website. It works when the user enters a quire or topic and the system writes back text on the given subject.
Before you open the Elementor Page Builder, make sure the widget is active.
Step 1
Click on the Xpro Addons option available on the WordPress Dashboard Menu.
Step 2
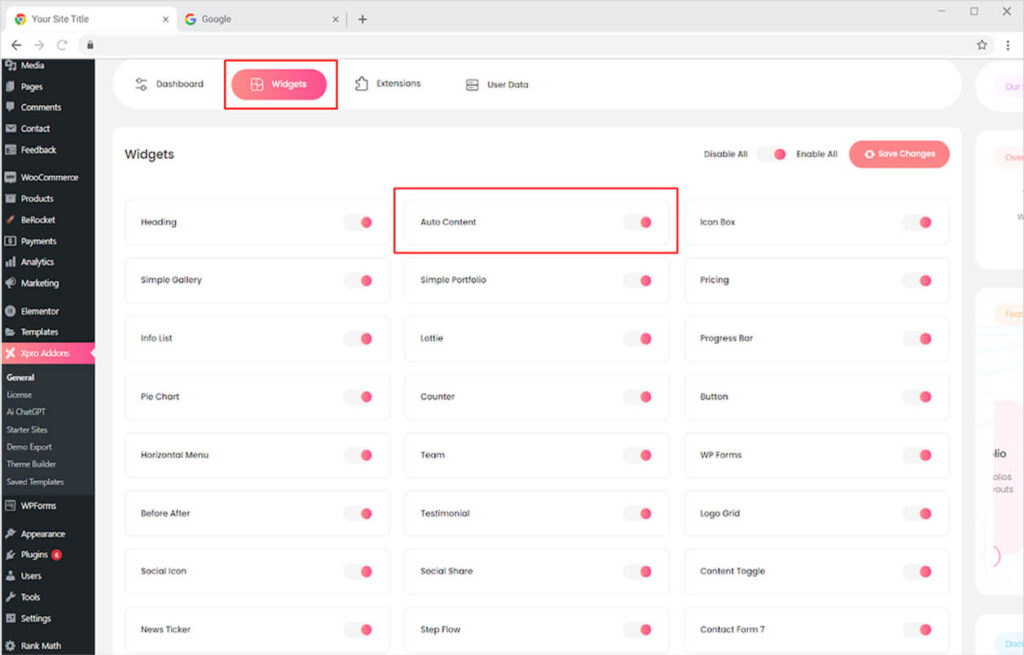
From the Xpro Addons Dashboard, click on the Widgets Tab, find the Auto Content widget, and finally, toggle the button ON to enable it.
In order to use the Auto Content widget in the Elementor, open the Elementor Page Builder and click on the Xpro Addons.
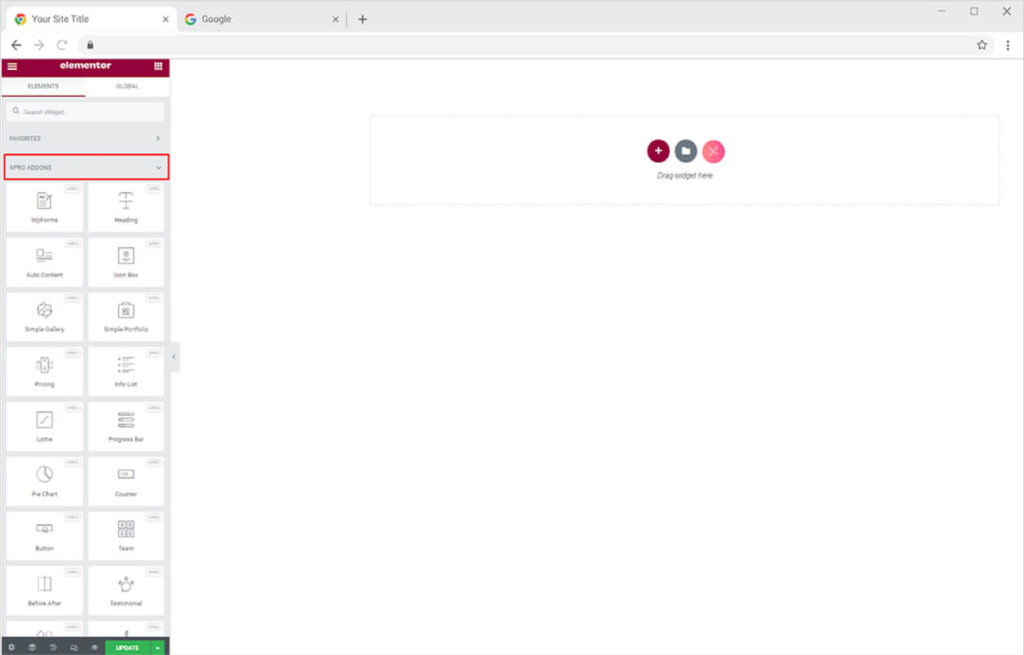
Locate or search for the Auto Content widget and drag’n’drop it to the Elementor Page.
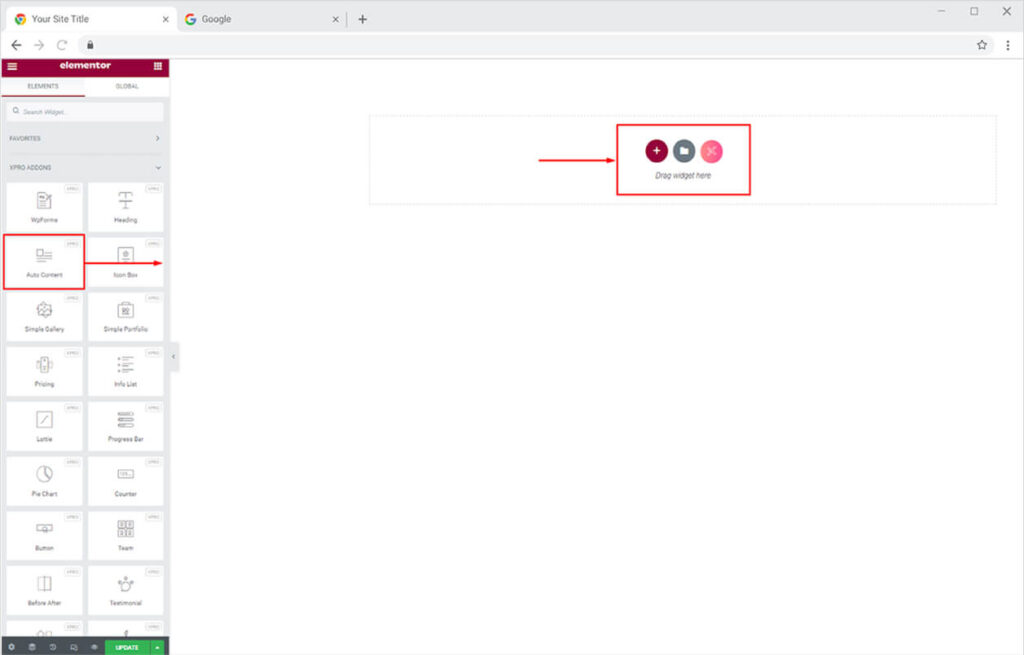
The default view of the widget looks like this after you drop it into the Elementor Page.
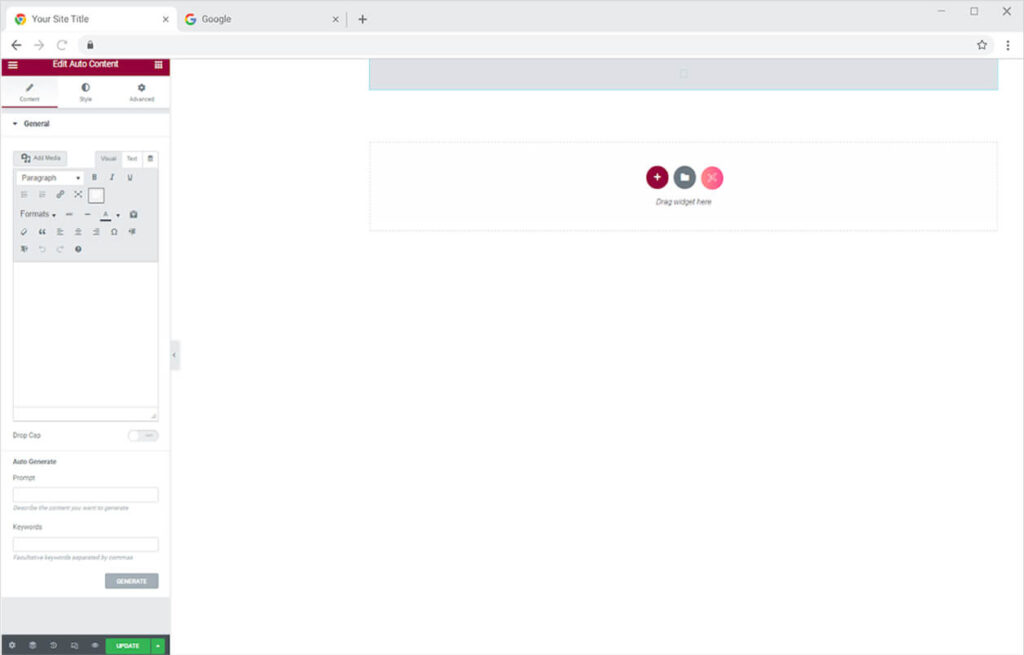
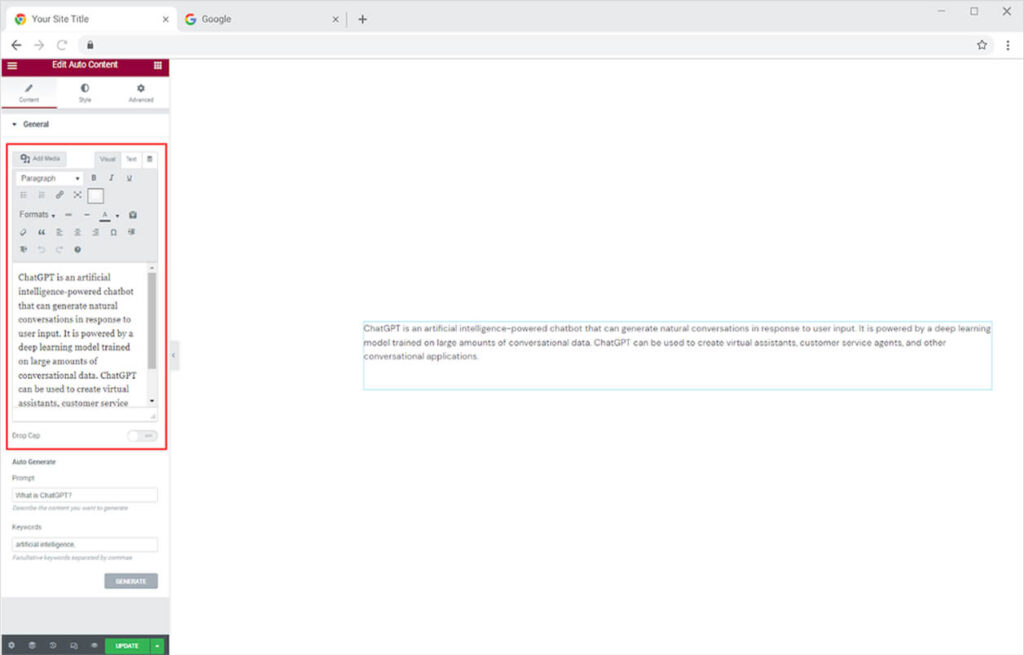
To generate content, you must first provide the system with a topic or query. In the Prompt bar under Auto Generate, type a subject for which you want content. Following that, include some keywords that will be used in the content. At last, hit the generate button.
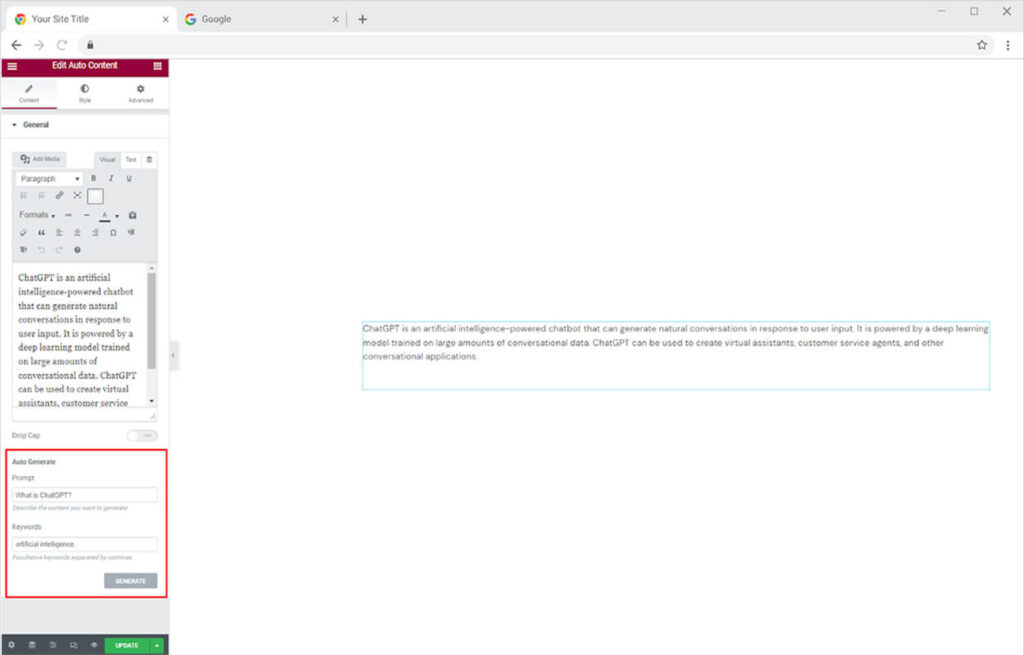
You can perform multiple settings like link insertion, bold, italics, and much more to the text from the above content box and include a media in between.
Style Tab
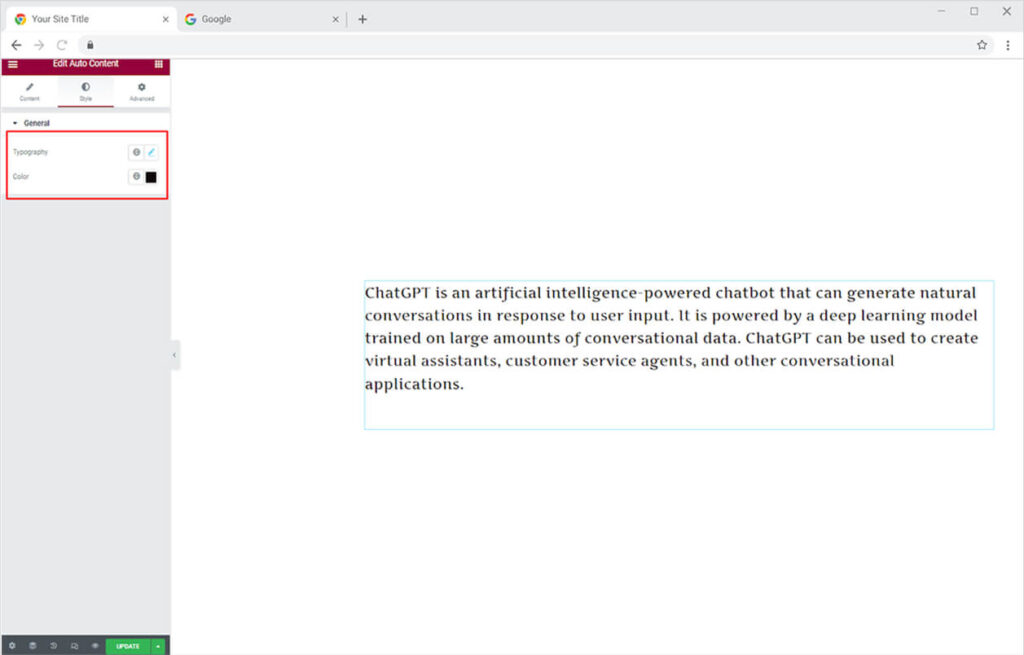
From the style tab, you can perform text customizations from the typography box. Style font, size, weight, spacing, and other text customization for content. Moreover, you can choose a color for the text display.
Best Auto Content Widget for Elementor
That is all from our OpenAI Feature for Elementor. We hope you completely understand the functionality and feature usage of this powerful Xpro Elementor widget and feature. This widget is perfect for publishing content with minimal effort. If you want to explore with and add more appealing Elementor widgets, check out our complete selection of FREE Elementor widgets and download our FREE Elementor addons right away.
Furthermore, have a look at our other potential widgets such as Testimonial for Elementor, Advanced Gallery Widget for Elementor, and FREE Elementor extensions. You’ll be amazed at how simple it is to customize your WordPress website using XPRO Elementor Addons.