Introduction
Xpro Elementor Addons provide outstanding widgets that improve the quality of the Elementor page builder and make your website more appealing to users. 360 Product View is another offering by Xpro that enhance the look and feel of your products. 360 Product View for Elementor is a remarkable widget that allows you to display your products in an immersive way.
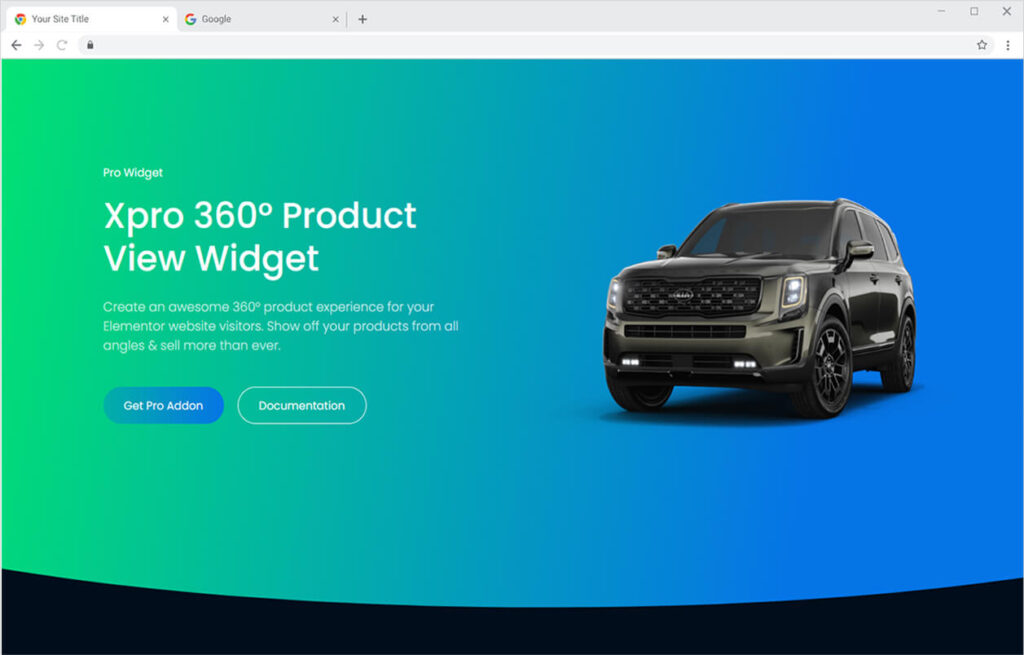
Elementor 360 Product View widget is a premium widget by Xpro that allows you to present your products or ideas in 3D. Present your product from all angles so that visitors get the best impression of what you have to offer. This widget is convenient for businesses that sell their products online. This powerful widget allows you to present your product or idea in a more distinguished manner that captures the attention of viewers. Let’s see how can you fully utilize this powerful widget to produce the best result.
How To Install 360 Product View Widget
Requirement
You need to install and activate the Pro version of Xpro Elementor Addons. If you already have the plugin installed, just make sure the 360 Product View Widget is ‘Enabled’, so you can find it in the Elementor editor.
Step 1
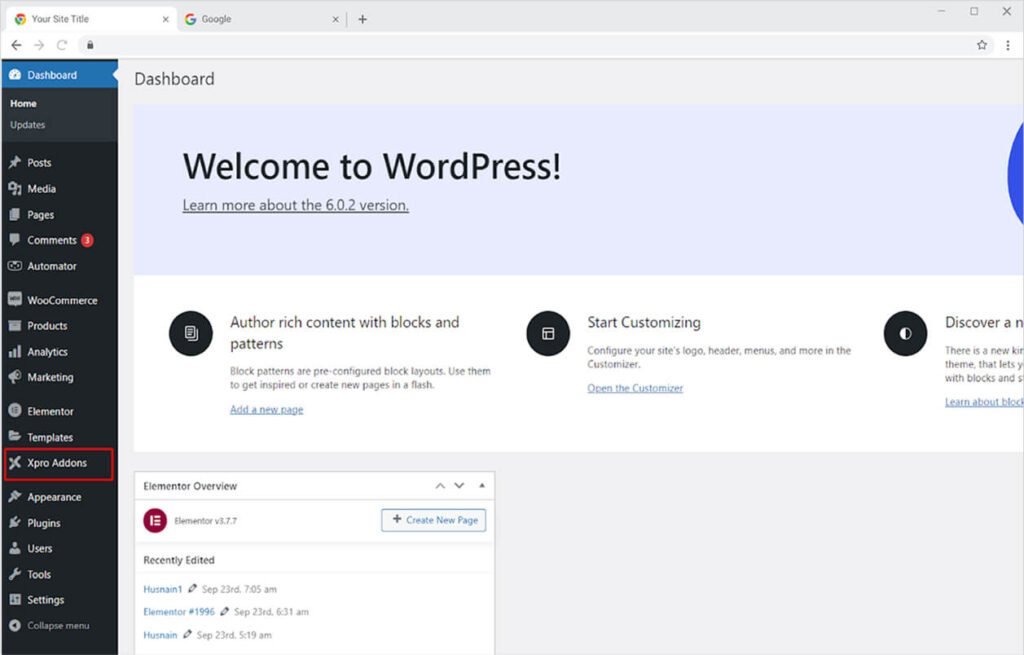
Click on the Xpro Addons option available on the WordPress Dashboard Menu.
Step 2
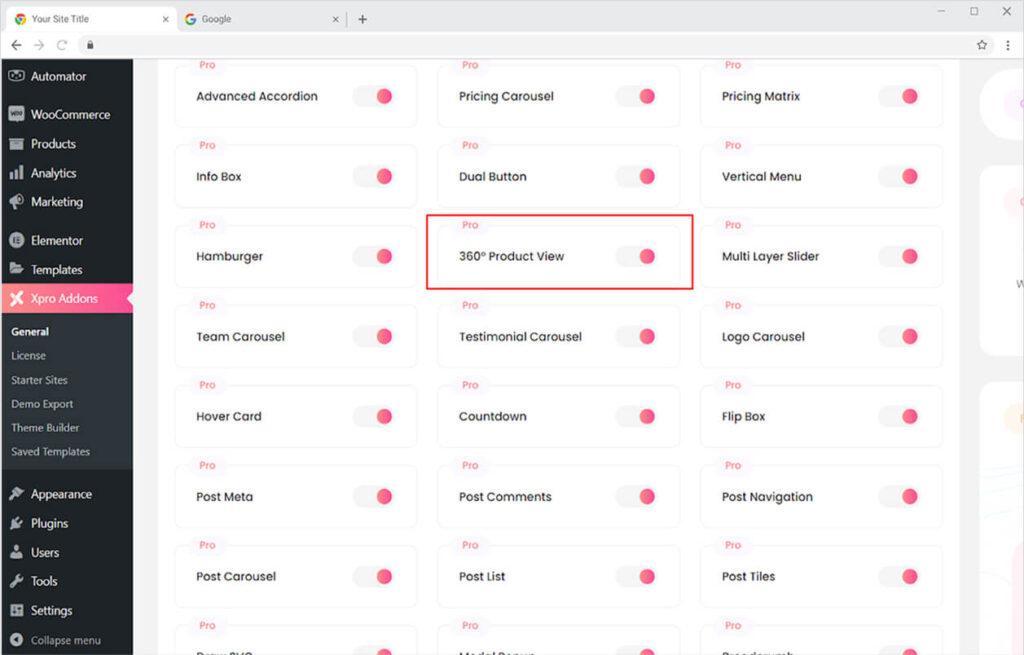
From the Xpro Addons Dashboard, click on the Widgets Tab, find the 360 Product View widget, and finally, toggle the button ON to enable it.
How to Use 360 Product View Widget for Elementor
Using 360 Product View can assist you in creating an incredible product appearance on your website. We realize the value of the online business and enable our users to showcase products in the most visually appealing way. This add-on is perfect for eCommerce businesses because it boosts consumer engagement and conversion.
Step 1
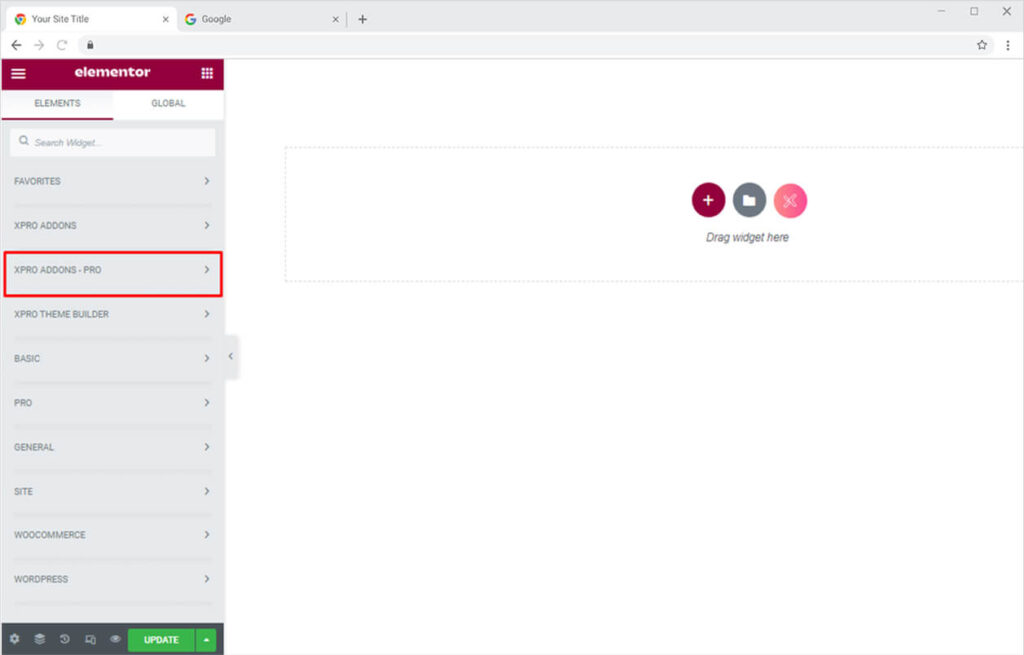
Click on the Xpro Addons – Pro section available in the Elementor Editor.
Step 2
From the Xpro Addons – Pro section, find and simply drag’n’drop the 360 Product View widget on your desired page location.
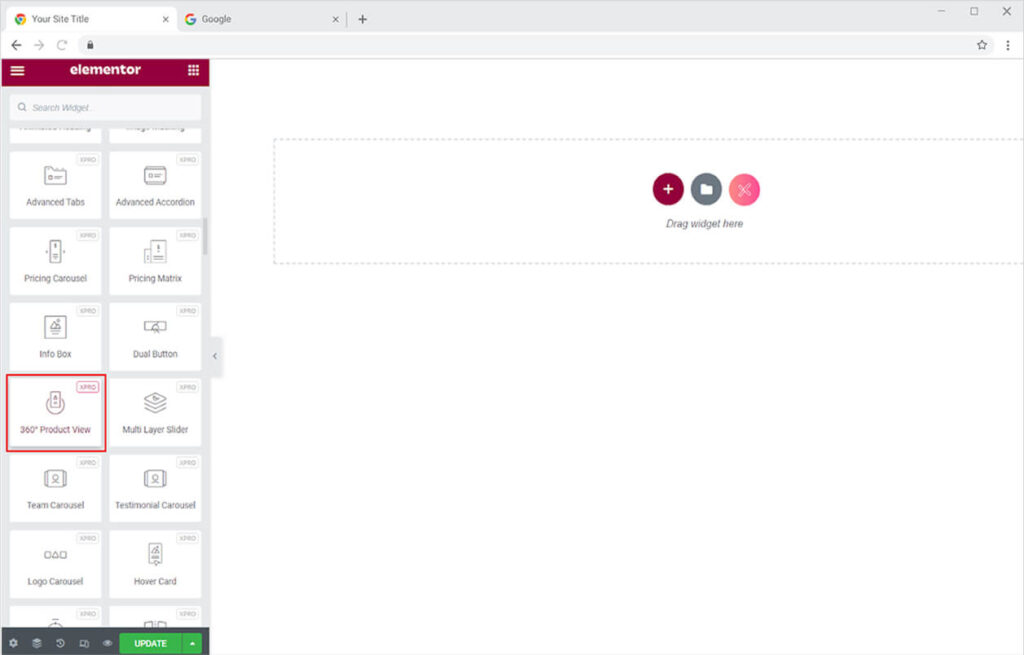
This is the default view of the widget:
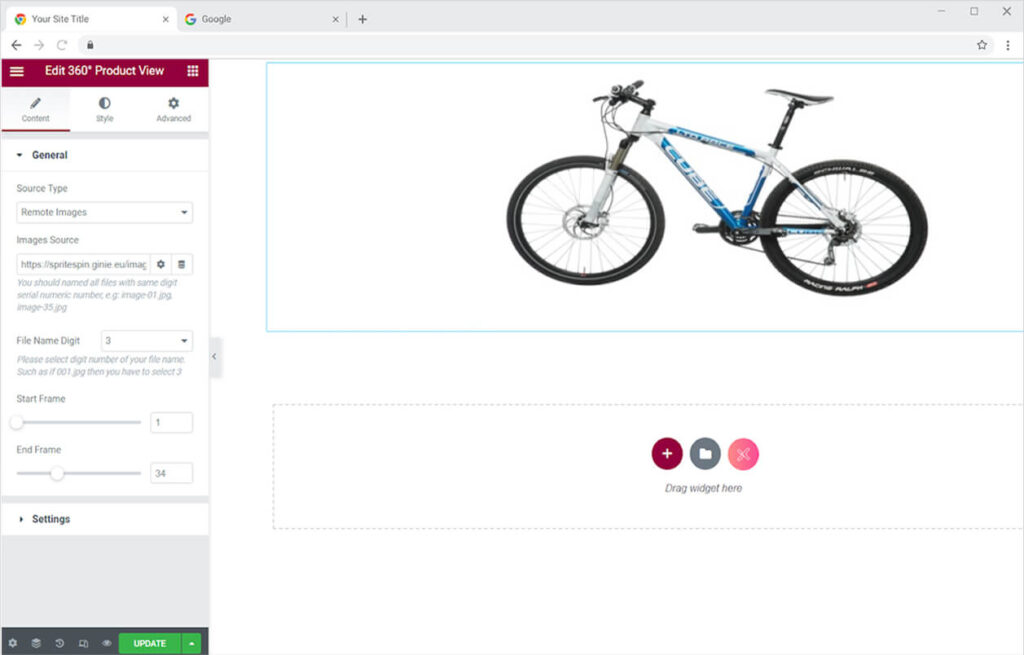
How to Add Files in the 360 Product View
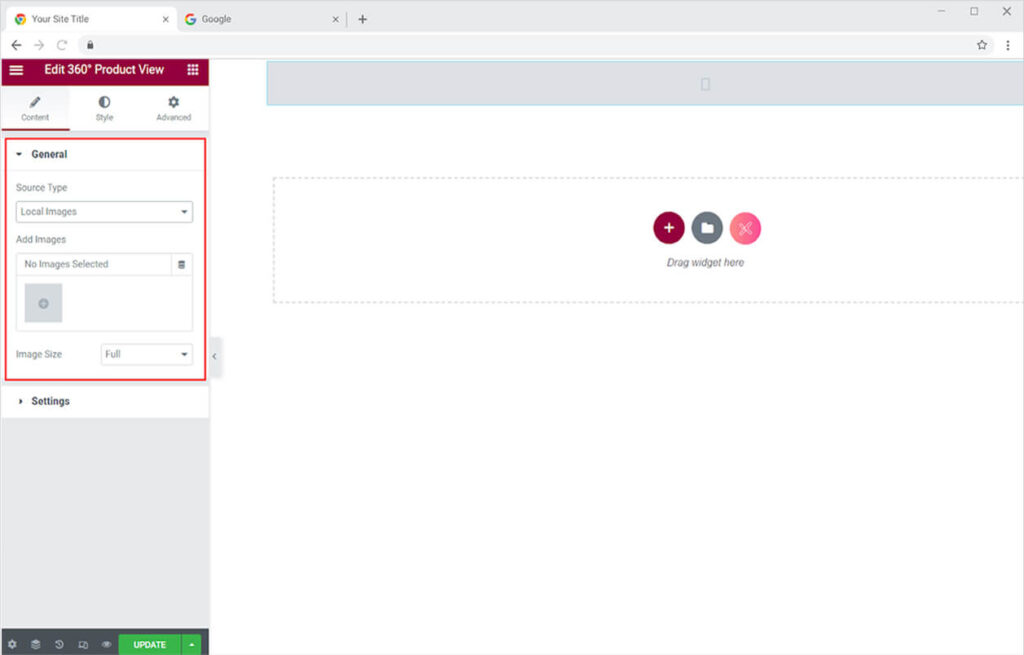
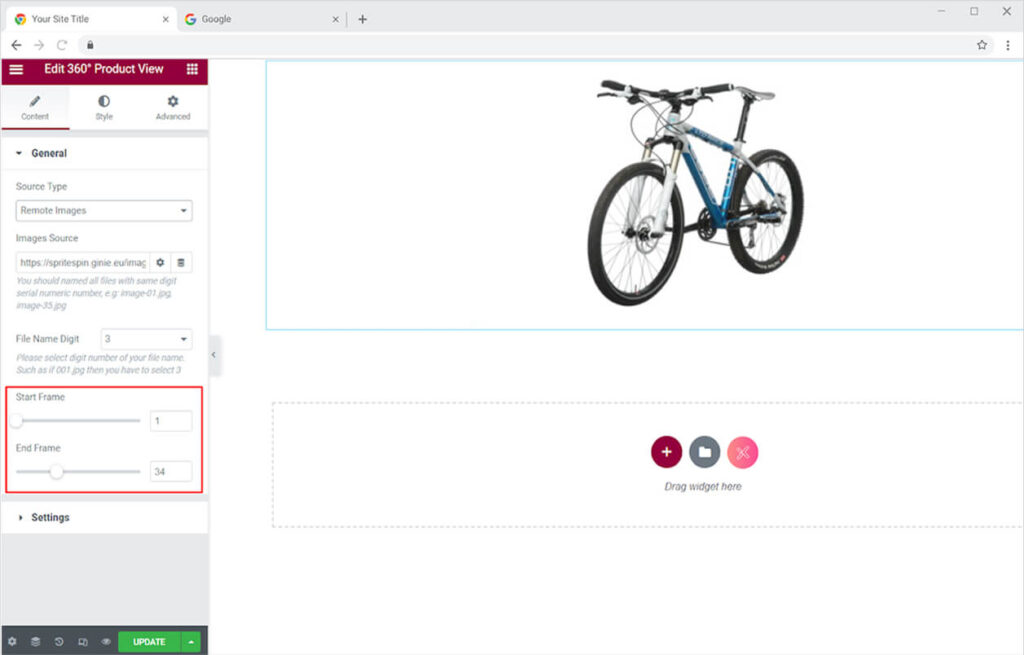
In the default view (above), the widget already shows a 360 product so you can understand the functionality of this widget. To change the file, navigate to the Content Section’s General Settings and select the source type. After selecting the source type, you are presented with two options: local image and remote image.
- The local image allows you to add files from your desktop or media library. Create a gallery and insert it into the widget. Adjust the image size to your need.
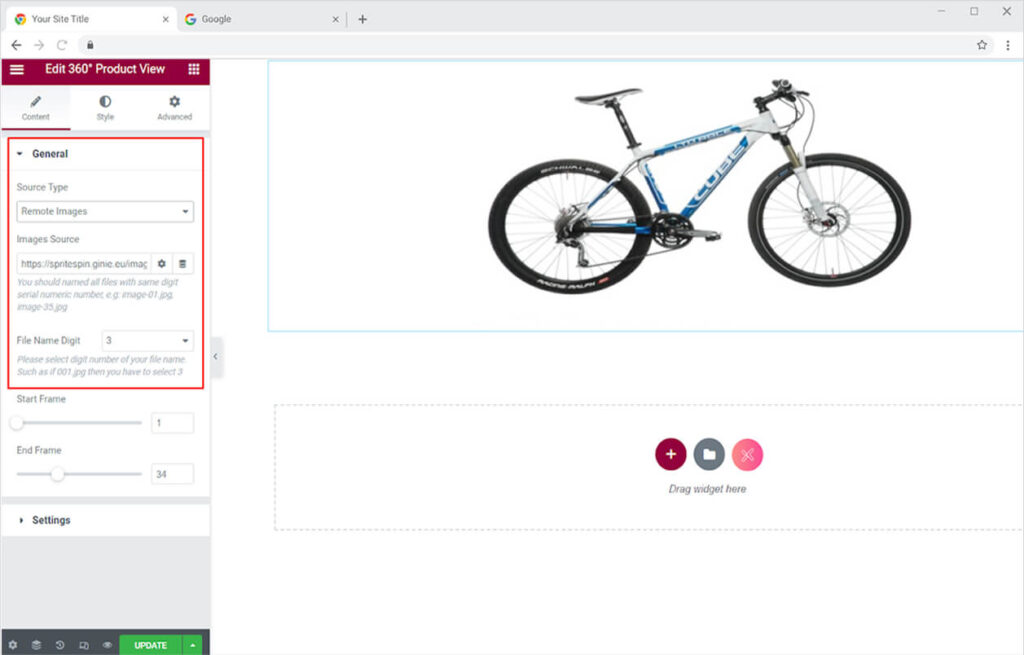
- The remote image allows you to add files from a link source. Just copy and paste the link below. Make sure that all the files should be named with the same digit serial number. Let’s assume that there are 10 files then save each with 001.jpg, 00.2.jpg, 003.jpg, and so on to 010.jpg. Also, add the file name digit below for the software to understand. If the file name is 001.jpg then select 3 as the file name digit.
Select the starting and end frame to control where the frame should start and end. For example, if you want frame 2 to appear first and end with frame 34 then select 2 as the Start Frame and 34 as the End Frame.
Setting Section
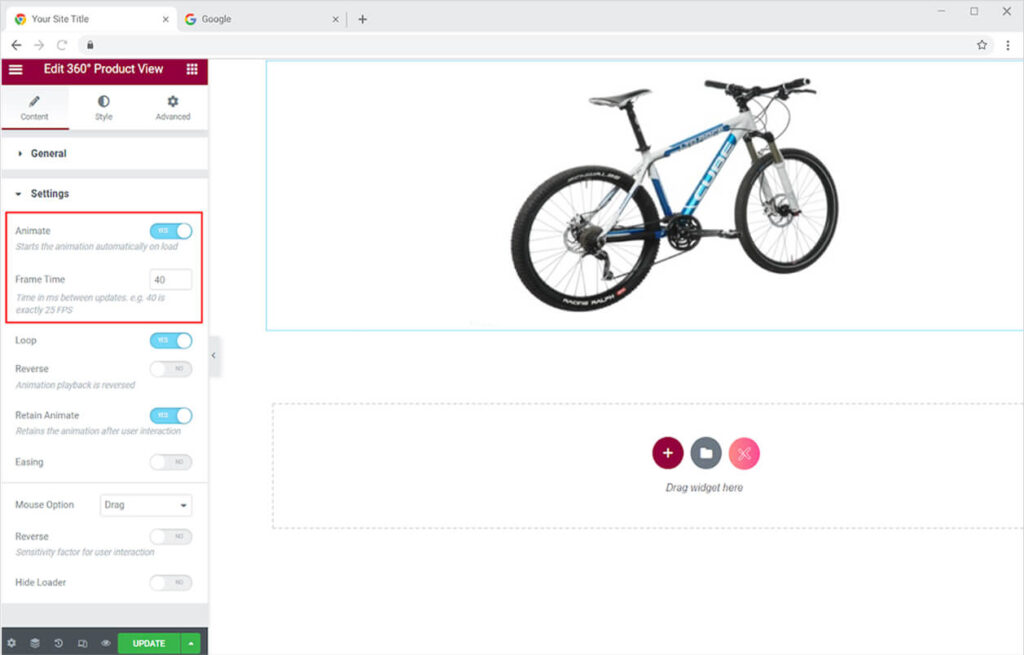
Coming down to the setting section, here you have the option to start animating automatically after loading. The image will start to rotate as you open the page. Turning off the animate will stop the rotation, however, you can move the image with the mouse.
You can adjust the speed between image transitions from Frame Time according to your requirement. The image transition speed is specified in microseconds, where 40ms equals 25 frames per second. Increase the number to slow down the transition. The ideal rate for frame transition is 40ms, however, you can pick any speed you want.
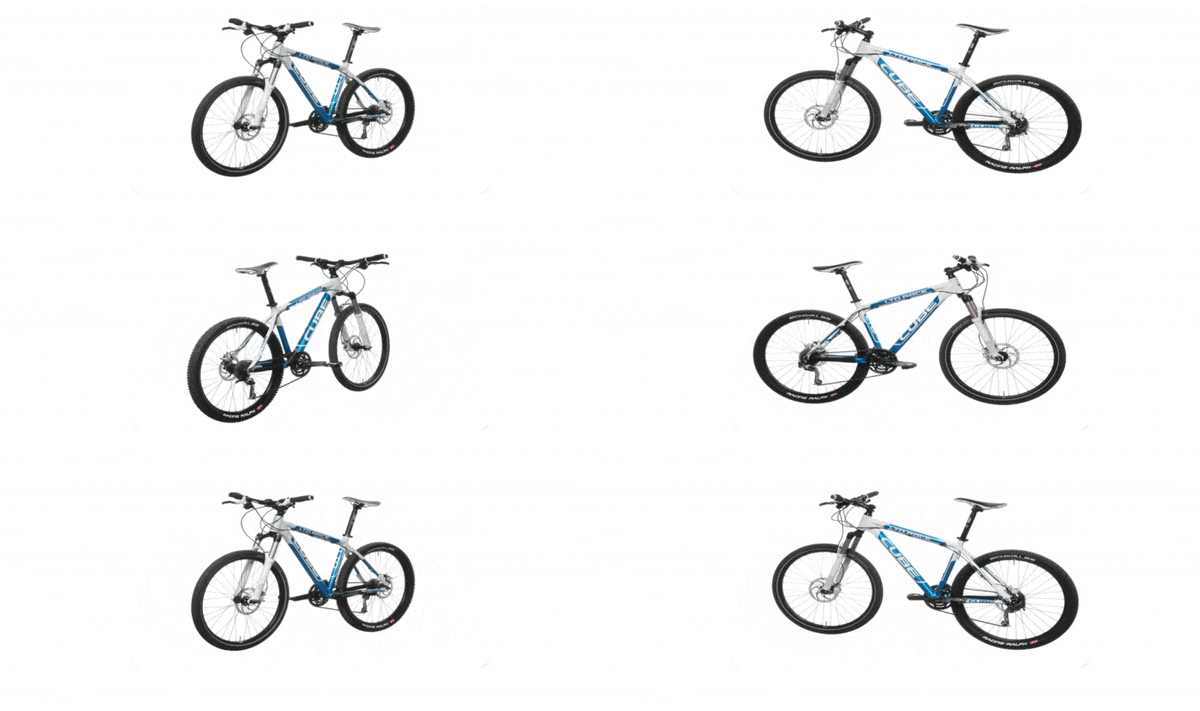
The result will look something like this
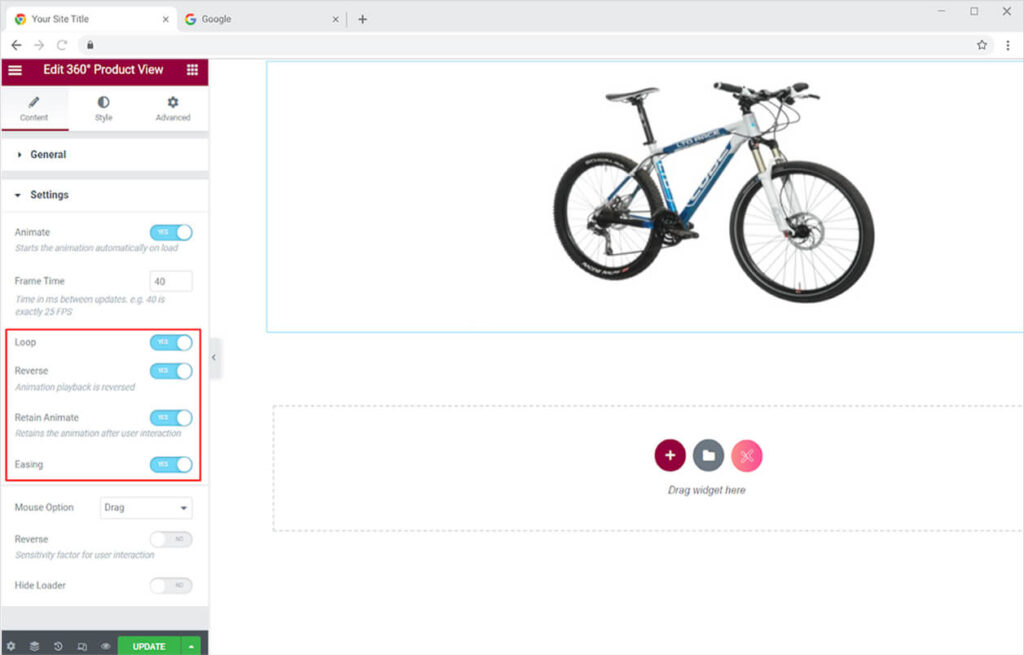
If you have the image set to animate, you have the option of setting the animate to loop, which will keep the image rotating. You may also set it to reverse, which will cause the image to rotate backward.
After that, you have the option to retain image animation in which the image will start moving after the user interaction. The animation stops when the user interacts with the image and resumes after the interaction. Turning the retain animate off, on the other hand, has no effect when the interaction is complete. Enabling Easing will smooth out the image and eliminate blurriness.
You have three different mouse effects options to choose from. Each option provides a unique way of experiencing the product.
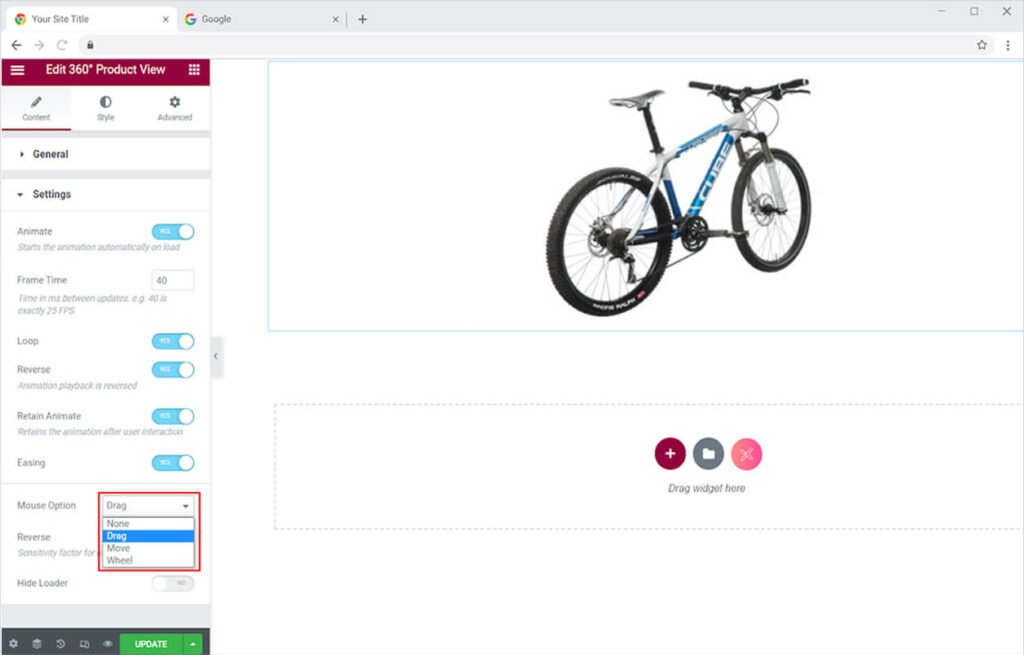
- Drag: Using the drag option allows you to move the image by clicking and dragging the mouse on the image.
- Move: Using the move option allows you to move the image without having to click on it. Simply move your mouse over the image, and it will move accordingly.
- Wheel: Using the wheel option does not have any impact on the image and it will keep on rotating even when you drag the mouse above it.
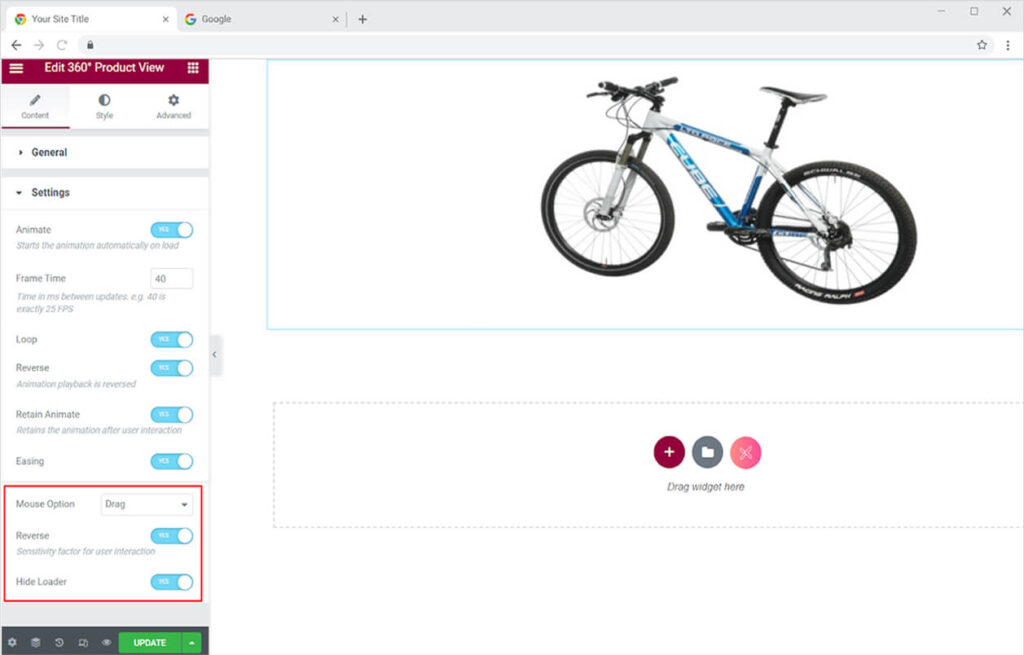
You can reverse the user interaction with the image by selecting the reverse option under the mouse option. When you turn on the reverse option, the image will move from left to right when you drag the mouse from right to left. On the other hand, when you turn off the reverse option the result will be the opposite.
The default view of this widget shows the loader before displaying the image. If you do not wish to include the loader, you can remove it by selecting the hide loader option.
Style Section
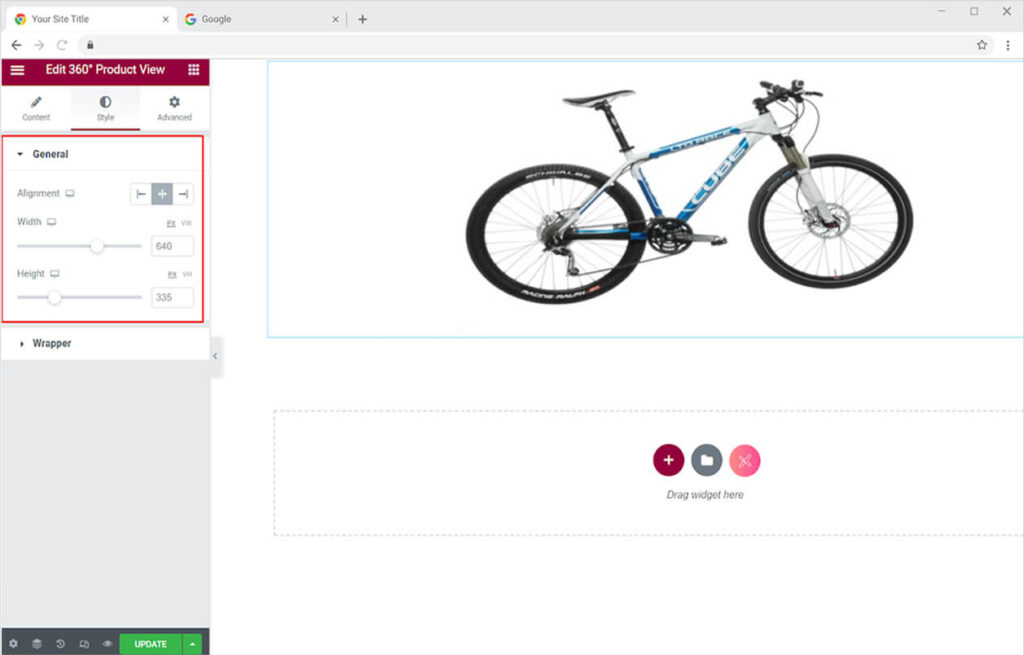
In the General settings of the Style Section, you can adjust the alignment of the widget to the left, middle, or right of the screen. You can also adjust the height and width of the add-on to make it look appropriate on your site.
How to add the Background in the Widget
In the Wrapper section, you have multiple customization options from which you can create a beautiful image appearance. You have the option of changing the color in the background.
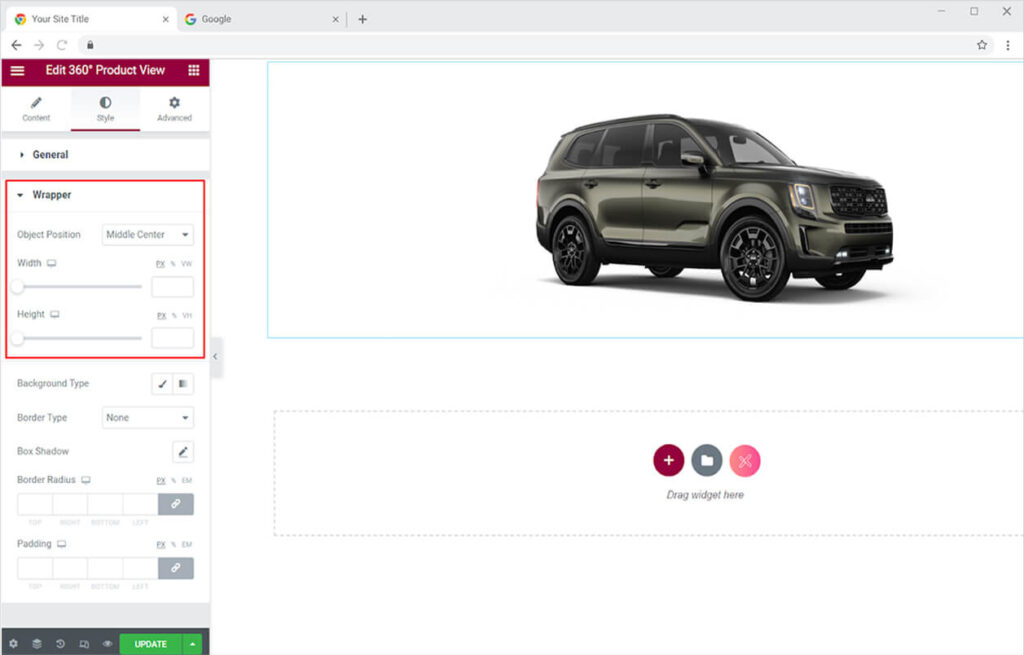
Or you can add two layers of colors in the background.
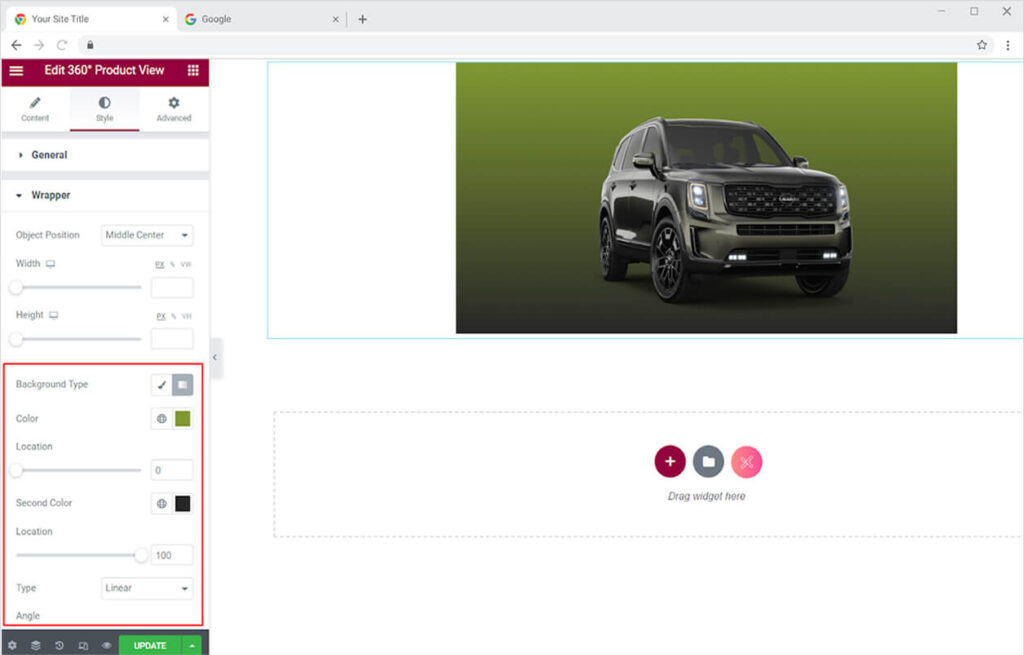
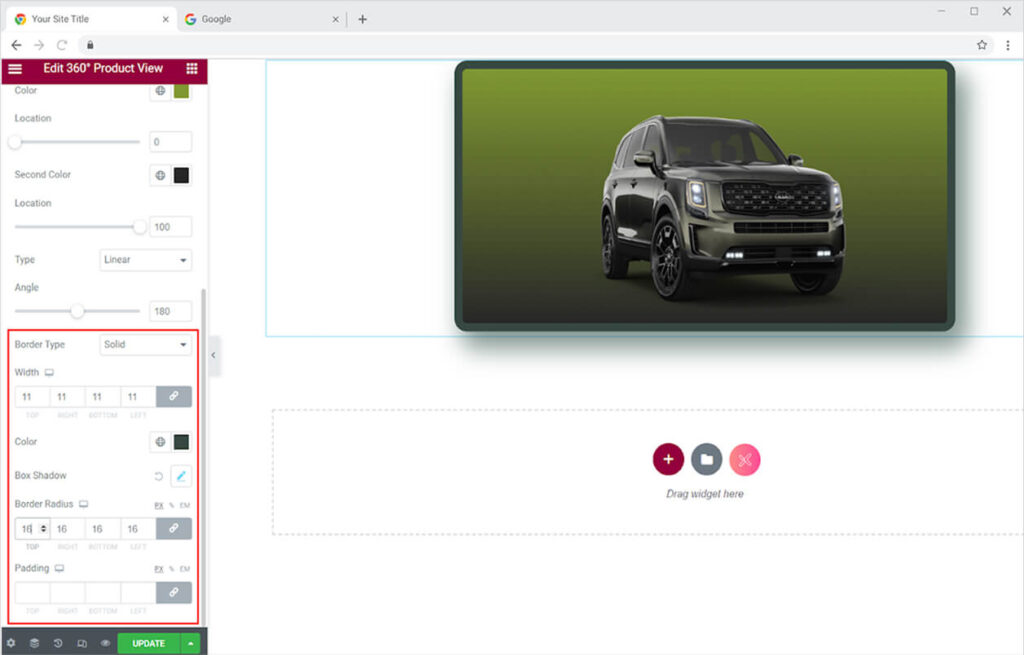
In further editing, you have the option of choosing between solid, double, dotted, dashed, and grove border types. You can change the color, radius, and padding for the border. Add a shadow to the box with Shadowbox to enhance the appearance of your product.
Best 360 Product View Widget for Elementor
This was all from our 360 Product View widget for Elementor. We hope you completely understand the functionality and feature usage of this powerful Xpro Elementor widget. Make full use of this widget to create a beautiful product view and multiply your product sales. Check our premium Elementor info box widget to create attractive information boxes on your website. Combine this 360 product view widget with our slider for Elementor and instantly drive more sales.
Xpro Elementor Addons offer a wide range of widgets, Elementor templates, and blocks that help designers develop an attractive site. Check our 50+ free add-ons for Elementor which are enough to create a professional WordPress website. If you want to explore and add more attractive Elementor widgets then check our complete list of Pro Elementor widgets and download our Pro Elementor addons right now. In case you want to grow your social media audience, you can easily utilize Xpro Social Share Widget to showcase social share icons in the most presentable way.