Introduction
The Elementor Vertical Timeline widget is an incredible strategy to display the progress of your projects, milestones, and existing and future events. A fantastic vertical chart display can convey lengthy information in an attractive manner.
Display information in the timeline with the Xpro Vertical Timeline widget for Elementor. Enhance the widget’s appearance with personalized styling and incredible styling possibilities. Add as many items as you want and shape them as you desired.
How to Install Vertical Timeline for Elementor
Requirements
You need to install and activate the Pro version of Xpro Elementor Addons. If you already have the plugin installed, just make sure the Vertical Timeline Widget is ‘Enabled’, so you can find it in the Elementor editor.
To enable the widget, simply follow these steps:
Step 1
Click on the Xpro Addons option available on the WordPress Dashboard Menu.

Step 2
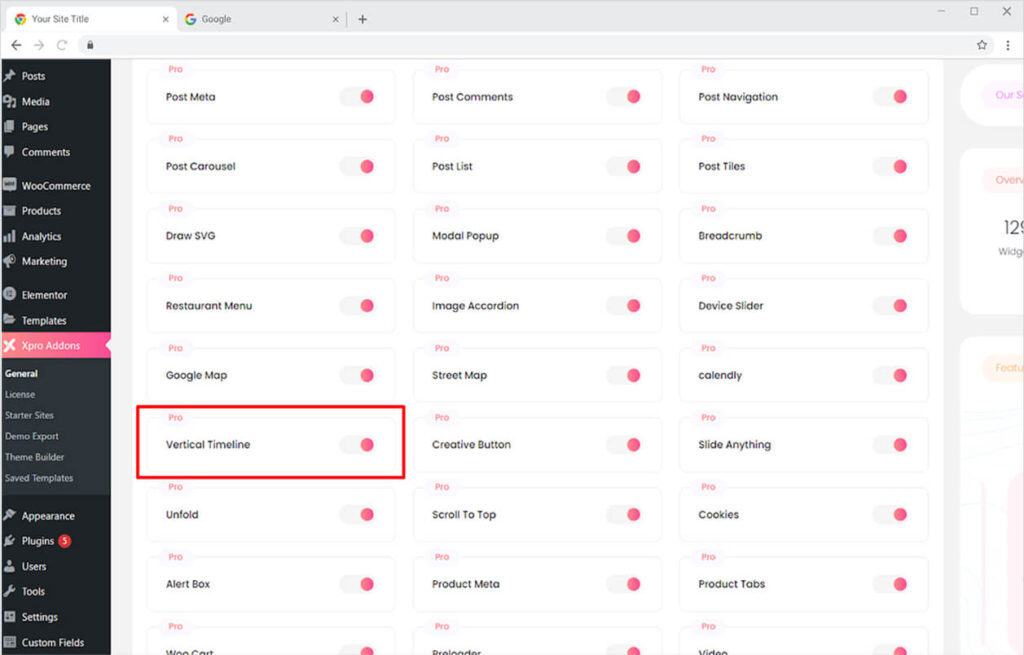
From the Xpro Addons Dashboard, click on the Widgets Tab, find the Vertical Timeline widget, and finally, toggle the button ON to enable it.
How to Use Vertical Timeline for Elementor
The Xpro Elementor Vertical Timeline widget is a perfect approach to illustrate progress or steps to present any information to your website visitors. Appeal to your clients visually and help them better understand your offering. Let’s learn how you can create a vertical timeline with Xpro Elementor.
Step 1
Click on the Xpro Addons – Pro section available in the Elementor Editor.

Step 2
From the Xpro Addons section, find and simply drag and drop the Vertical Timeline widget on your desired page location.

This is the default view of the widget after you drag and drop it into the page.

How to Add Content in the Vertical Timeline widget for Elementor
You can add as many items or steps as you desired. Each step provides you with a variety of style options to help you create the ideal layout for your needs. Images, text, and icons can all be added and managed. Let’s start with the project tagline, which can be either text or an image. Add a date to help visitors understand the time.

To add an image, click on the image icon from the media type and select or upload an image from your desktop. Adjust the size of the image from the Image Size option.

On the other side of the line, you have the option to add an image, title, and description. Explain to your users about your project or event.

For the bullet media in the middle, you have the option to add an image, icon, or text. Furthermore, enable inline style to perform multiple styling for normal and hover effects like
Date Background: Add color to the background of the tagline and date.
Bullet Color: Color the icon or text in the middle.
Bullet Background: Add a background color to the icon.
Separator Color: Color the lines that separate each content.
Content Background: Add a background color to the main content in the vertical timeline.

Position the direction of the timeline menu to left, right, or in middle. Moreover, you can adjust the space between each piece of content from the space option.

How To Style The Vertical Timeline for Elementor
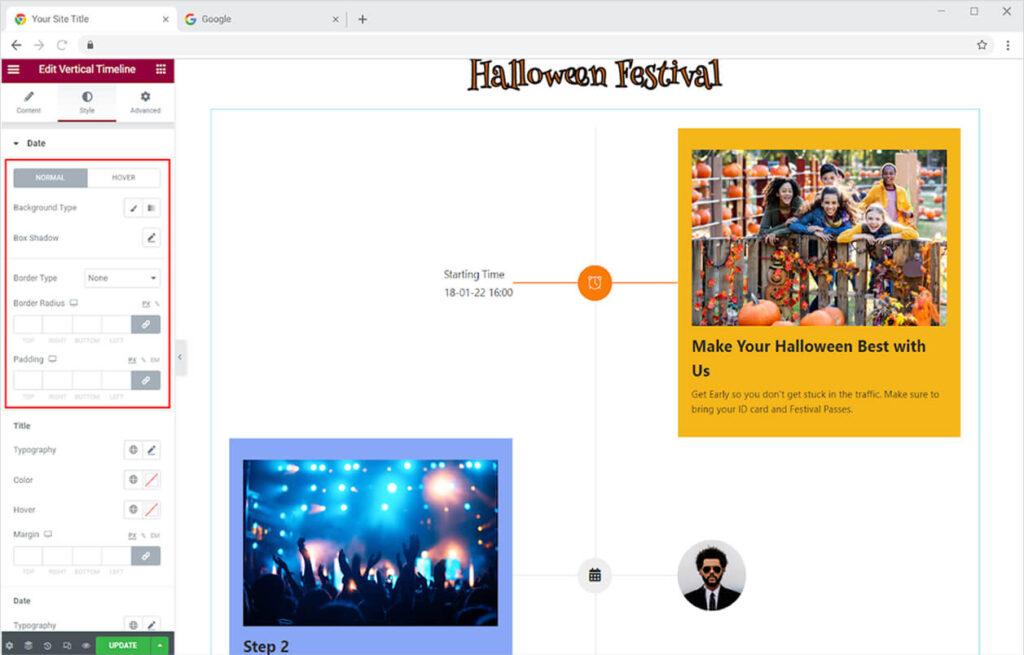
You can do extensive customization in the Elementor Page Builder’s style section to make the widget more appealing and appropriate for your needs. To begin, add a backdrop and shadow box to the date and create a separate background type and shadow for the Hover effect so that it appears differently when the user drags the mouse above it. You can choose from solid, double, dotted, dashed, and grove border types in further editing. The border’s color, radius, and padding can all be customized.
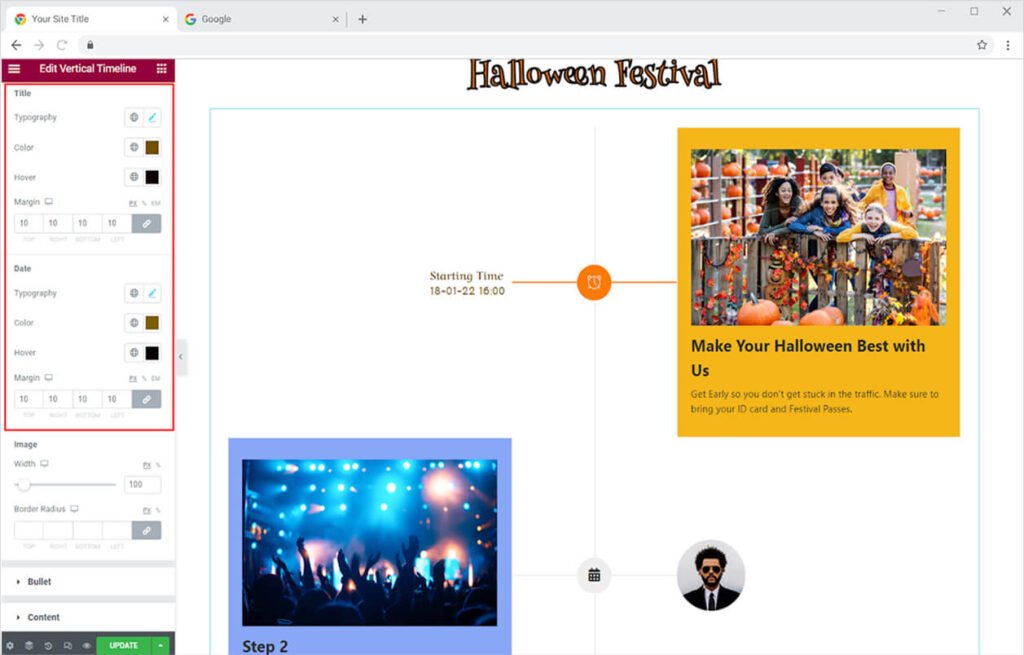
Style the title and date from each respective section. Edit the typography and change its font, size, style, and much more. Color the text for normal and hover. Further, adjust the margin and set each position.
If you choose to add an image in the date then from the style you can change its width and border-radius.

How to Style Bullet in Vertical Timeline for Elementor
For the bullet in between, you can style it by adjusting the size for the icon and background. Moreover, you can color the icon and background and also include color for separator and divider lines.
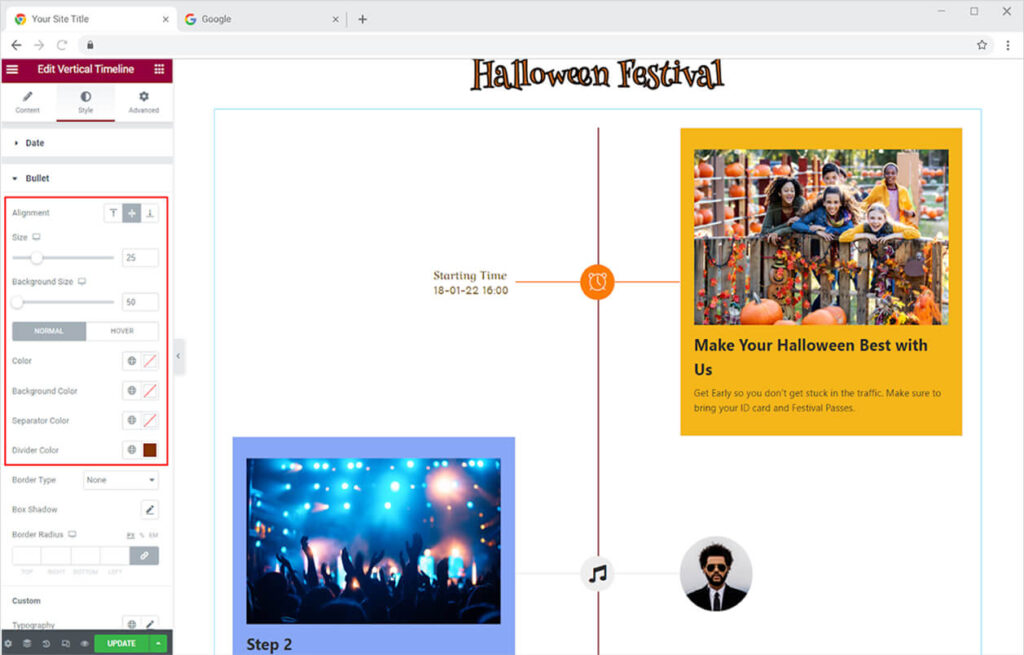
You can change the border type and include solid, double, dashed, groove, or dotted borders to the bullet. Further, you can adjust the width, and radius and add color to the border. If you have included text in the bullet then you can edit it as well.

How to Style the Content in The Vertical Timeline
Set the alignment of the text to left, right, or middle in the content box. Adjust the width of the content box according to your need.
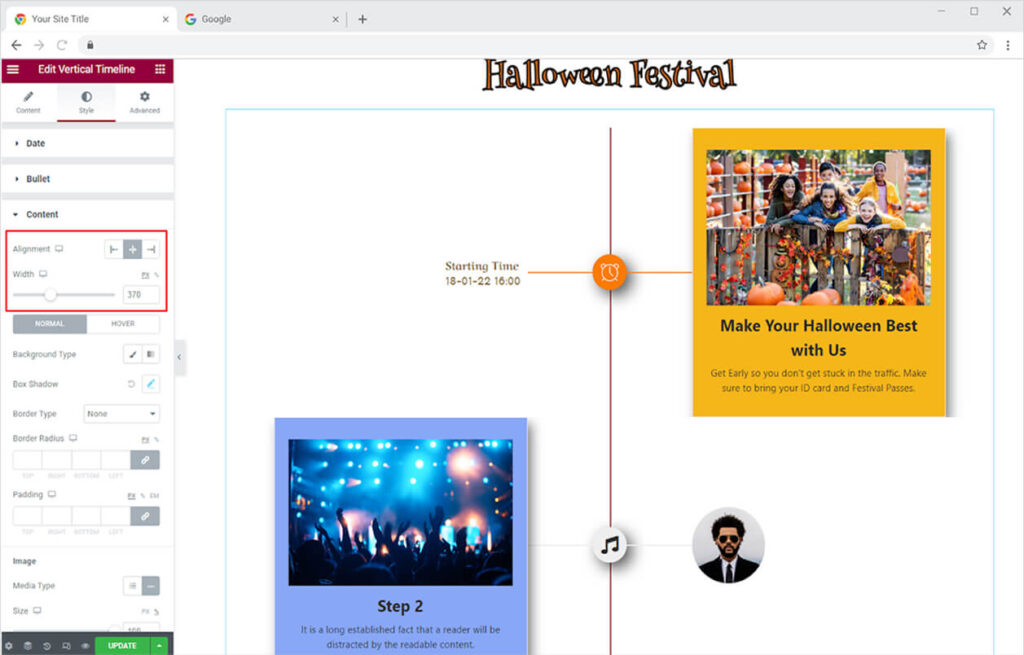
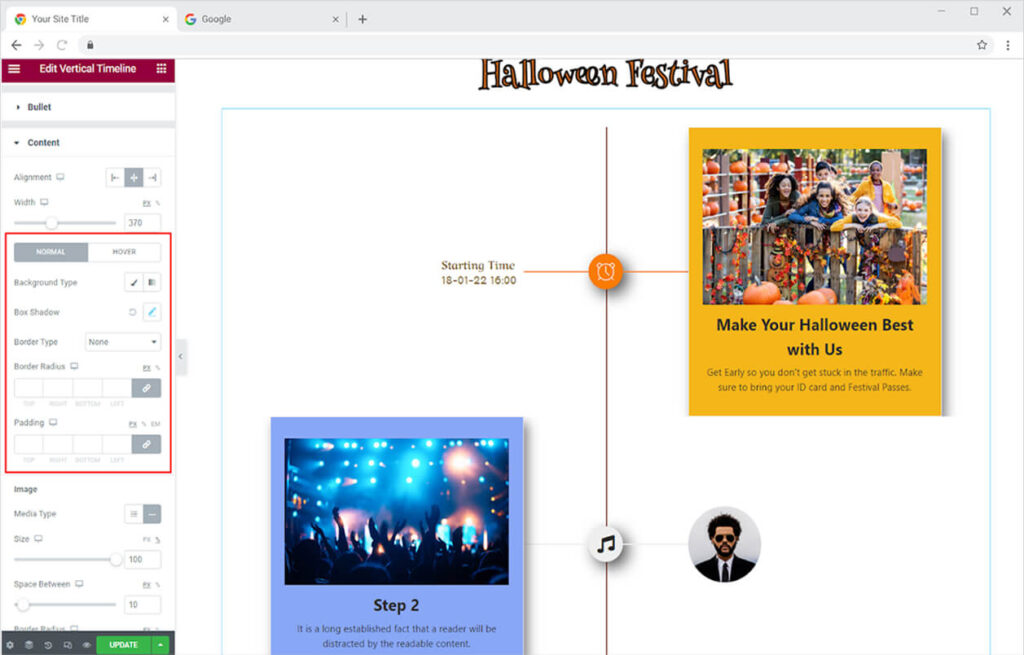
Add a background color to the content for normal and hover effects. Enhance the appearance of the layout by adding shadow to the box. In further editing, you have the option of choosing between solid, double, dotted, dashed, and grove border types. You can change the color, radius, and padding for the border.
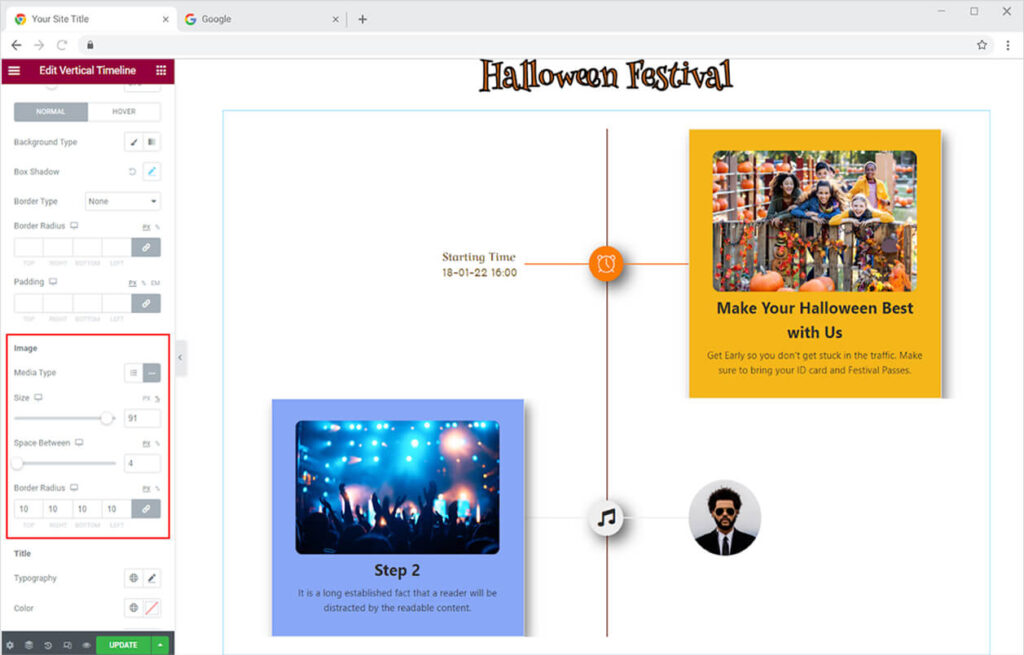
You can arrange the image inline or block mode from the image section. Change the size and spacing between them. Also, change the radius of the border.
For the title and text in the content, you can style their typography by changing the font, size, spacing, and much more. Color the text as well as the hover. Adjust the margin to set their position.
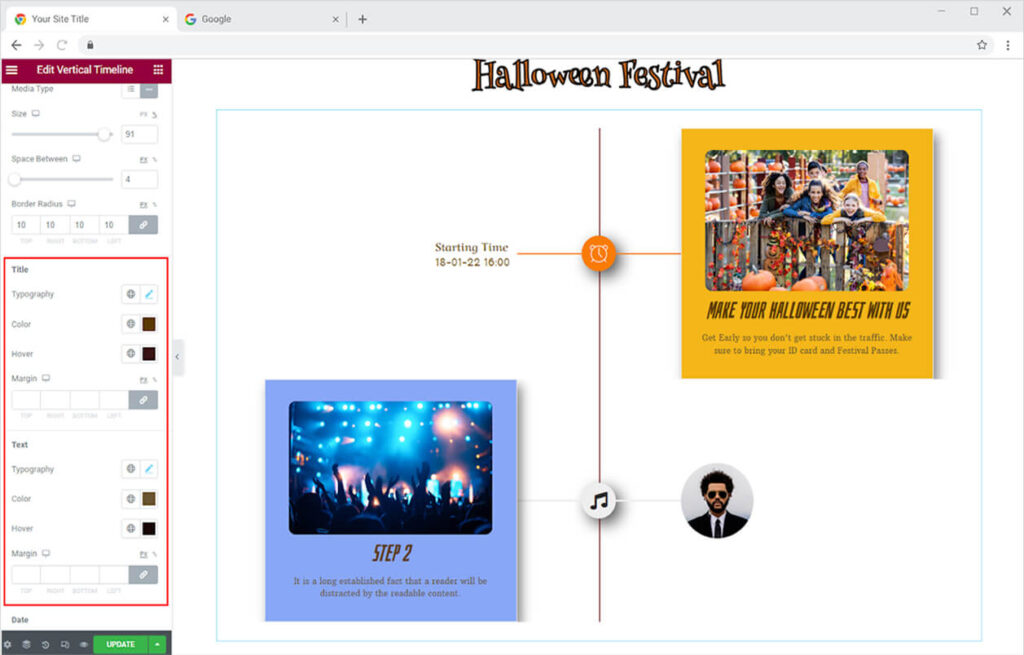
Best Vertical Timeline for Elementor
This is all from the amazing Vertical Timeline widget by Xpro Elementor. We hope that you have fully understood the functionality and complexity of this powerful tool. Utilize this widget to create the best-looking website.
Xpro Elementor Addons offers a wide range of widgets, theme templates, and box template for Elementor that helps you create a fully functional website without any need for coding. If you want to know more about amazing widgets like Vertical Timeline then check out the Vertical Menu for Elementor. Check our 50+ free Elementor Addons which are enough to create a professional WordPress website. If you want to explore and add more attractive Elementor widgets then check our complete list of Pro Elementor widgets and download our Pro Elementor addons right now.