Introduction
The Cookies widget for Elementor allows you to add a cookie pop-up box display from which users of your site can agree to provide you with their data. Elementor Cookies by Xpro comes with all the necessary components and styling tools you need to display the cookie box.
Every developer recognizes the value of cookies, which not only support their site but also provide a better experience for the user. Cookies are used to remember the visitor and their preferences in order to improve the visitor’s website experience. This Elementor premium widget by Xpro makes it extremely easy to add cookies to your site.

How to install Cookie Widget for Elementor
Requirement
You need to install and activate the Pro version of Xpro Elementor Addons. If you already have the plugin installed, just ensure the Cookies Widget is ‘Enabled’ from the Xpro Dashboard so that you can find the widget in the Elementor editor.
To enable the widget, simply follow these steps:
Step 1
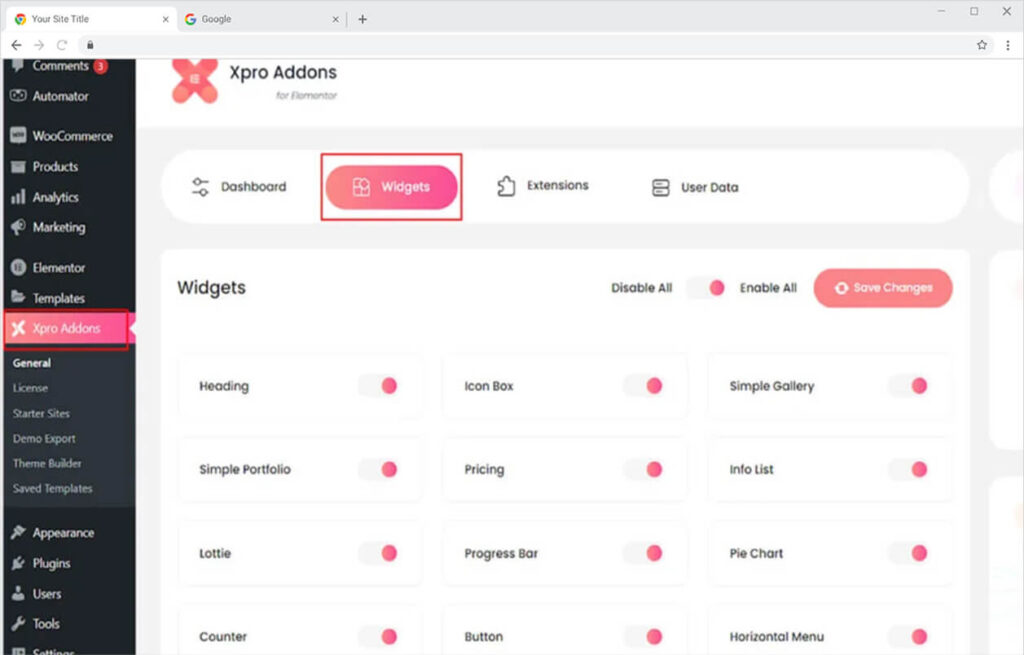
Click on the Xpro Addons option available on the WordPress Dashboard Menu.
Step 2
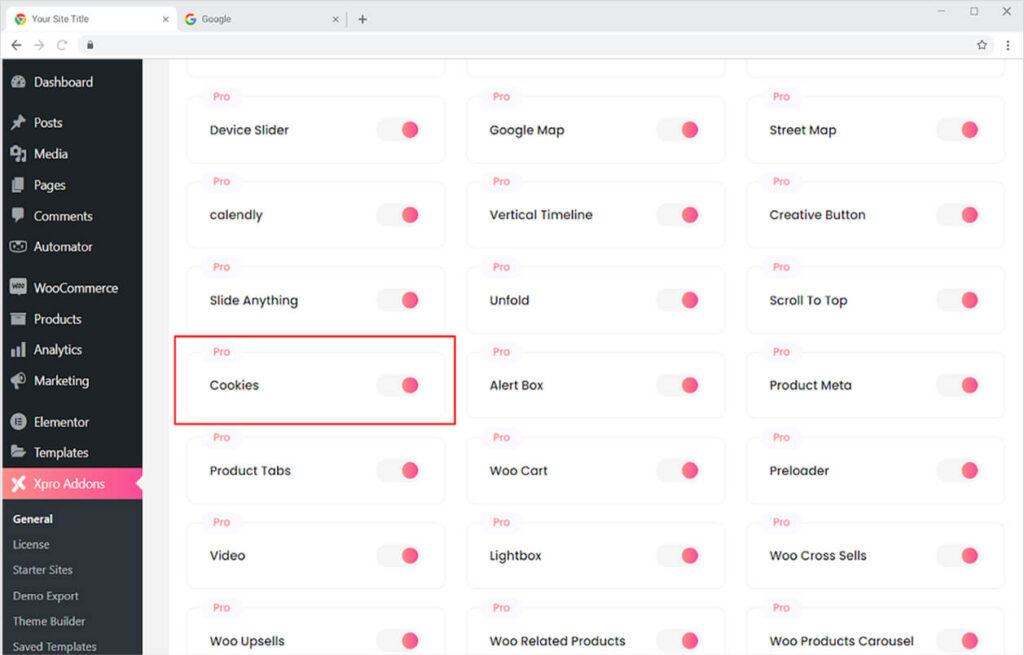
From the Xpro Addons Dashboard, click on the Widgets Tab, find the Cookies widget, and finally, toggle the button to enable it.
How to Use Cookies Widget for Elementor
Cookies are added by developers on websites to improve the user experience for their visitors. These widgets are nicely displayed with the intention of not distracting visitors who are reading or looking for something. An unpleasant cookie pop-up might leave a negative impression on consumers and raise the bounce rate.
Xpro Elementor understands the need of showing the best result for you and your site visitor. Adjust the position of the cookie box, color text, and background, and add a link to make it easy for the user to continue.
Step 1
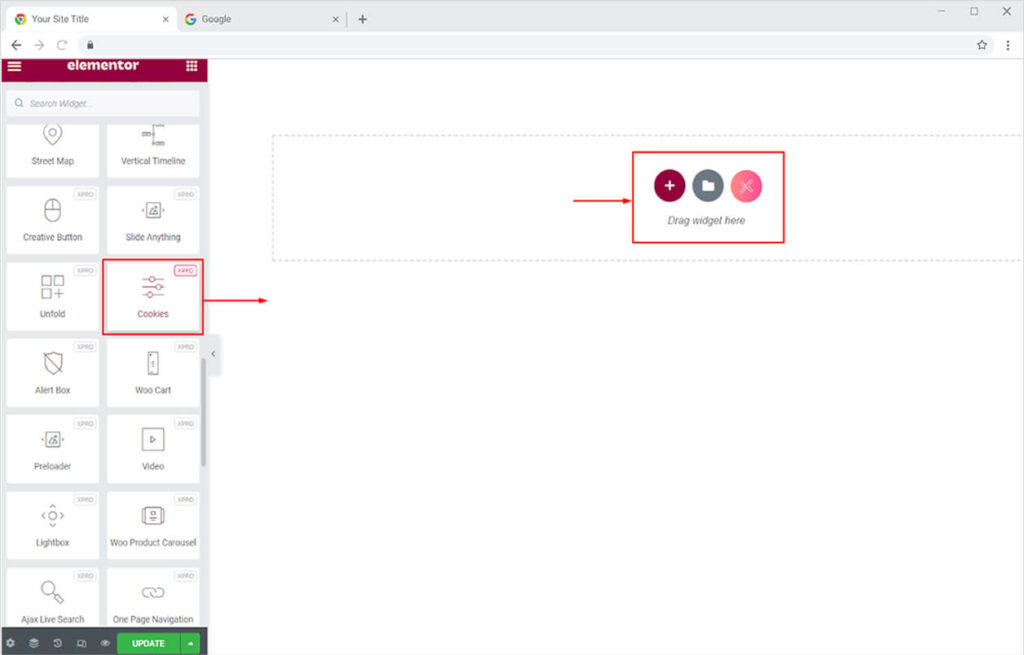
Click on the Xpro Addons-Pro section available in the Elementor Editor.

Step 2
From the Xpro Addons-Pro section, simply drag & drop the Cookies widget on your desired page location.
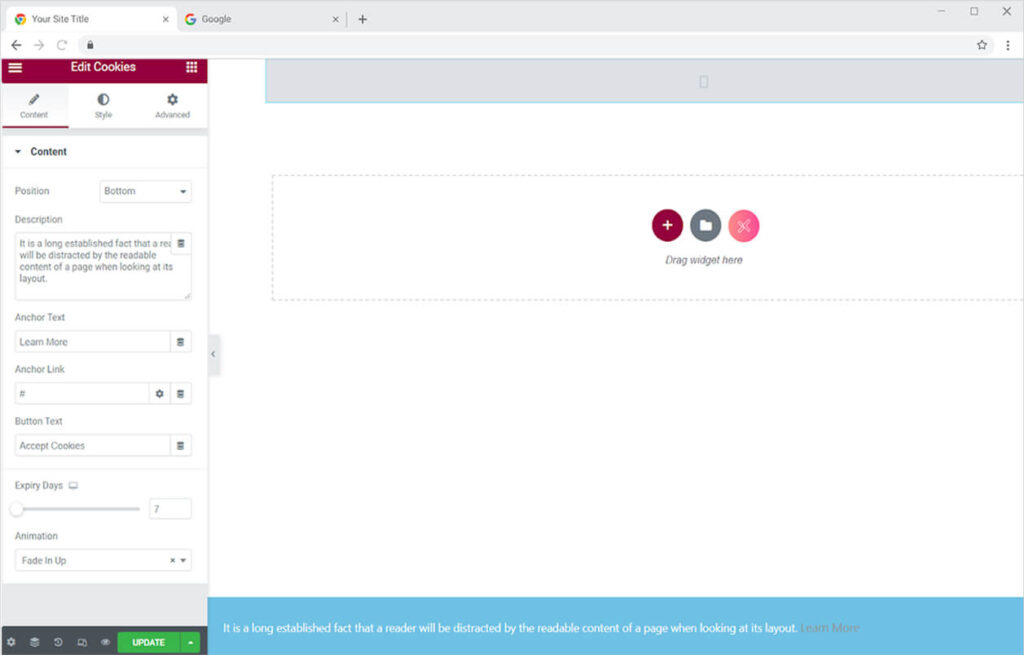
This is the default view of the widget when you drag and drop it to an Elementor page builder.
How to Position the Cookies widget for Elementor
You can adjust the location of the widget display from the content section by selecting Position. To set its location, simply click on the bar next to Position. You can place the widget at the top, bottom, button right, or bottom left.

How to add Content in the Cookies widget for Elementor
You can add the text in the widget display by writing content in the description. Add convincing content to make the user click and accept to share their data.

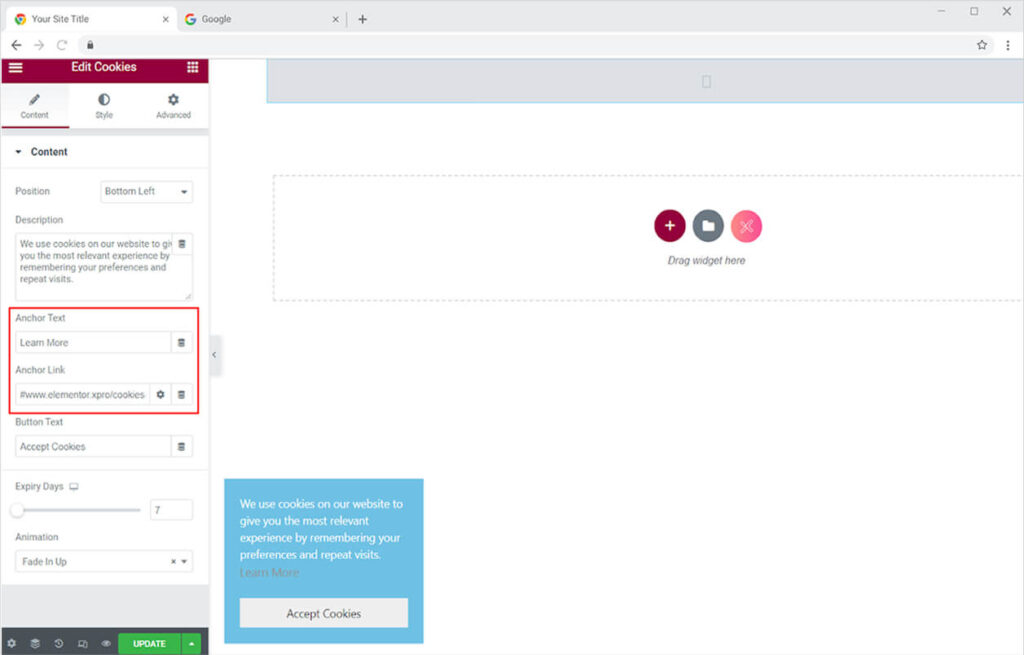
From the Anchor text and Anchor link bar, add a text and link it respectively. In order to build and maintain ethical means, direct users to a page where they learn about terms and policies of accepting to provide you with data.
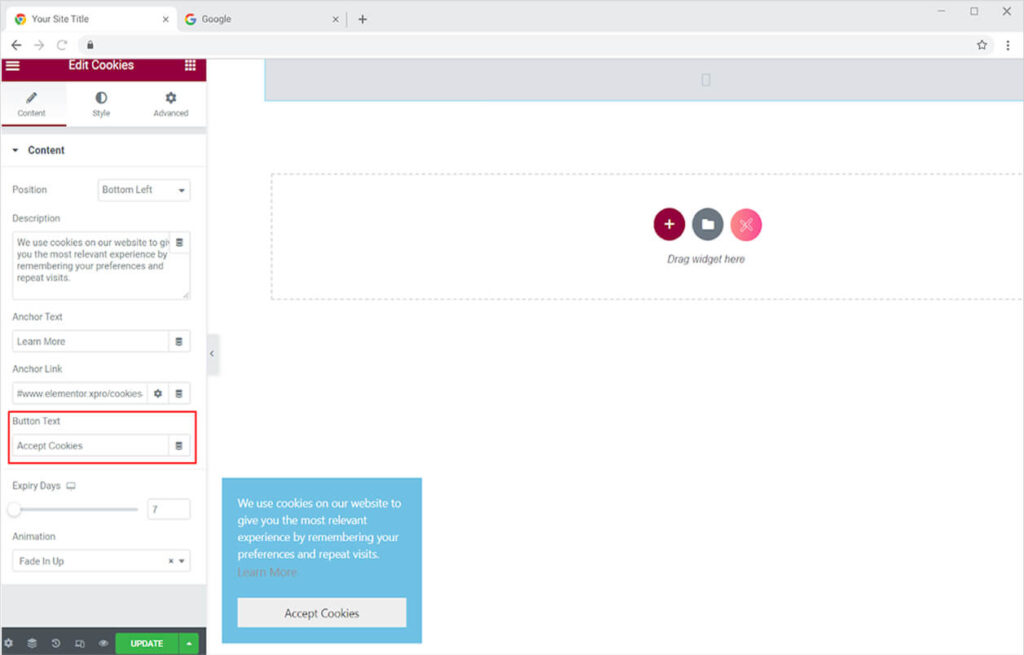
Create the content for the button where the visitor to your site agrees to give you his or her information.
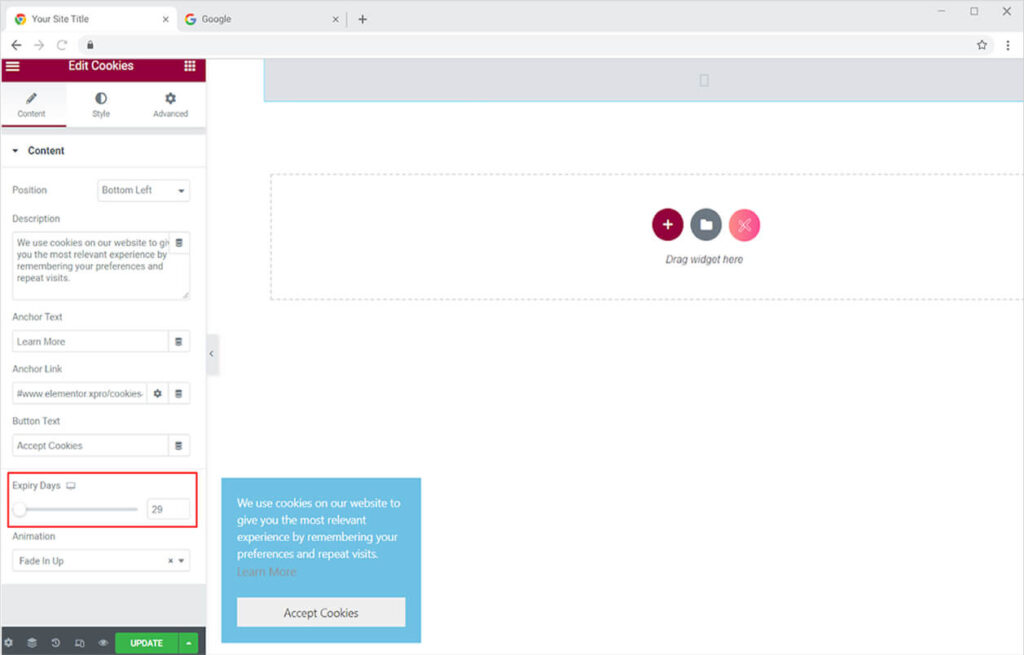
Set the cookie expiry days to indicate when the cookies’ validity will expire and the user will be requested to accept the cookies again.
There are several animation options available to help you introduce the cookie box in a more eye-catching manner. Xpro Elementor includes attractive animation to capture the attention of the visitor. Select any animation from the animation drop-down menu.

How to Style the Cookie widget for Elementor
Color the text and the background in the box from the Text Color and Background Type options respectively. Add classic or gradient colors for the background.

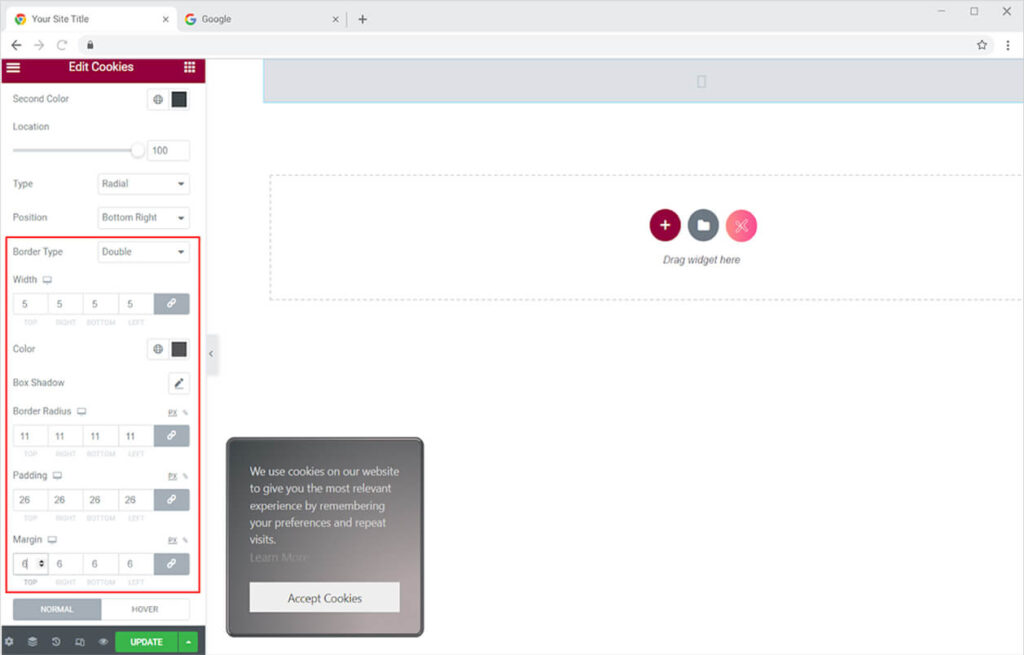
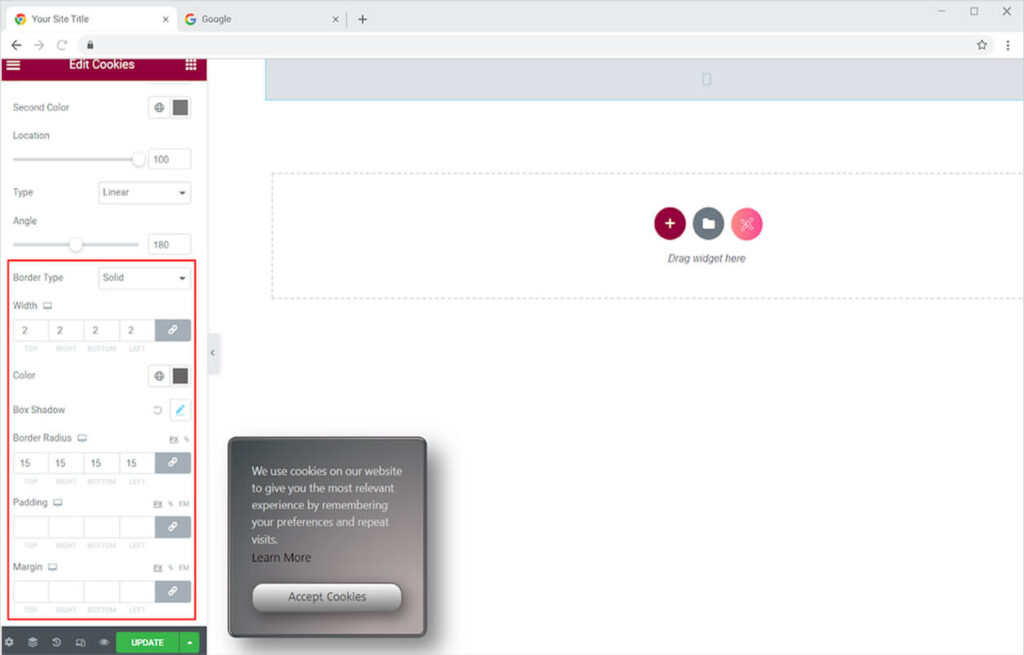
You can also change the border of the box to make them more visually appealing. You can choose from five different types of borders.
- None
- Solid
- Double
- Dotted
- Dashed
- Groove
Change the width and radius of the border to match your preferences. You can also change the border color. Moreover, add a shadow to the box through the shadow box option.
Style the link text color for normal and hover so that it changes color when the user moves the mouse above it. This makes it clear to readers that the text is linked to a webpage.

How to Style the Button in the Cookie widget for Elementor
Set the typography of the text in the button. You can modify the font, size, style spacing, and much more of the text in the button using the typography option.
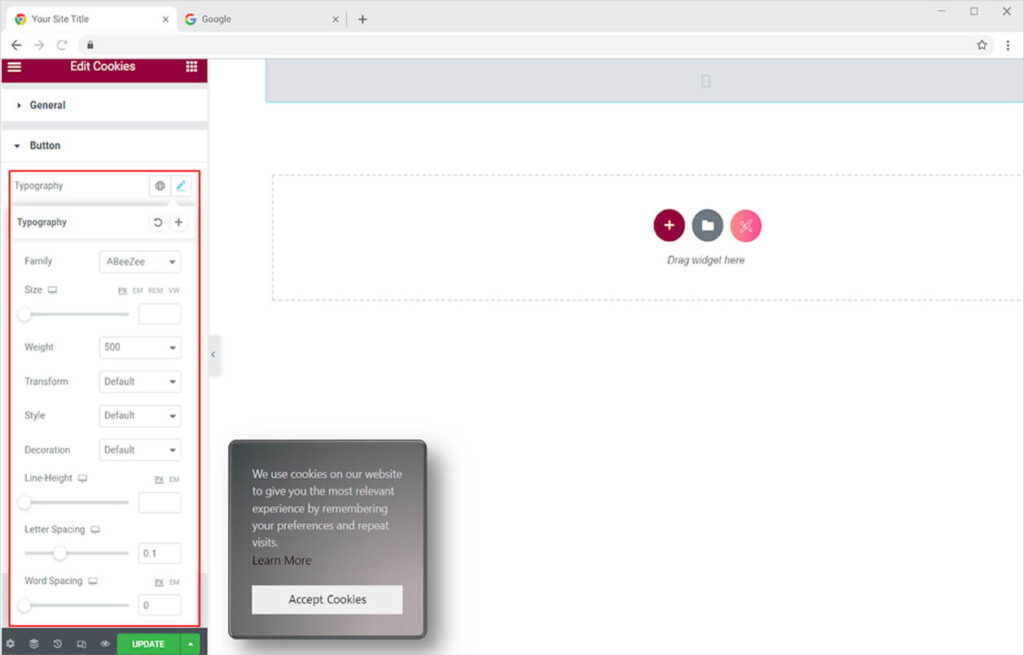
Color the font and background in the button from the Color and Background Type for normal as well as for the hover effect.

Select a border for the button just like you did previously in the Cookie box. Select a border and change its width and radius. Just like in the Cookie box, you can add a shadow to the button as well.
Best Cookie widget for Elementor
This is all from the Elementor Cookie widget by Xpro that lets you design the best Cookie box for your site. We hope that you fully understand the uses and functionality of this amazing product and will be able to effectively utilize it.
Xpro Elementor Addons offer a wide range of widgets, Elementor templates, and features that help you develop an attractive site. Check our 50+ free Elementor widgets which are enough to create a professional WordPress website. If you want to explore and add more attractive Elementor widgets, then check our complete list of Pro Elementor widgets and download our Pro Elementor addons right now.