Introduction
Elementor Featured Image is another fantastic free Xpro Theme Builder that helps in the creation of an appealing website. You may be wondering why this functionality is required when WordPress allows you to add featured photos to the article or page. Xpro Elementor makes it simple to not only place this image wherever on the webpage but also to customize the image arrangement to your specifications.
Xpro Featured Image for Elementor is an essential tool that you need to include images in your article. You have the choice to include the featured image anywhere on the webpage. Adjust the size as well as apply CSS filter and enhance the appearance of the image.

Requirement
You need to install and activate the Free version by Xpro Elementor Addons. If you already have the plugin installed, just make sure the Featured Image Widget is ‘Enabled’, so you can find it in the Elementor editor.
To enable the widget, simply follow these steps:
Step 1
Click on the Xpro Addons option available on the WordPress Dashboard Menu.
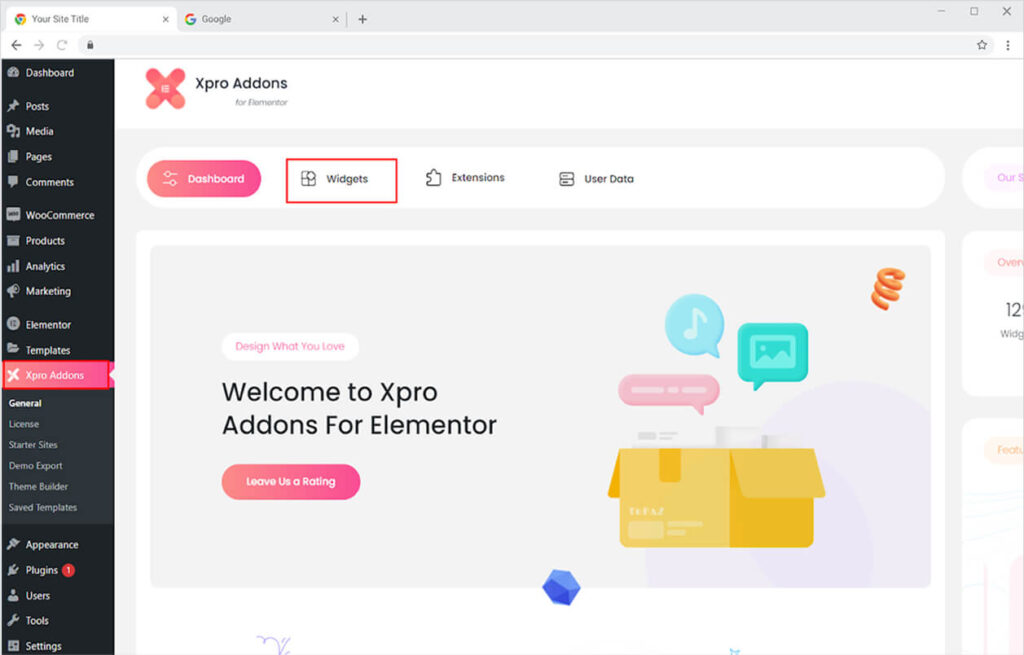
Step 2
From the Xpro Addons Dashboard, click on the Widgets Tab, find the Featured Image widget, and finally, toggle the button ON to enable it.
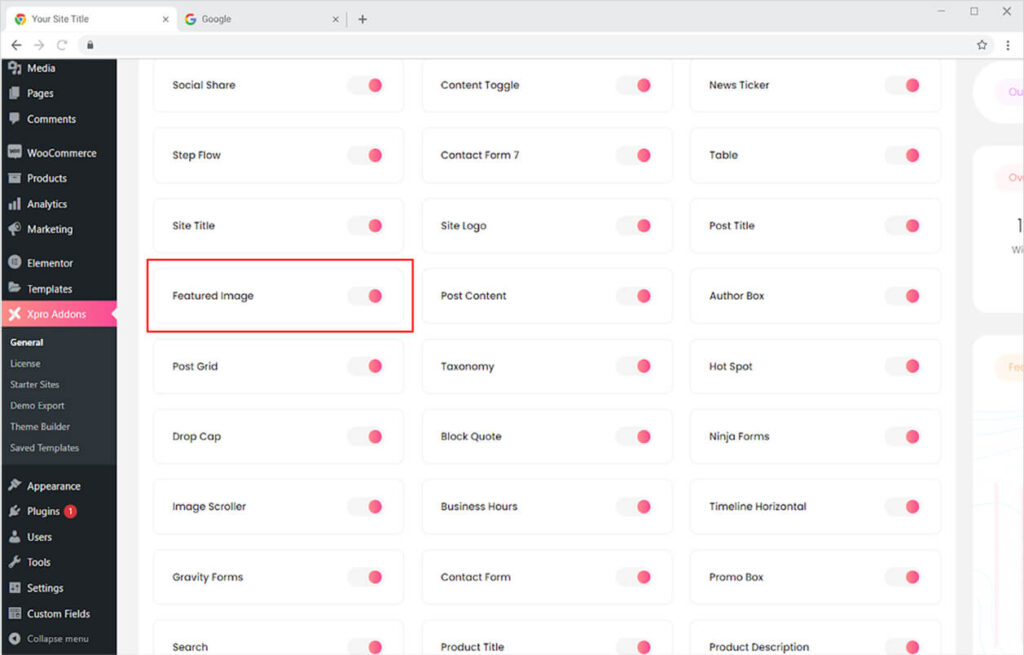
How to Use Xpro Featured Image Widget for Elementor
Featured Image is an easy to use widget that let you add and manage images in your webpage. Multiple customizations allow you to adjust and style the image according to your need.
Step 1
Set the featured image from the WordPress dashboard.

Step 2
After selecting and a featured image in WordPress, click on the Xpro Theme Builder section available in the Elementor Editor.
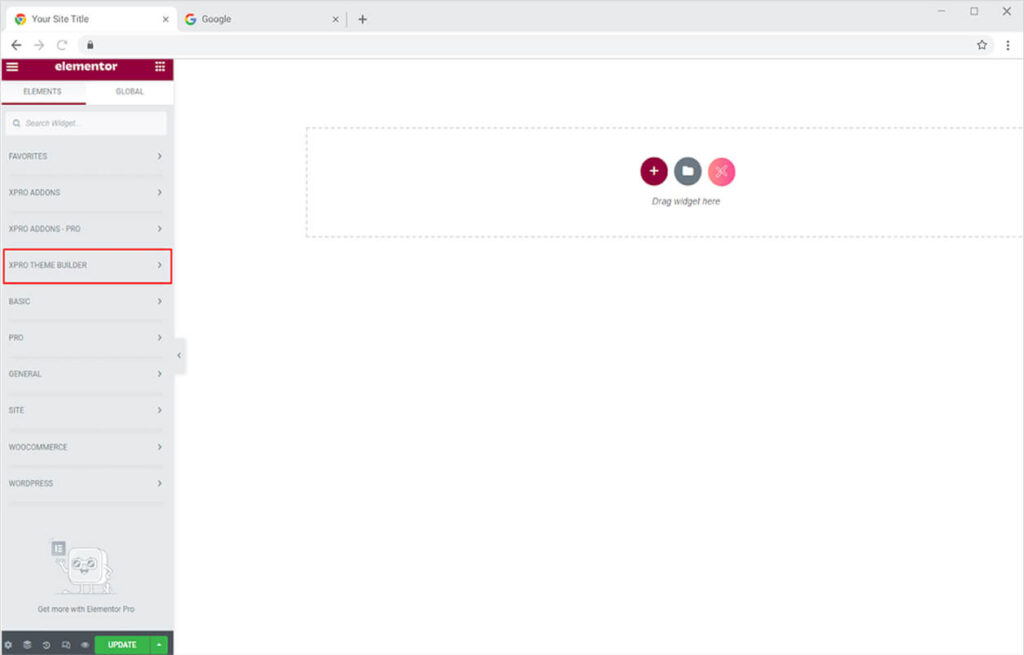
Step 3
From the Xpro Theme Builder section, simply drag’n’drop the Featured Image widget on your desired page location.
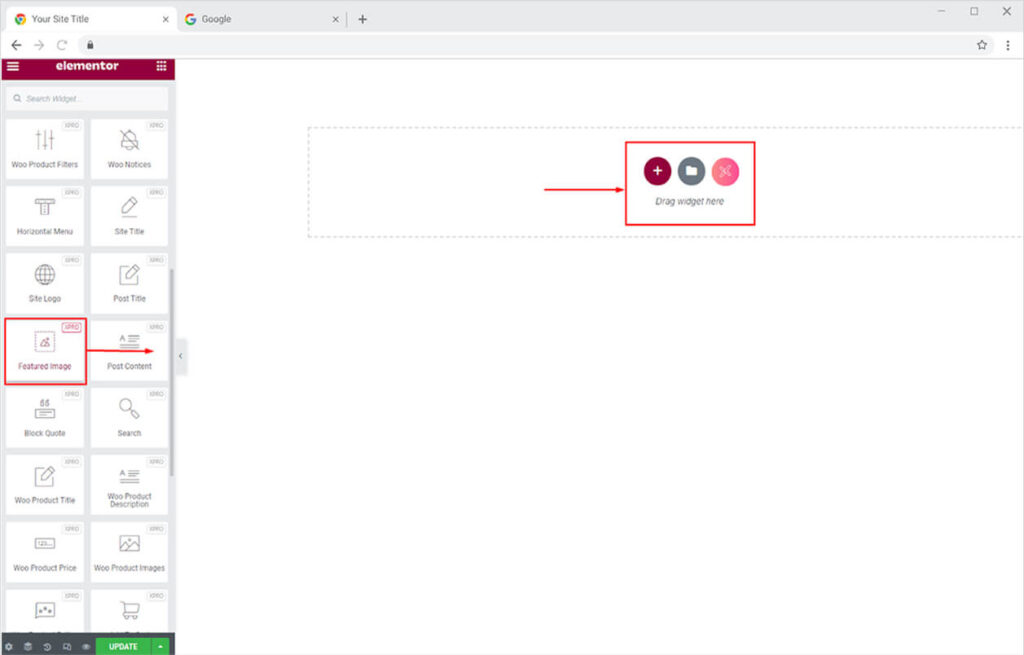
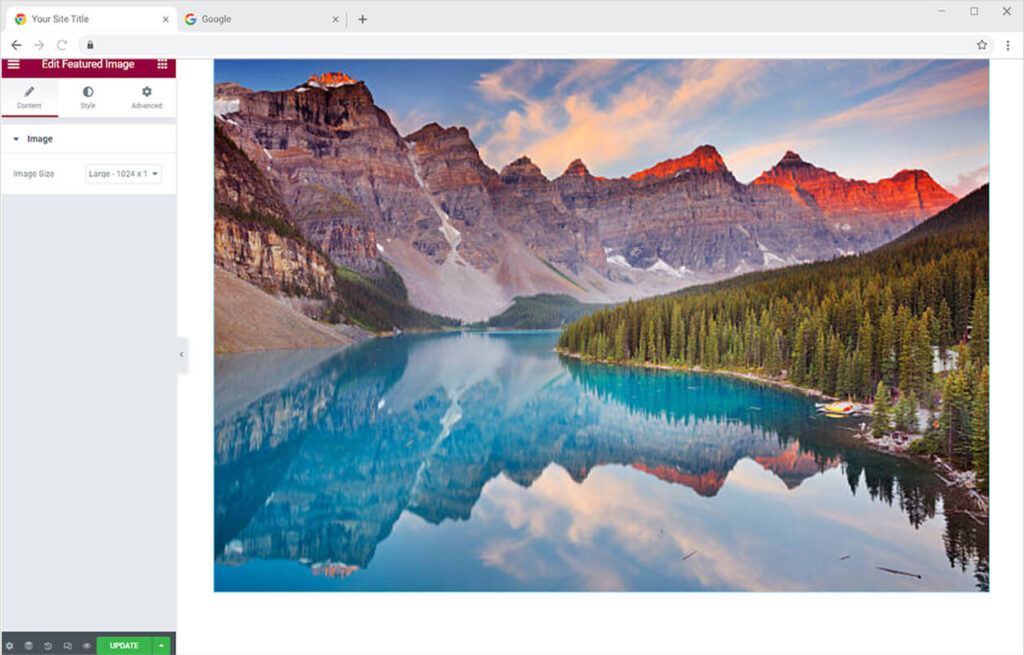
This is the default view of the widget after you drag and drop it into the desired location on page.
How to Adjust the Size of the Featured Image
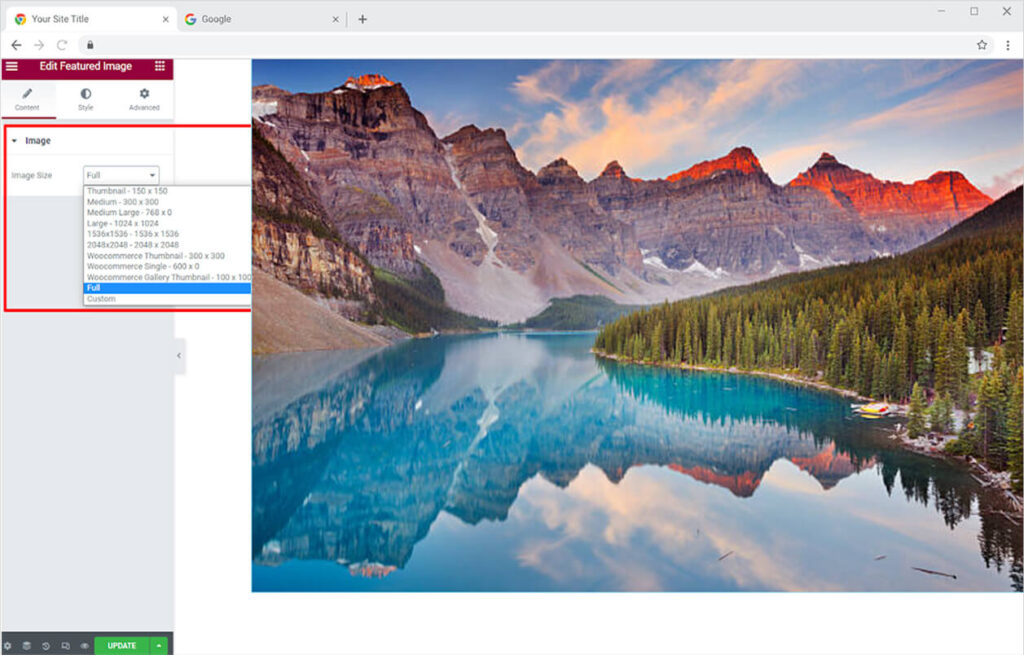
The content section proved you with the image menu from where you you can select the size for the featured image. Simply click on the bar besides Image Size and select the size in which the image look perfect.
How to Style the Featured Image
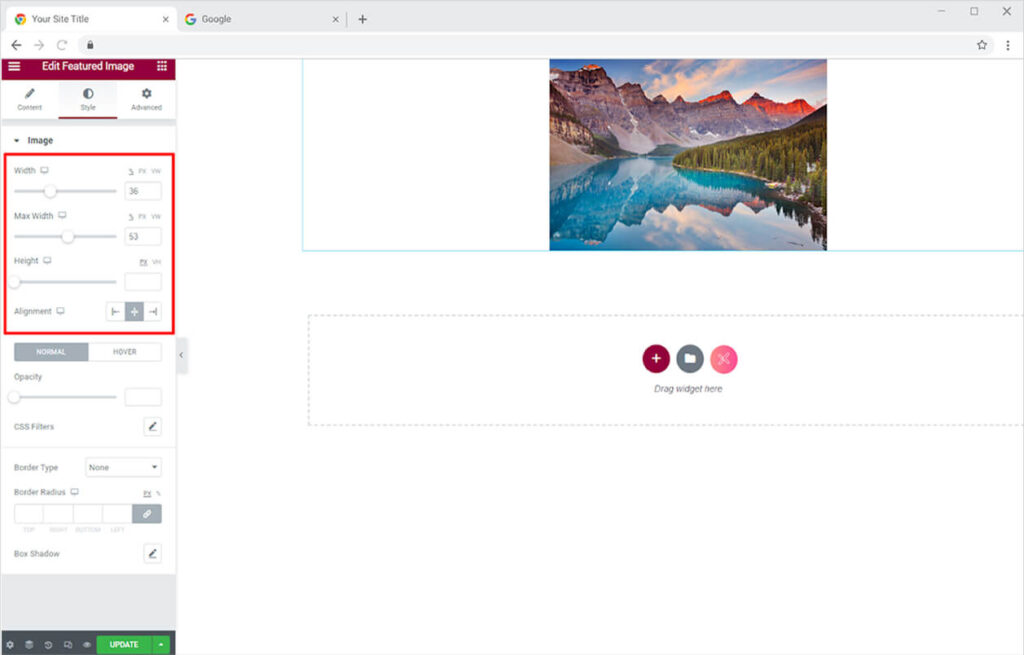
The style section in the Elementor Page Builder allows you to make multiple styling to the widget. Adjust the width and height of the display and set its location to left, right, or center of the page.
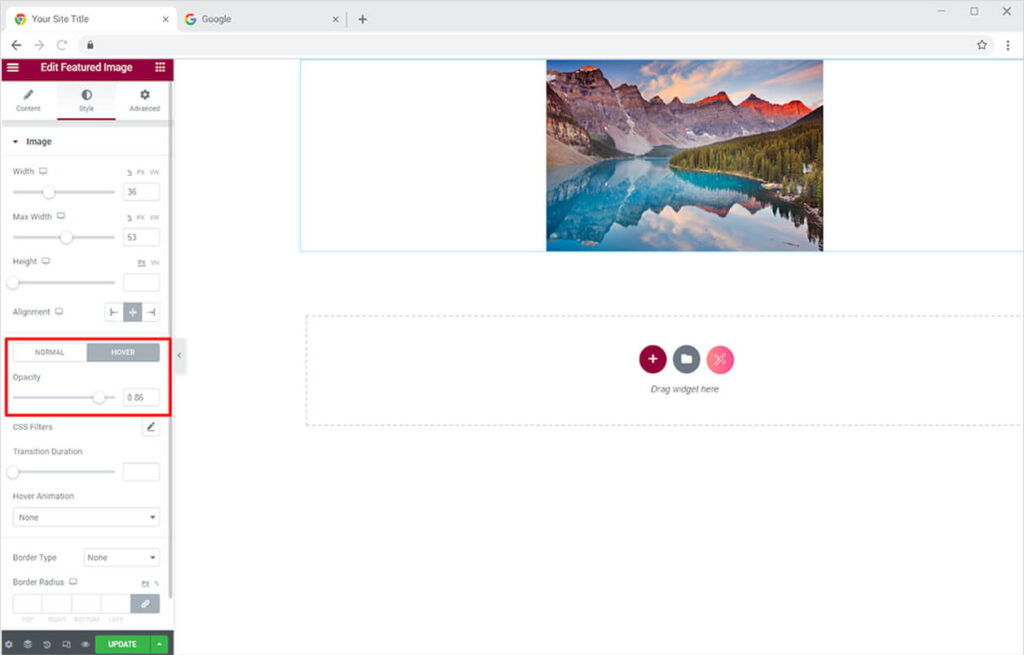
The Normal and Hover effect allows you to make changes for a normal display of the image and when the user drag the mouse above it. The appearance of the image differ as the user move the mouse above it. Adjust the clearity of the image for the normal and hover from the Opacity option.
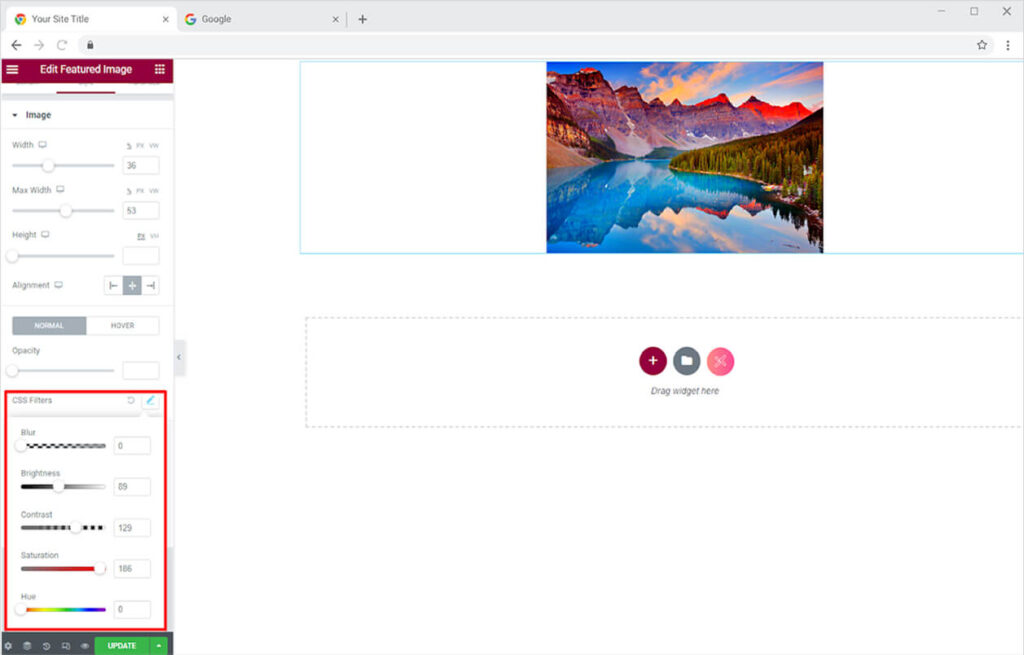
The CSS filters are an amazing features that allow you to edit the image. Make the following editing from the CSS Filters drag-down option.
- Blur
- Brightness
- Contrast
- Saturation
- Hue
Set the transition Duration on how long does it take for hover effect to apply. Another great feature by Xpro Elementor is the Hover animation where you have multiple stunning animation to choose from. This feature not just enhance the attractiveness of your site but also improve the user experience.
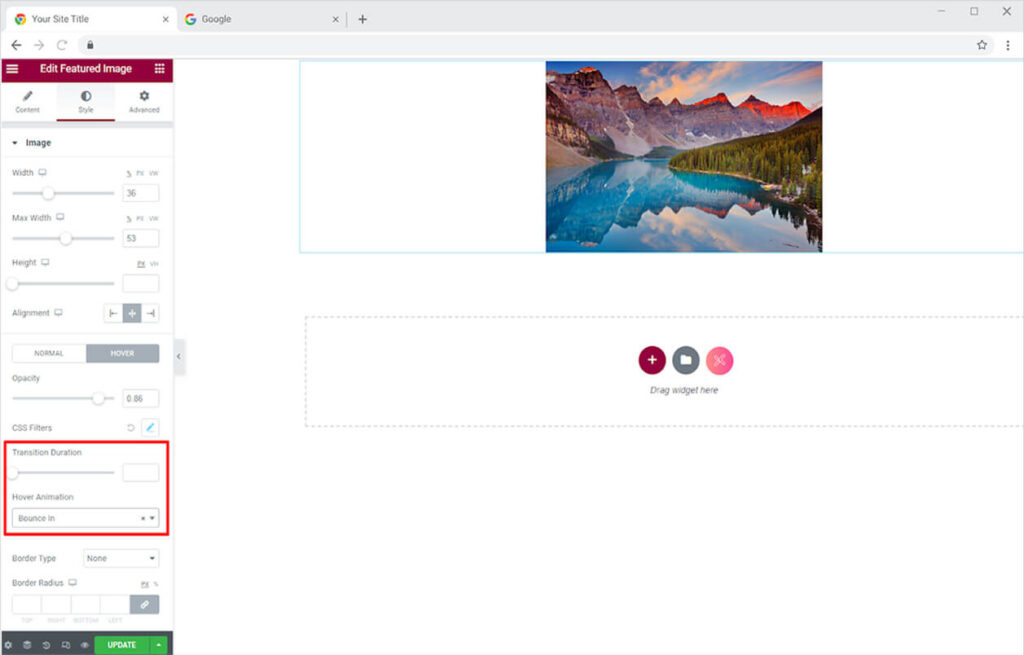

In further editing, you have the option of choosing between solid, double, dotted, dashed, and grove border types. You can change the color and radius for the border. Add a shadow to the box with Shadowbox to enhance the appearance of your product.

Best Featured Image widget for Elementor
This was all from our Featured Image widget for Elementor. We hope you completely understand the functionality and feature usage of this amazing Xpro Elementor widget. Make full use of this widget to create a beautiful feature image and enhance the appearance of your website. Combine this widget with Post Content widget by Xpro Elementor to create blogs.
Xpro Elementor Addons offer a wide range of widgets, Elementor templates, and blocks that help designers develop an attractive site. Check our 50+ free add-ons for Elementor which are enough to create a professional WordPress website.