Every e-commerce website requires a cart display, which appears when a customer adds a product to their shopping basket. Display the information on the cart to the customer so that he understands the entire cost and quantity of his purchases. If a customer needs it, he can use this widget to make adjustments to his cart. Furthermore, the widget allows the user to enter a coupon code to avail of discounts and then proceed to checkout and pay after completing his online shopping.
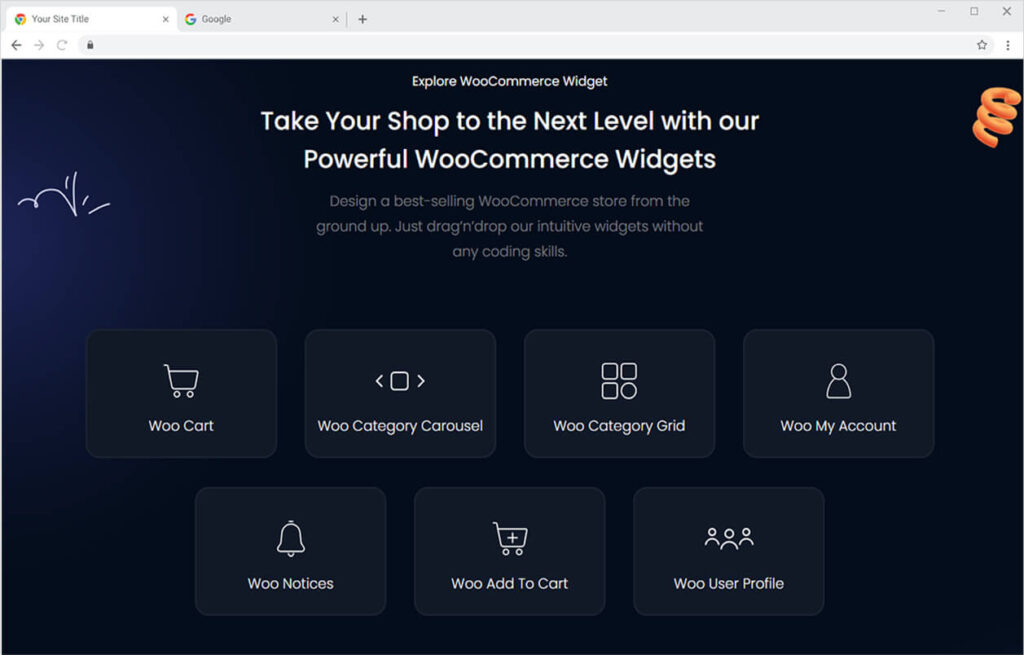
In today’s world, having an e-commerce website is a must for any business. This is why Xpro Elementor recognizes the importance of a business website and provides a wide choice of Xpro Elementor WooCommerce Widgets to help you build a product layout and webpage.
The premium widget comes with huge customization options that allow you to build a cart display of your choice. Make the widget layout and appearance suitable to your website theme. Apply color, border, and shadow to enhance the display.
How to Install Xpro Woo Cart widget for Elementor
Requirements
Using Xpro Woo product widgets requires the installation of the WooCommerce plugin. You need to install and activate the Pro version of Xpro Elementor Addons in order to use our Woo Cart widget. If you already have the plugin installed, just make sure the Woo Cart Widget is ‘Enabled’ from the plugins section of Xpro Dashboard, so you can find & use the widget in the Elementor editor.
To enable the widget, simply follow these steps:
Step 1
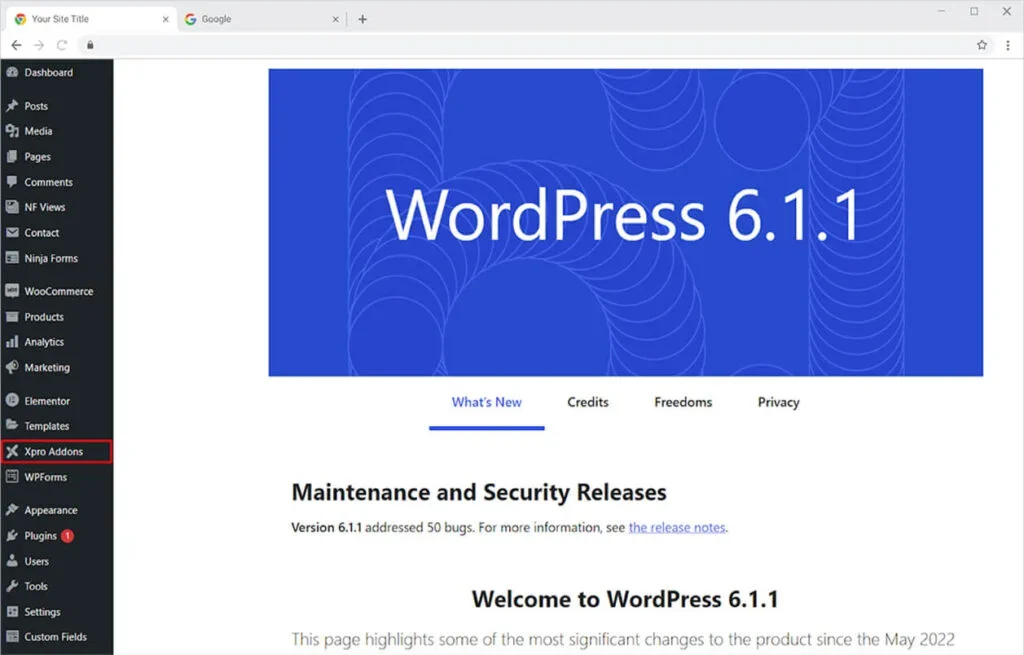
Click on the Xpro Addons option available on the WordPress Dashboard Menu.
Step 2
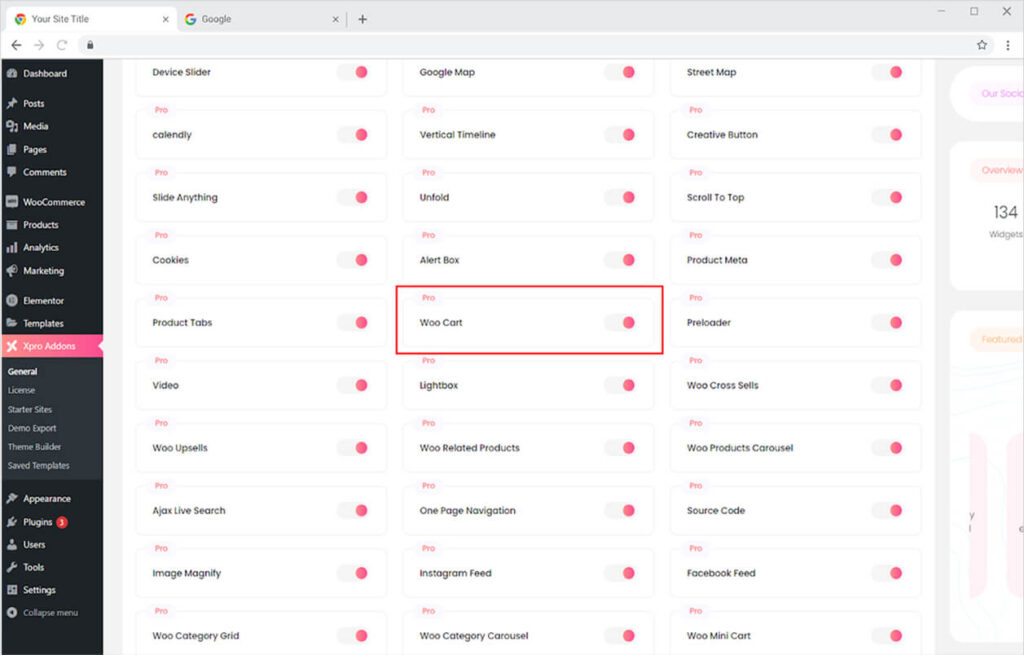
From the Xpro Addons Dashboard, click on the Widgets Tab, find the Woo Cart widget, and finally, toggle the button ON to enable it.
How To Use Xpro Woo Cart Widget for Elementor
In order to use any WooCommerce widget you must have a WooCommerce plugin installed in your WordPress. Simply use the Elementor drag-and-drop feature to display the widget on the webpage. Modify the widget appearance from the Content, Style, and Advanced Tab.
Step 1
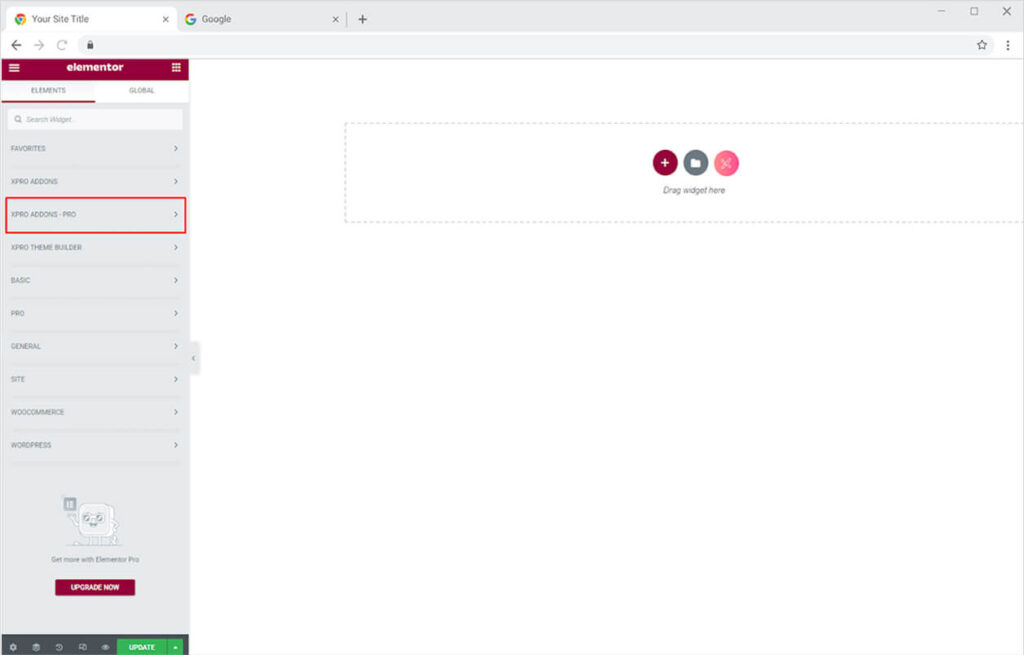
Click on the Xpro Addons – Pro section available in the Elementor Editor.
Step 2
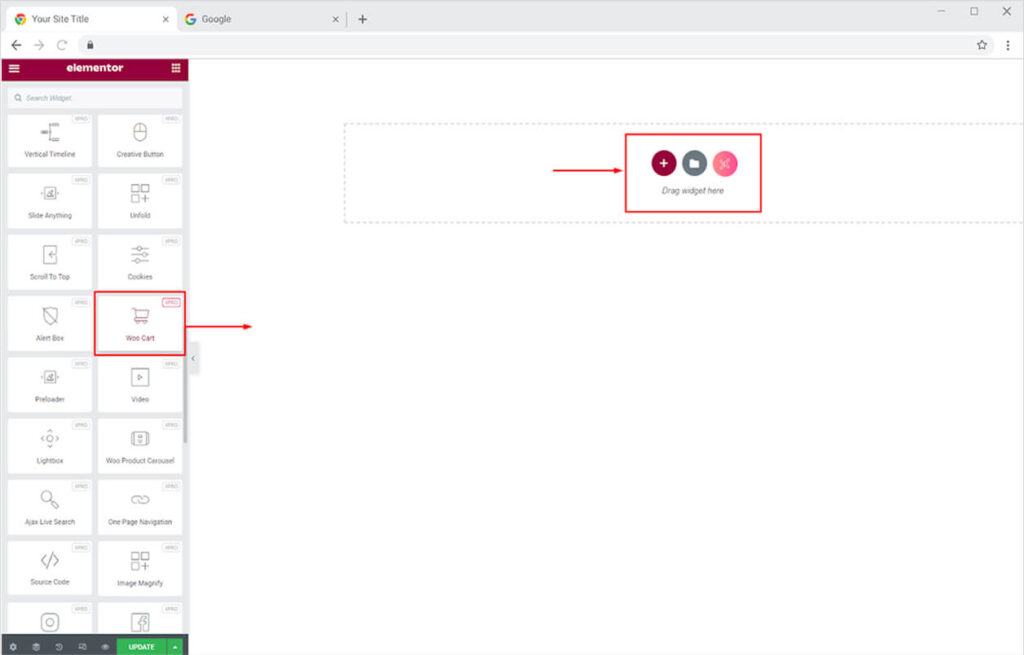
From the Xpro Addons – Pro section, search for ‘Woo Cart’ in the search bar and simply drag’n’drop the widget to your desired page location.
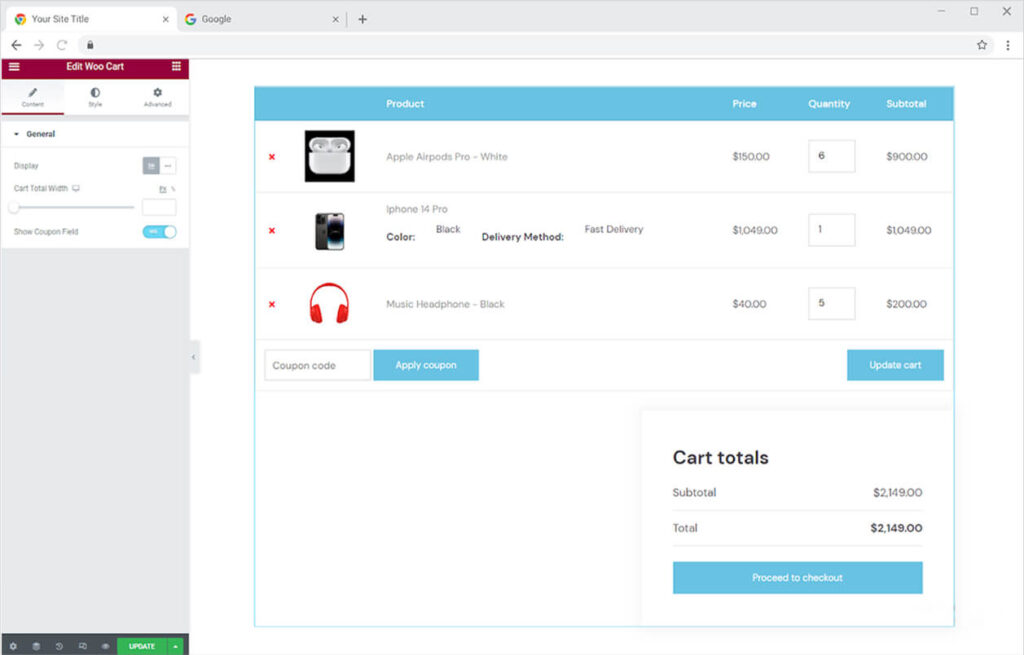
The default view of the widget will look like this. It will show you products in your cart.
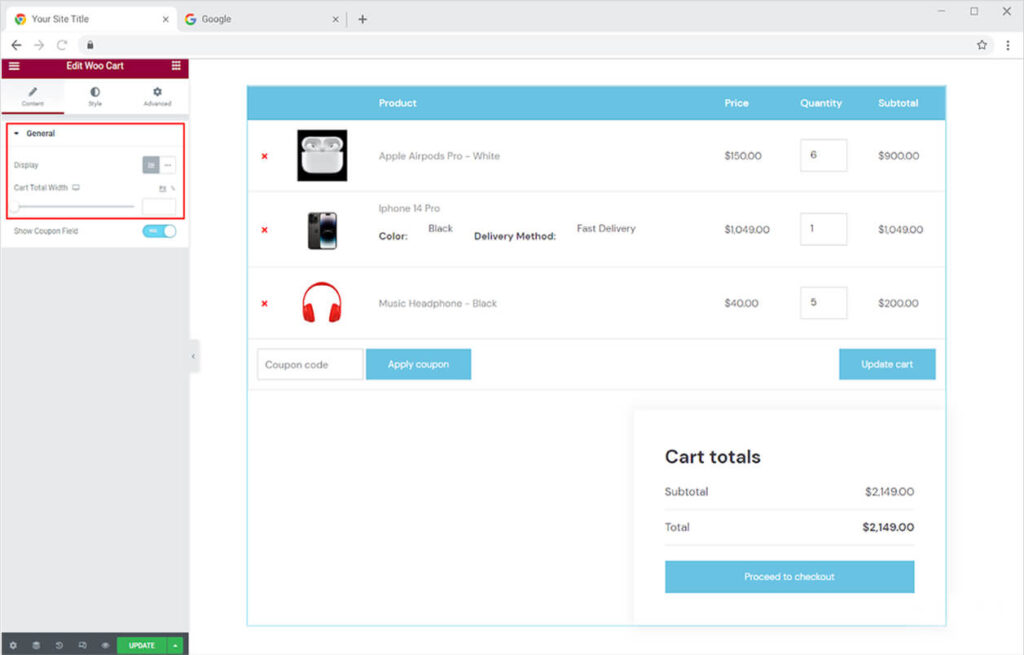
Content Section
Arrange the widget in the block or inline layout. If you have chosen to display in the block then you have the option to customize the width.
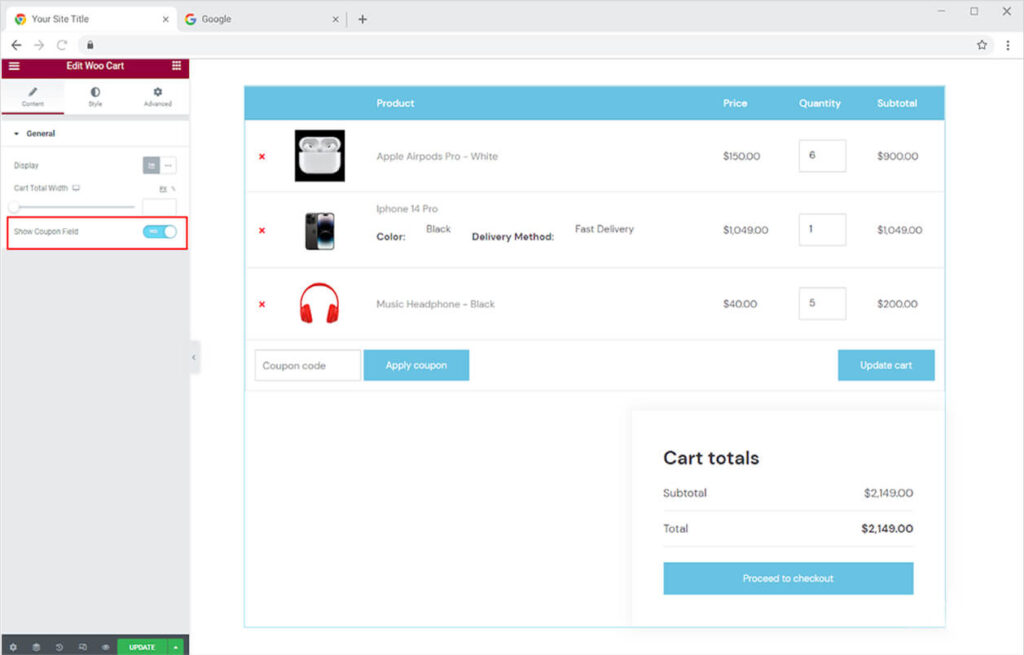
Enable the option to display a coupon field where the consumer can input the code so that the customer can receive discounts you are offering.
How to Style Xpro Woo Cart Widget
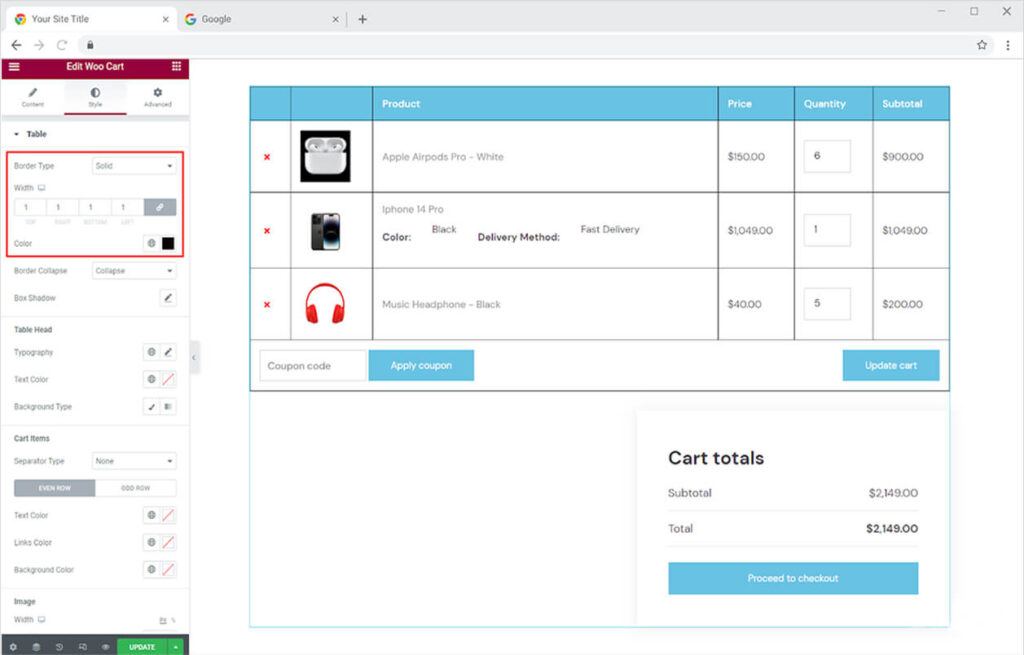
Adjust the table appearance from the table menu. Add a border if you want in the table where you can separate each table entry. Select the border type between solid, double, dashed, dotted, and groove. Further, adjust its width and color the borderline.
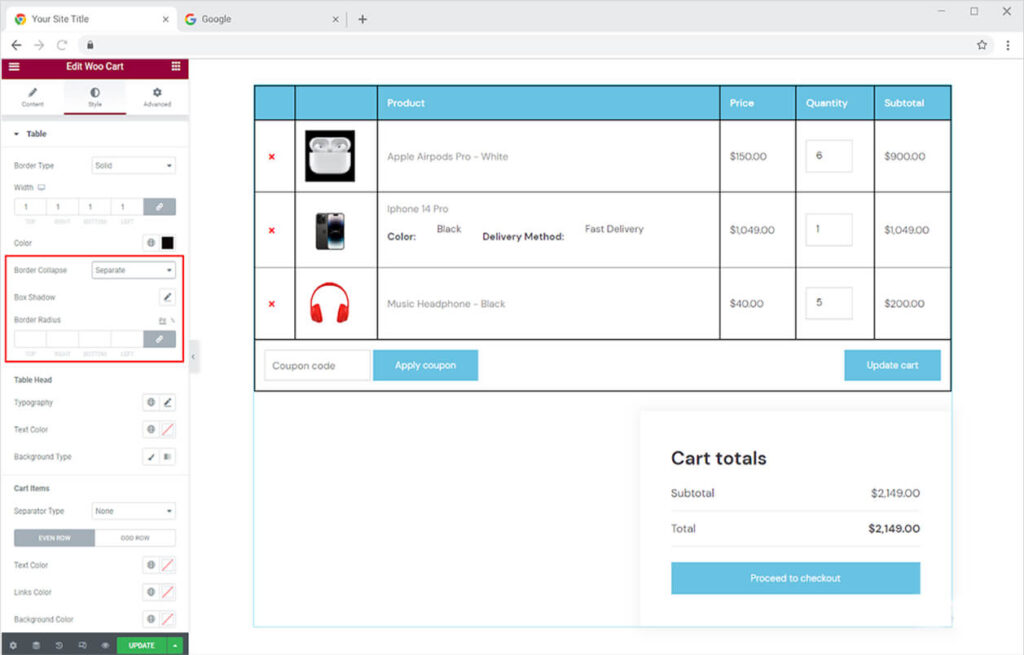
Select between collapse and separate for border collapse. The separate option allows you to adjust the border radius.
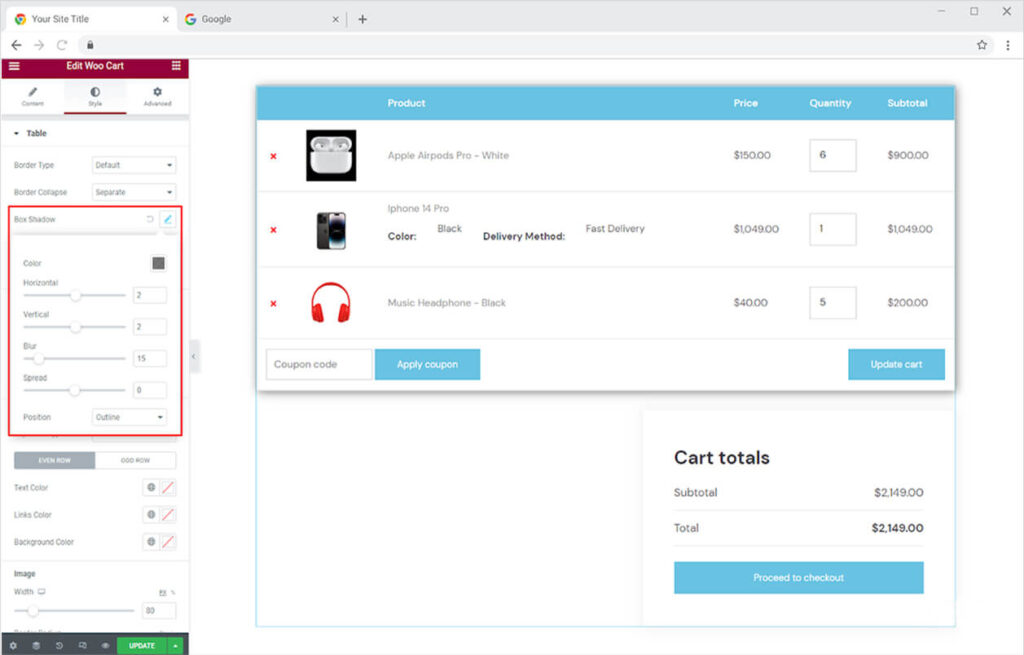
Give a shadow to the cart box if you want to. Click on the Shadow Box and adjust the shadow position on horizontal and vertical scales. Further, managing the appearance by blur and spread.
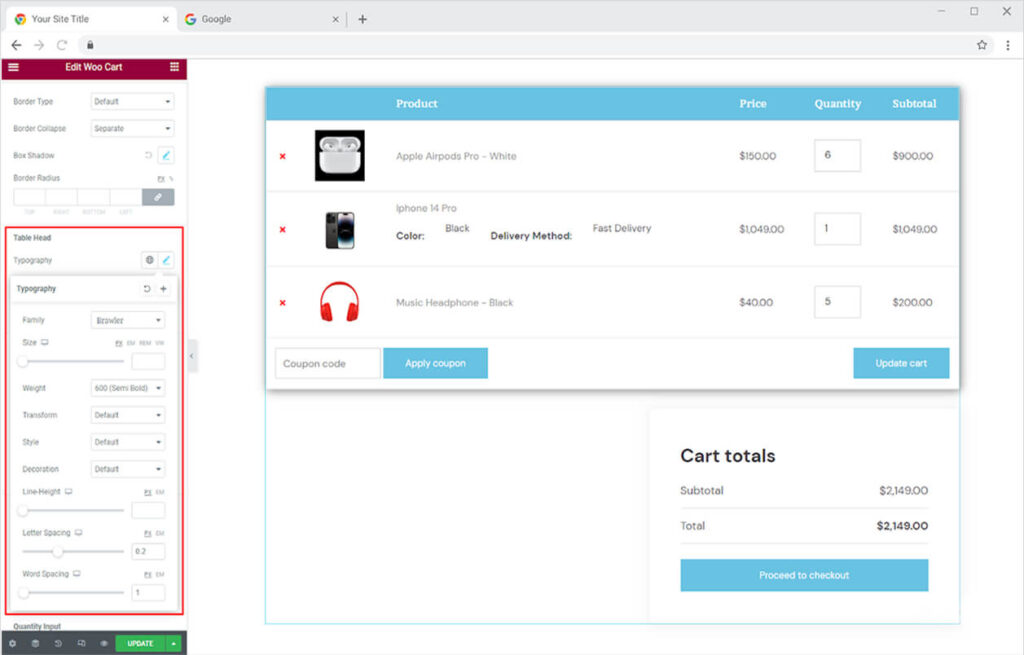
How to Style Table Heading in Woo Cart Widget
Personalize the text in the table heading from the typography box. Here you can change the font, size, weight, and other text customizations.
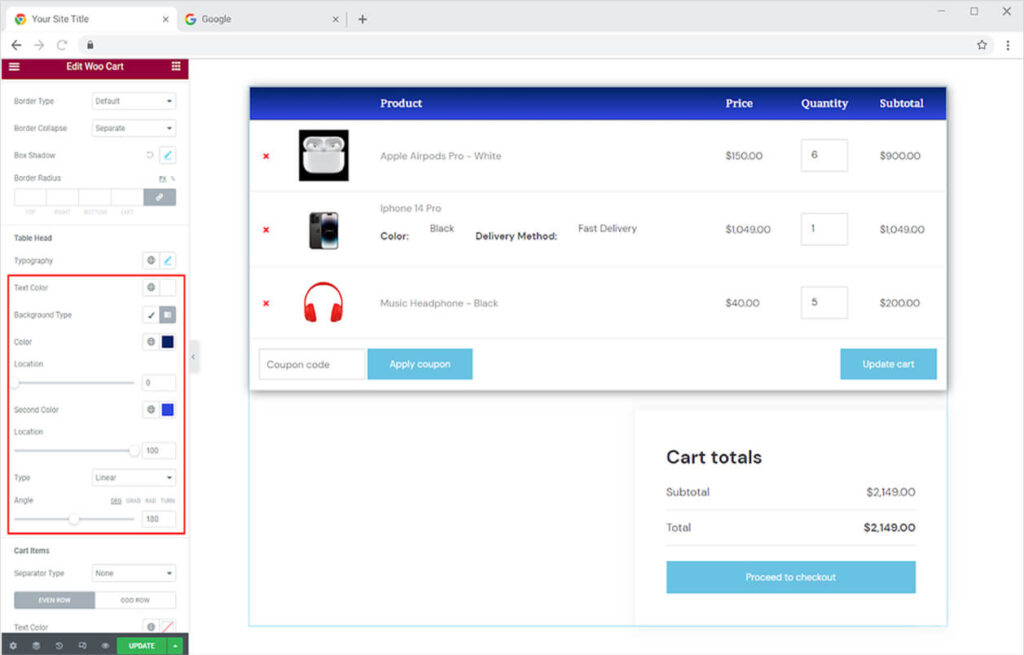
Color the text and background of the heading table from its given options. Add classic or gradient colors for the heading background.
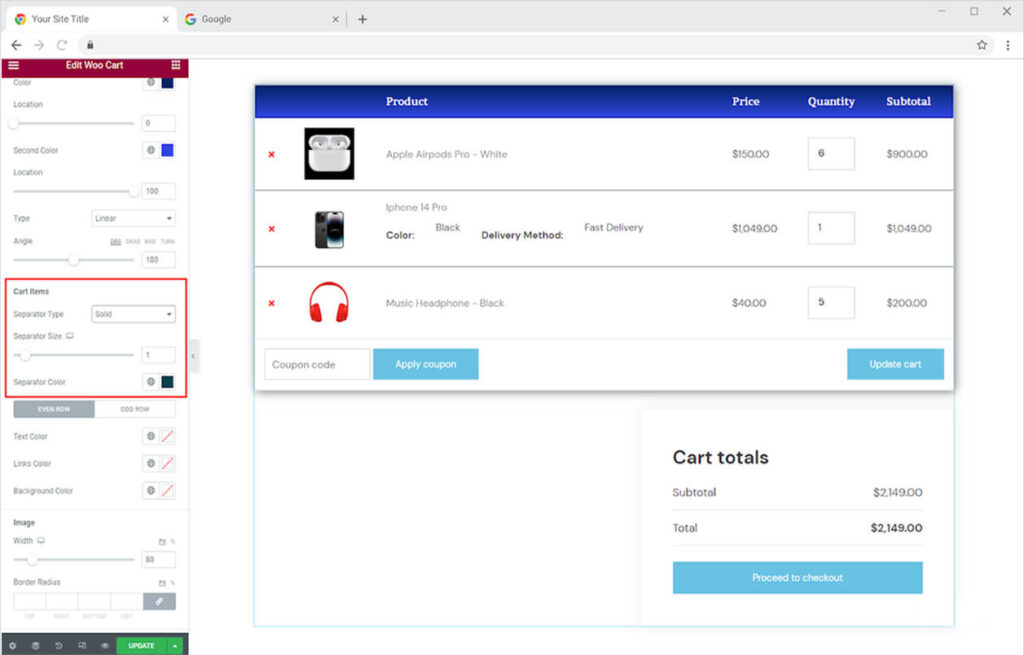
Select a separator type and further modify its size and color to separate the cart items.
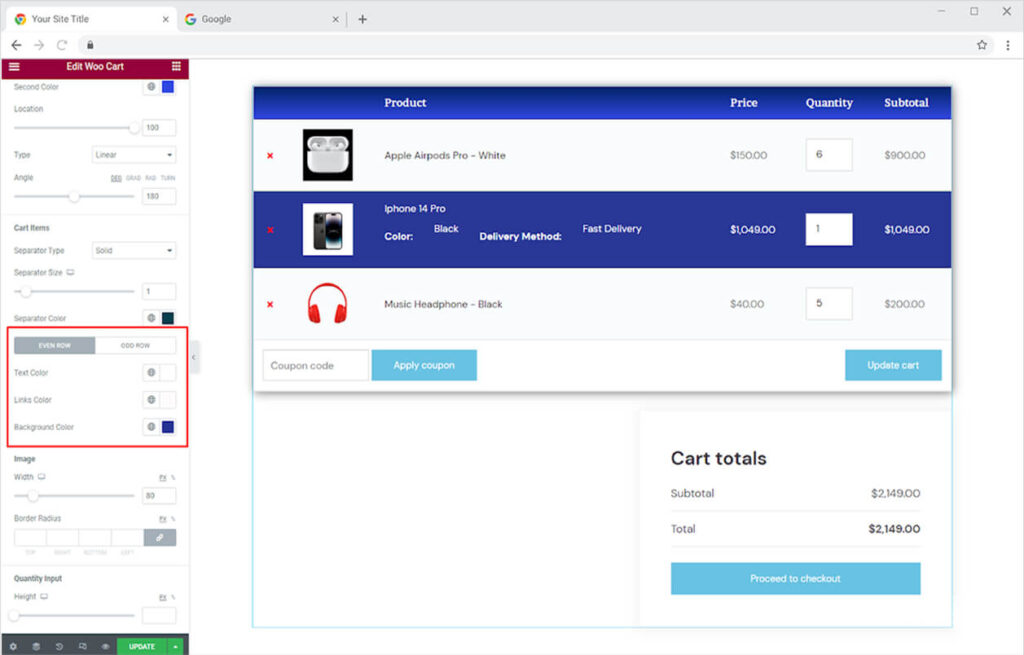
You can customize even and odd table rows independently of their tabs. Colorize the text, the link color, and the background color.
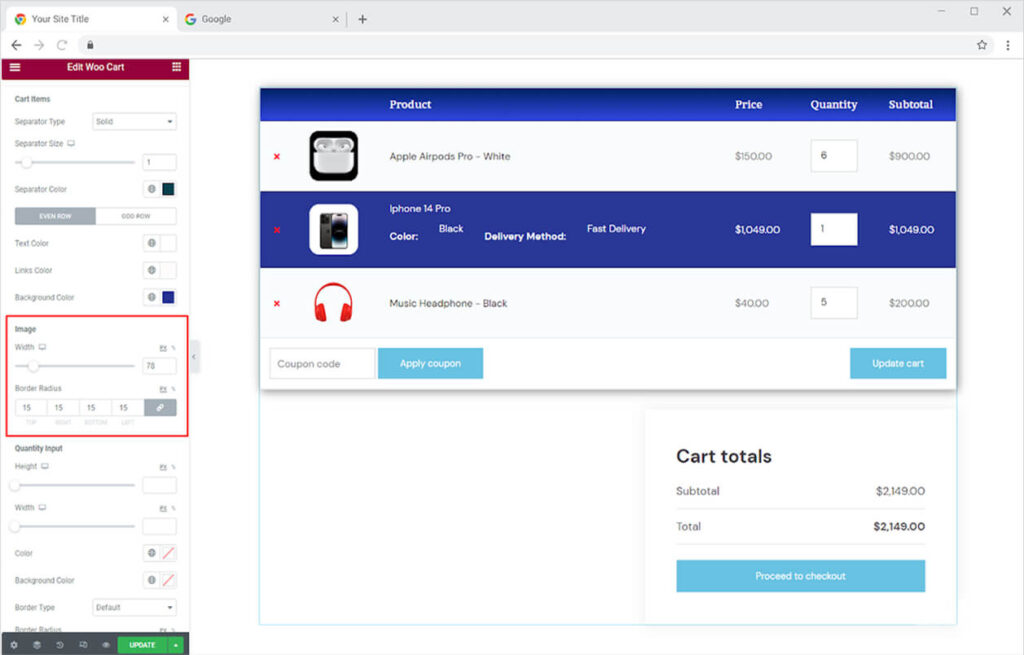
Adjust the image width in the table and further customize its radius.
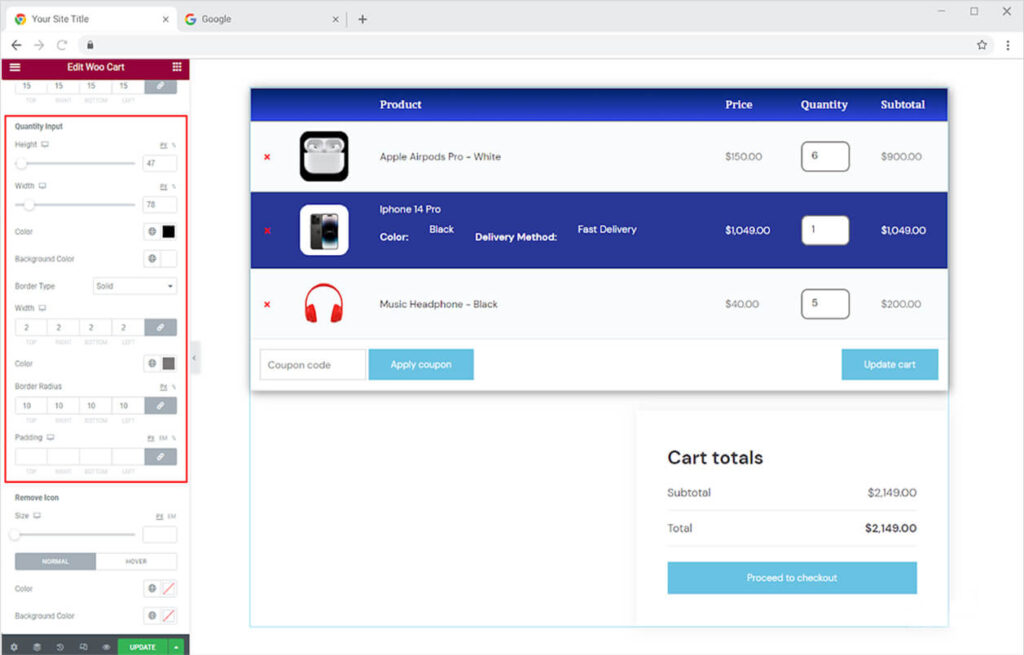
How to Style Quantity Input in Woo Cart Widget
From the Quantity Input Section, you can adjust the width and height of the quantity box. In addition, color the input number and the background.
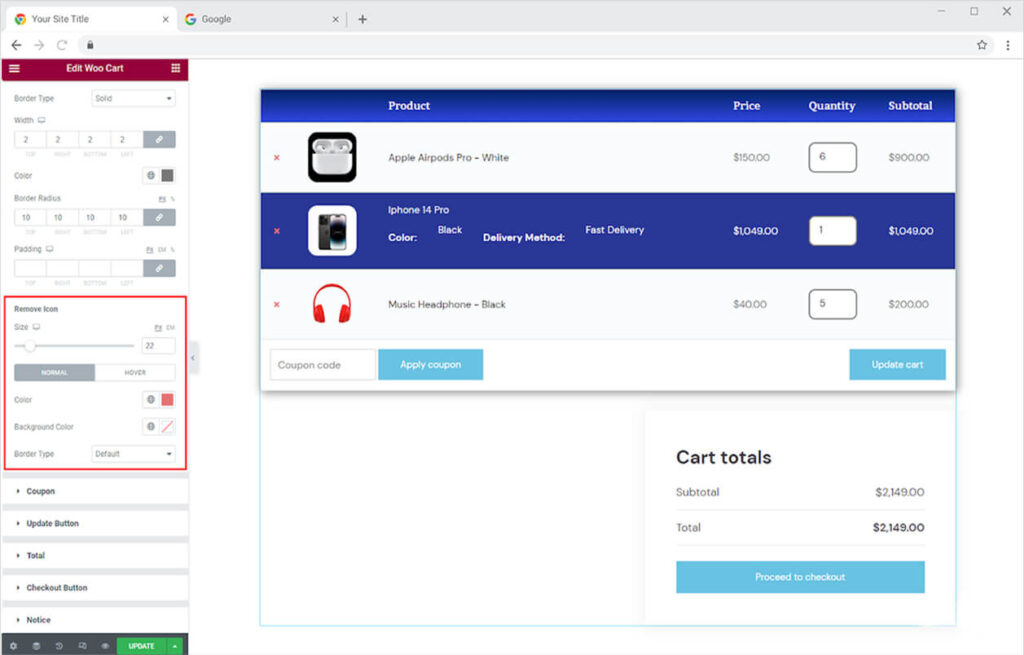
Customize the removed symbol from where the customer can remove a product from their cart. Adjust the size of the remove button and color it for normal and hover display. If you want you can make a border around the button and give it color for normal and hover display.
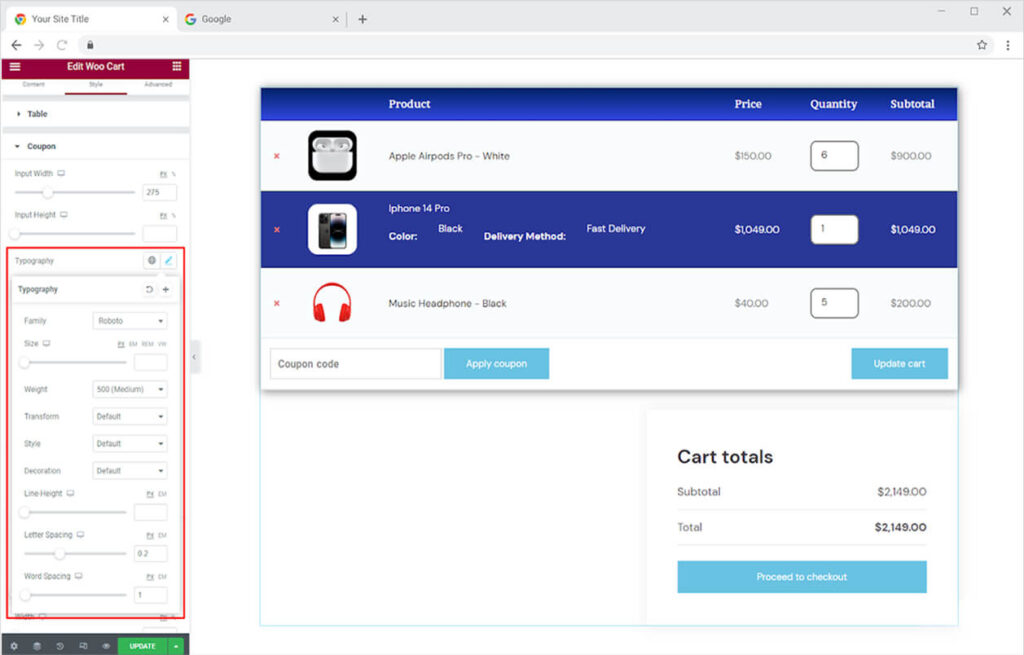
How to Style Coupons in Xpro Woo Cart Widget
Adjust the coupon box width and height from its specified option. Moreover, style the typography within the coupon box.
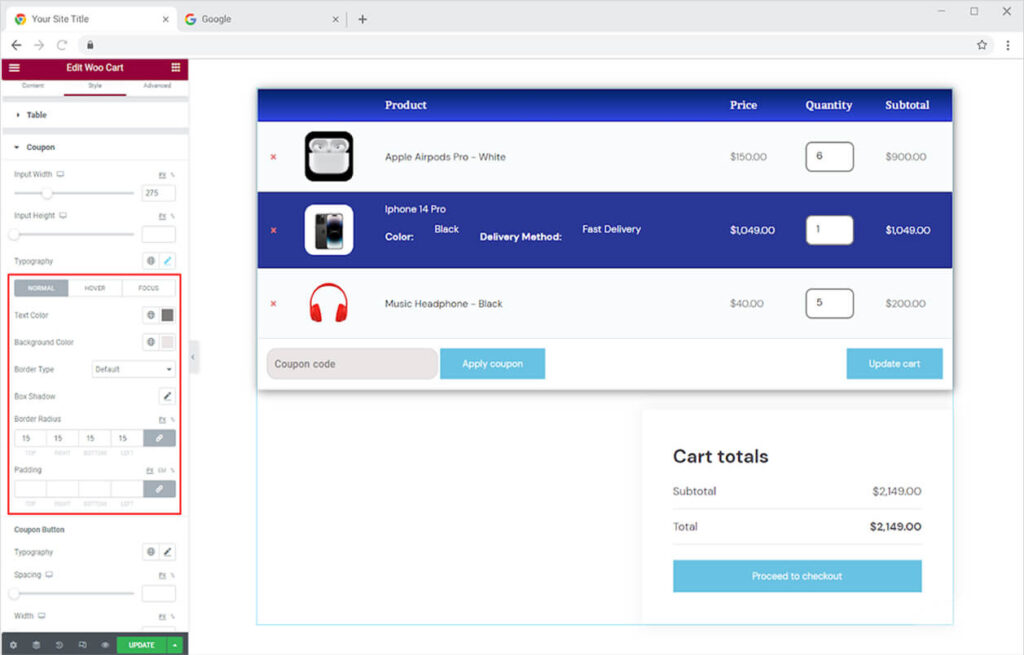
Color the text and background when it is in a normal state, hover, or focused. Moreover, you can make a border by selecting a border type and customizing its width and radius.
How to Style Coupon Button in Xpro Woo Cart Widget
Style the typography of the text in the button and also adjust its size from the option and space from the space option.
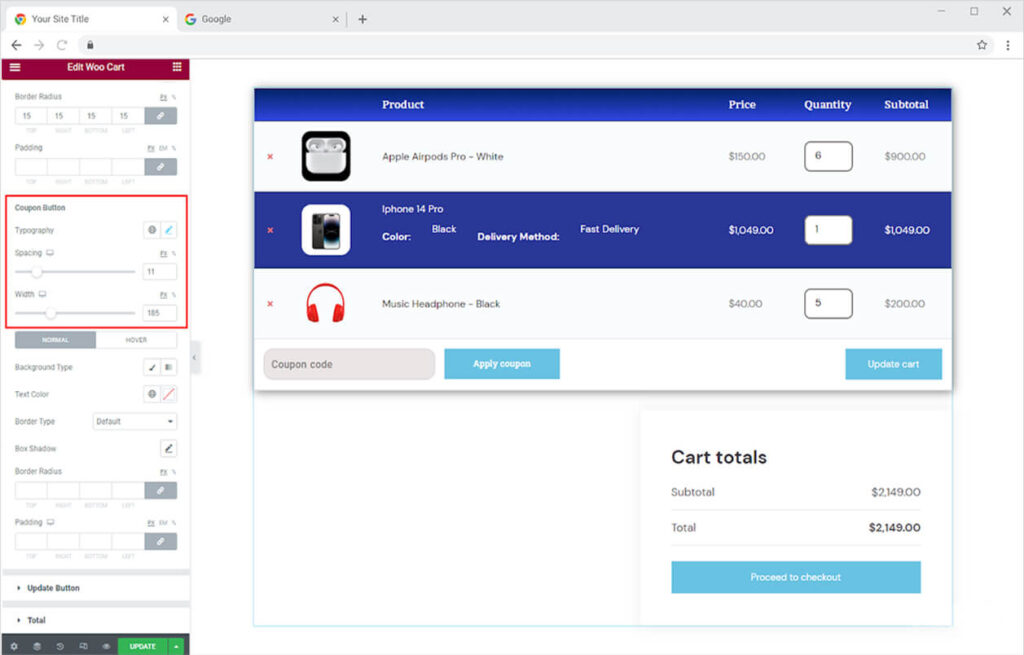
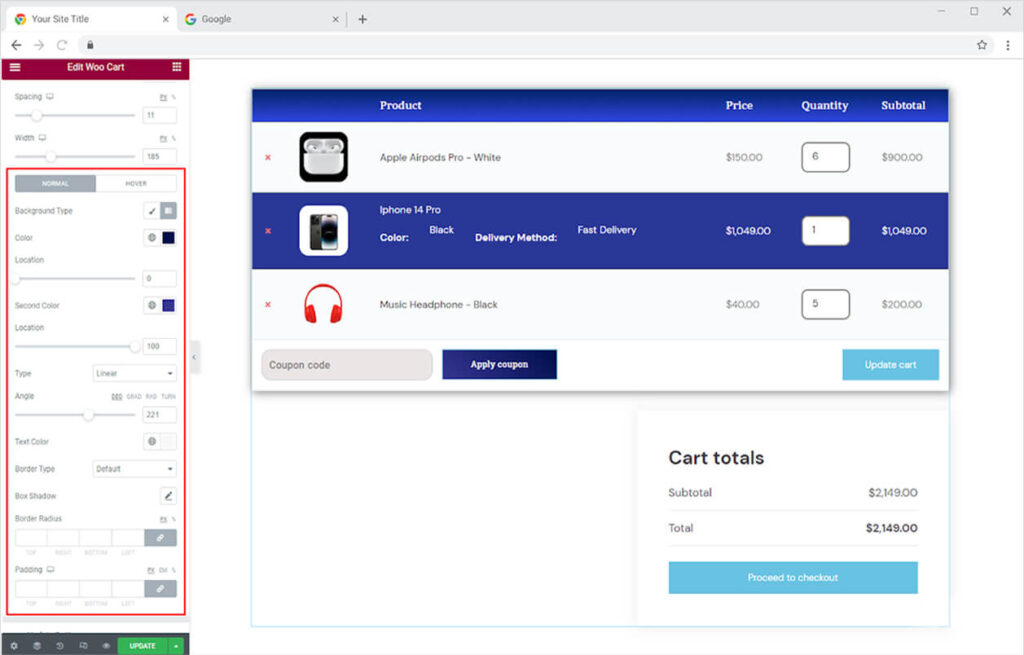
Color the background with a classic or gradient color for normal and hover states. Select a border type for adding a border and further adjust its width and radius.
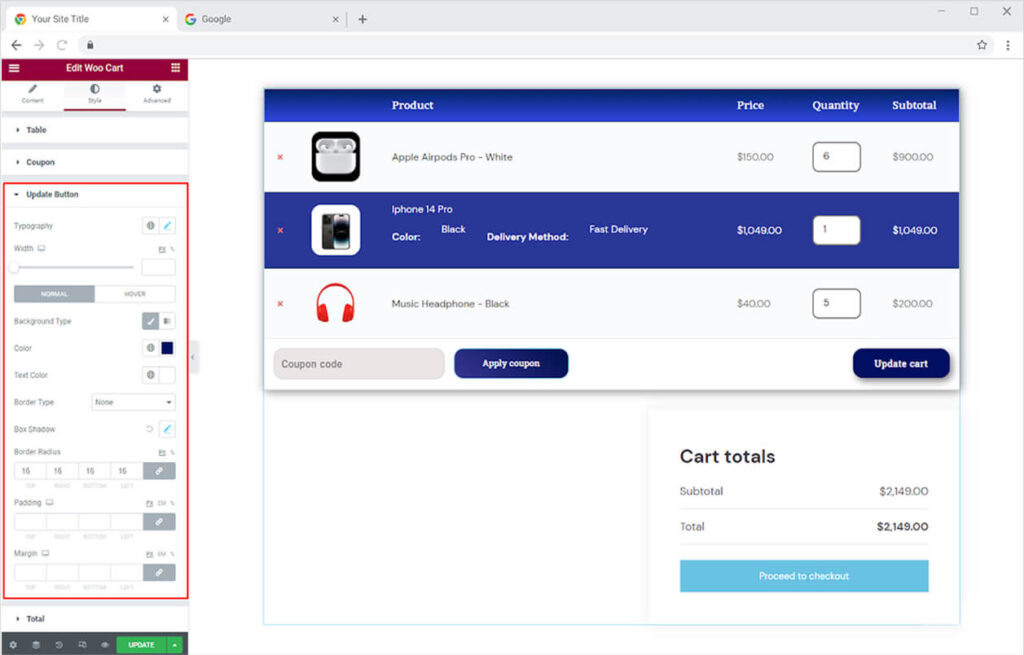
How to Style Update Button in Xpro Woo Cart Widget
Update Button Menu provides you with the same customization options that you had for the Coupon Button. Here you can personalize the text typography and color. Further, make a border and add background color for normal and hover state. Moreover, you have the option to make a shadow from the shadow box.
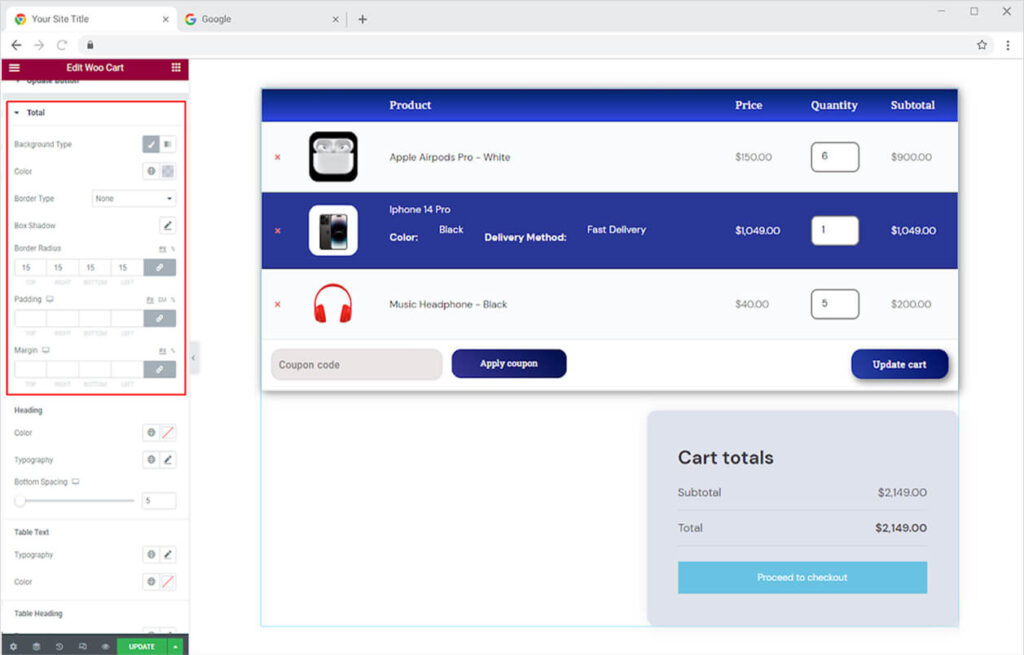
How to Style Total Cart Box in Xpro Woo Cart Widget
From the Total Menu, you can customize the layout of the total cart box that displays the total customer have to pay and proceed To the Checkout button. Start the customization with the background color. Make a border if you want and further manage its width and radius. Moreover, you can make a shadow from the shadow box.
How to Style Content in Total Cart Box
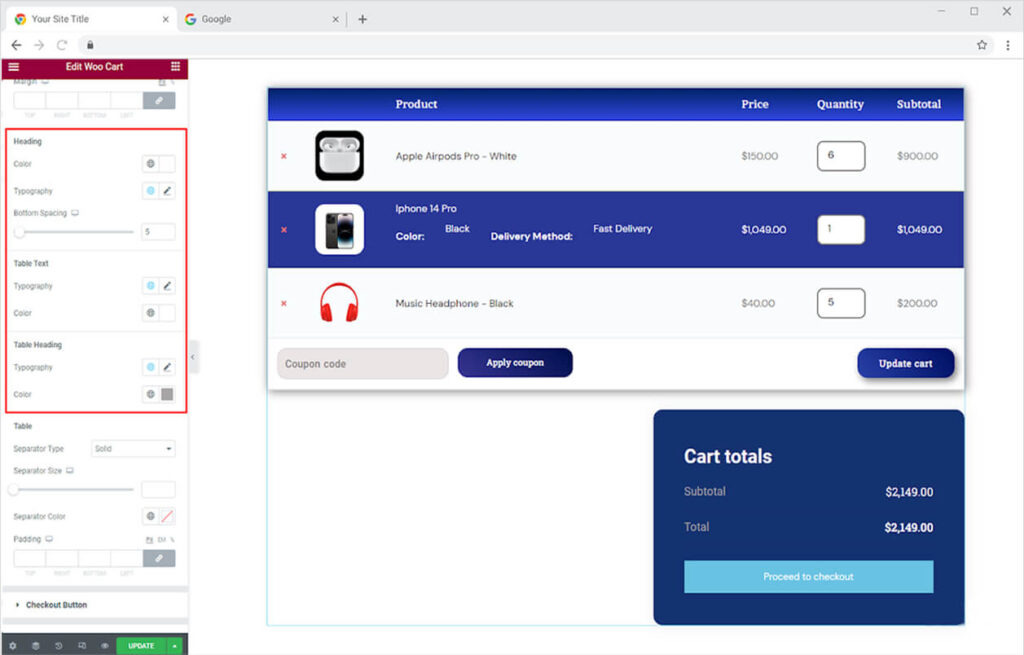
Each content part has a separate section from where you can perform customization to each of them separately. Customize the typography and color of the heading, table text, and table heading. Furthermore, from the heading section adjust the button space.
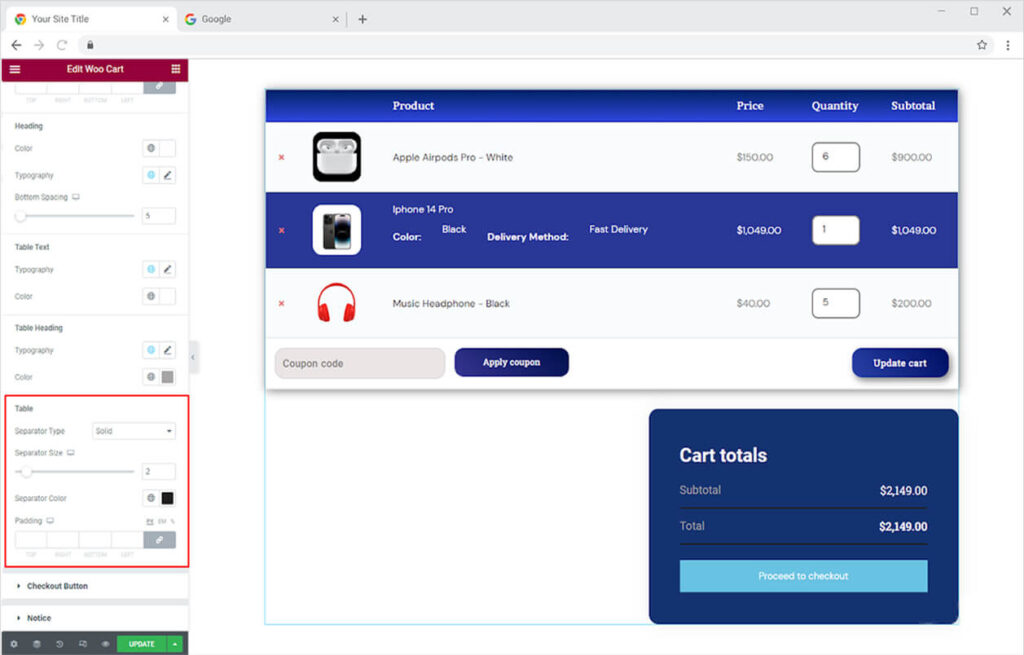
Style the separator in the table by selecting the separator type. Furthermore, you can adjust the size of the separator and color the separator line.
How to Style Checkout Button in Xpro Woo Cart Widget
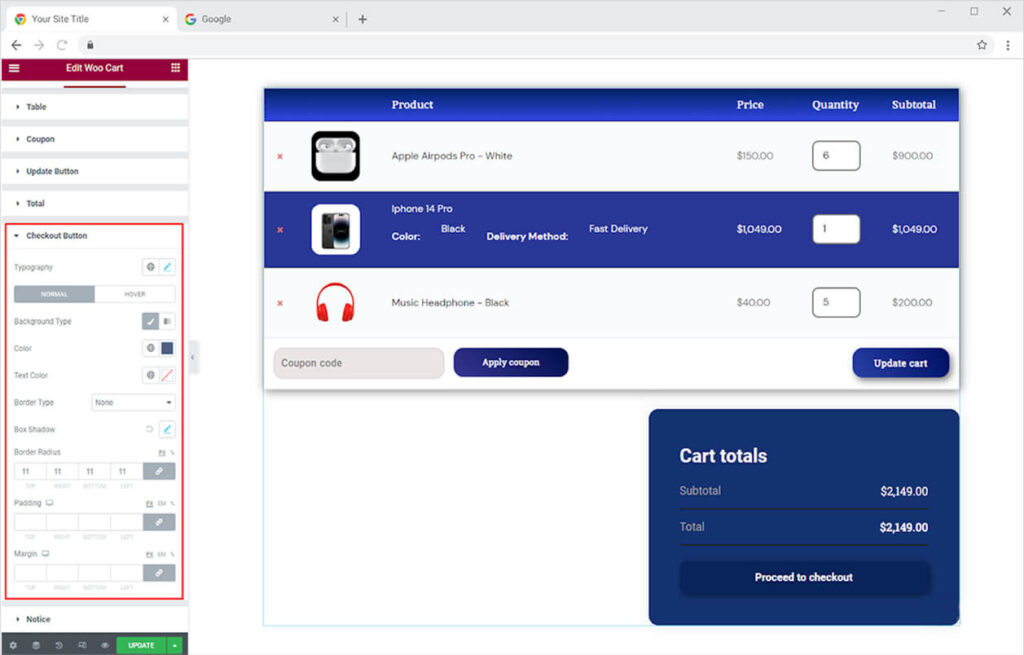
Enhance the appearance of the Checkout Button by customizing it the way you want. Personalize the typography and color the text and background for normal and hover displays. Moreover, you can select a border and make a shadow from the shadow box.
How to Style Notices in Xpro Woo Cart Widget
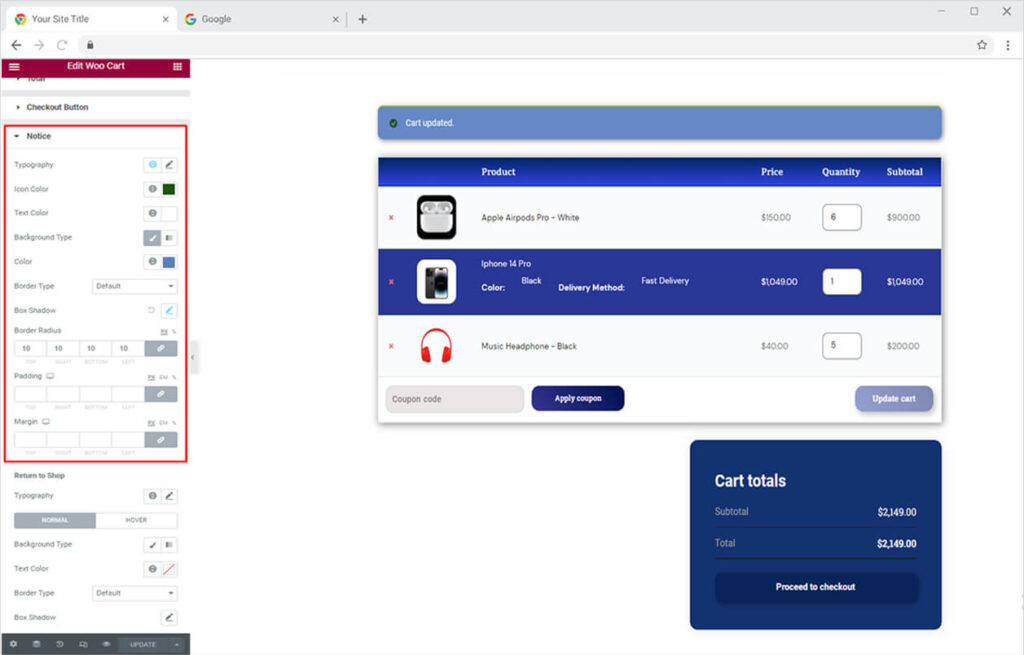
Notify the user after he makes any adjustments to the cart. Style the Notice by customizing the typography of the text in the Notice. Color the text and background of the Notice Box. Make a border by selecting a border type and five a shadow by shadow box.
Best Woo Notices widget for Elementor
We hope you fully understand the functionality and complexity of this Xpro widget. Utilize this WooCommerce widget to create an appealing product cart layout. Explore other Xpro Woo Product Widgets like Woo Product Tab.
Xpro Elementor Addons offer a wide range of widgets, theme templates, and features that help you develop an attractive site. Xpro Elementor Theme Builder can help you easily create a theme page. Check our 50+ free Elementor Addons which are enough to create a professional WordPress website. If you want to explore and add more attractive Elementor widgets then check our complete list of Pro Elementor widgets and download our Pro Elementor addons right now.