Xpro Text Marquee Widget for Elementor
The Text Marquee Widget is a premium Elementor Addon that the developers use to bring their text to life by making it move from left to right or right to left in a loop. This movement of text help attract users’ attention therefore it is popularly used to display promotional or important messages.
The auto text scroll speed, orientation, and display can be custom managed to provide you with full control over the layout appearance. Furthermore, experience the flexible customization experience with typography, border, color, and more.
Xpro Elementor Addons are filled with amazing widgets, features, and theme templates that allow developers to create a fully functional and appealing WordPress website. Enhance the functionality of your Elementor Page Builder and the appearance of your website. Elementor Text Marquee widget is another amazing widget that grabs the attention of website visitors. Customize text marquee with multiple styling options such as typography, colors, border, and so much more.
How to Install Xpro Text Marquee Widget for Elementor
Requirement
You need to install and activate the pro version by Xpro Elementor Addons to use this amazing widget. If you already have the plugin installed, just ensure the Text Marquee Widget is ‘Enabled’, so you can find it in the Elementor editor.
To enable the widget, simply follow these steps:
Step 1
Click on the Xpro Addons option available on the WordPress Dashboard Menu.
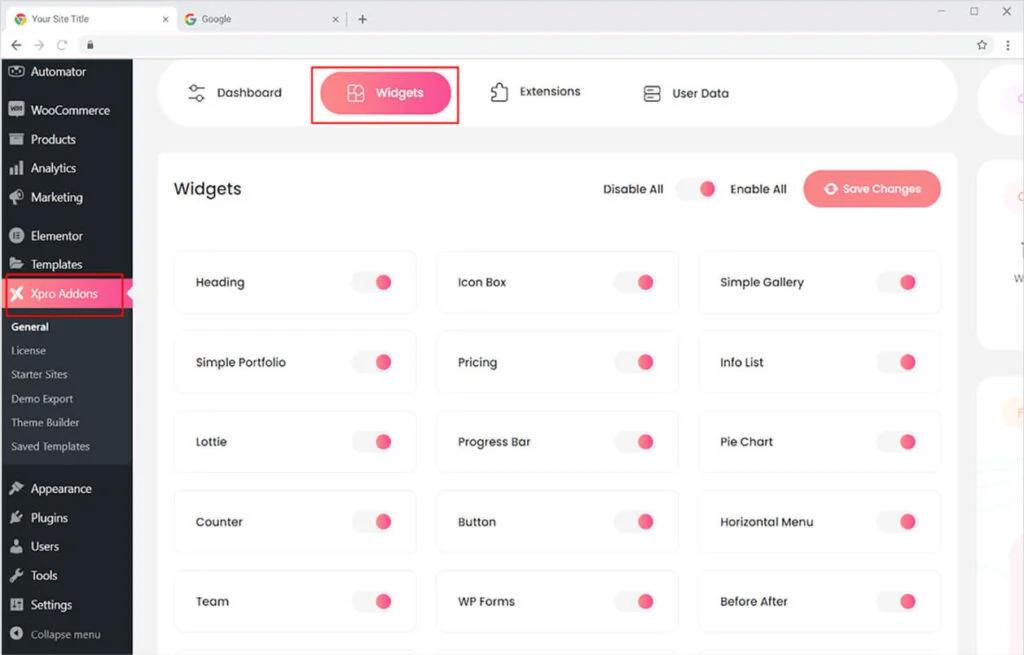
Step 2
From the Xpro Addons Dashboard, click on the Widgets Tab, find the Text Marquee Widget, and then toggle the button ‘ON’ to enable it.
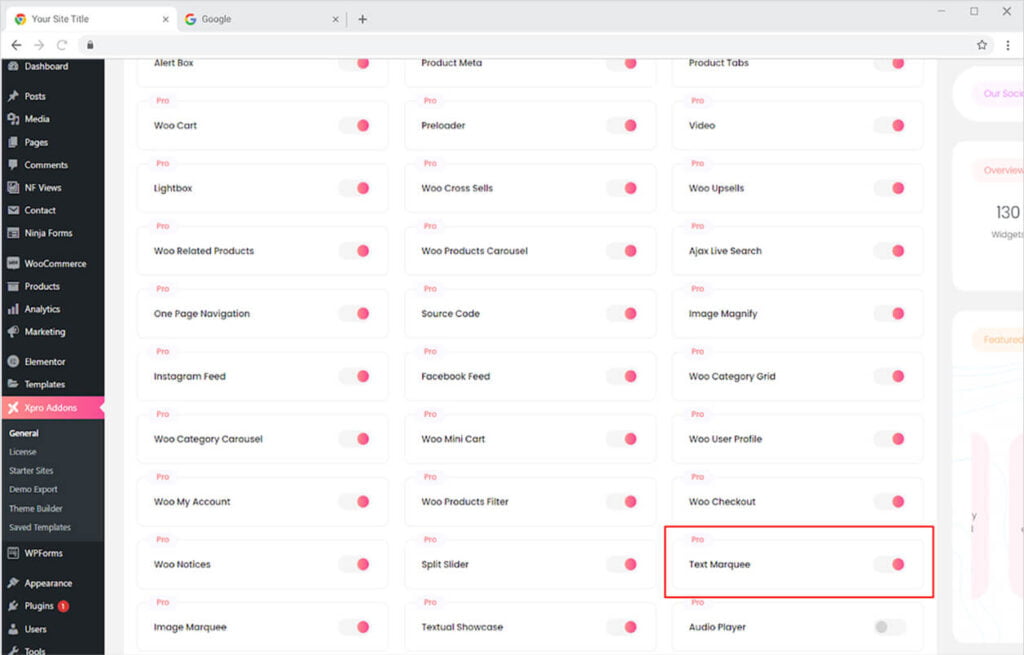
How to Use Xpro Text Marquee Widget for Elementor
Elementor Text Marquee widget is a wonderful widget created by Xpro Elementor that allows you to display information or promotional messages on your website’s screen. Add as much item text as you want and customize the typography and layout to your preference.
Step 1
Click on the Xpro Addons – Pro section available in the Elementor Editor.
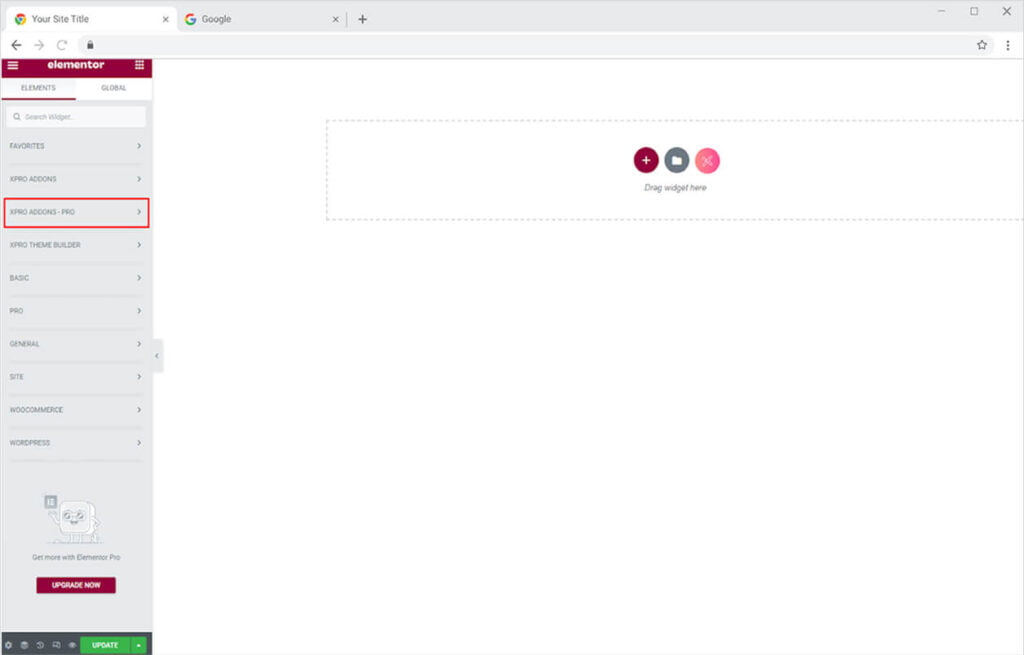
Step 2
From the Xpro Addons section, find and simply drag’n’drop the widget on your desired page location.
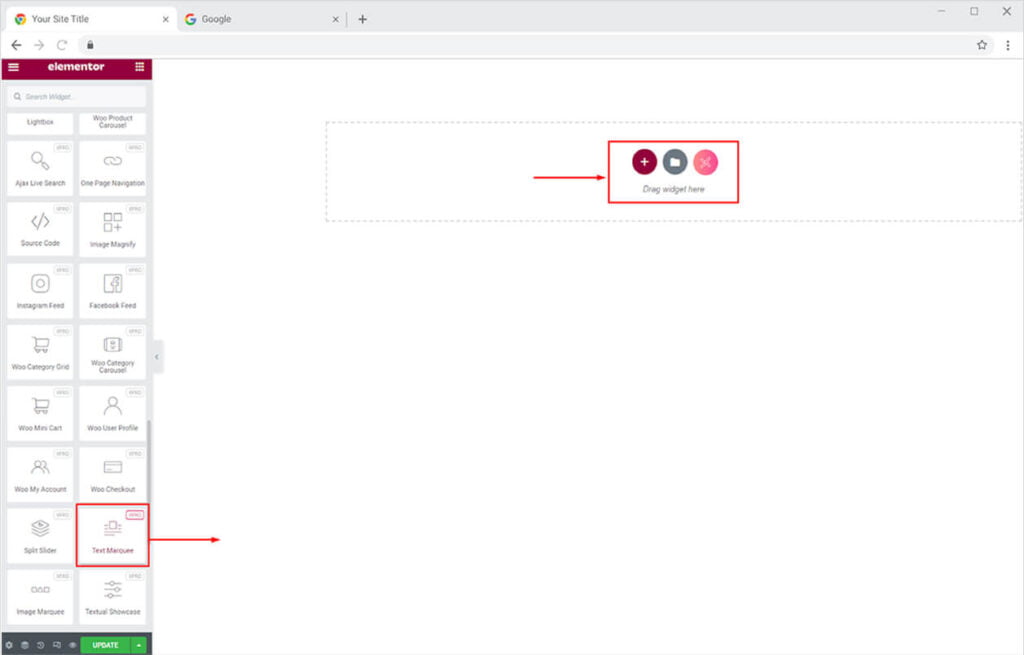
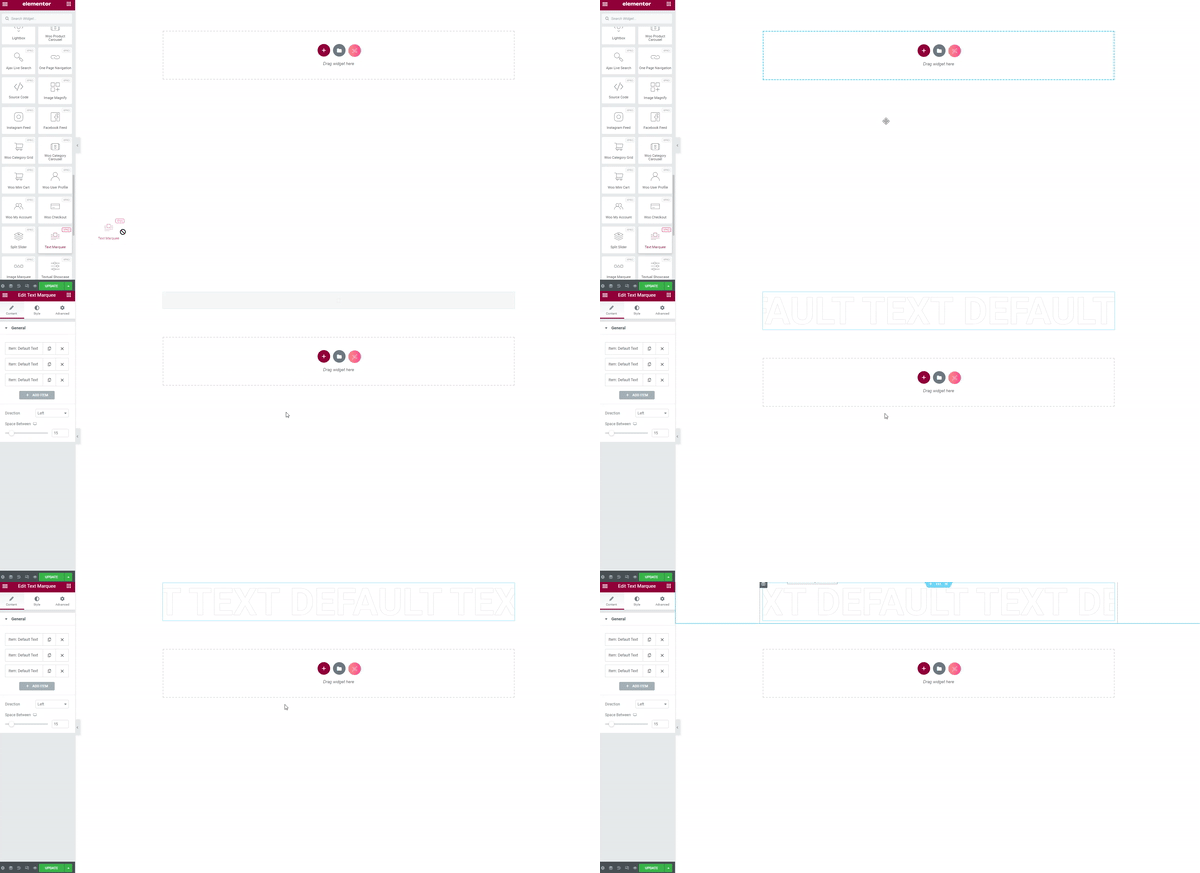
This is the default view of the text marquee widget after you select and drop it into the page.
How to Add Content in Xpro Text Marquee Widget for Elementor
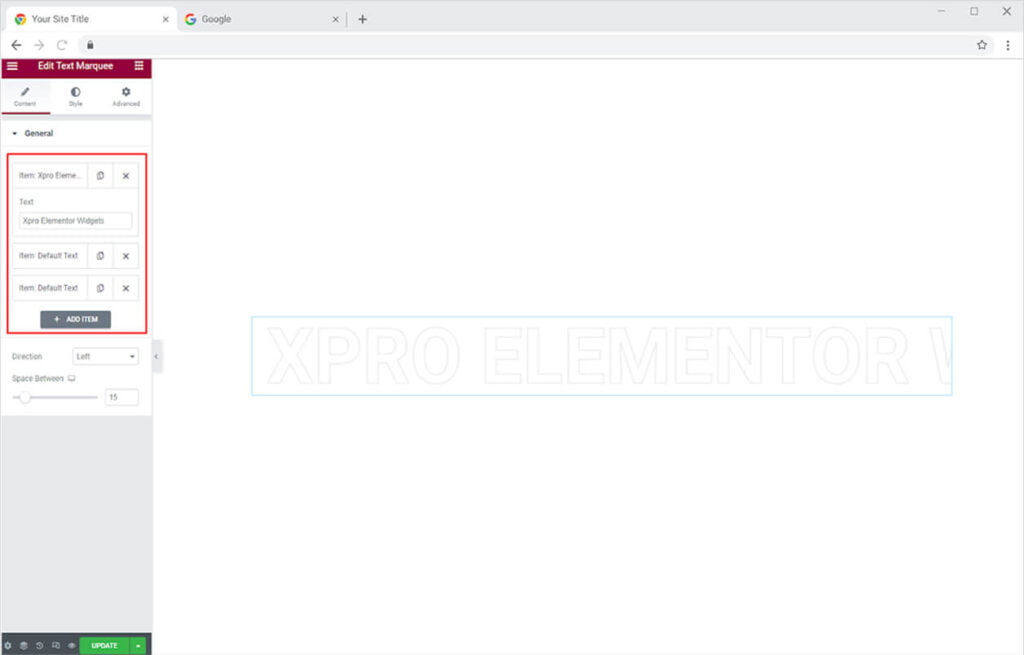
The General Menu of the Content Tab shows a few bars for adding content. Click on the bar to open up the drag-down option from where you can add text. Add text in each bar and if you want to add more then click on the “+Add Item”.
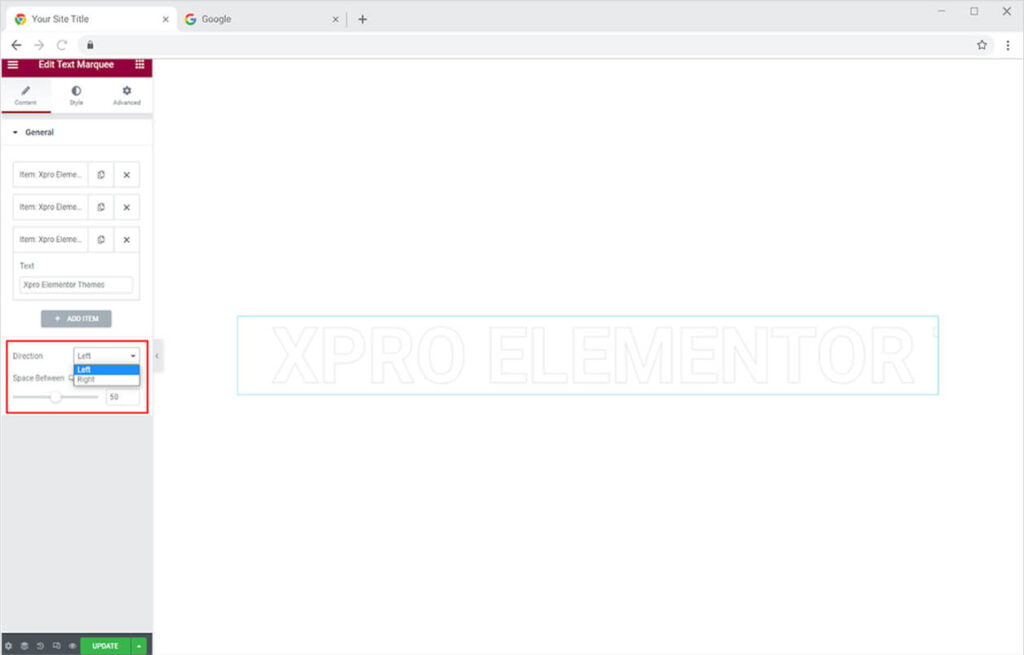
You have the choice to run text from left to right or right to left. Choose the direction of the text of your choice. Furthermore, adjust the gap between each content through the Space Between option.
How to Style Xpro Text Marquee Widget for Elementor
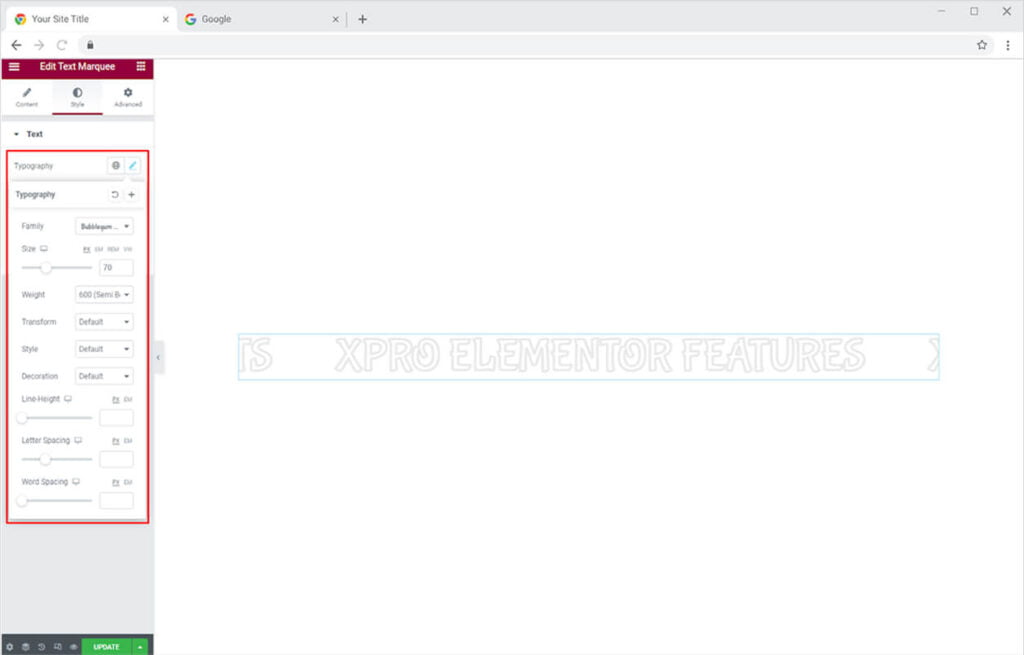
Start the styling process by personalizing the appearance of the text. Change the text font, size, letter spacing, word spacing, and much more.
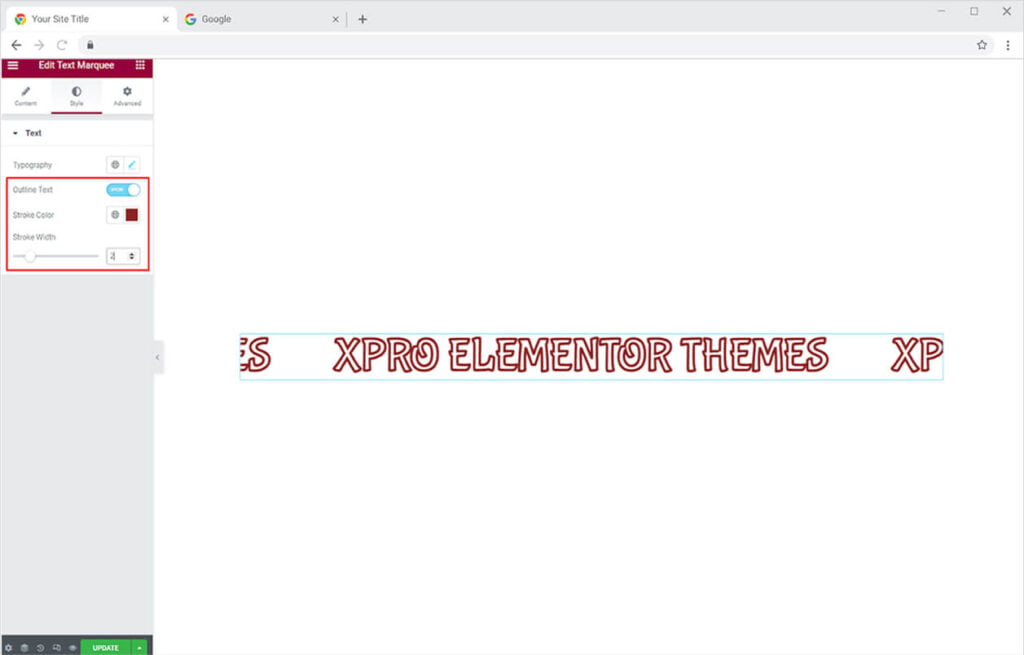
Make the text outline by enabling the outline text option. If you choose to enable the outline then you have the choice to add an outline stroke color and manage its width.
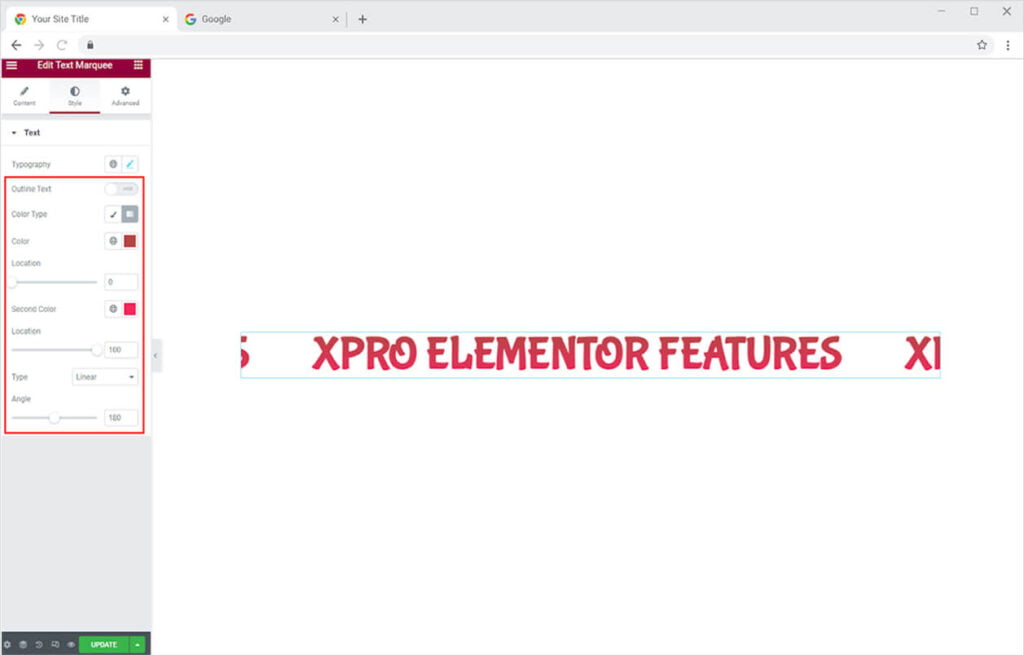
If you chose not to enable the outline text then you have the choice to add classic or gradient color to the text.
Best Text Marquee Widget for Elementor
We hope you fully understand the functionality and uses of this easy-to-use Text Marquee widget for Elementor. Test your imagination to make your site look its best by utilizing this widget. Combine this widget with our Promo box widget for Elementor and instantly drive conversions.
Xpro Elementor Addons offer a wide range of widgets, Elementor templates, and features that help you develop an attractive site. Check our 50+ free Elementor widgets which are enough to create a professional WordPress website. If you want to explore and add more attractive Elementor widgets then check our complete list of Pro Elementor widgets and download our Pro Elementor addons right now.