Xpro Split Slider Widget for Elementor
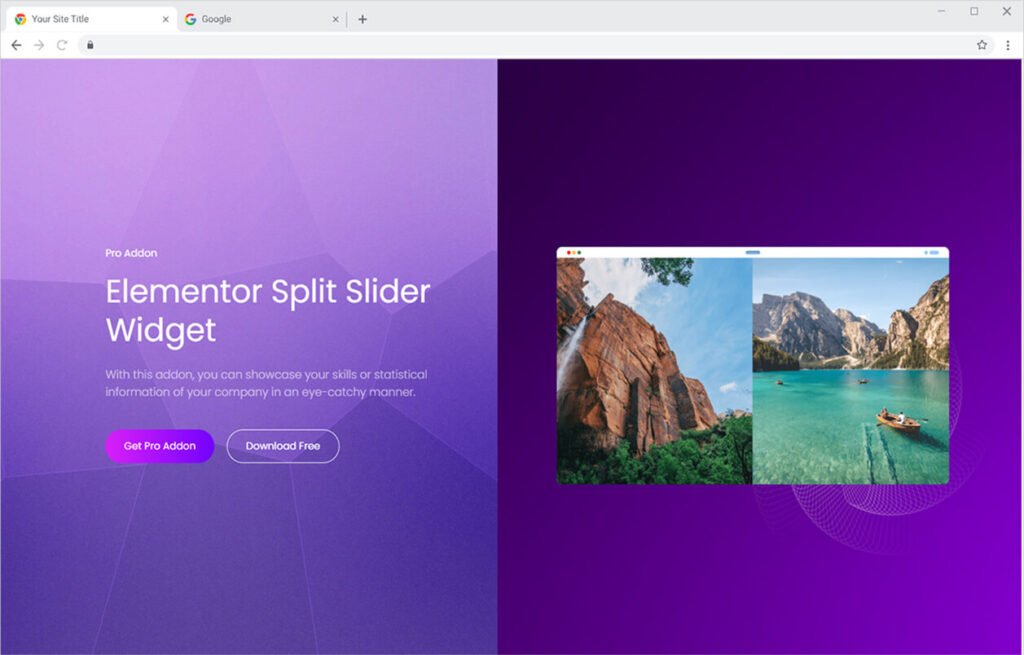
Xpro Elementor Addons provide outstanding widgets that improve the quality of the Elementor page builder and make your website more appealing to users. Elementor Split Slider widget is another advanced widget by Xpro Addons that allows you to showcase any content in an attractive way. The widget is divided into two slides one can be used for content and the other to display an image. However, you can include an image, content, or dynamic widget on any slide.
Create a beautiful display of content by managing and customizing the widget. Enhance user engagement and experience by developing an attractive slide show. Change the slides in an amazing animation and capture the visitor’s eyes.
How to Install Xpro Split Slider widget for Elementor
Requirements
You need to install and activate the Pro version of Xpro Elementor Addons in order to use our Split Slider widget. If you already have the plugin installed, just make sure the Split Slider Widget is ‘Enabled’ from the plugins section of Xpro Dashboard, so you can find & use the widget in the Elementor editor.
To enable the widget, simply follow these steps:
Step 1
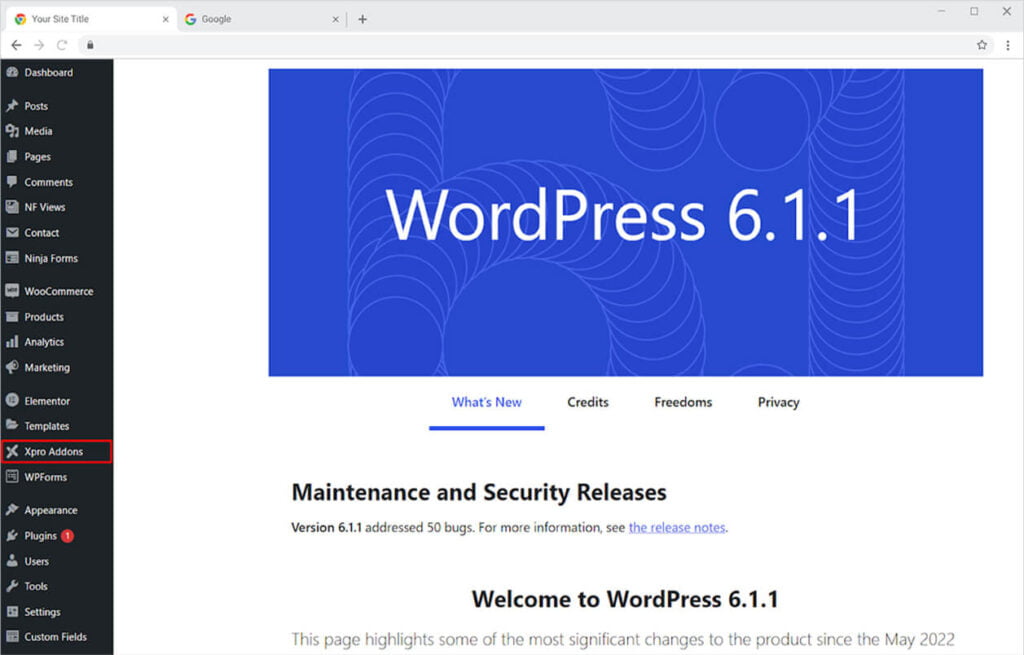
Click on the Xpro Addons option available on the WordPress Dashboard Menu.
Step 2
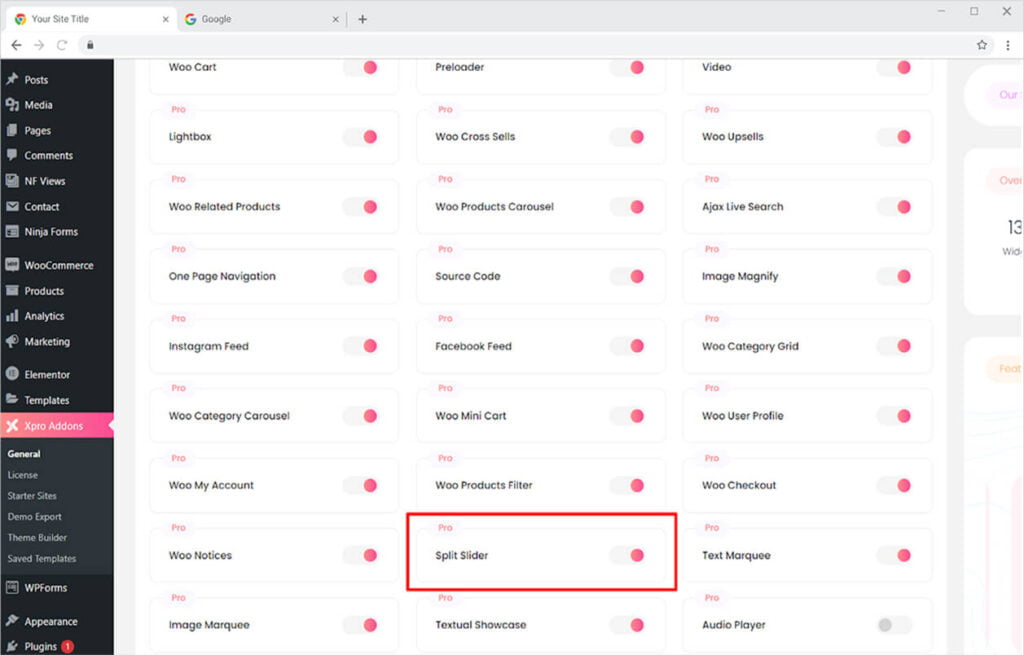
From the Xpro Addons Dashboard, click on the Widgets Tab, find the Split Slider widget, and finally, toggle the button ON to enable it.
How to Use Xpro Split Slider widget for Elementor
The powerful widget is extremely easy to use and can construct a beautiful layout in no time with minimum effort. Include content in the slider with ease and personalize it with our extensive design choices. Specify how the widget will appear and interact with visitors. Let’s discuss further how can you utilize this amazing widget.
Step 1
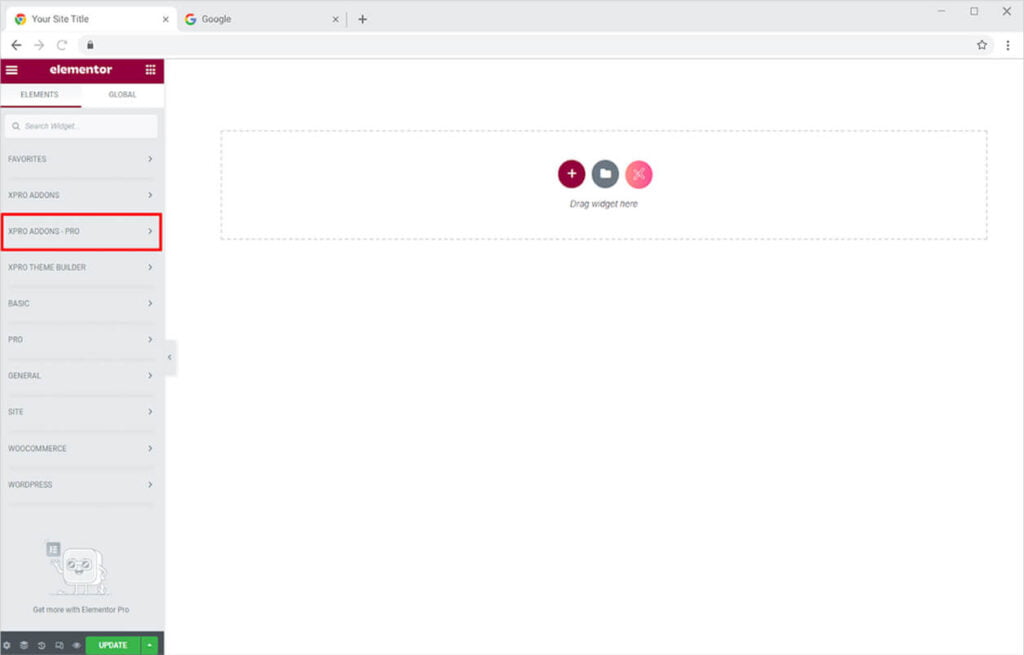
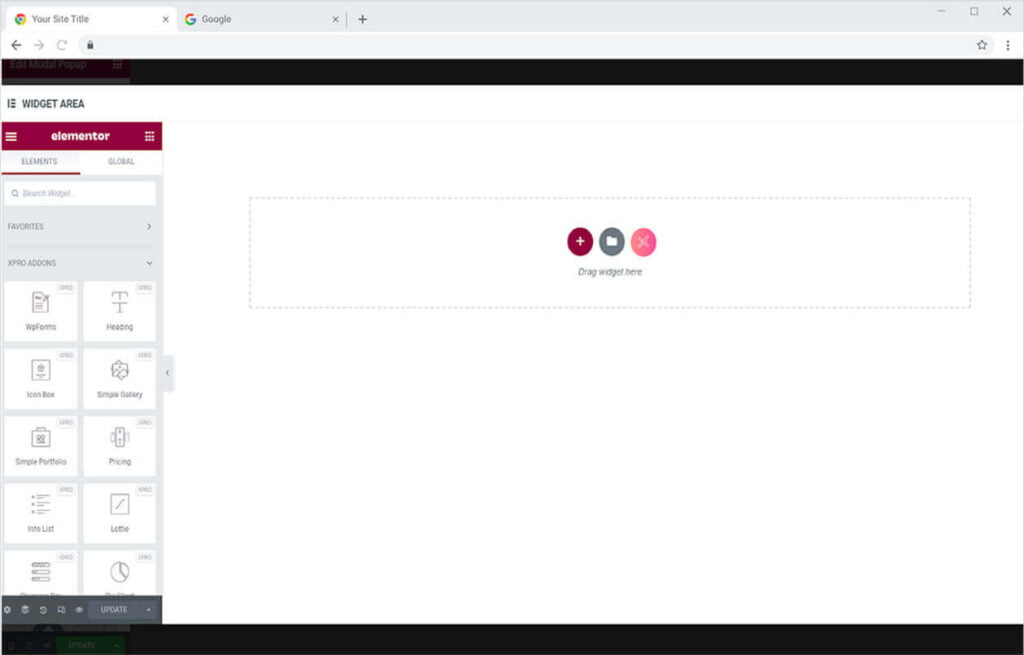
Click on the Xpro Addons – Pro section available in the Elementor Editor.
Step 2
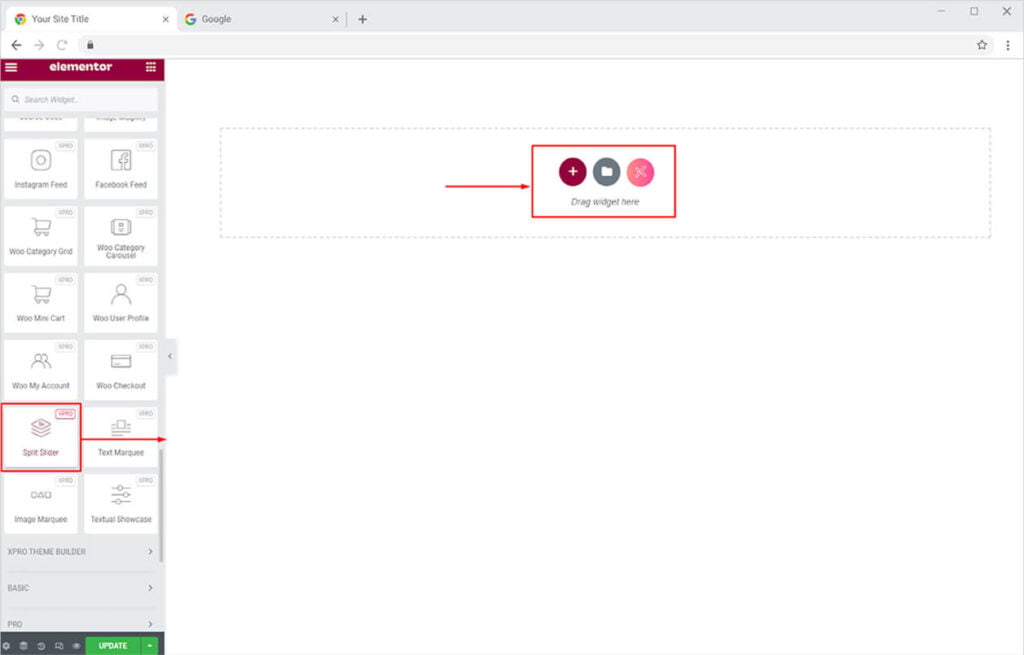
From the Xpro Addons – Pro section, search for ‘Split Slider’ in the search bar and simply drag’n’drop the widget to your desired page location.
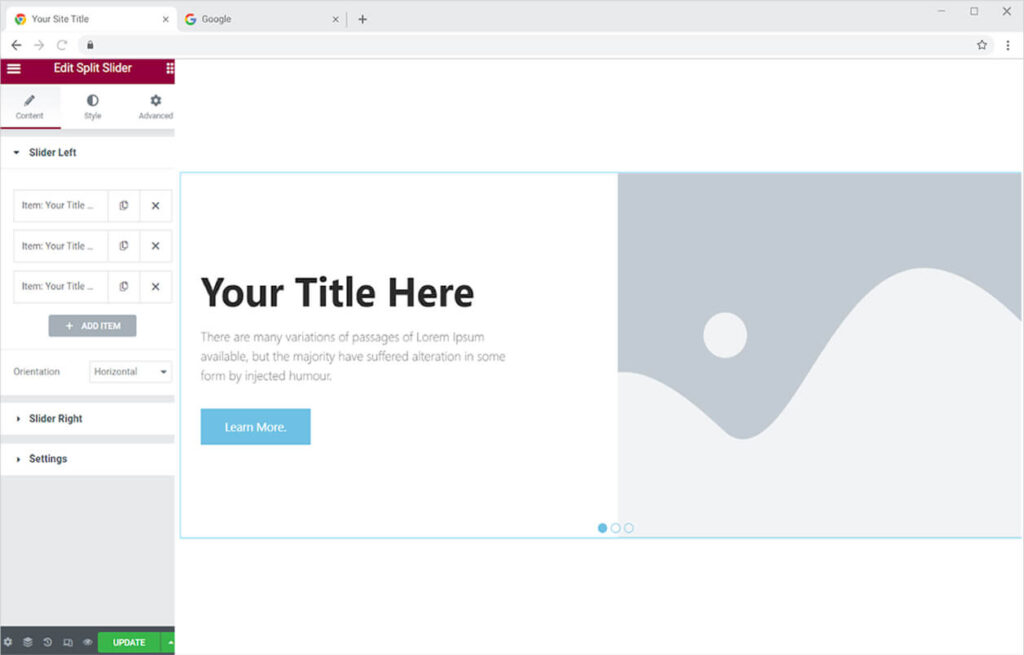
This is the default view of the widget after you select and drop it into the Elementor Page.
How to Add Content to the Xpro Split Slider Widget
In the Content Tab, you can view two menus Slider Left and Slider Right. Both menus consist of bars that consist of options to add content to the widget slide display. You have the choice to either add text, image, or any widget to the slide box. Use the Slider Left for the left slides and Slider Right for the slides on right.
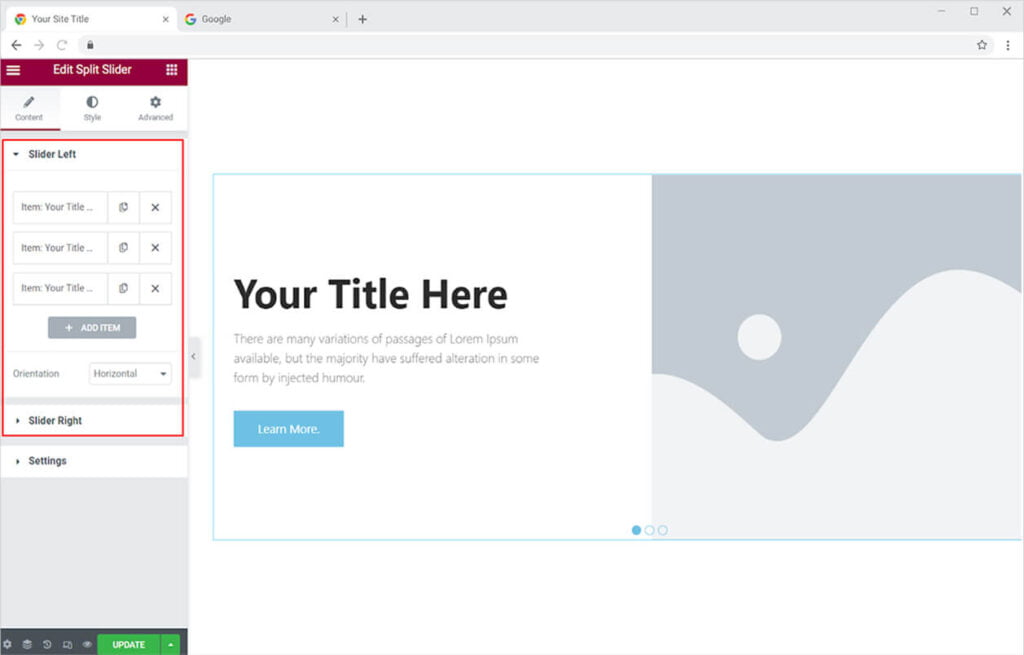
Click on the Slider Left to add content to the left slides. Select the bar where you want to add the content. Select the layout of the slide from the option provided of image, content, and dynamic.
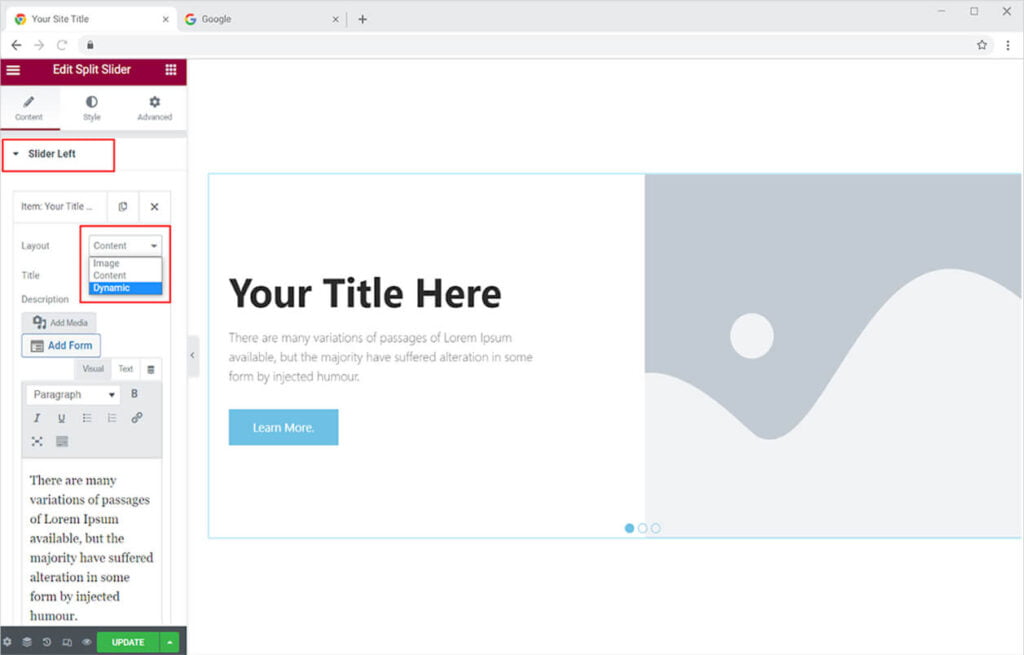
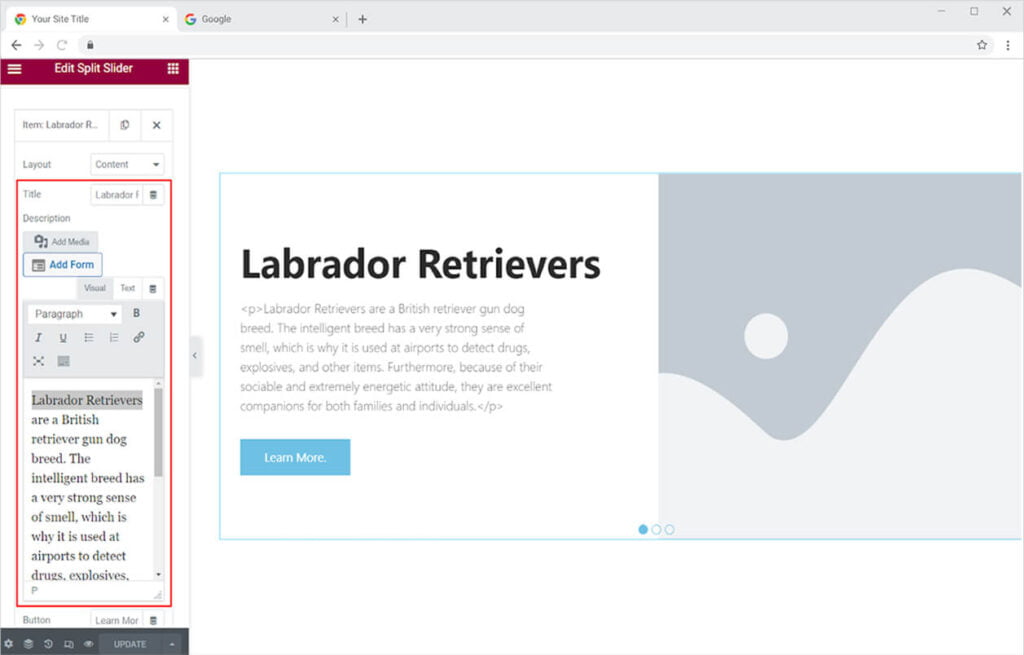
If you have selected to add content to the slide then it will display the box to add a title and description. Give your content a title and write a description which will be displayed in the slider widget.
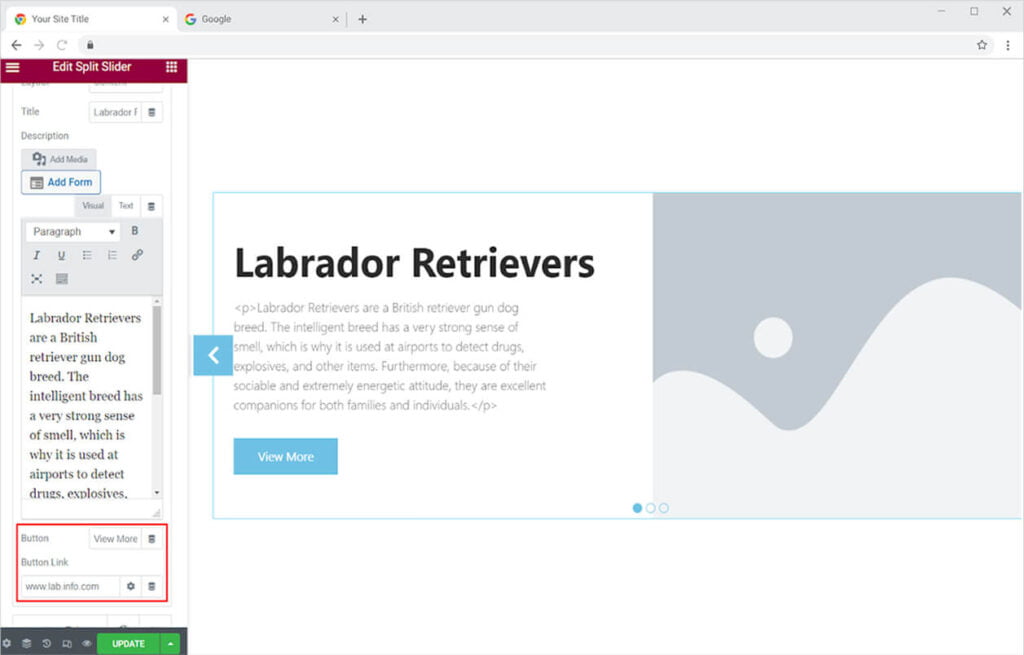
Moreover, you can include a button and provide it text and a link so that the visitors are directed to the page after they click on it.
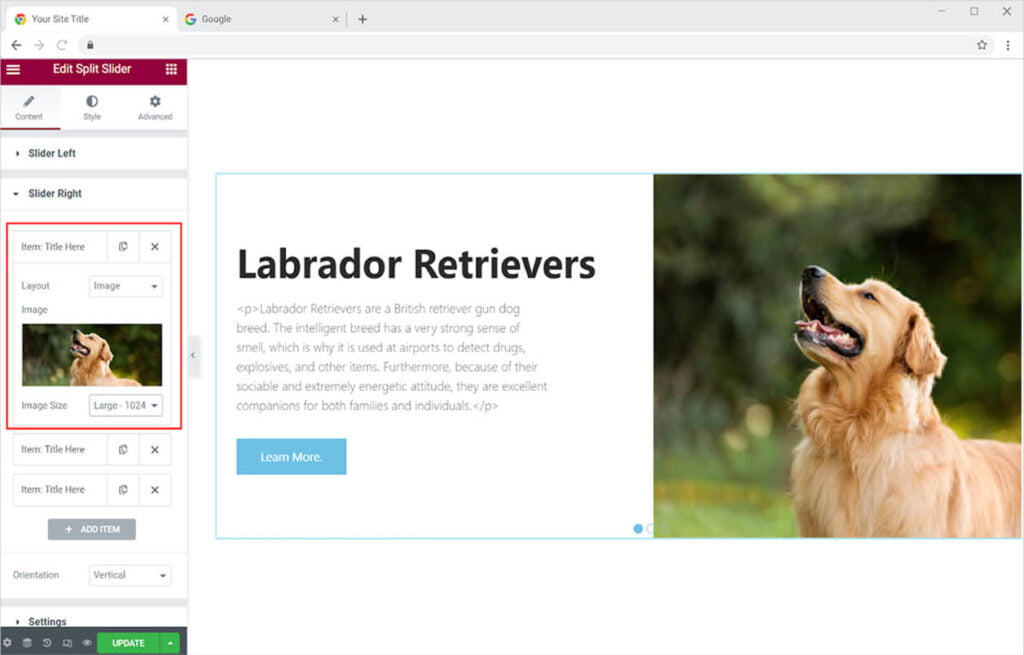
If you have chosen to include an image in the slider then you have the option to upload the image and adjust its size.
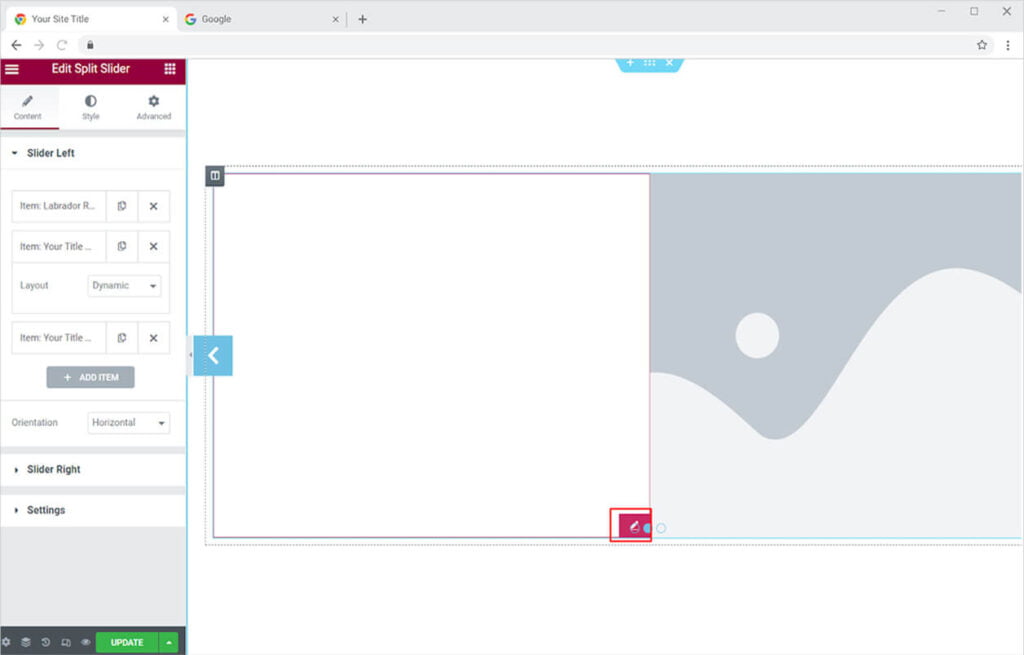
In order to add any widget in the slider, select the layout dynamic and an option with an edit icon will appear on that specified slider. When you click on the edit button, an Elementor page builder will open from where you can add anything to the slider.
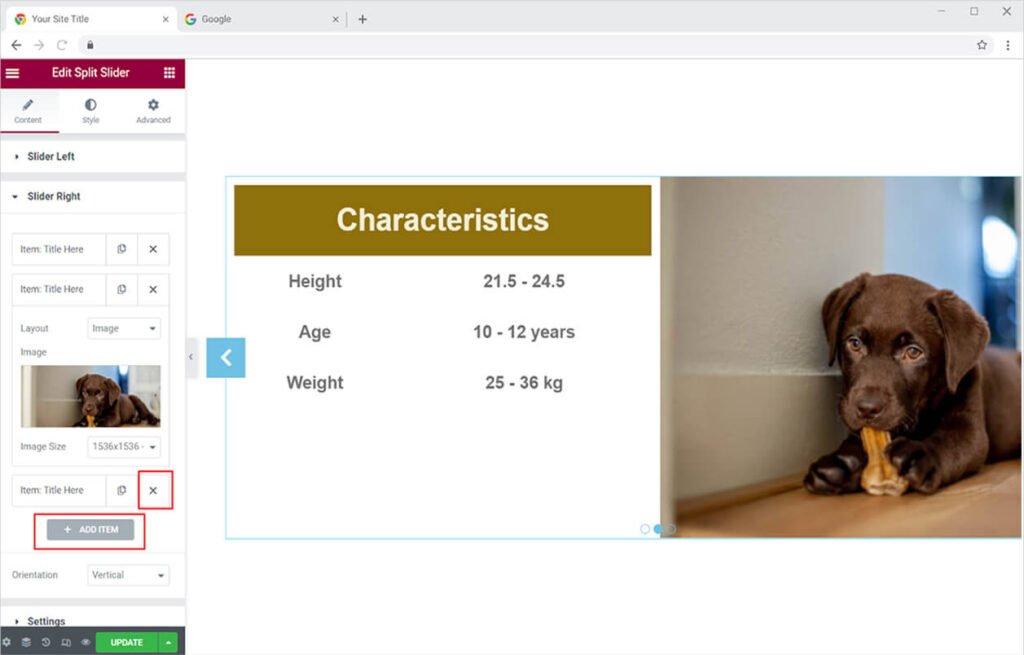
Just like that fill and add content to all the slides. If you want to add more slides then click on the “+ Add Item” button and if you want to close an item then simply click on the close icon “x”.
How to Change the Orientation of Slides in Split Slider Widget
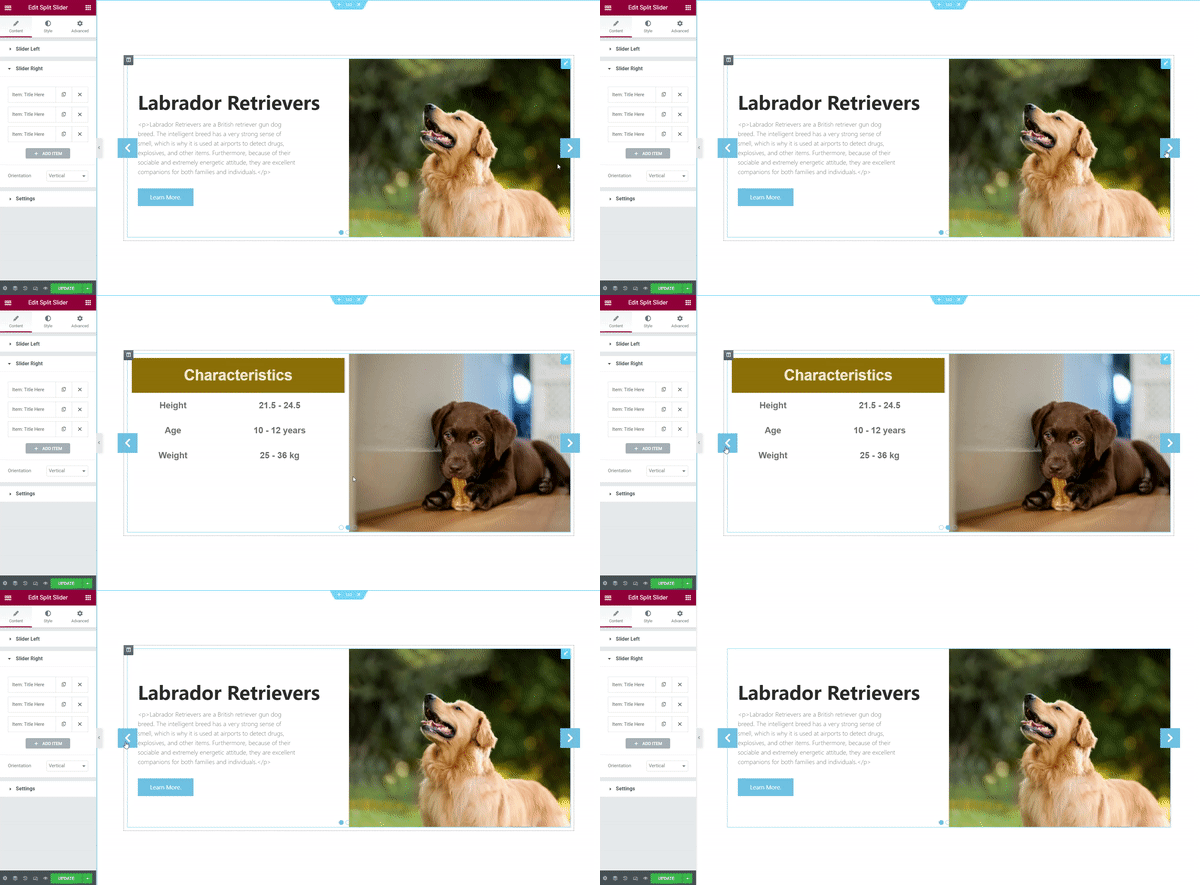
Choose how the slides travel to proceed to the following slides. You can choose between vertical, which moves the slide upward as you click next, and horizontal, which moves the slide to the right as you click next. You can select the different orientations for the left and right slides just like I did below.
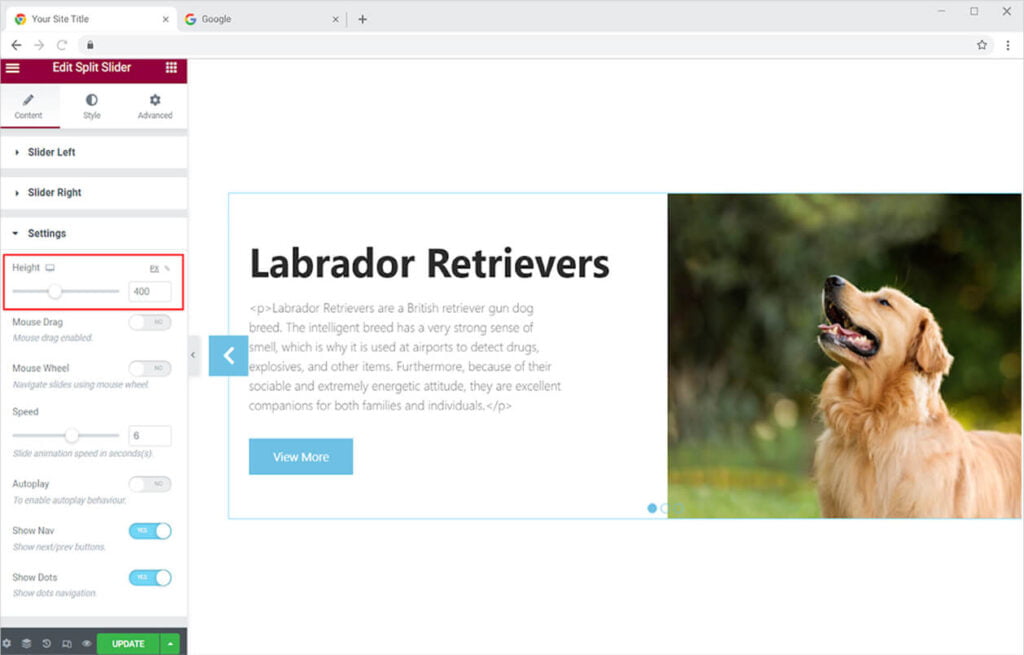
Perform different settings to the widget from the Setting menu. You can adjust the height of the widget display by dragging the circle in the height bar.
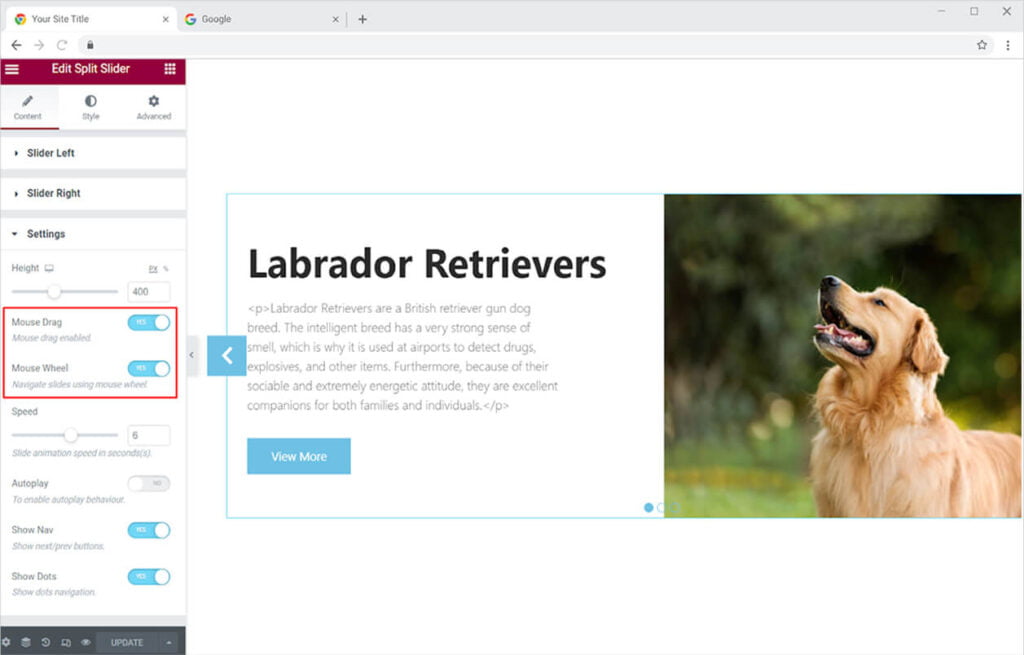
Allow the user to see the next slide by clicking and dragging the mouse. Enable the Mouse Drag option to give this feature to the visitor. You can also enable the option for Mouse Wheel that will let the visitor change side by rotating the wheel on their mouse.
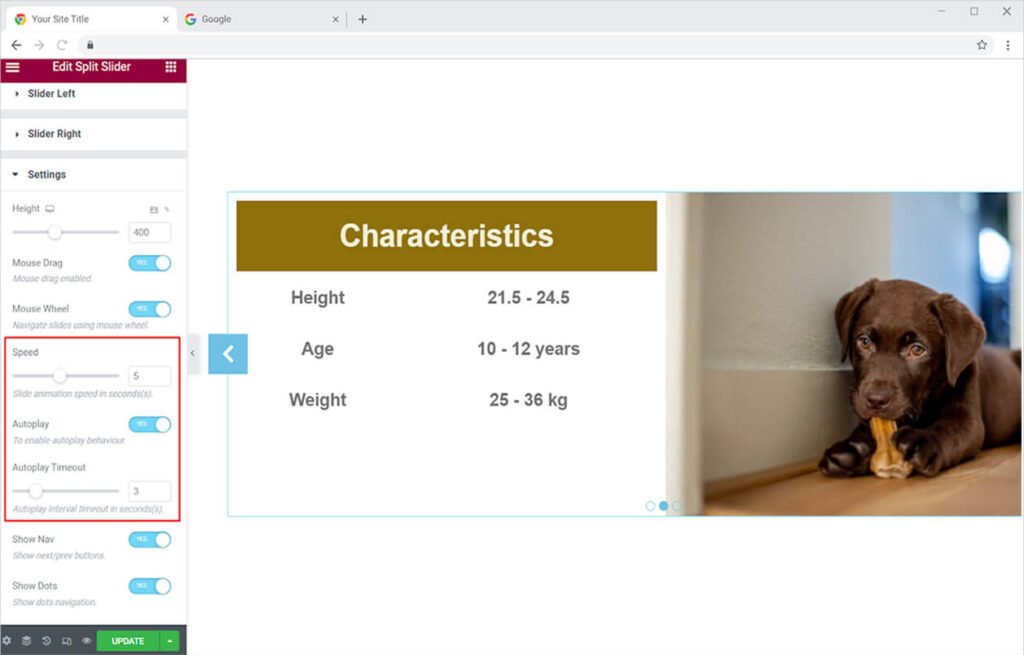
Adjust the speed of the slide animation in seconds. By enabling the Autoplay, the slide will keep on rotating. You can select the time it will take for the slides to change.
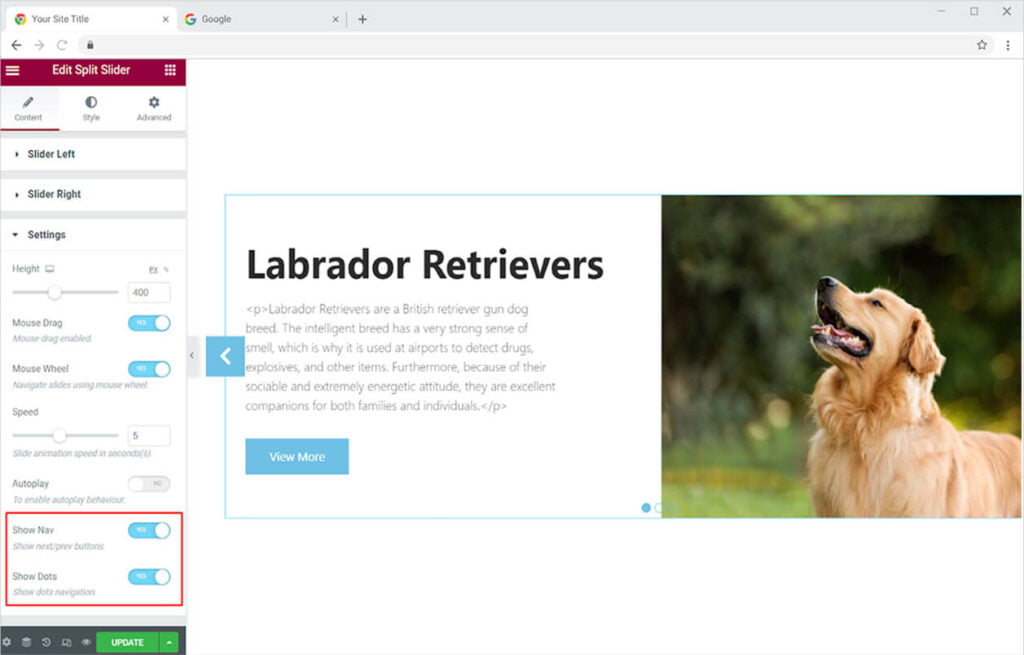
Enable the option to show navigation and dots. The navigational arrows at the side of both ends, allow the user to navigate through the slides. Dots at the bottom, allows users to understand how many slides there are and what position he is at.
How to Style the Xpro Split Slider Widget for Elementor
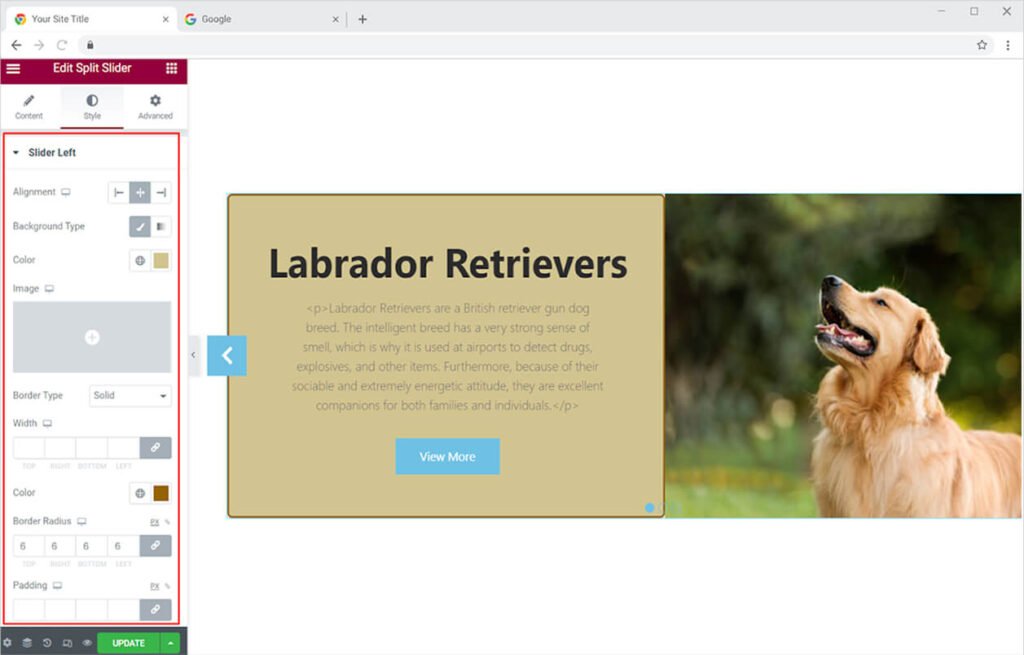
Click to open the Style Tab where you can perform multiple customizations to the widget display. Start with the left slider customization. Align the body content in the the slider to left, right, or center of the box. You can make the background colorful using gradients, classic colors, or an image. Include a border to the slider by selecting border type between solid, double, dashed, dotted, and groove. Furthermore, adjust the width, radius, and color of the border.
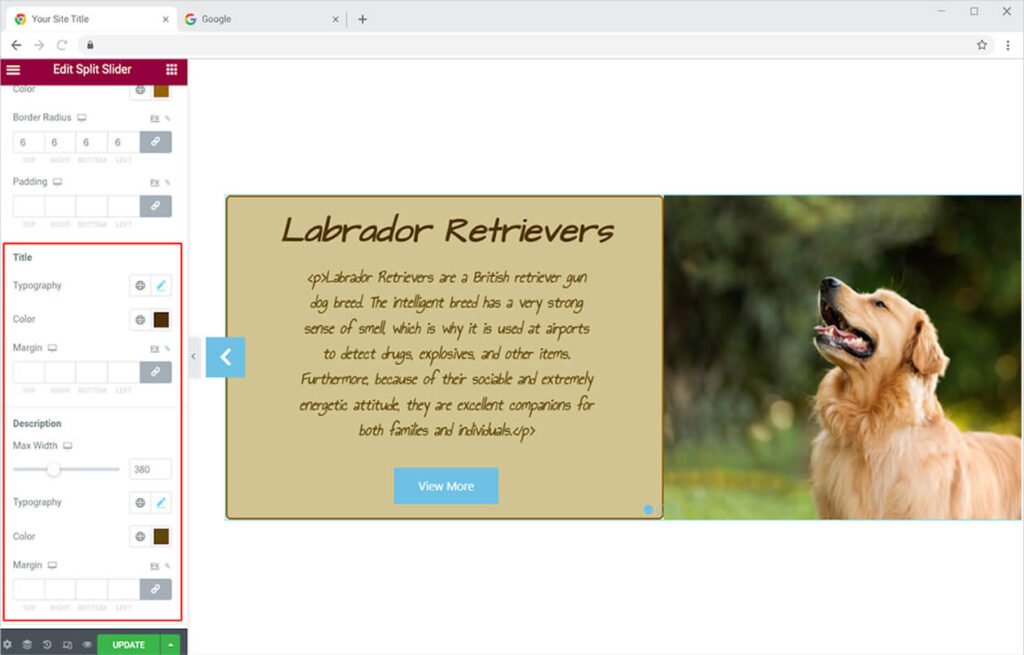
Style the title in the content by personalizing its typography and coloring the text. You can also perform the same styling for the description including adjusting the width of the text.
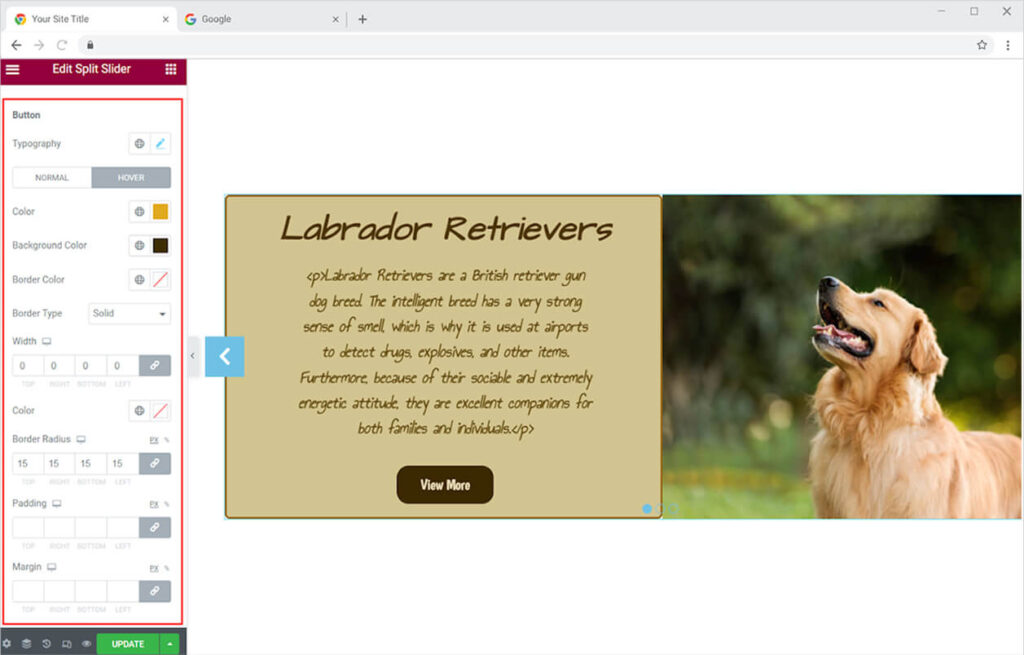
How to Style the button in Xpro Split Slider Widget
Start with styling the typography of the text on the button. From the typography menu. You can style the font, size, spacing, etc for the text. Color the text and background of the button for normal and hover states. Make a border through border type and adjust its width and radius and also give it a color.
The way you customize the left slider, you can perform the same styling options for the right slide.
How to Style Navigation in Xpro Split Slider Widget
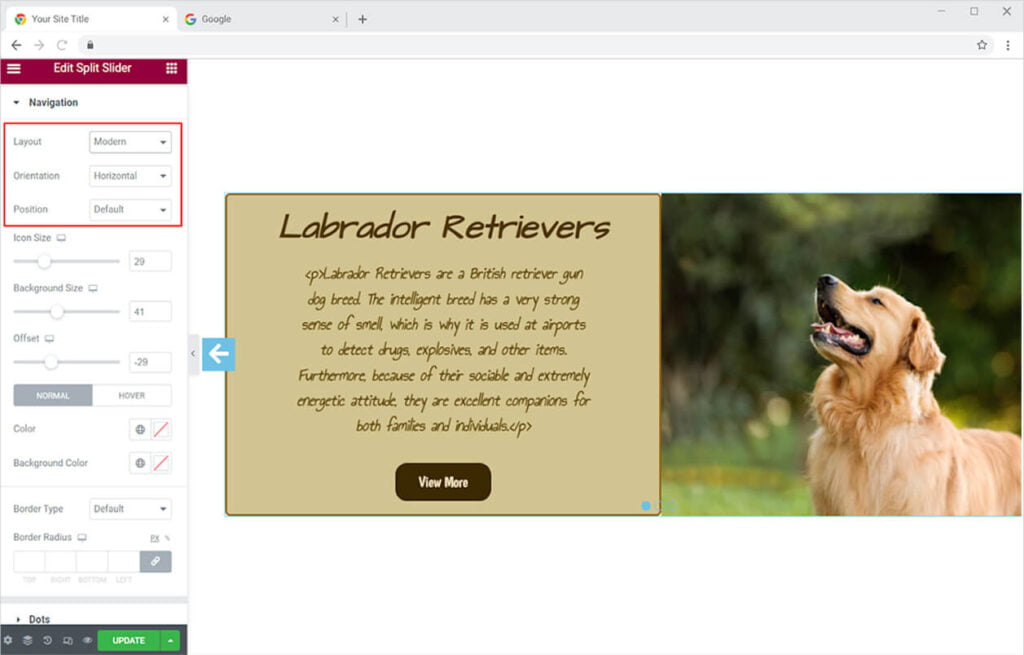
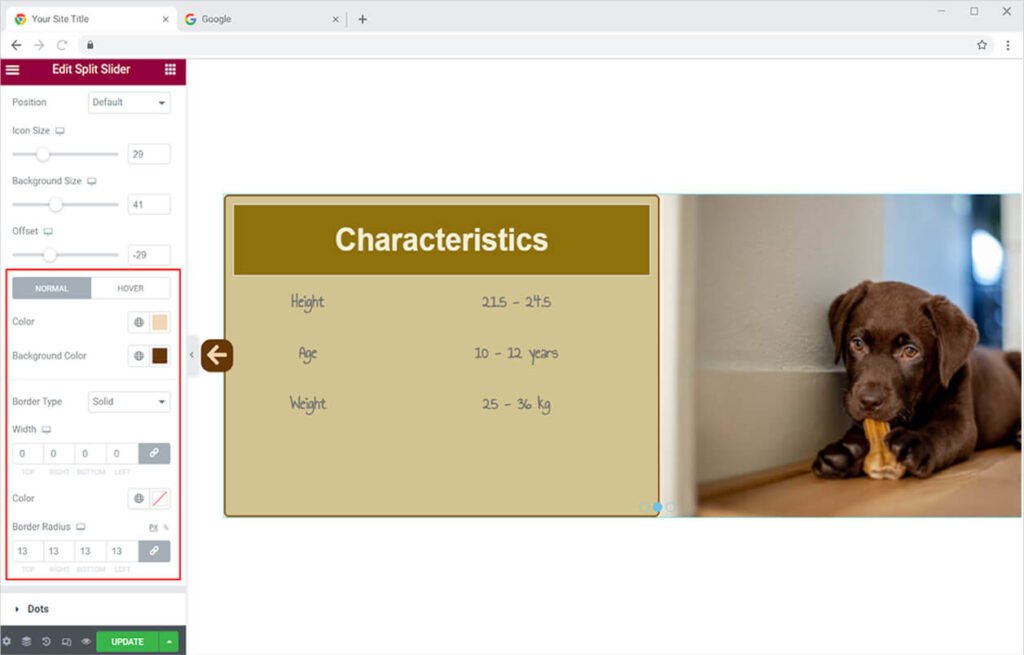
Select the layout between modern and classic. Make their orientation either horizontal or vertical. Position these icons anywhere on the widget.
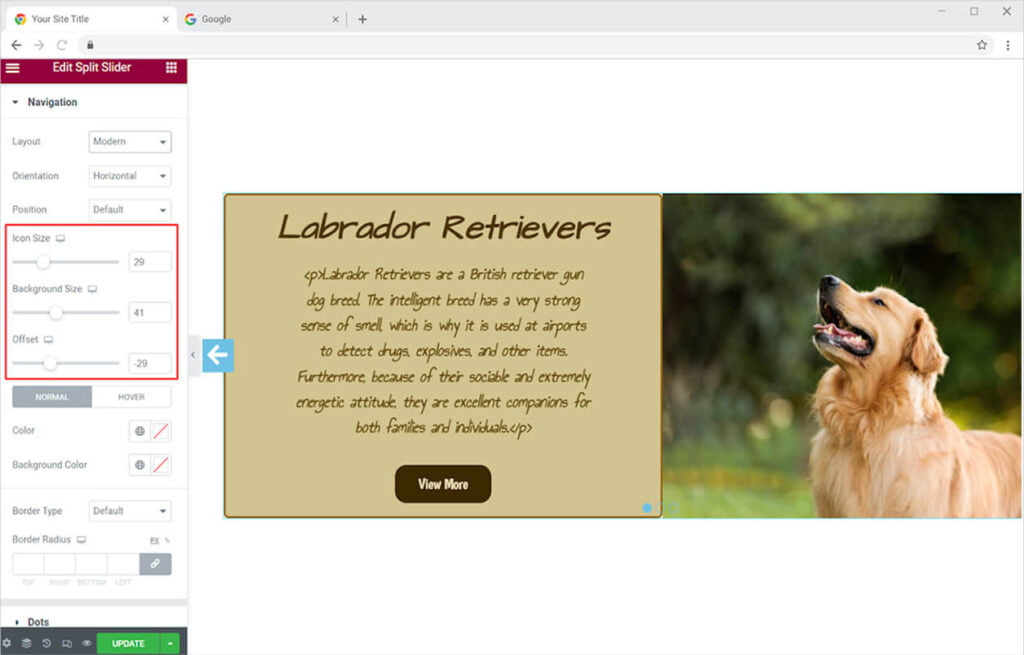
Adjust icon size and background-size through their respective positions. Move it from its position through the offset bar.
Color the arrow icon as well as the background. Select the border type to add a border to the navigation arrow. Adjust the border width and radius and add color.
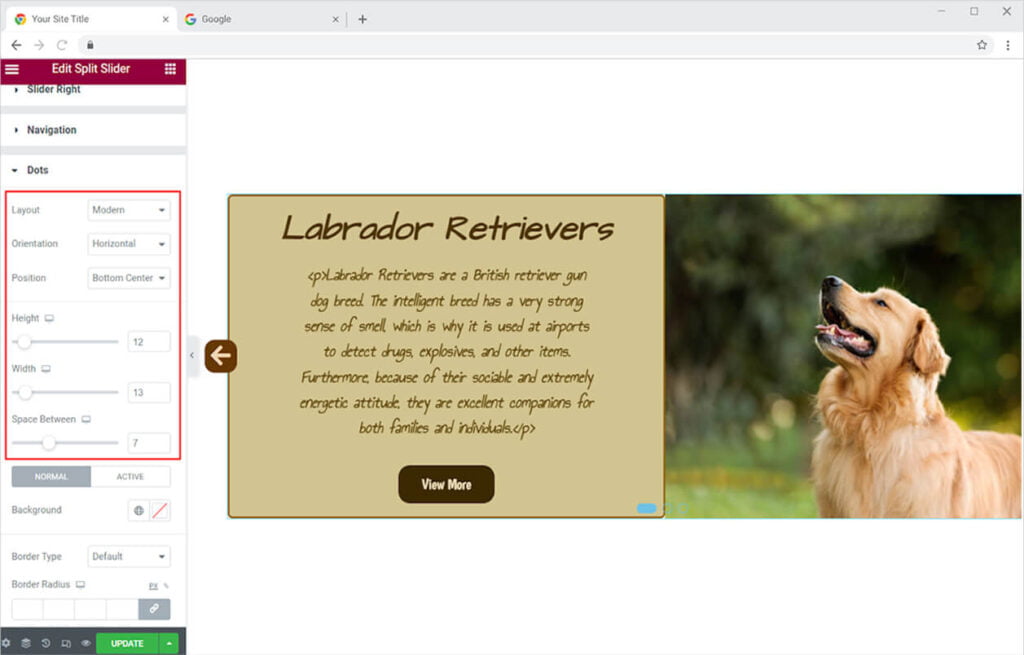
Style the dots at the bottom in the same way that you styled the navigation. Select the layout, orientation, and position of the display. Adjust the height, space, and space between each dot.
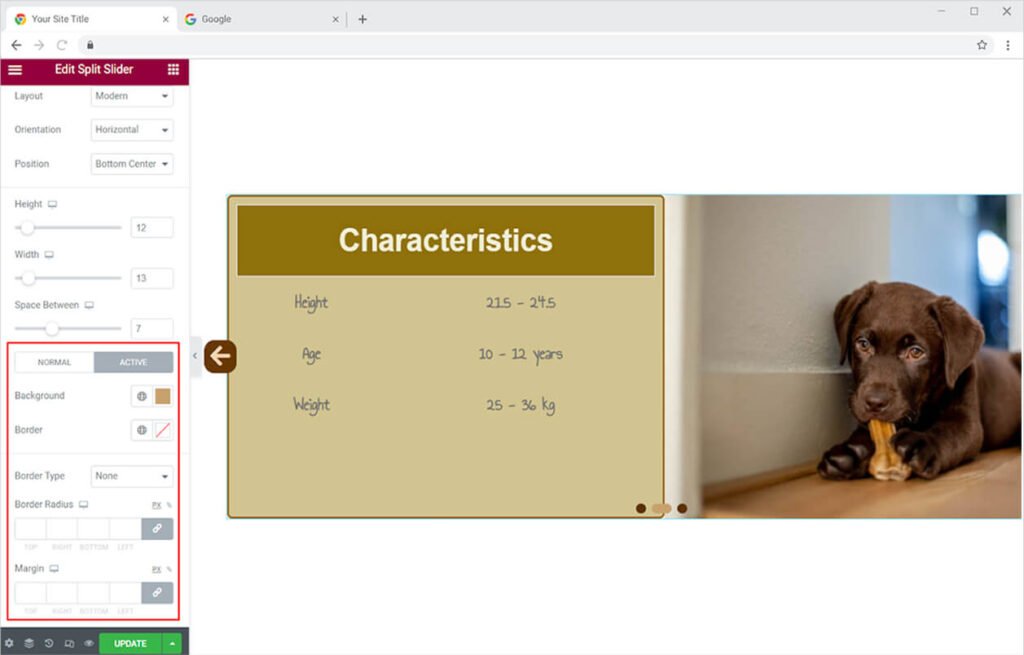
Color the dots for their normal state and a different color for when that dot represents a slide. Give a border to it if you want to and make further editing.
Best Split Slider Widget for Elementor
This was all from our Split Slider widget for Elementor. We hope you completely understand the functionality and feature usage of this powerful Xpro Elementor widget. Make full use of this widget to create a beautiful content split slider and enhance the webpage appearance. Check our premium Elementor Multi Slider widget to create attractive and advanced sliders on your website. Combine this Split Slider widget with our light box and instantly improve user experience.
If you want to explore and add more attractive Elementor widgets then check our complete list of free Elementor widgets and download our free Elementor addons now. Moreover, check out our other promising widgets like Featured Image for Elementor, Elementor 360 Product Viewer, and free Elementor extensions. You will be surprised how easily you can customize your WordPress website using Xpro Elementor Addons.