Introduction
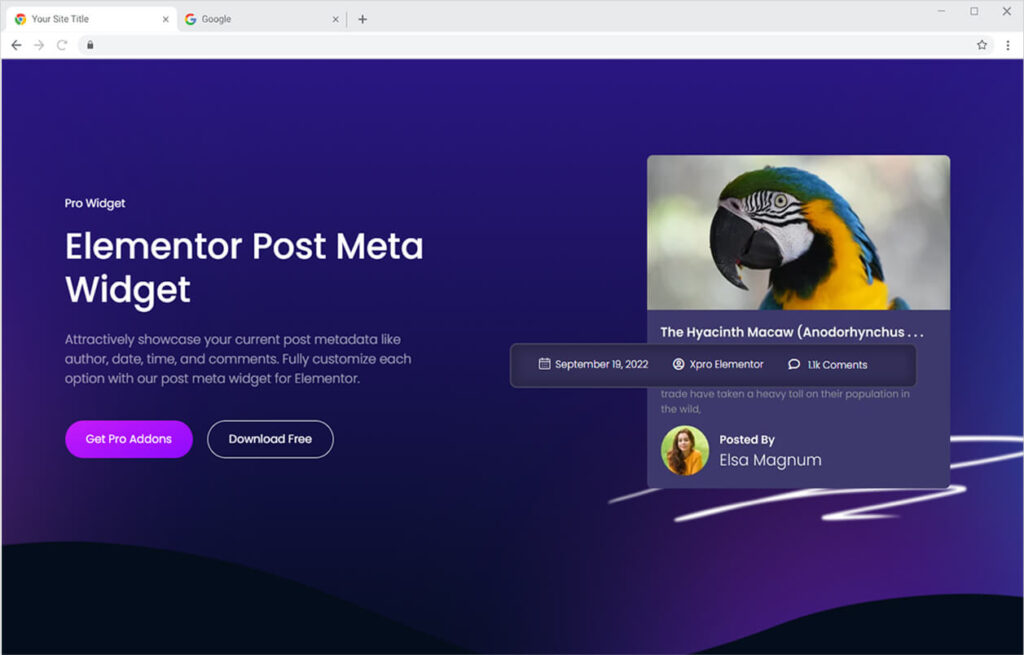
Post meta data gives important details about a blog post, such as the date of publication, author information, and the comments section. This information enables users to comprehend the essence of the blog post. With the Xpro Post Meta widget for Elementor, all post meta data can be dynamically represented, improving the display and site navigation. By presenting important information in an effective and aesthetically pleasing way, this widget improves the overall user experience.
Xpro Post Meta for Elementor includes a multitude of customization options for each part, allowing you to design them separately. With our intuitive theme builder widget, you can completely customize your blog post experience. Add a date, time, author, or any custom field with its own URL and icon.
How To Install Post Meta Widget
Requirement
You need to install and activate the Pro version of Xpro Elementor Addons. If you already have the plugin installed, just make sure the Post Meta Widget is ‘Enabled’, so you can find it in the Elementor editor.
Step 1
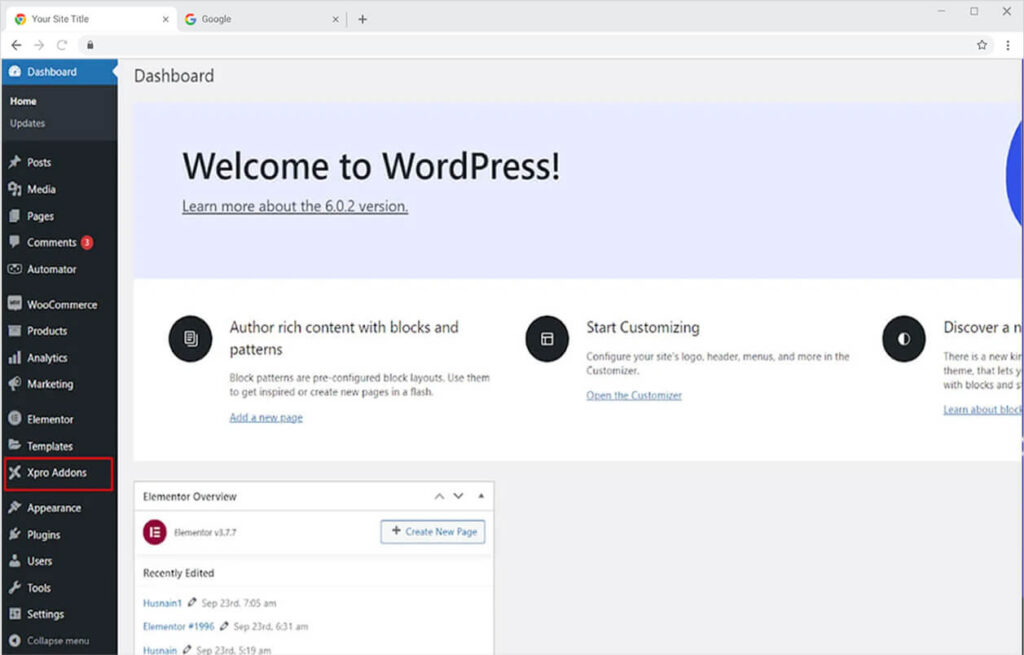
Click on the Xpro Addons option available on the WordPress Dashboard Menu.
Step 2
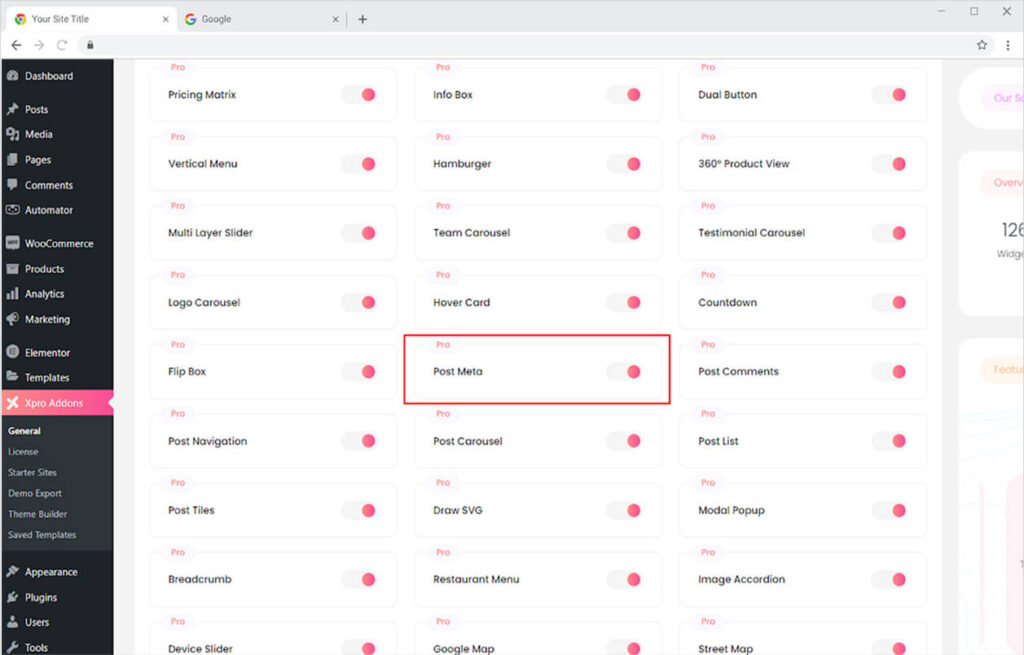
From the Xpro Addons Dashboard, click on the Widgets Tab, find the Post Meta widget, and finally, toggle the button ON to enable it.
How to Use the Post Meta widget for Elementor
Xpro Post Meta for Elementor is an informative tool that tells the reader about the date and age of the post as well as display the categories, comments, and much more. From the Xpro Elementor page builder, you can customize the design and make it personalized for your users.
Step 1
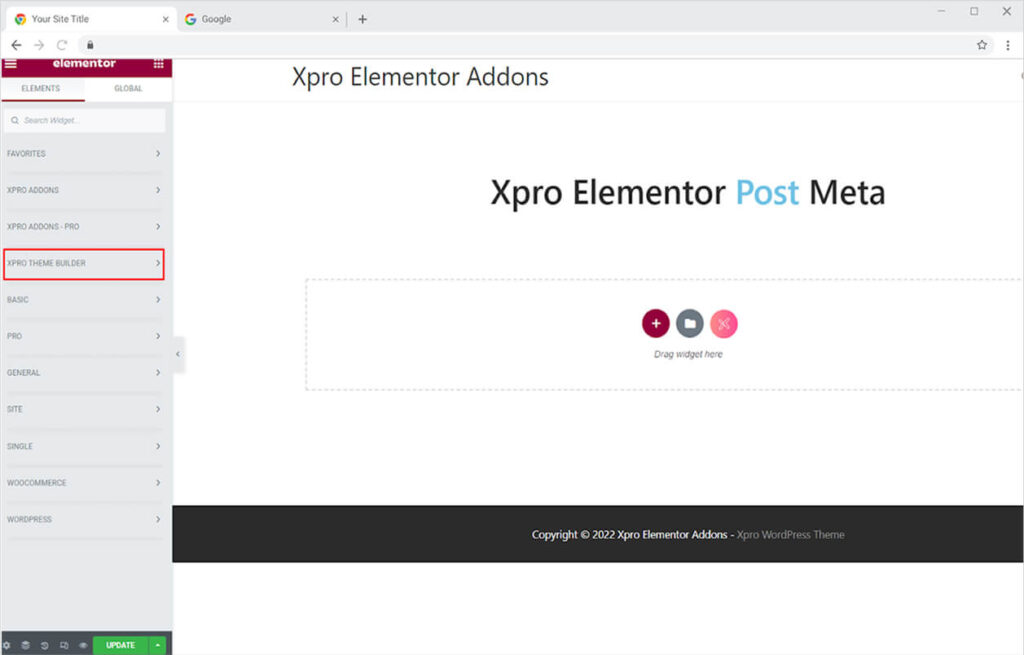
Click on the Xpro Theme Builder section available in the Elementor Editor.
Step 2
From the Xpro Theme Builder section, find and simply drag and drop the Post Meta widget on your desired page location.
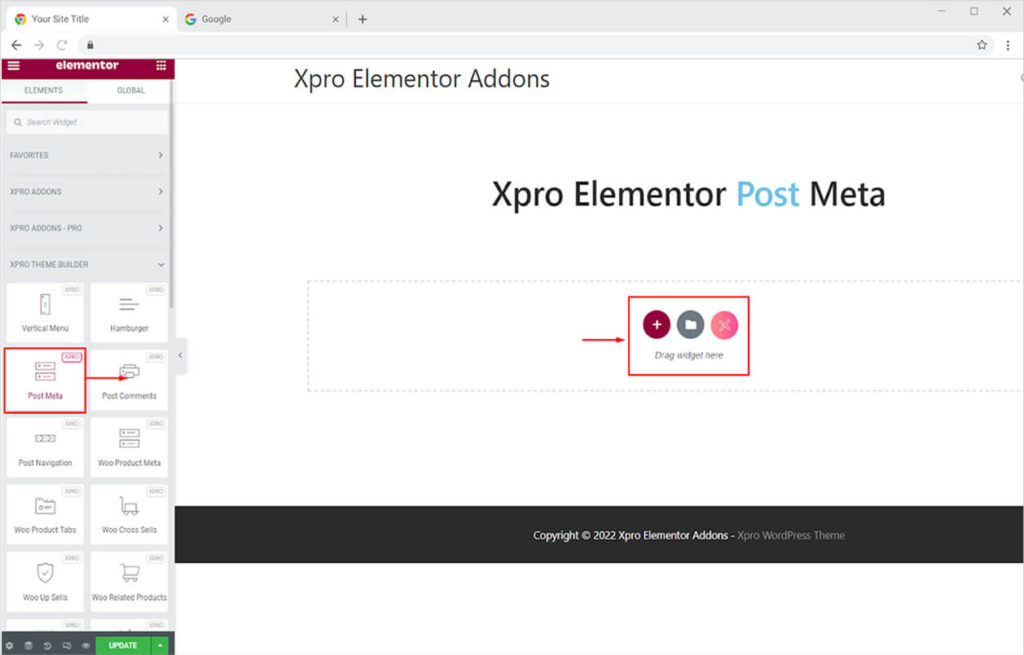
The default view of the widget will look something like this after you drag and drop it to the desired location on the page.
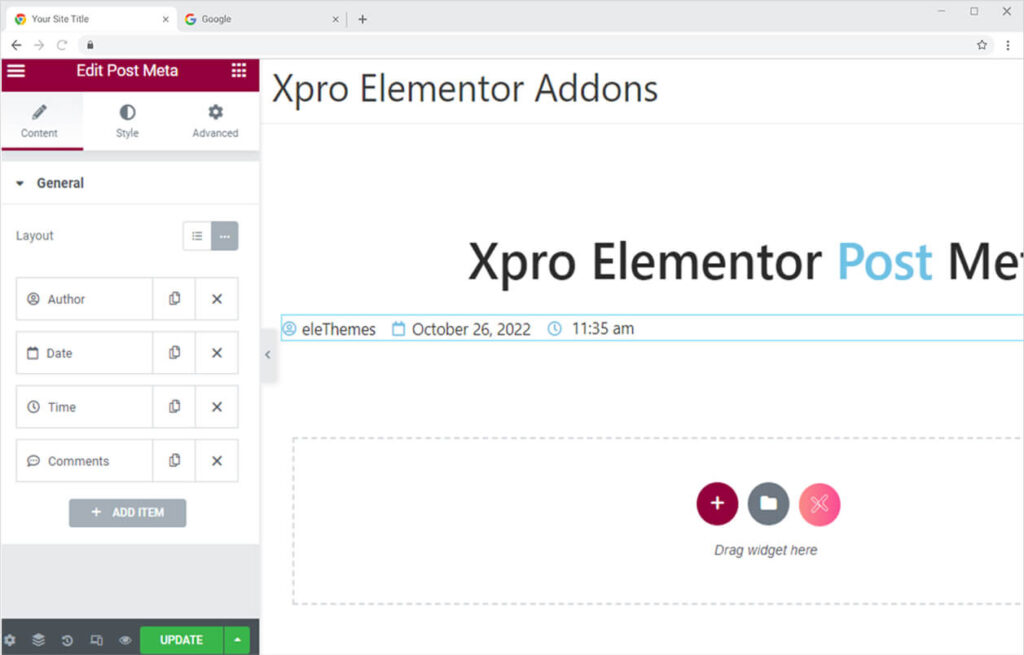
How to Set the layout of the Post Meta Display
You have the option to either set the layout of the Post Meta in default that shows the meta in a column or inline that shows the content in one horizontal line.
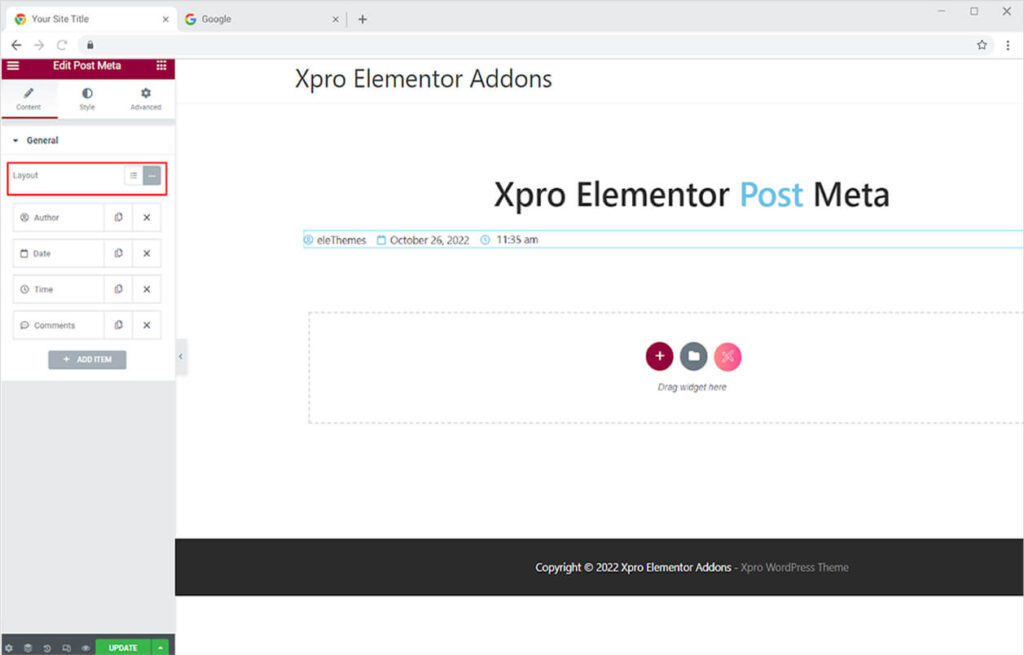
How to Edit the content for the Post Meta
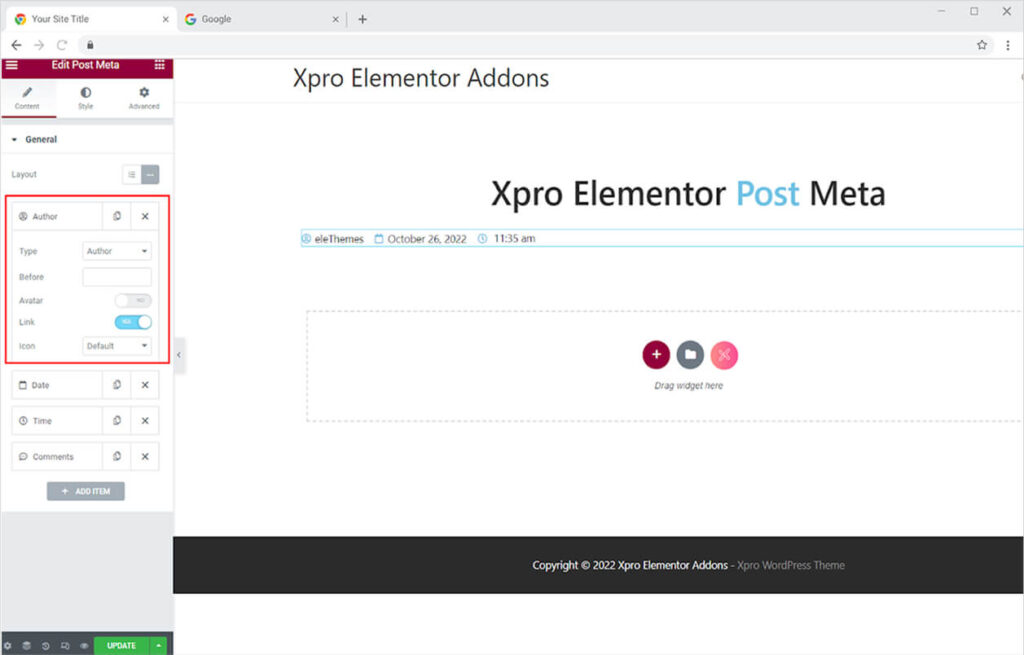
You can edit each meta from their given section. Click on the meta title that you want to edit and a box with edit options will appear.
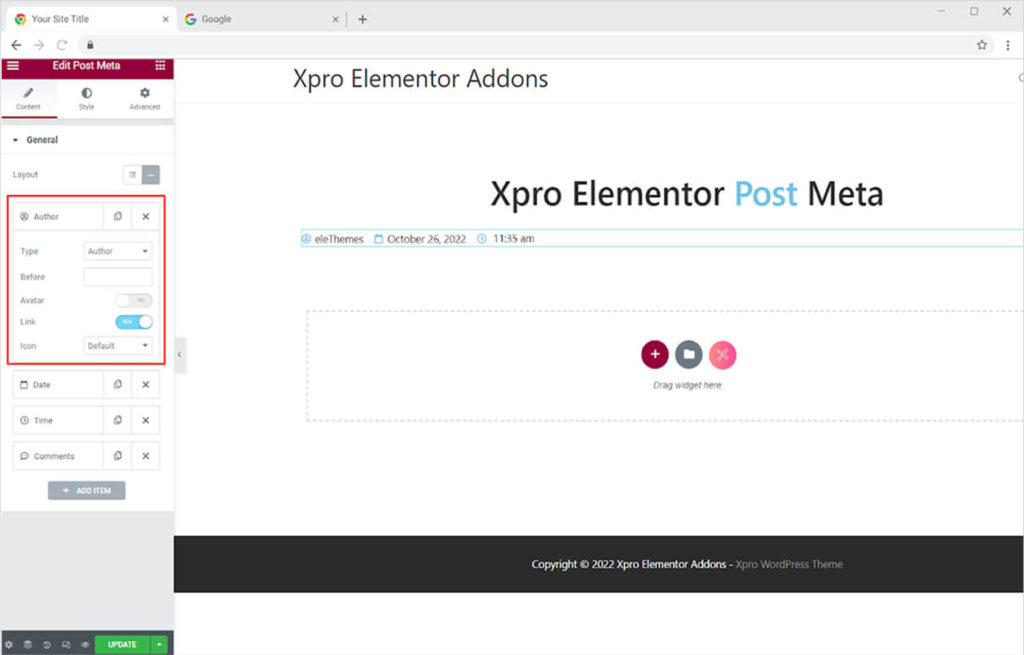
From the type option, you can select the meta that you want to include in the display. Simply click on the bar beside type to open a drag-down menu with all the options.
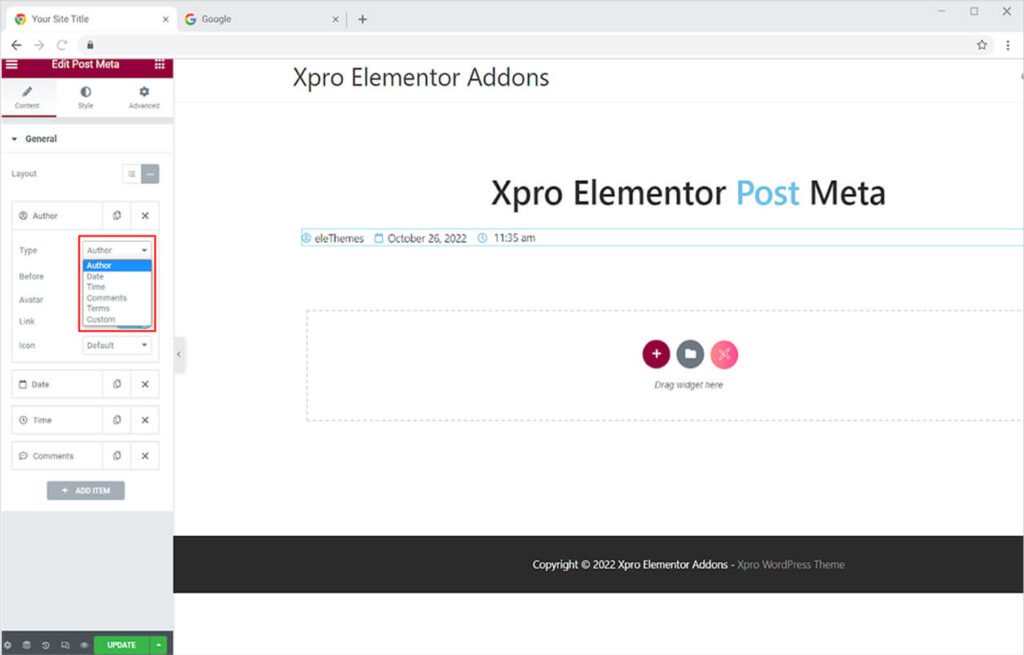
If you choose the author option, the author meta will be presented on the screen, and you will be able to make changes. Text can be added before the author’s name using the Before option. You can enable the option to display the author’s avatar and link the meta to any link. Additionally, you have the option of changing the icon for this meta.
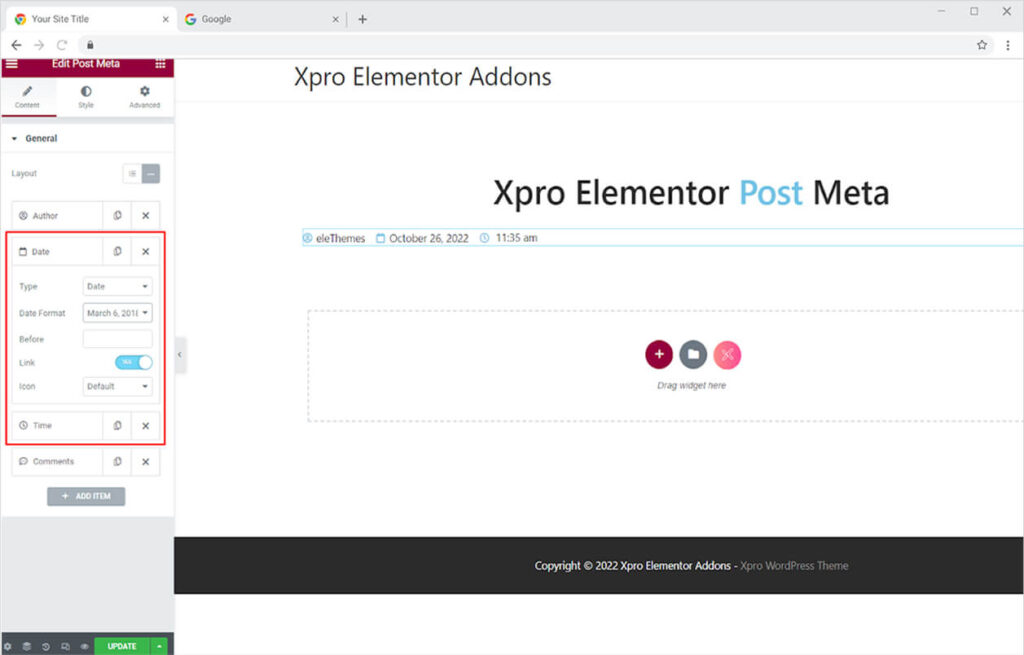
For the date and time section, you will be provided with options to change to their meta display. You can alter the display format from the options provided or customize it to meet your needs. Other features include the previously mentioned text earlier, links, and choosing an icon.
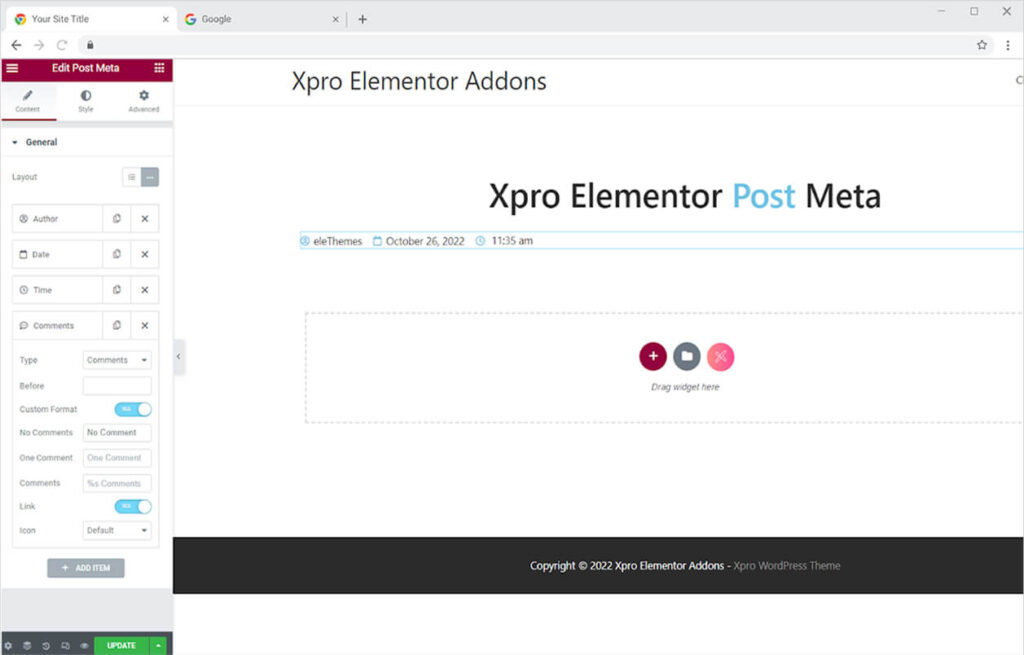
If you wish to include comment meta, you can update it as well. This part, in addition to the previously mentioned elements of Before, link, and icon, has a custom format option.
Furthermore, you can add more meta if desired, as well as custom meta. When you select custom as the type option, you will be presented with a custom control box. You can add text and links to wherever you want. You can also include an icon in the meta.
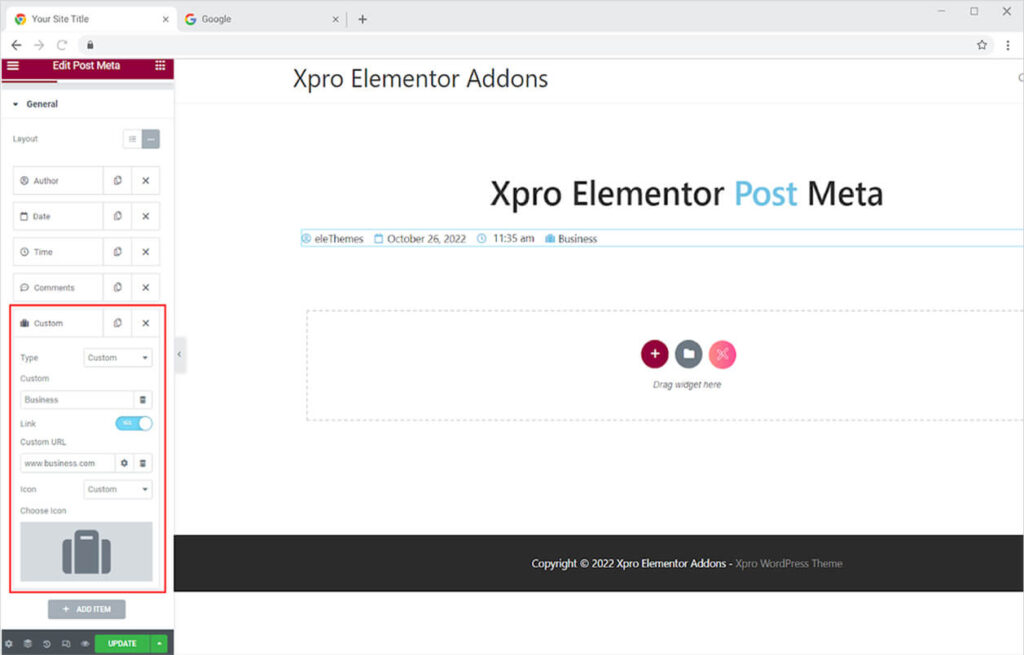
How to Style the Post Meta widget for Elementor
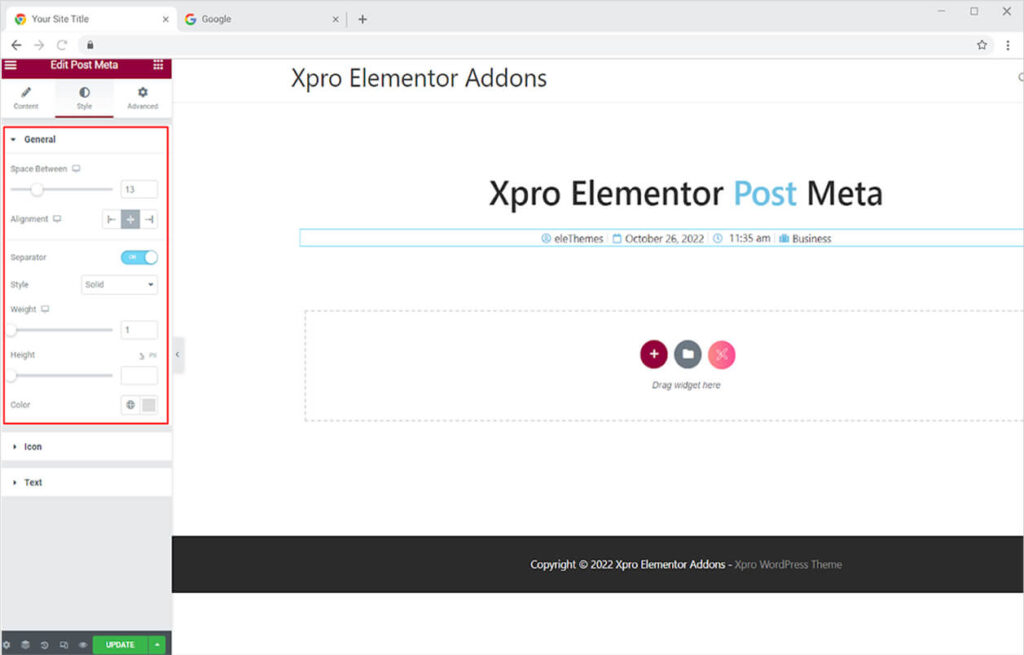
Xpro features allow you to modify your widget based on your needs. Post Meta’s style options allow you to modify any component to improve its appearance.
The general styling allows you to set the alignment and position the display to left, right or center of the screen. Adjust the space between each meta. You may enable to add a separator which further allows you to style this part.
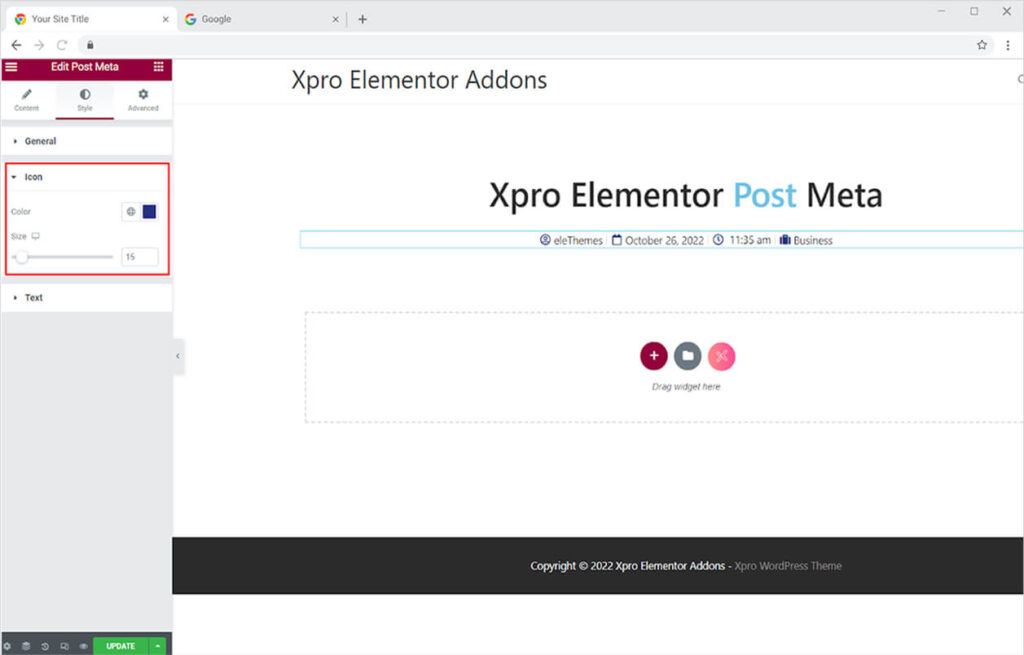
How to Style the Icon in the Post Meta widget
From the icon section, you can style the color and change size for the icon.
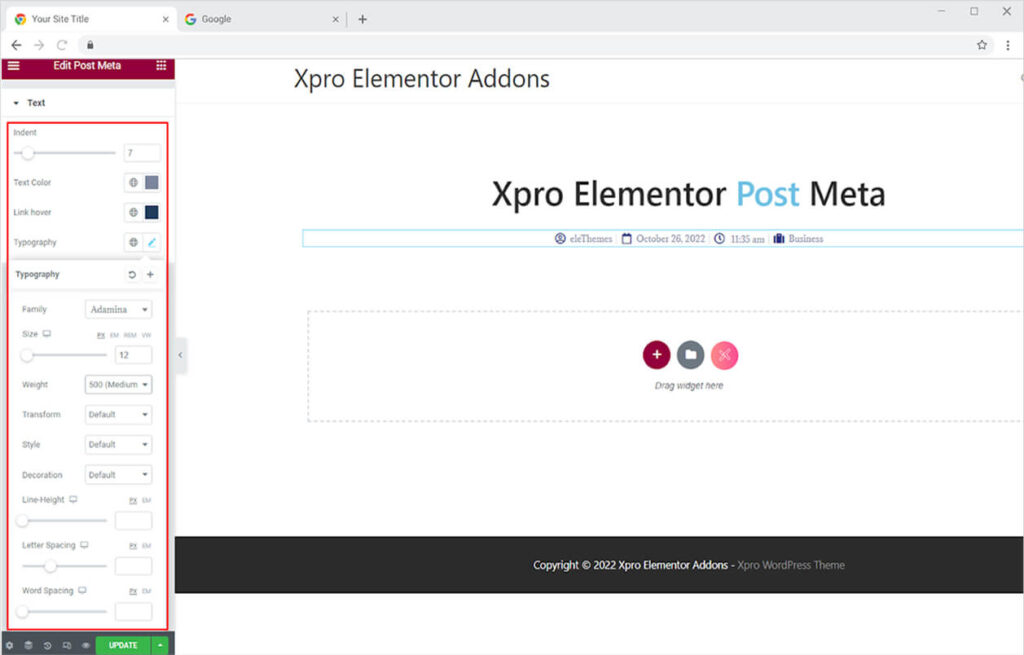
How to Style the Text in the Post Meta Widget
Change the font, size, style, and other characteristics of the text’s typography. Add a color to the text for both the normal and hover effects. You can change the spacing between text and icon using the indent option.
Best Post Meta Widget for Elementor
This is all from the Post Meta widget for Elementor. We hope you fully understand the functionality and implications of this superb widget and will be able to construct a fantastic blog page.
Xpro Elementor Addons offers a wide range of widgets and theme builder to help you create a fully functional website without any need for complex coding. Check out the Elementor Taxonomies Widget that showcase your WooCommerce product tags & categories with customized icons, background, layout & much more.