Xpro Elementor Woo Mini Cart Widget
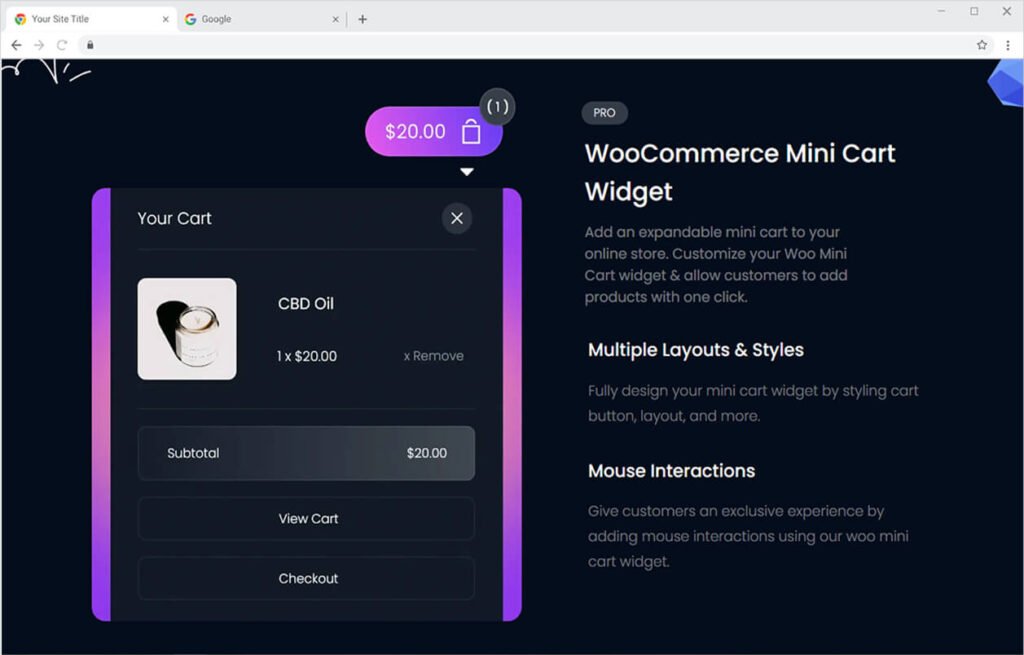
Woo mini Cart helps display information such as the number of products purchased, the items in the cart, and the total bill. All this information helps customers understand cart information when they are exploring your online store. With just one click, product information is added to the Elementor Mini Cart from where customers can view and manage their buying.
In today’s world, having an e-commerce website is a must for any business. This is why Xpro Elementor recognizes the importance of a business website and provides a wide choice of woo widgets to help you build a product layout and webpage.
Using the Elementor drag and drop tool, add the Woo Mini Cart widget to the website. Customize the display’s overall layout to match your theme. Select between the choices of layout, color, typography, and much more.
How to Install Xpro Woo Mini Cart widget for Elementor
Requirements
Using Woo product widgets requires the installation of the WooCommerce plugin. You need to install and activate the Pro version of Xpro Elementor Addons in order to use our Woo Mini Cart widget. If you already have the plugin installed, just make sure the Woo Mini Cart Widget is ‘Enabled’ from the plugins section of Xpro Dashboard, so you can find & use the widget in the Elementor editor.
To enable the widget, simply follow these steps:
Step 1
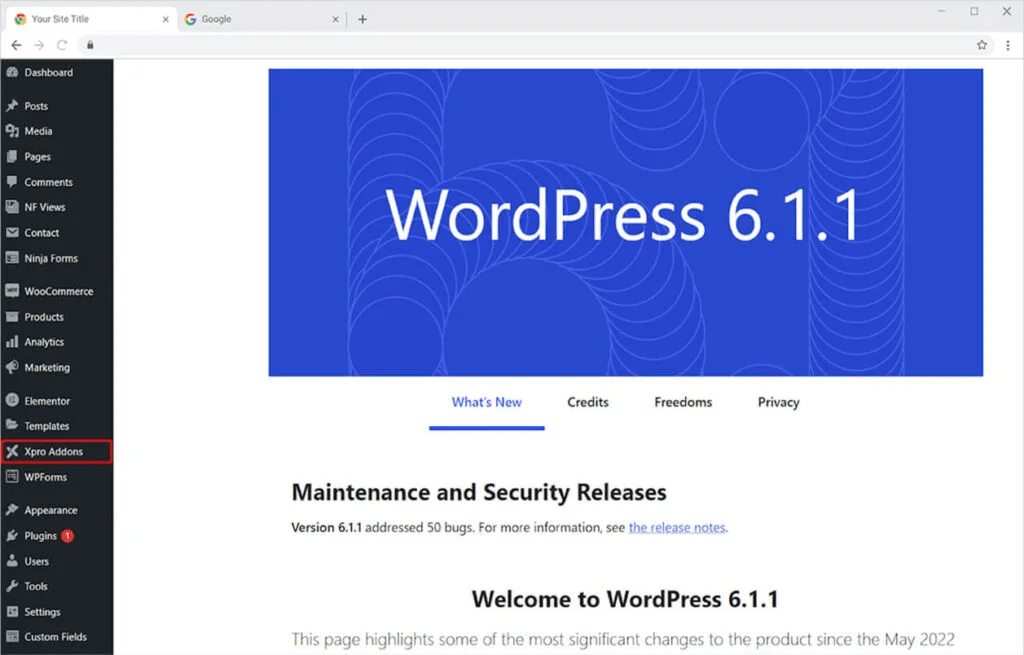
Click on the Xpro Addons option available on the WordPress Dashboard Menu.
Step 2
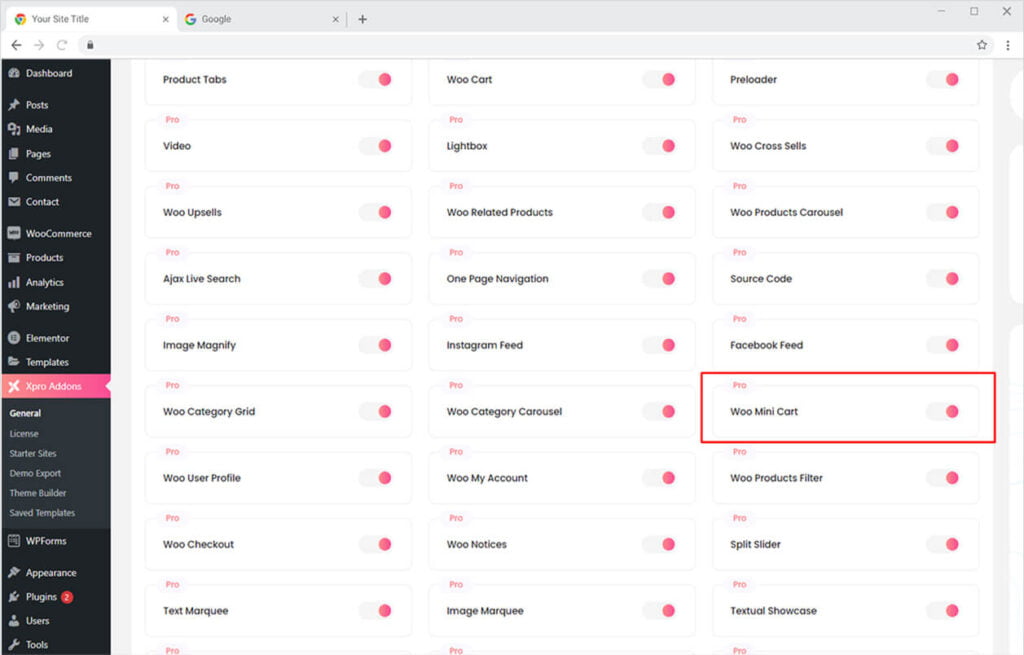
From the Xpro Addons Dashboard, click on the Widgets Tab, find the Woo Mini Cart widget, and finally, toggle the button ON to enable it.
How to Use Xpro Woo Mini Cart widget for Elementor
To use any Xpro Woo widget, you must have the WooCommerce plugin installed in your WordPress. Create and add a product with WooCommerce and use the Xpro widget to enhance the website’s appearance and functionality. Customize the mini cart widget by selecting a layout, managing typography, and adding color.
Step 1
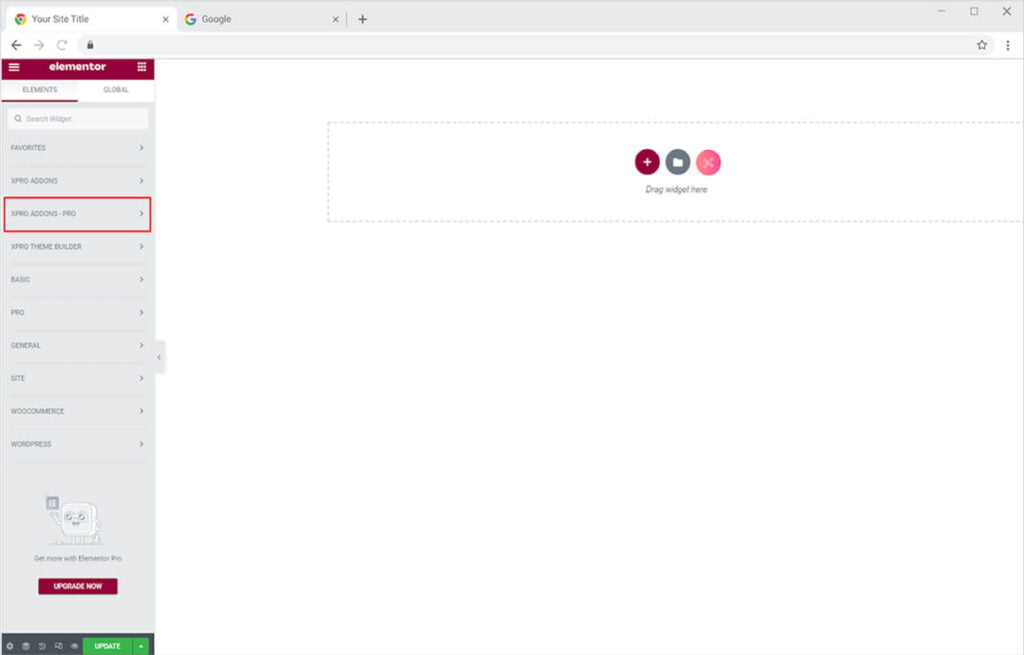
Click on the Xpro Addons – Pro section available in the Elementor Editor.
Step 2
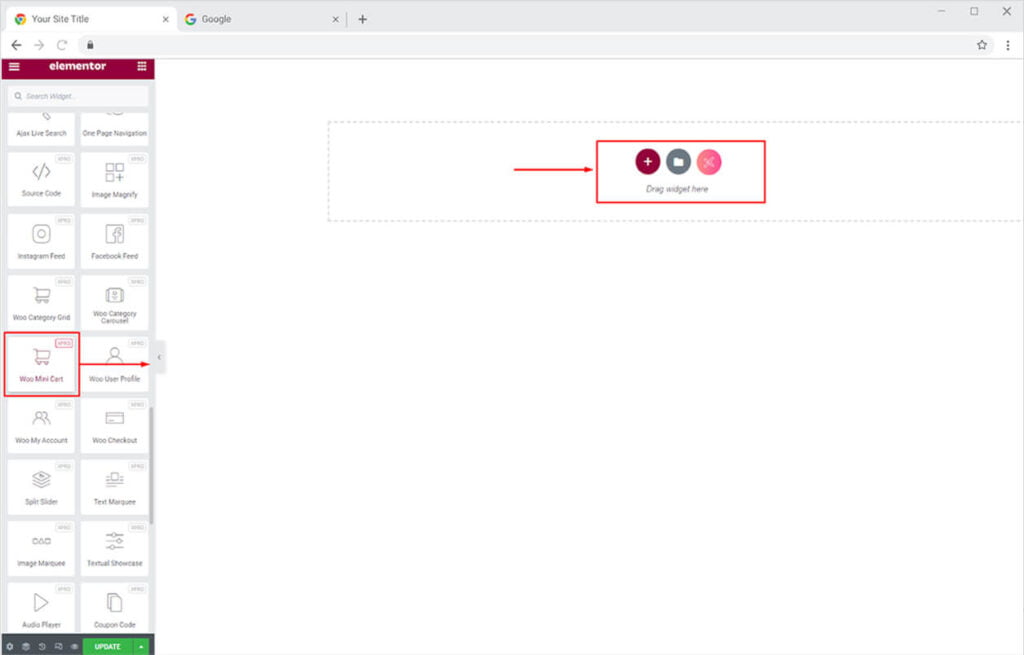
From the Xpro Addons – Pro section, search for ‘Woo Mini Cart’ in the search bar and simply drag’n’drop the widget to your desired page location.
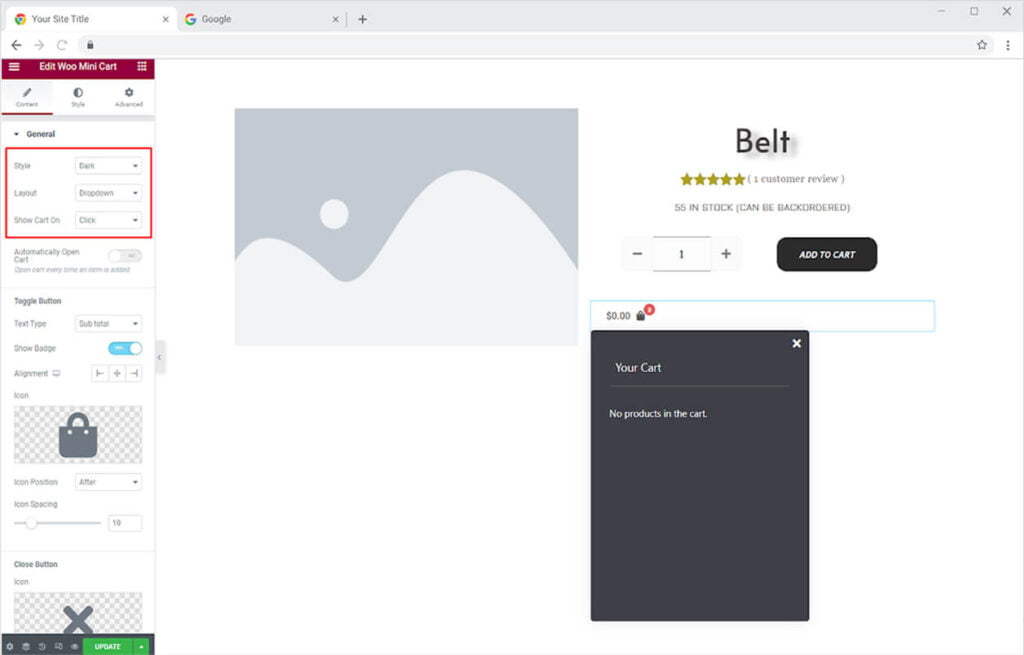
Content Section
Select the style for the widget between light or dark. Choose between three layout options which will either be shown with a click or the user drag the mouse above the widget.
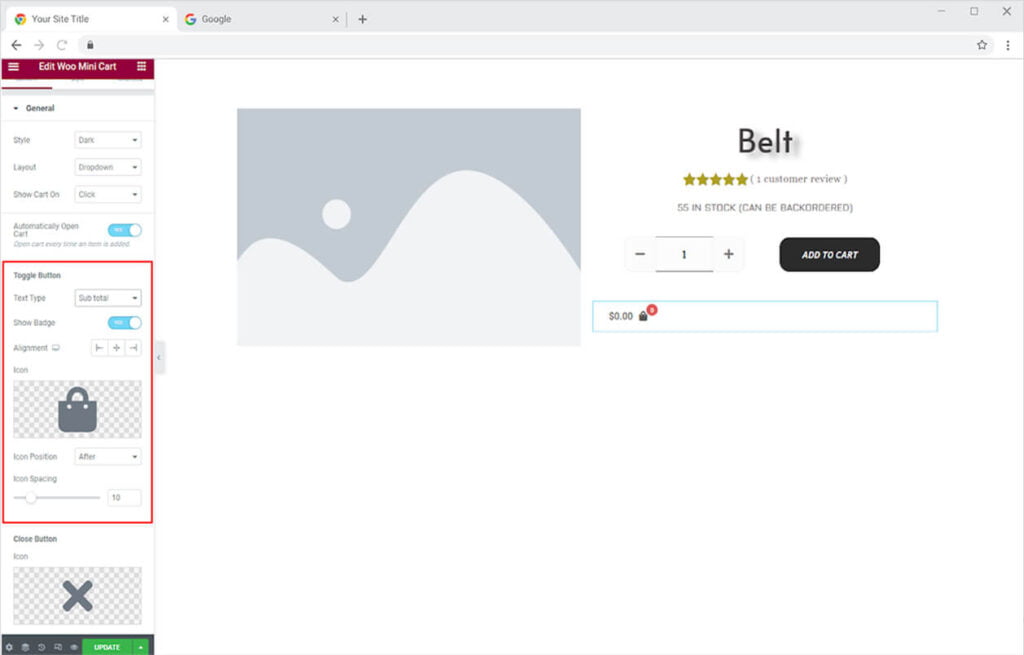
From the Toggle section, you can perform the following customizations for the mini cart button.
Text Type: You have the option to display a subtotal of the purchase made by a customer, a custom text, or nothing at all.
Show Badge: This option allows you to present a badge that shows the number of products being purchased.
Alignment: Set the position of the widget to left, right, or center.
Icon: Choose an icon from the icon box which will be presented alongside the text.
Icon Position and Spacing: Set to position icon before or after the text and adjust the space between them.
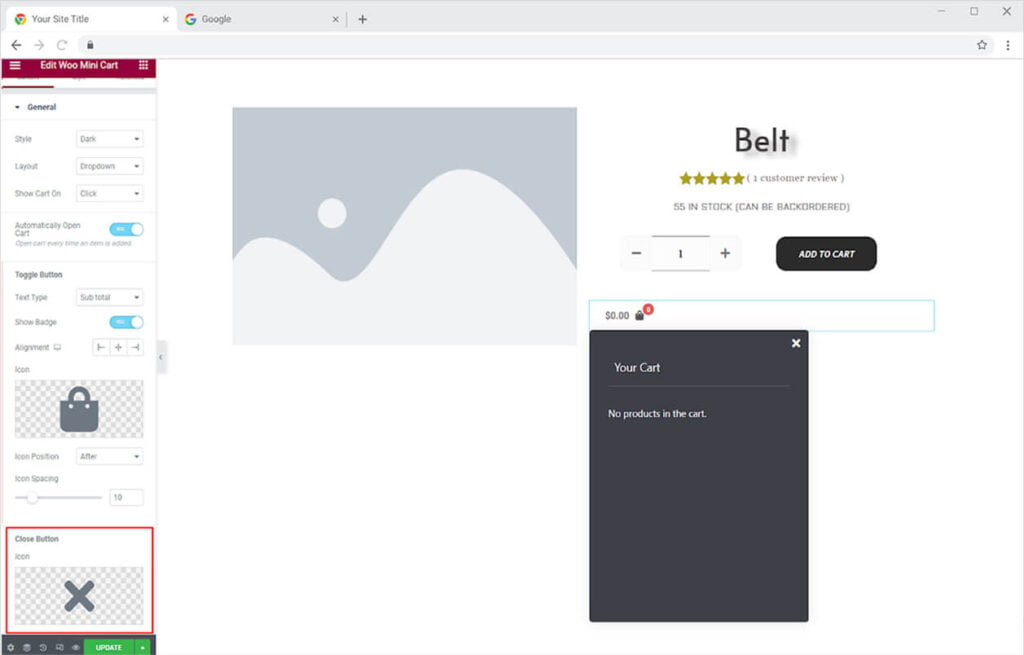
Choose an icon from under the close button section to close the mini cart menu.
How to Style Xpro Woo Mini Cart Widget
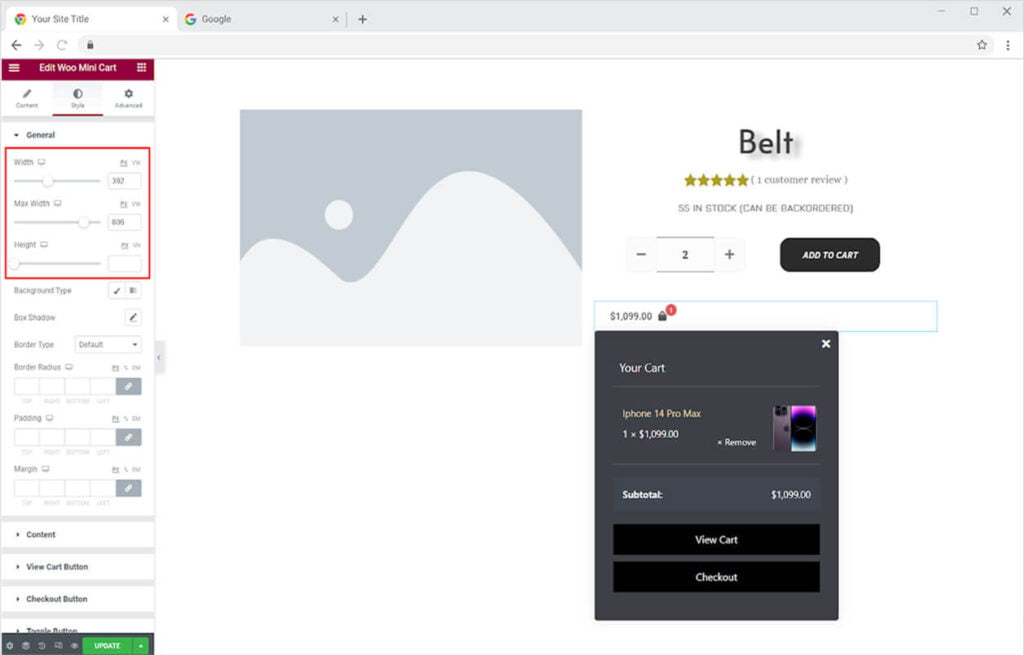
Start the styling process by managing the size of the mini cart display from the width, max width, and height options.
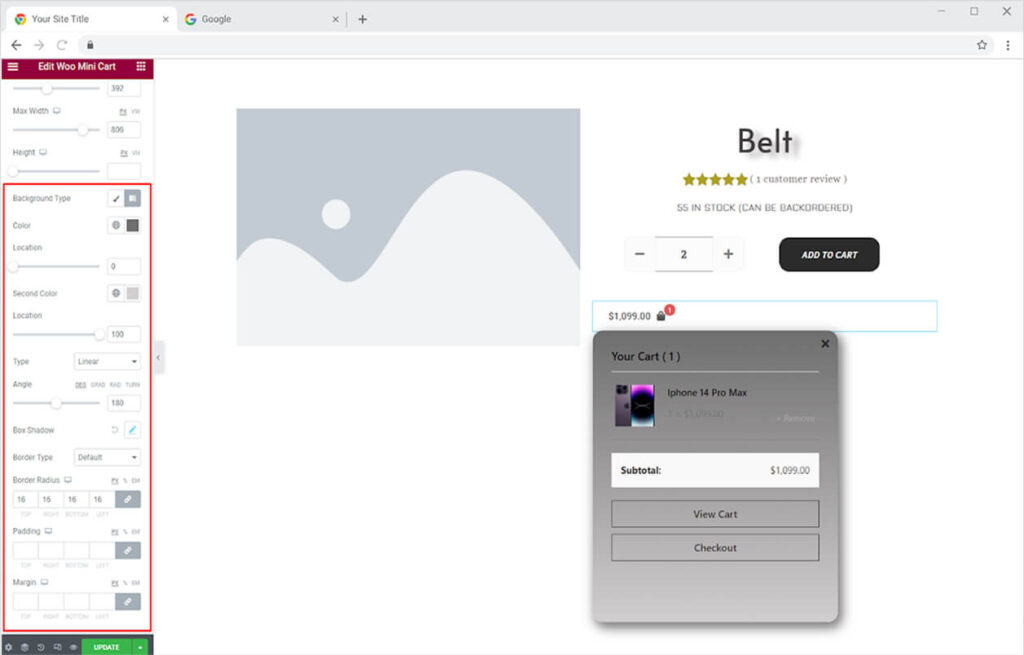
You can add a background to the mini cart by adding an image, classic, or gradient colors. Make a shadow of the mini cart by shadow box and adjust the shadow position. You can also make a border by selecting a border type between solid, double, dashed, dotted, and groove.
How to Style the Content in Woo Mini Cart Widget
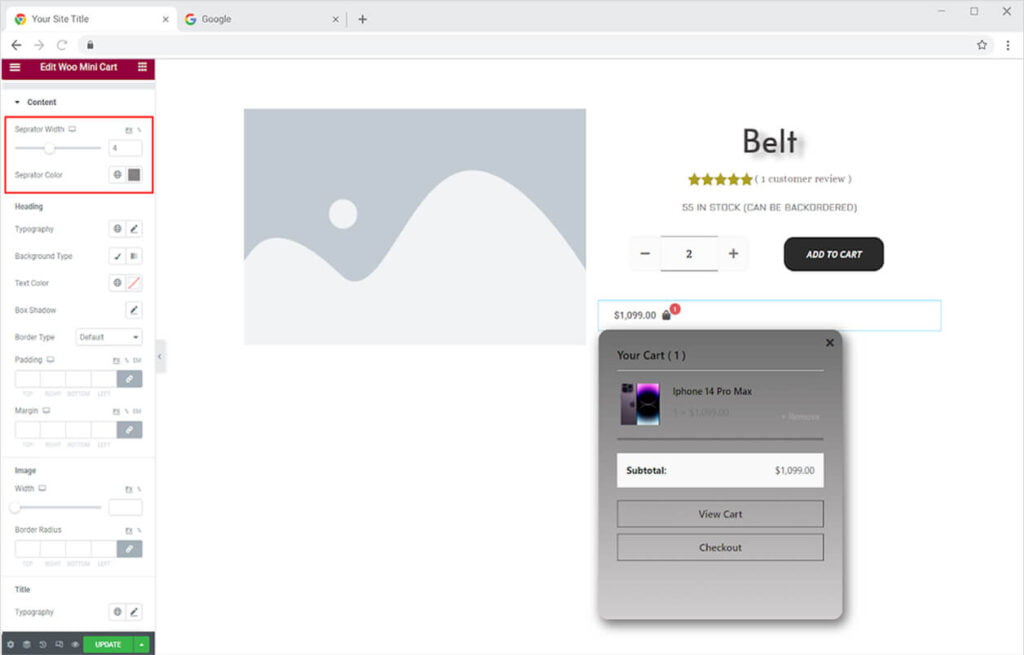
Customize the content with the box from the content section. Adjust the separator line width which separates the above part from the lower part and also color it as well.
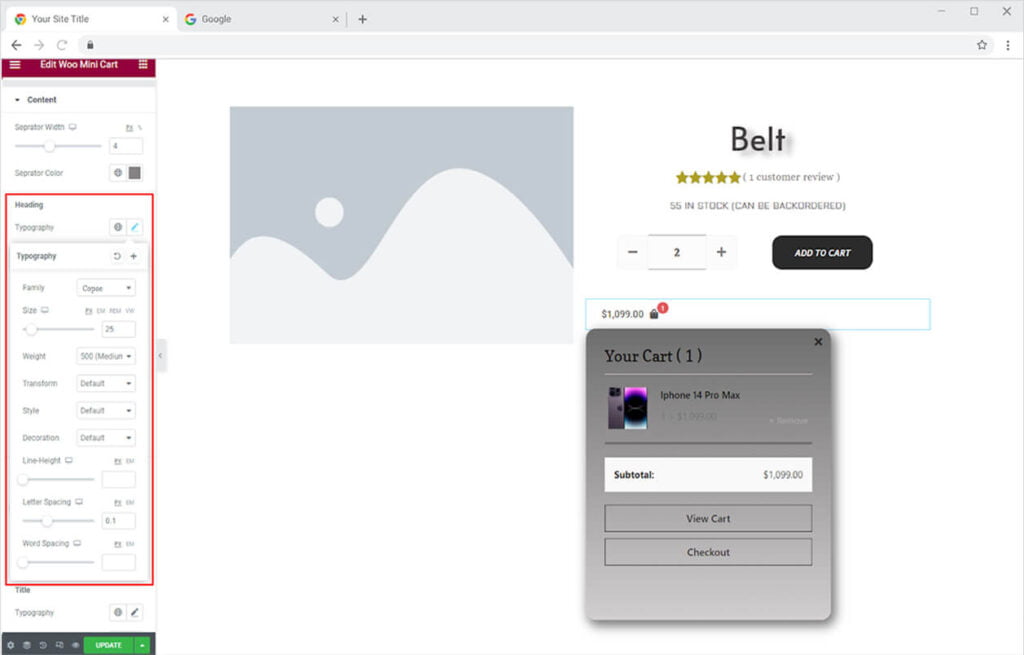
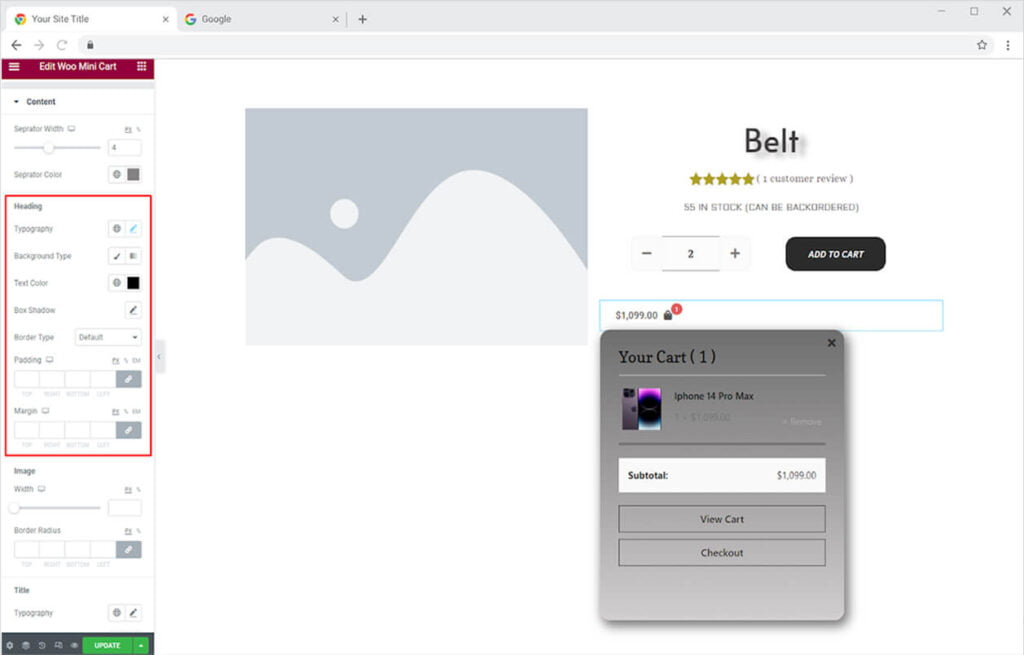
Personalize the text in the heading by changing its font, size, weight, letter spacing, word spacing, and much more.
Color the text and you may add a background to the heading by selecting a background color. Further, you can add a shadow and make a border around the heading.
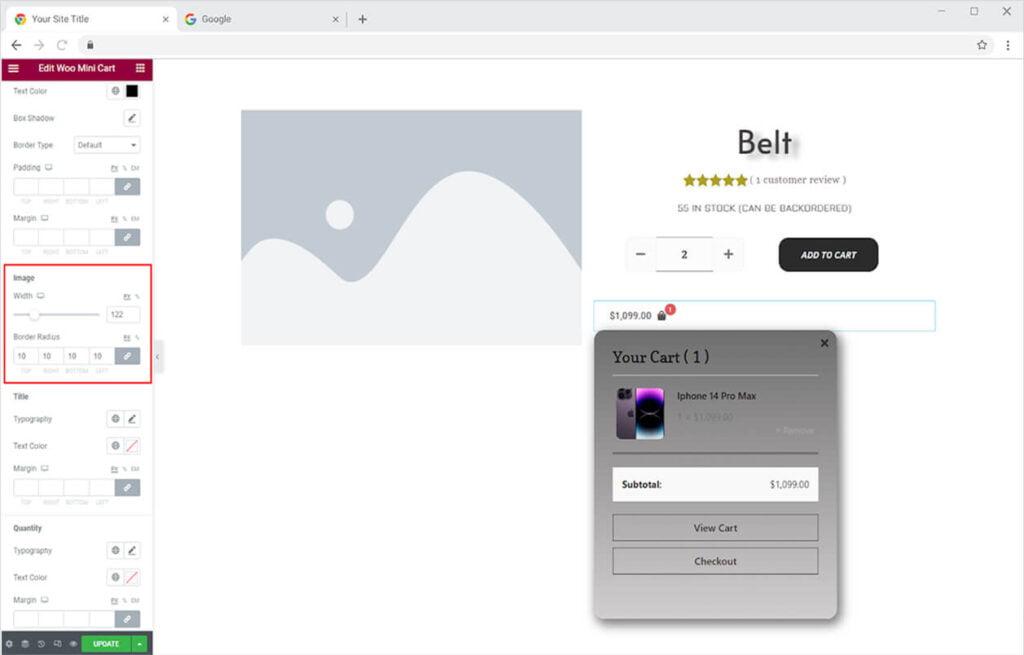
Adjust the image size by managing its width and radius.
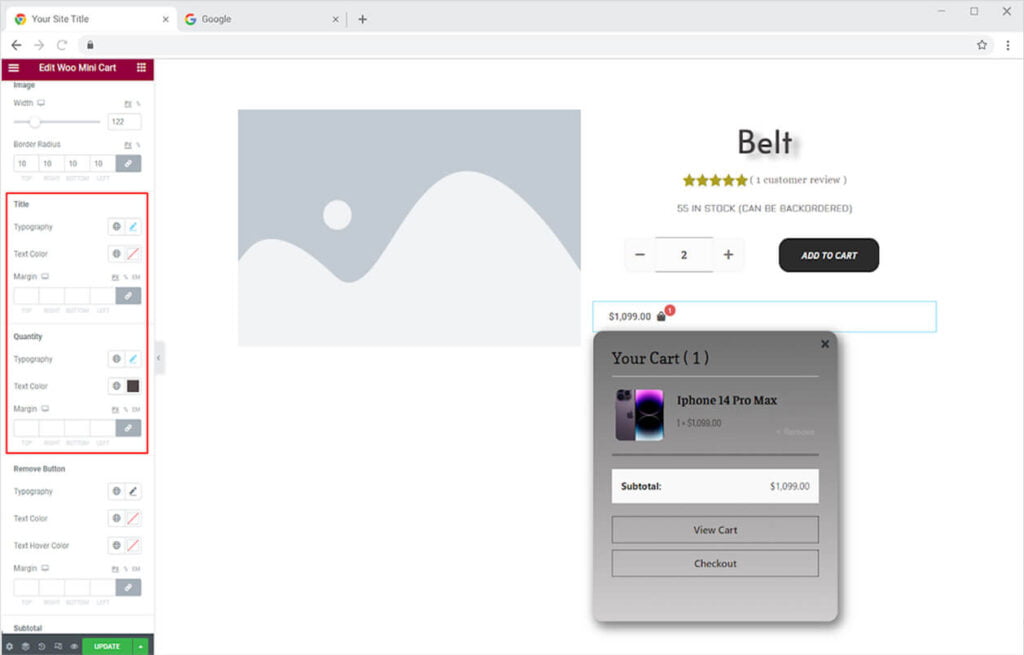
Personalize the text of the title and quantity by styling its typography, coloring the text, and adjusting the margin.
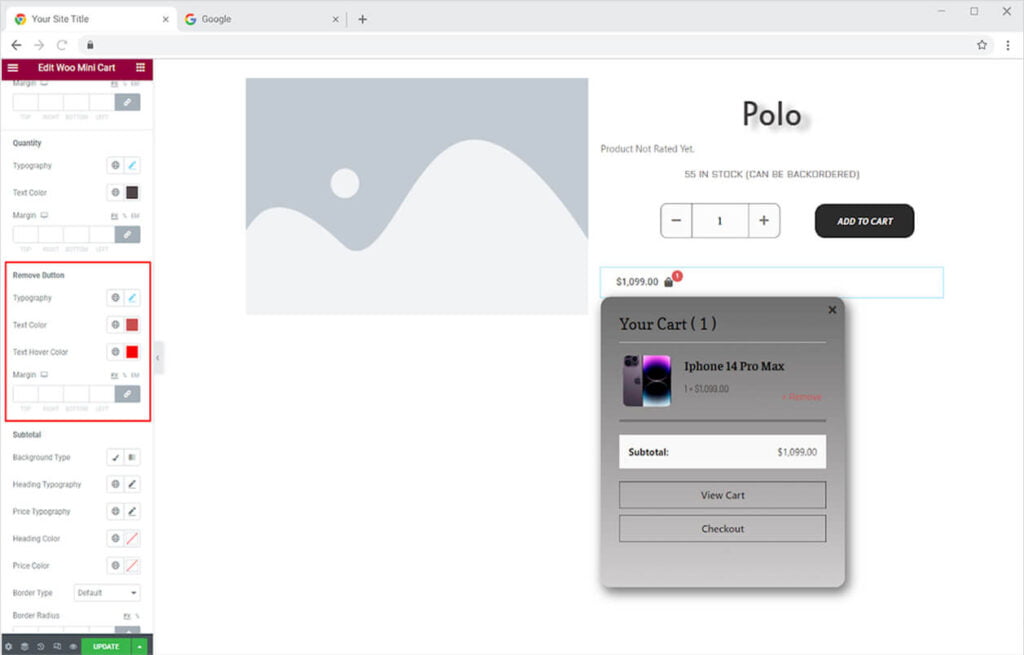
Customize the Remove button in the mini Cart display which allows customers to cancel an order while shopping. Personalize the typography of text as well as the color and hover color.
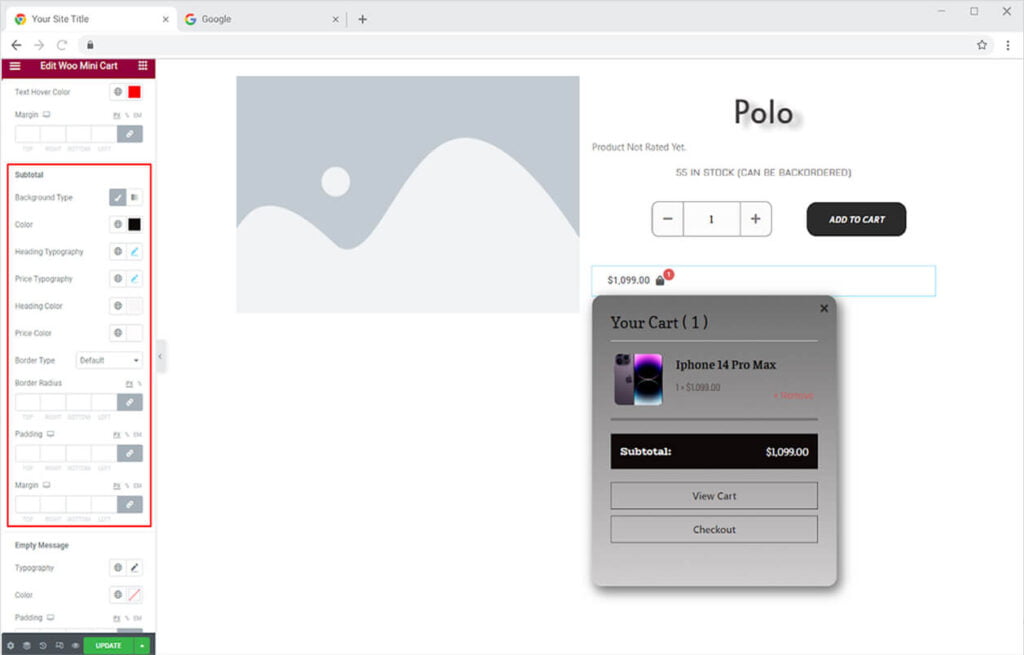
Design the section that represents the sub-total amount of payment for the product added to the cart by the customers. Color the background as well as the heading and price. Personalize the typography of the heading and price. Make a border to the box if you desire and adjust its width, radius, and color.
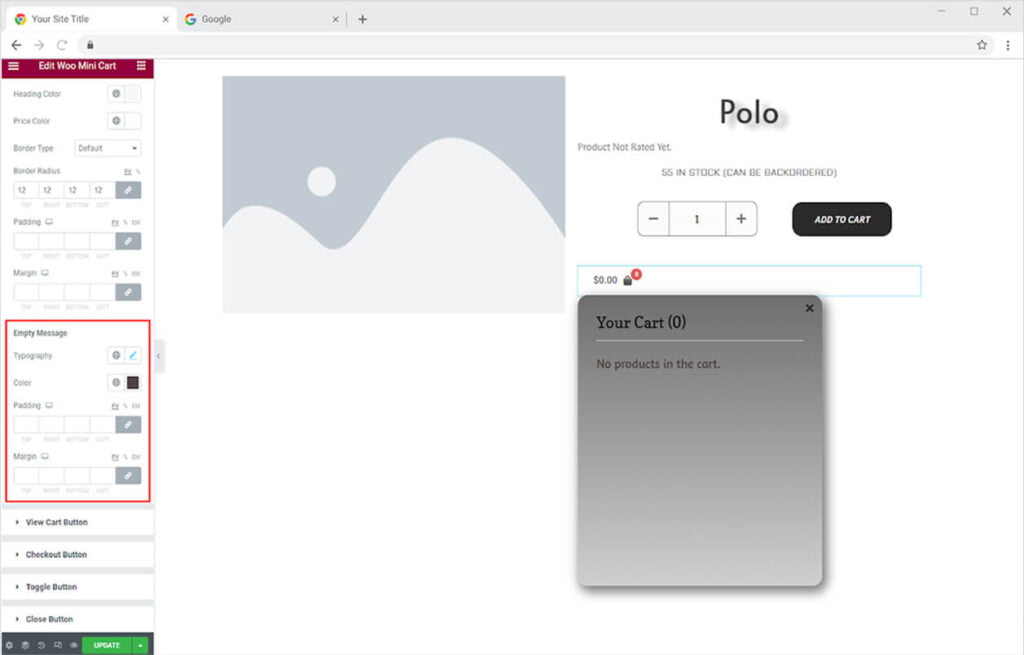
If the customer does not have anything put in the cart then display him the empty message instead of showing a blank box. Customize the display of empty messages by styling typography, color, padding, and margin.
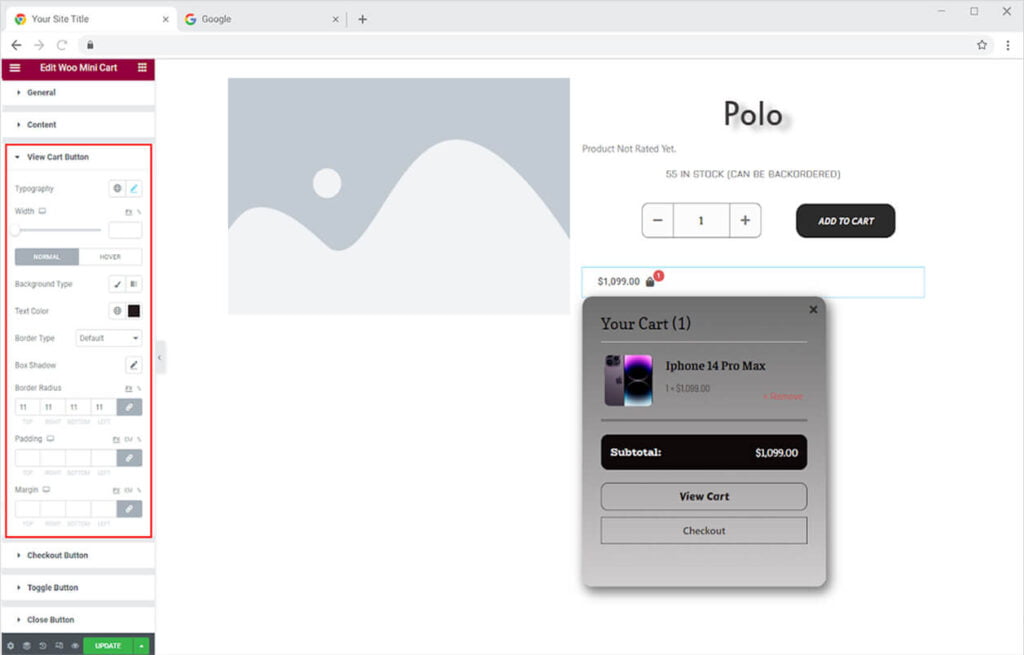
Moving down, you can view a button for the view cart. Customize the text in the button with typography and text color. Further, adjust the width of the button. You can add background and text color for normal and hover states. In addition, you may add a border to the button and adjust its appearance.
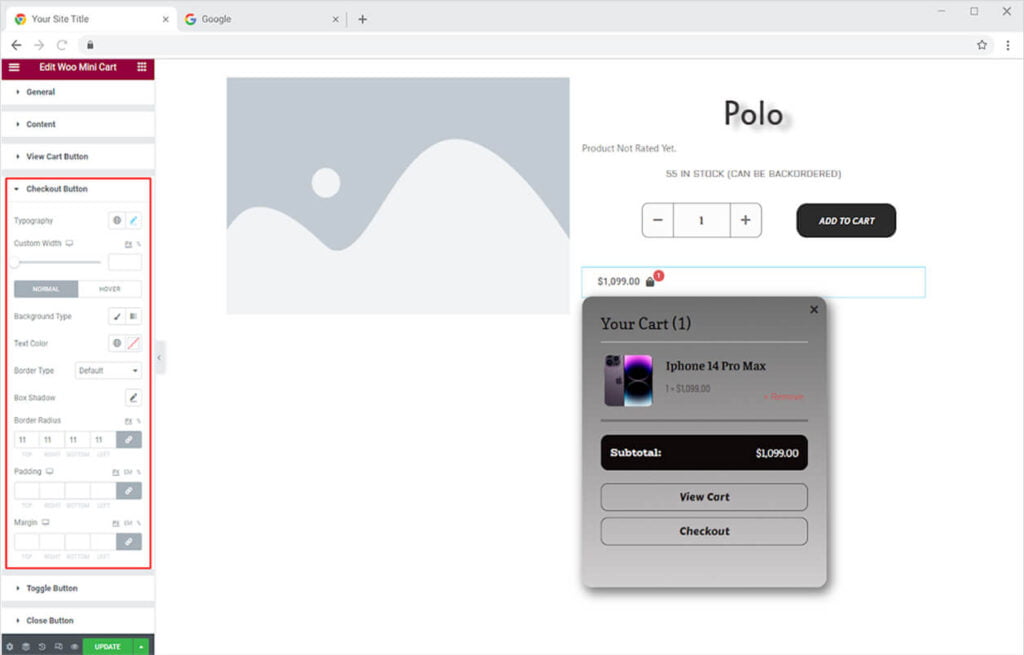
Customize the display of the Checkout button in the same way that you did for the View Cart button. You are provided with the same options for styling as in the View Cart button.
How to Style Toggle Button in Xpro Woo Mini Cart Widget
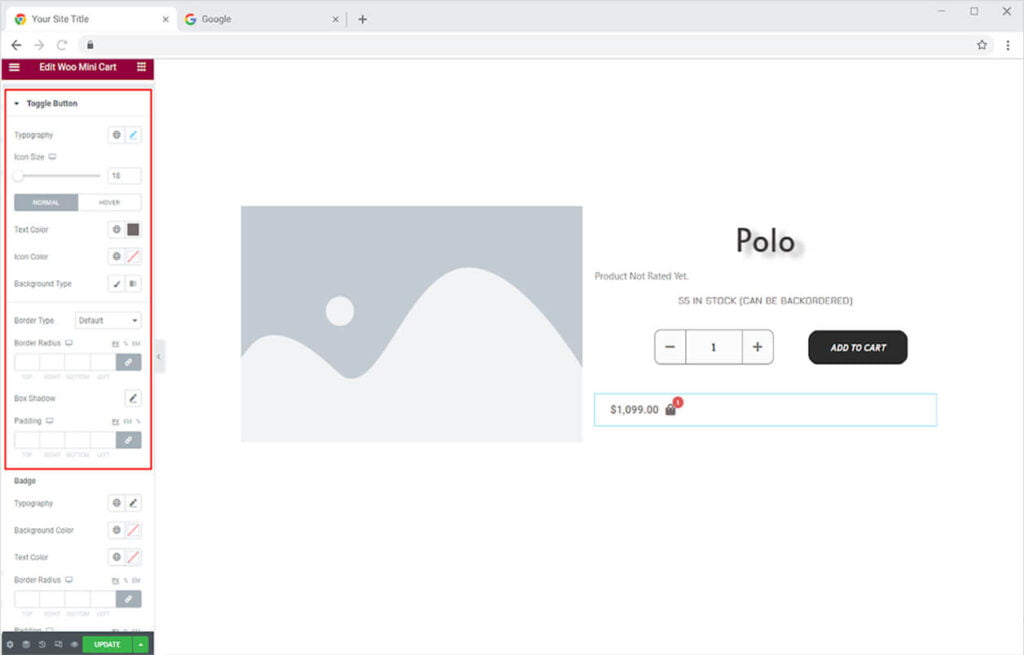
Open the menu for the Toggle button to customize its appearance by changing its typography and icon size. Color the text and icon. Make a background by adding classic or gradient colors. You can color text, icons, and backgrounds for normal and hover displays. Furthermore, you may add a border to the toggle button by selecting a border type.
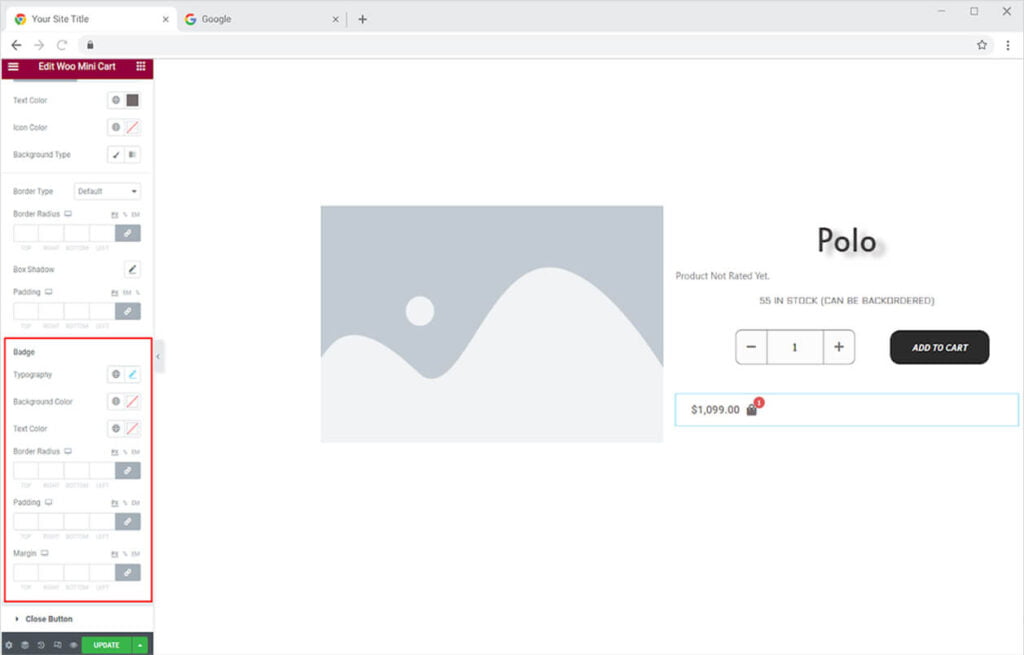
If you enable the option to show a badge in the widget then you can customize its appearance as well. Personalize the typography of the number in the text as well as its color and the background color. Adjust the background radius, padding, and margin.
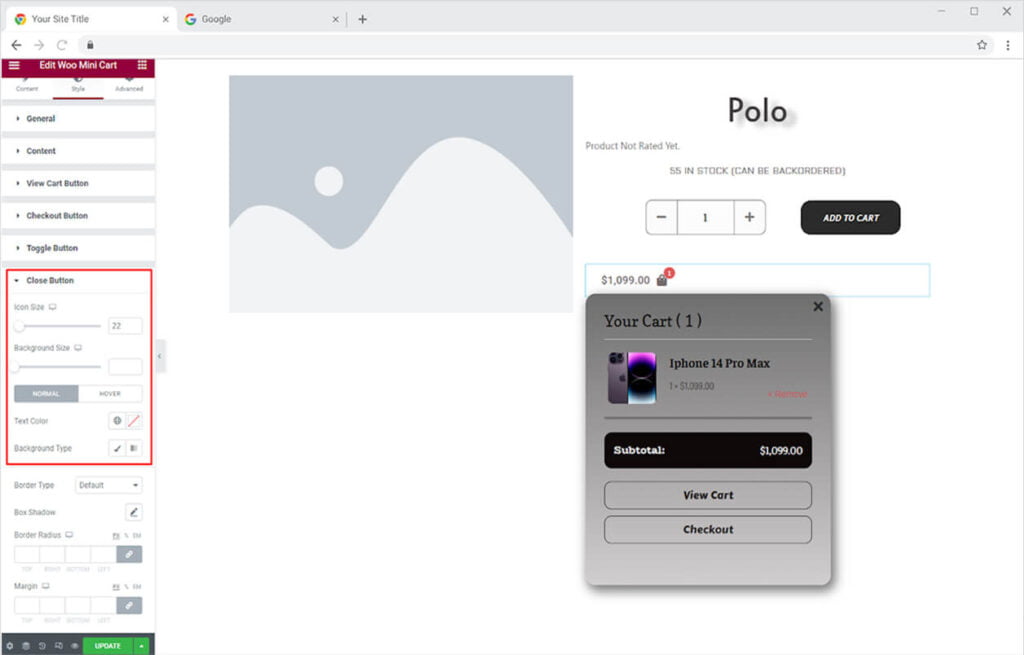
The last menu in the styling section allows you to style the close button that will help customers to close the mini cart box and continue their shopping. Customize the close button layout by managing the size of its icon and background. You can add a background by adding a color from below. Color the icon and background for their normal and hover display.
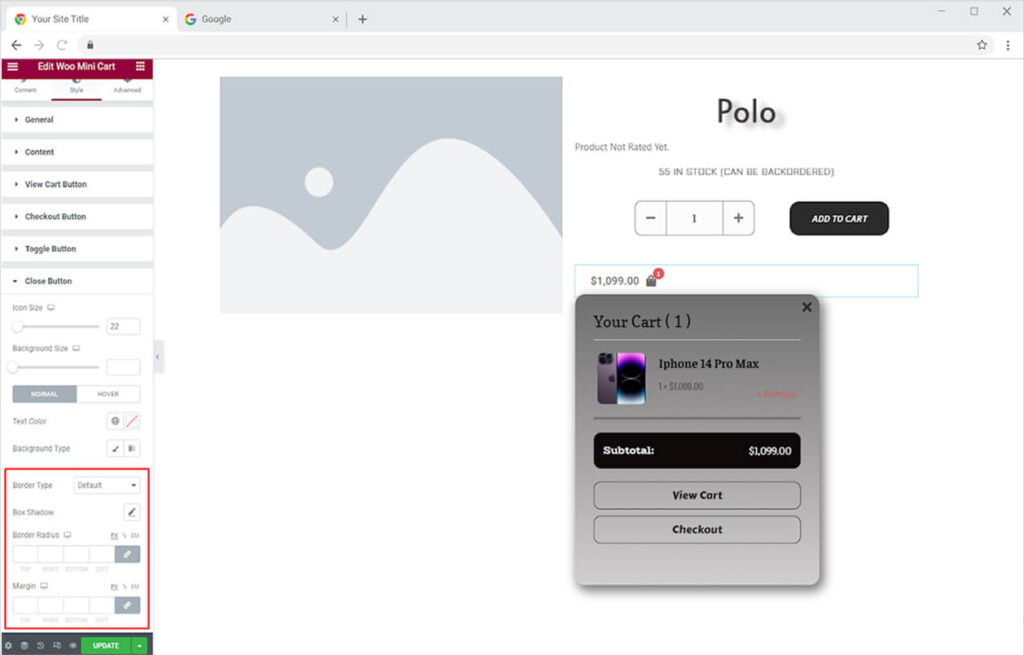
In further editing, you can make a border to the close button by selecting a border type. Adjust the border width, radius, and margin. You may add a shadow to this from the shadow box.
Best Woo Mini Cart widget for Elementor
We hope you fully understand the functionality and complexity of this Xpro widget. Utilize this WooCommerce widget to create an appealing product layout. Moreover, if you want to add more amazing and trending features to your websites. See the list of the best Pro Elementor Widgets by Xpro.
Xpro Elementor Addons offer a wide range of widgets, theme templates, and features that help you develop an attractive site. Xpro Elementor Theme Builder can help you easily create a theme page. Check our 50+ free Elementor Addons which are enough to create a professional WordPress website. If you want to explore and add more attractive Elementor widgets then check our complete list of Pro Elementor widgets and download our Pro Elementor addons right now.