Xpro mailchimp form for elementor
Integrating mailchimp subscription forms on your elementor website is a piece of cake with the Xpro mailchimp widget. Manage your audience and give a boost to your email marketing services with this widget. This widget has come up with the latest label and field styling to put text in a more diversified way. Moreover, you can align typography and give color to the button to pop-up your form.
Besides, everyone wants more number of subscription to their newsletter, right? Xpro mailchimp widget is specially developed to design their mailchimp form with limitless customization. It helps users to manage their marketing plan with all clients, customers, and other interested parties. You can customize the email label, confirmation screen, first and last name label but make sure not to alter the unique form of third party plugin.
Let’s dig into this documentation to get more benefits from the xpro mailchimp widget by elementor.
Here are a few steps you need to follow in order to style your mailchimp form:
- First, activate Mailchimp
- Set up a Mailchimp account
- Generate and set API key
- Activate Xpro mailchimp
How to activate mailchimp?
You need to have a mailchimp account in order to compose and style mailchimp forms, make an account on MailChimp’s sign-up page. If you already have an account, then proceed with the steps below.
Set up a mailchimp account
Simply follow this page to know how you can create a mailchimp account.
Generate and set API key
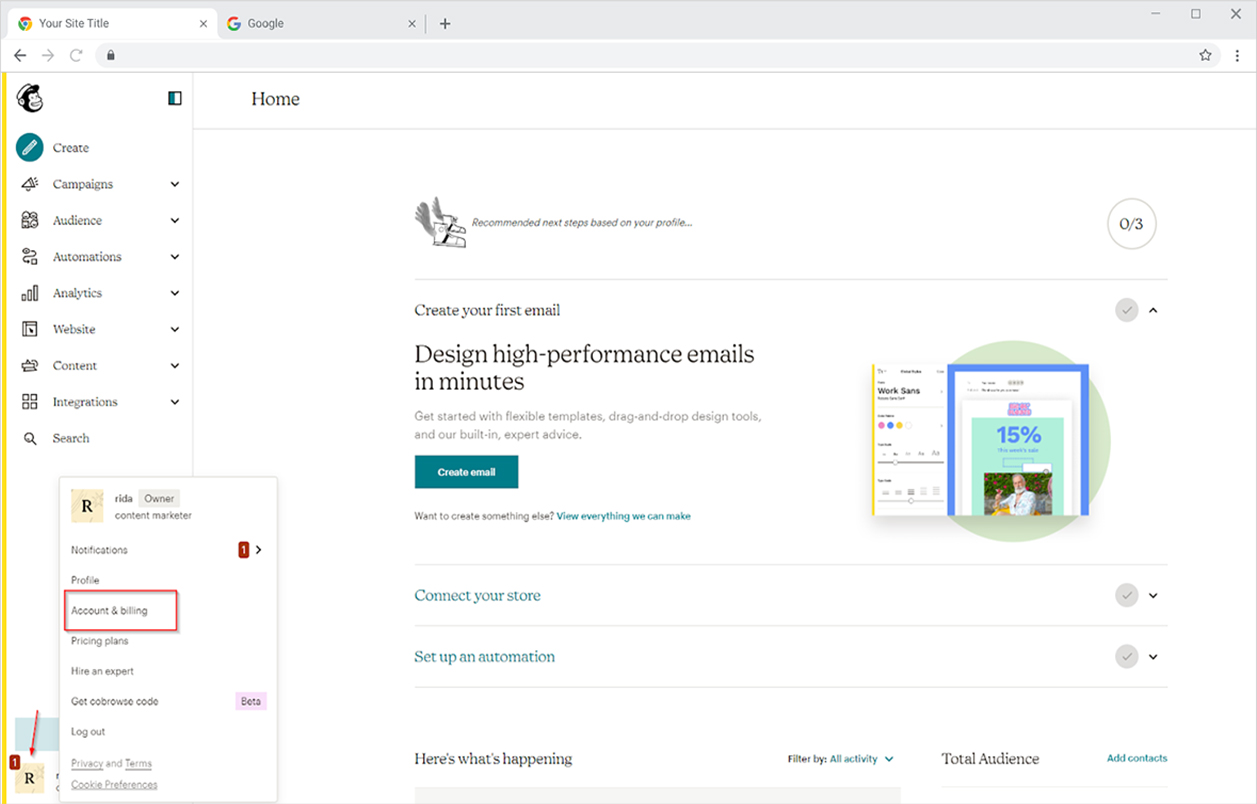
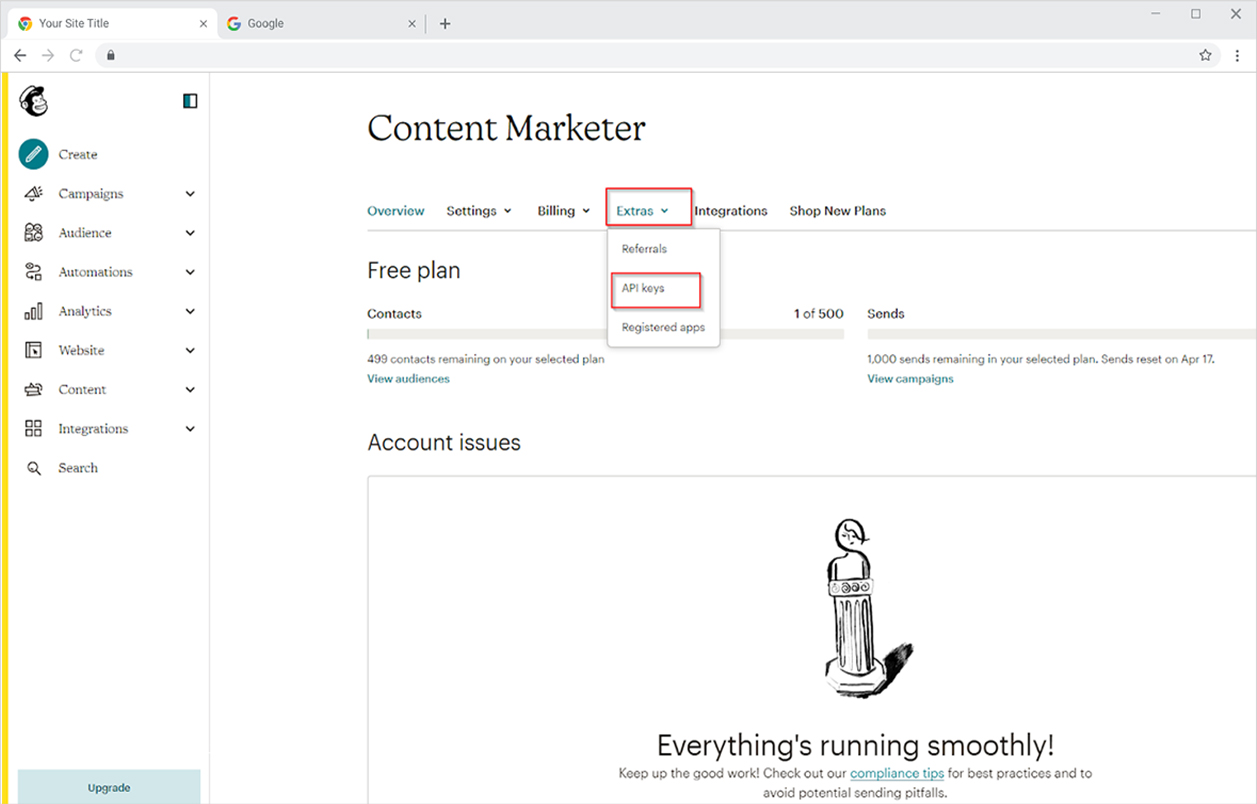
Once you signed up for your account, log in to your mailchimp account and go to the ‘account and billing’ and click on the extra menu section to choose the API key option.
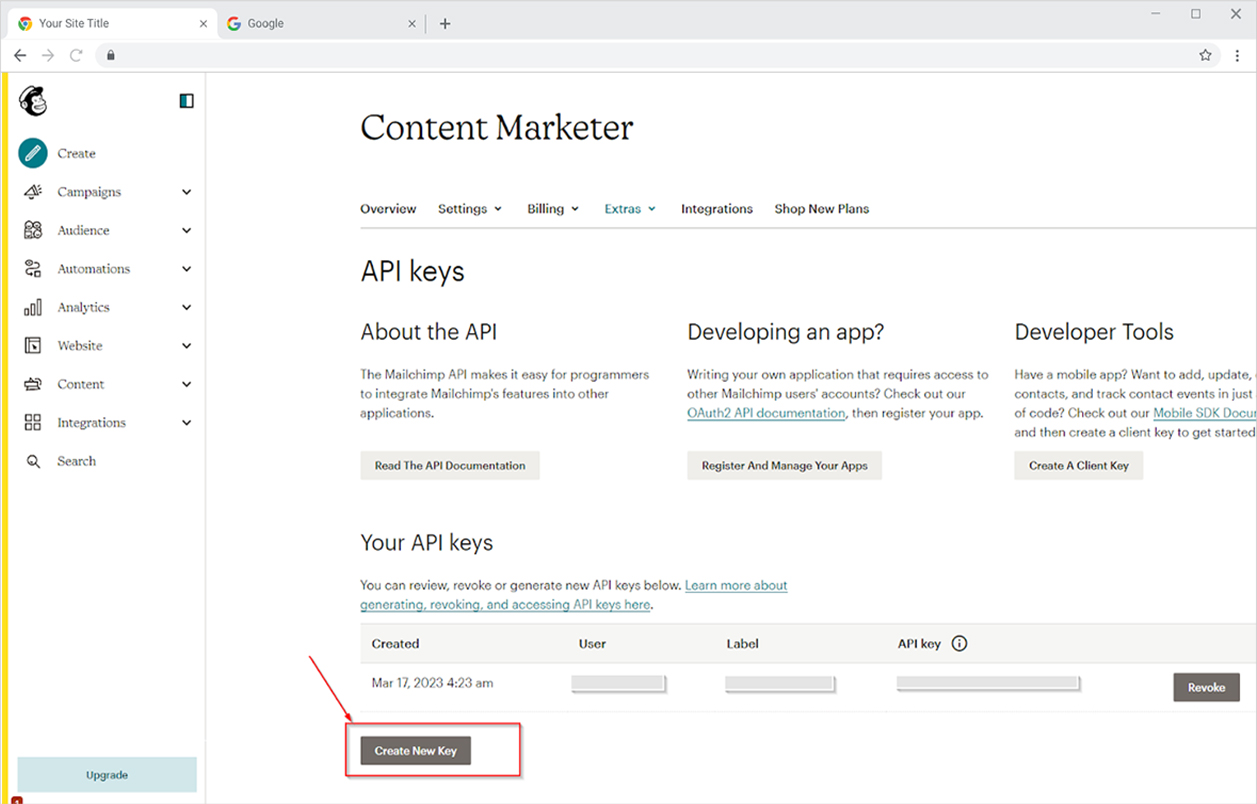
API page of your account will open up, under “Your API keys” section, click on “Create A Key” to generate your API key.
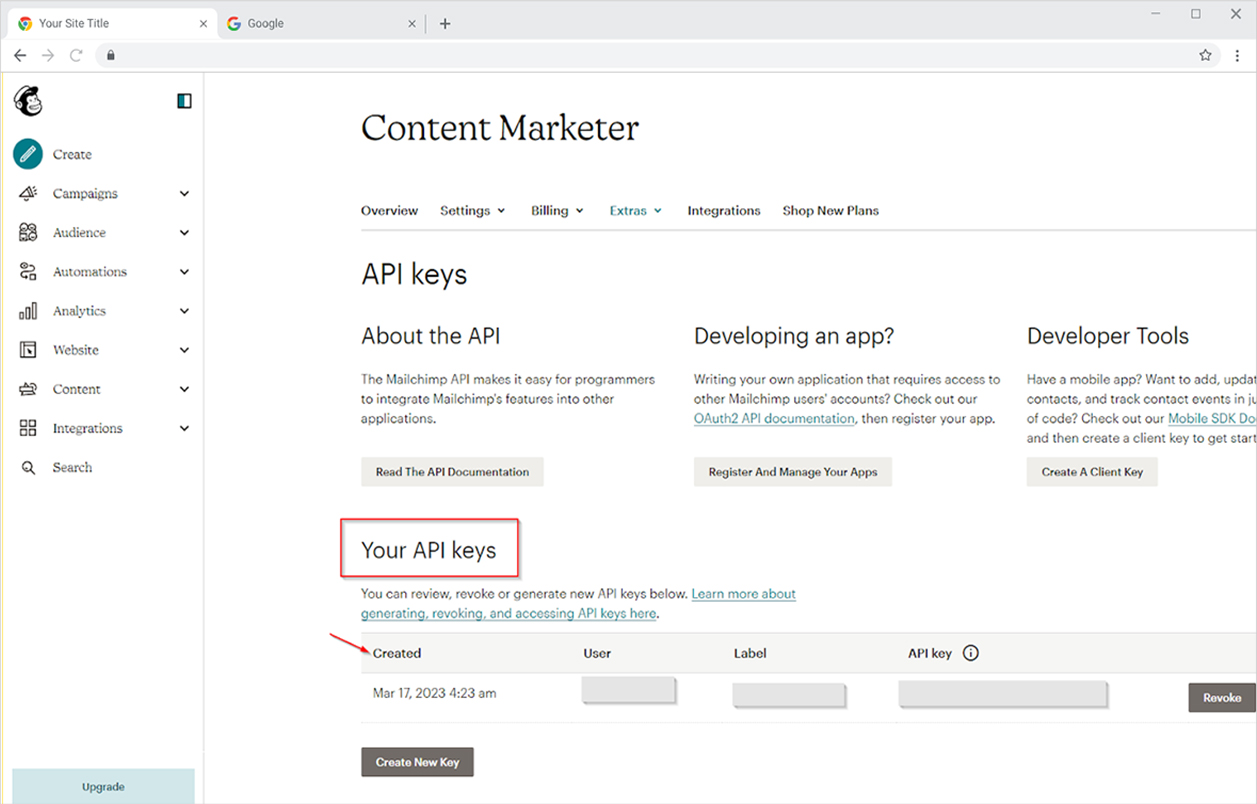
You can view your newly generated API key under “Your API key” section.
Install and activate the Mailchimp plugin
Head over to the wordpress dashboard to install and activate the mailchimp plugin. Once you complete this step, you need to set the key inside the mailchimp settings.
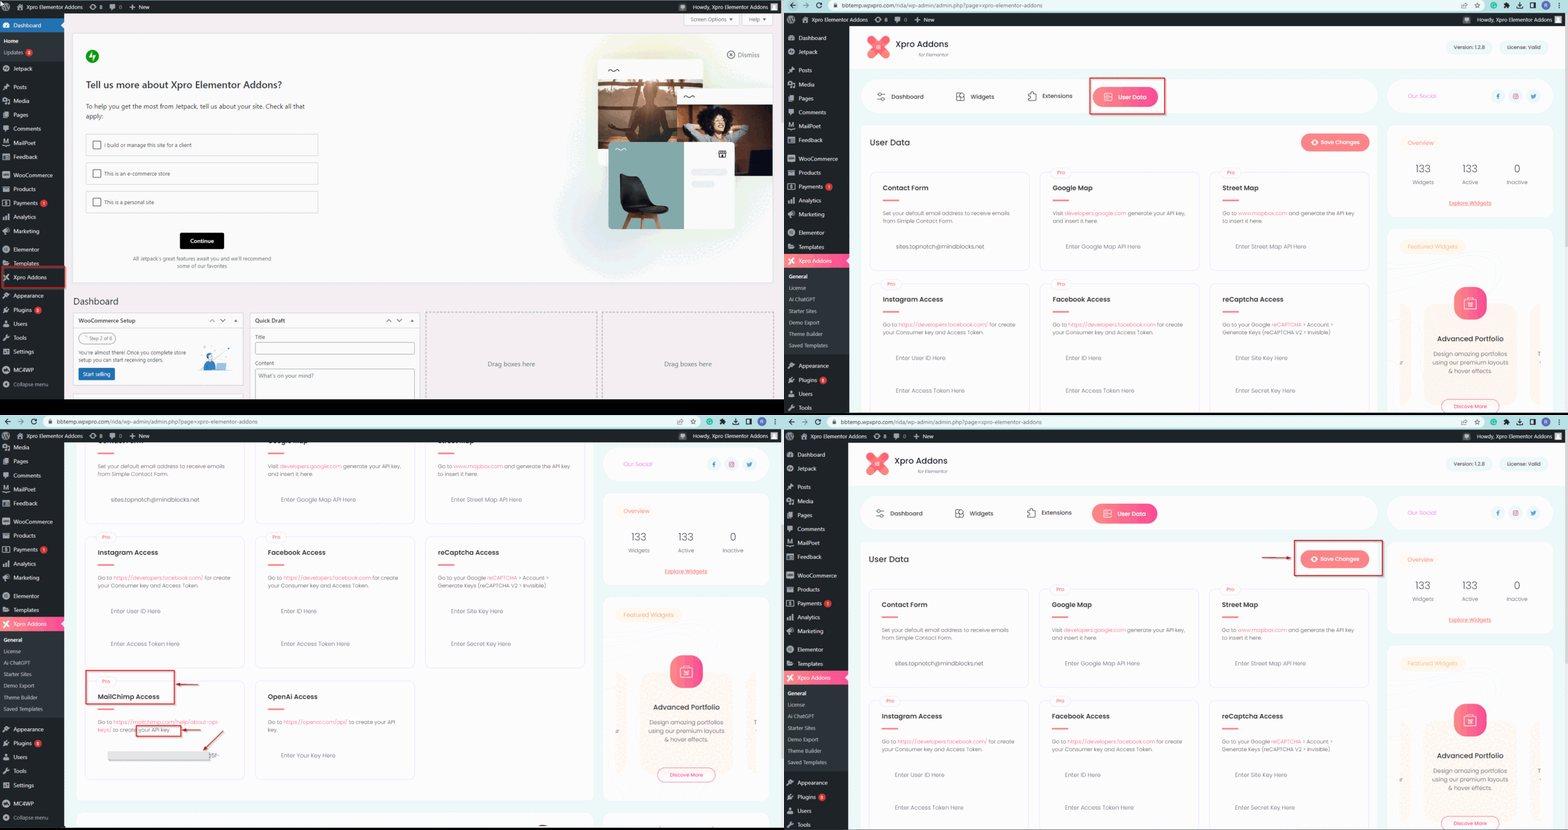
To set your API Key, go to the wordpress dashboard > Xpro addons > User data. In the ‘Mailchimp access section’, set the key to “Enter your key here” and click to ‘save changes”.
How to enable the Mailchimp widget for Elementor
You need to install and activate the free version of Xpro Elementor Addons. If you already have the plugin installed, just make sure the Mailchimp form Widget is ‘Enabled’ from the Xpro Elementor Addons dashboard, so you can find it in the Elementor editor.
To enable the widget, simply follow these steps:
Step 1
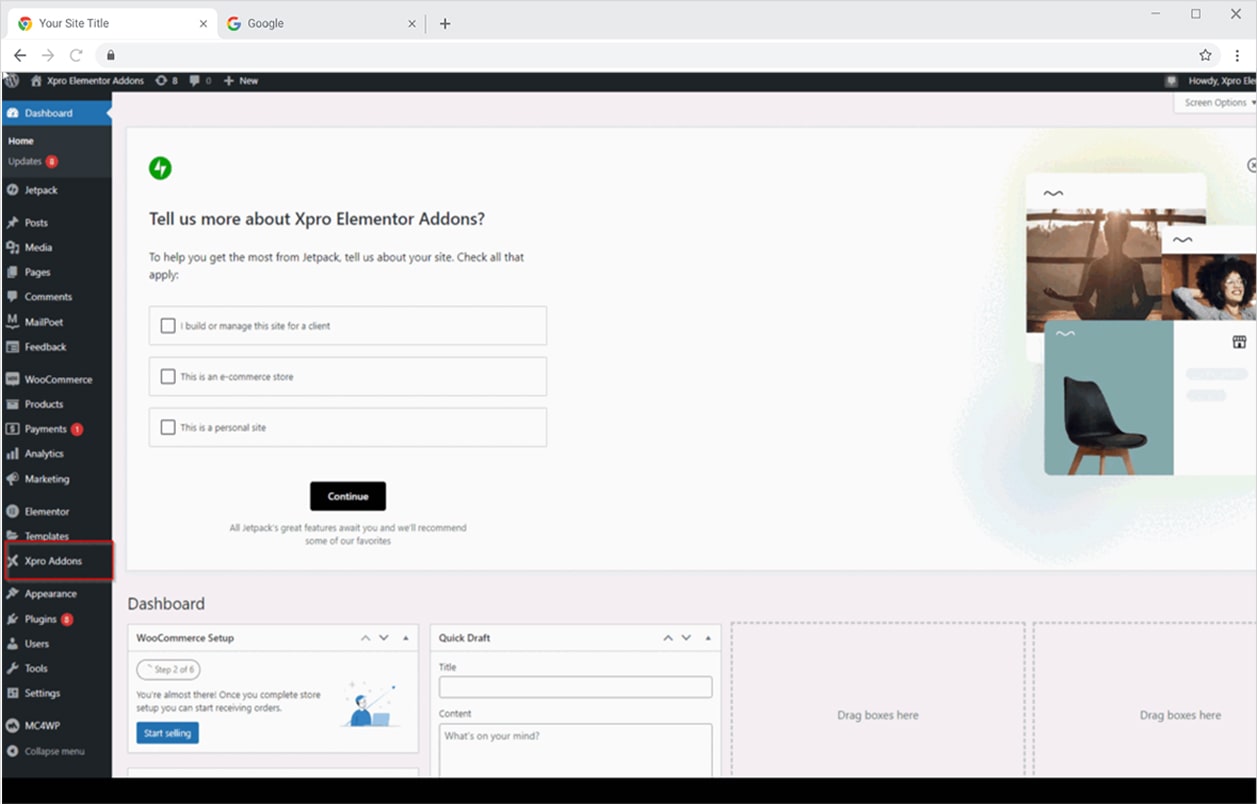
Click on the Xpro Addons option available on the WordPress Dashboard Menu.
Step 2
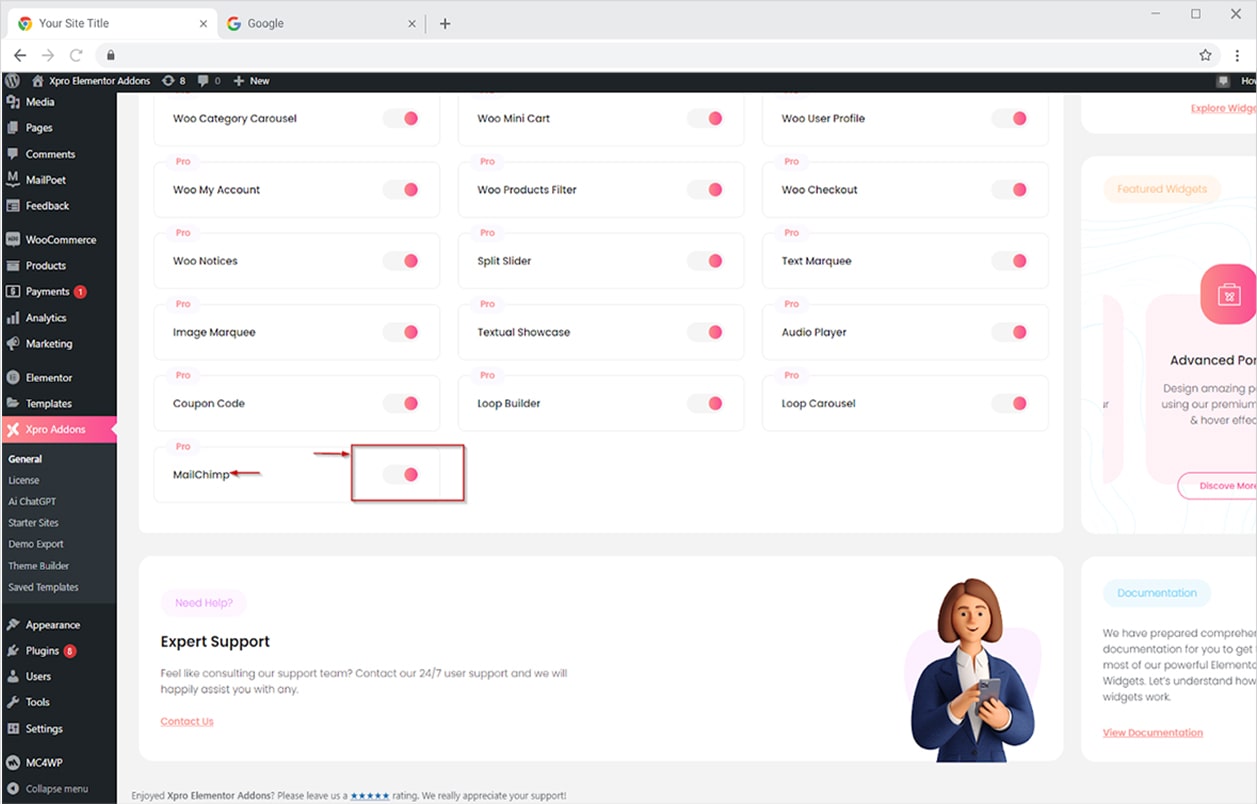
From the Xpro Addons Dashboard, click on the Widgets tab, find the Mailchimp widget, and then toggle the button ‘ON’ to enable it.
How to use Mailchimp form widget for Elementor
Simply drag’n’drop the widget into its final location and then release it. Using the mailchimp widget for elementor has become so easy as it provides dynamic flexibility to edit and style the content. You can use this widget to create good-looking and highly user-friendly forms which directly give 10x growth to any email marketing campaign. This widget allows the styling typography section of each part including label, field, and message which give a nice look to your form. You can change color combinations, add a hover effect, and much more.
Now, let’s jump into the elementor editor and start playing with the settings for styling a high pitch mailchimp form.
Step 1
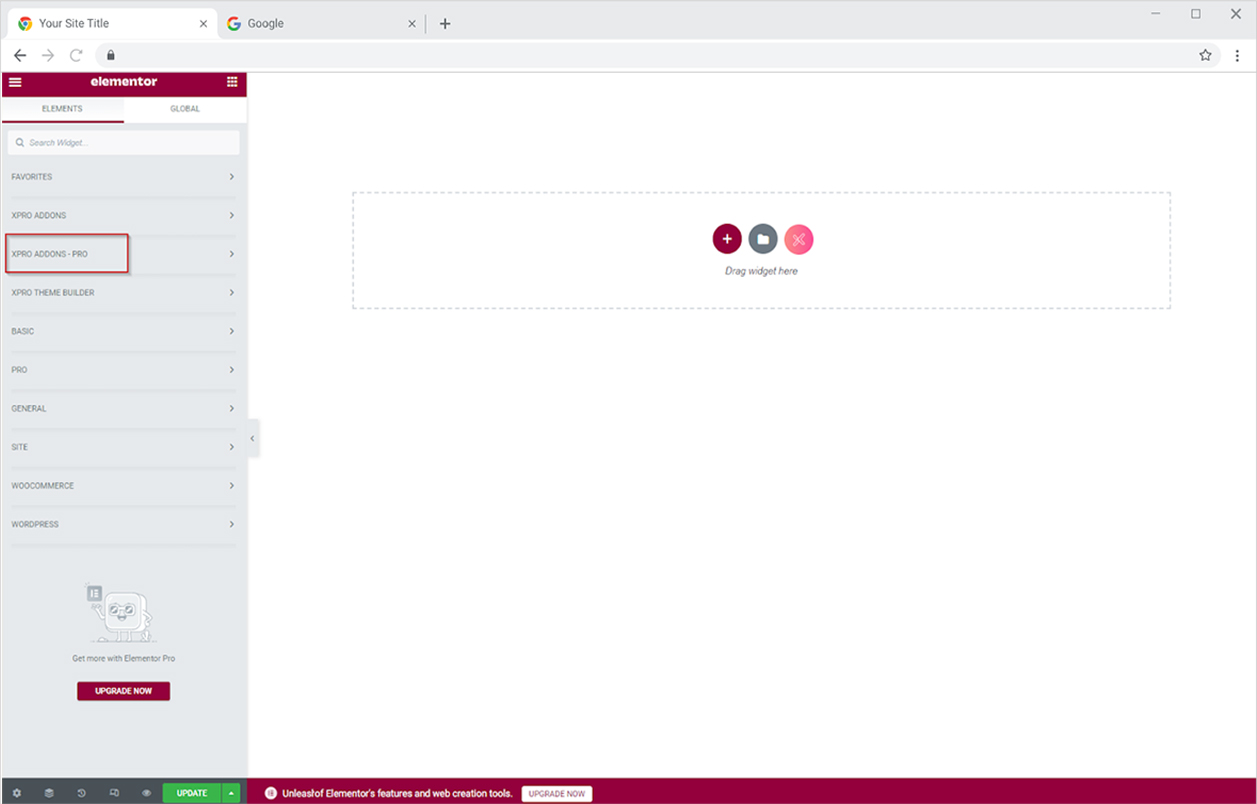
Click on the Xpro Addons section available in the Elementor Editor.
Step 2
From the Xpro Addons section, find the mailchimp widget, and simply drag-drop it to your desired page location.
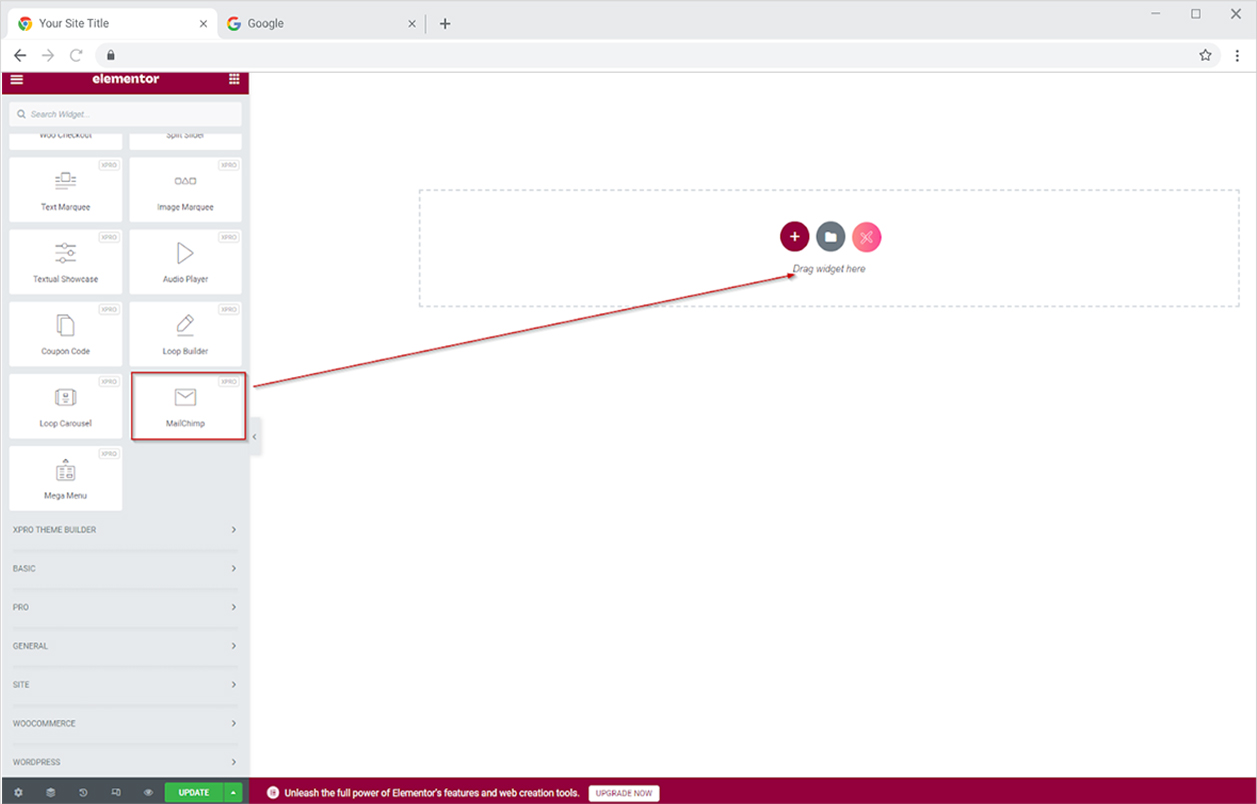
This is the default view of the widget when you drag and drop it into the page
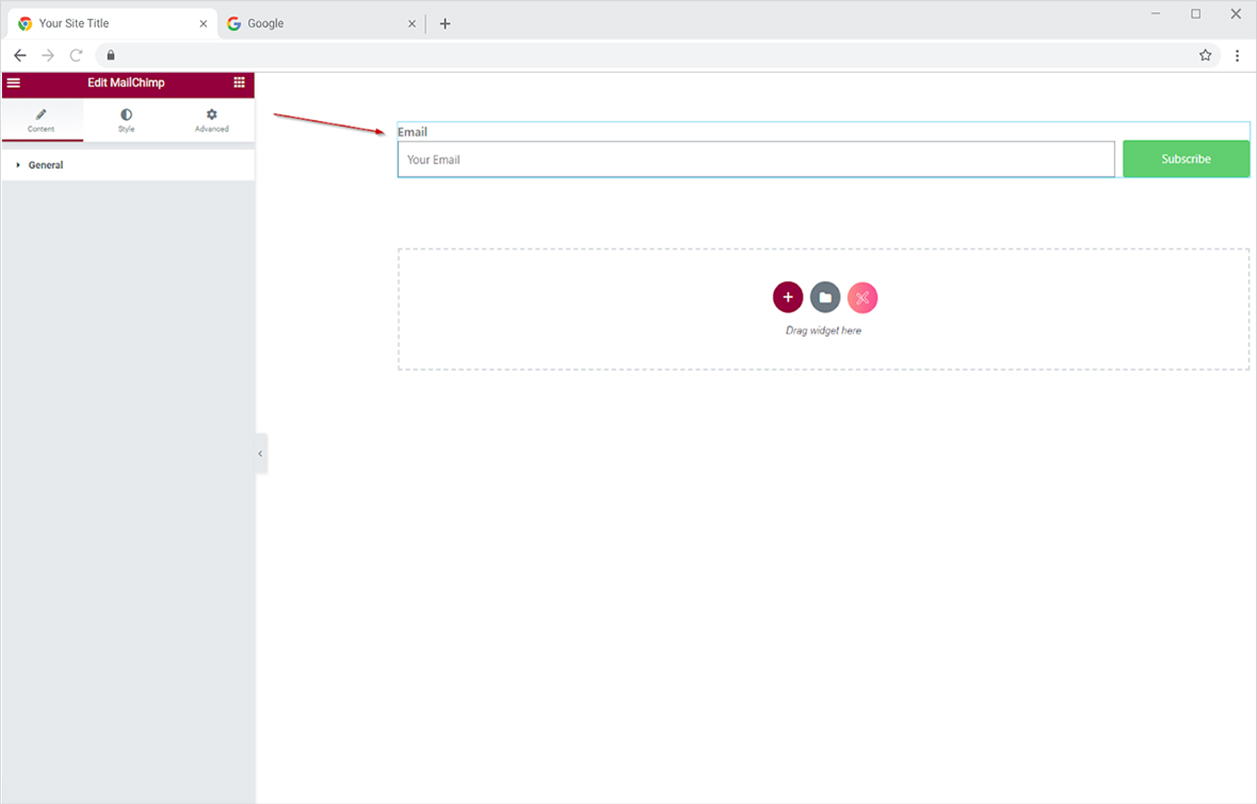
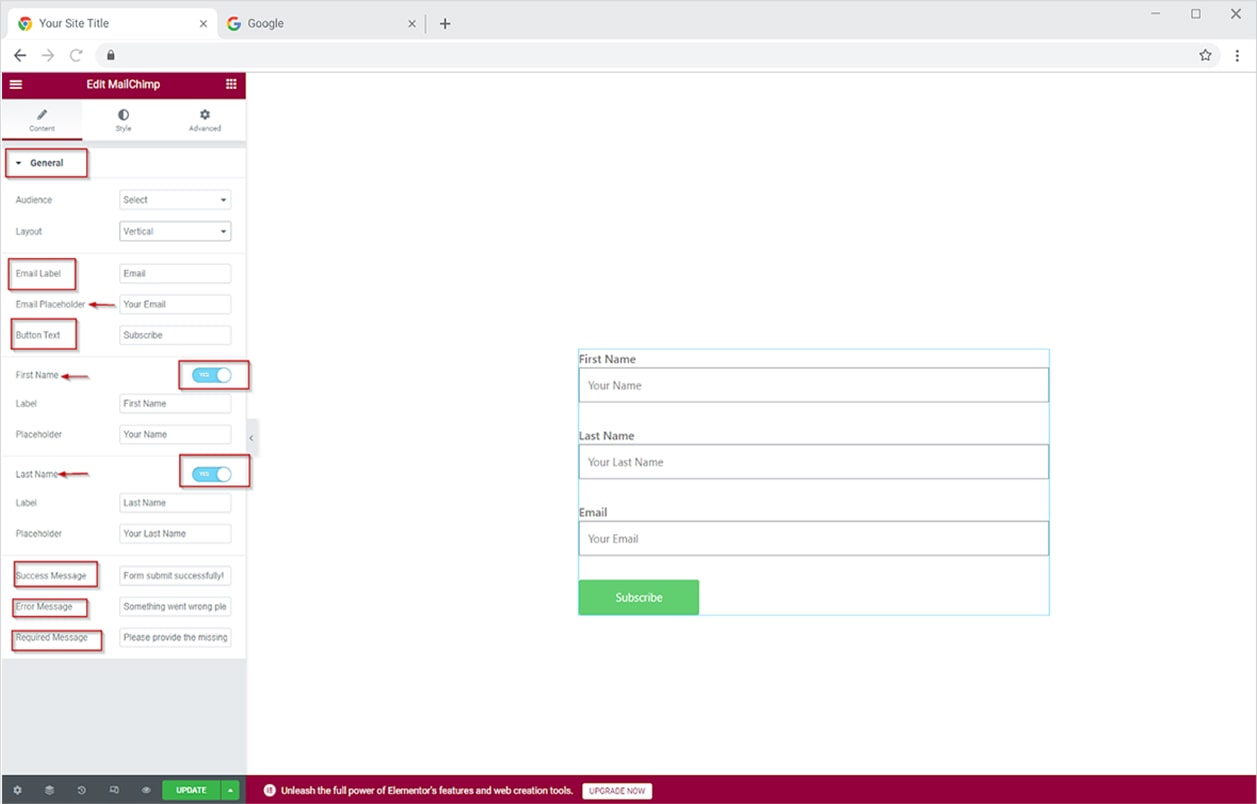
Content section
How to select an audience and change the layout
In the General setting, select the audience (any audience you have created and make a sign-up from). Change the layout horizontally or vertically the way it makes the form suitable for your website.
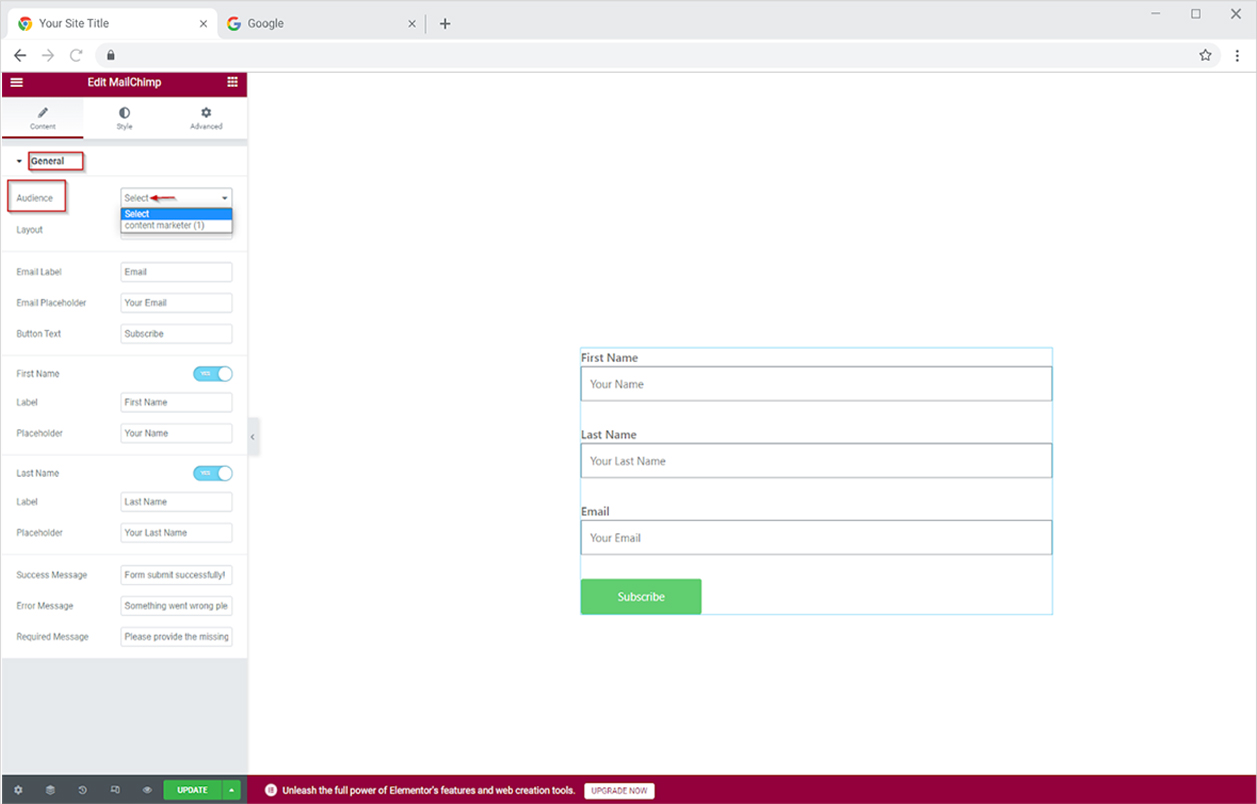
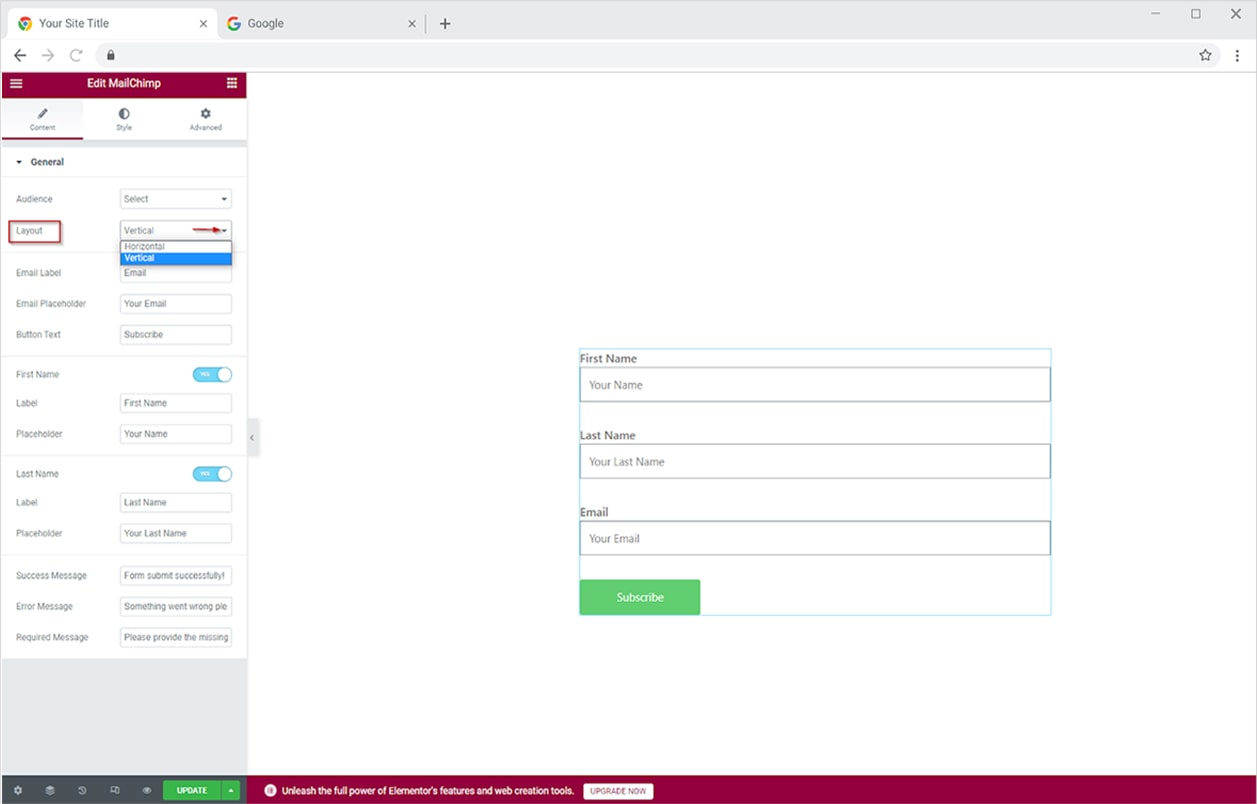
Other General settings
Drop down, select the following settings to make form according to your choice:
- Add or change a new email label.
- Write the email placeholder content.
- Add and change the button text of your choice.
You can also toggle the button “NO” of first name and last name labels if you don’t want to show it.
- Add the first name label and placeholder text.
- Add the last name label and placeholder text.
Edit the following messages of your choice at the end of the form:
- Success message
- Error message
- Required message
How to style mailchimp form with Xpro mailchimp widget for elementor
Xpro mailchimp widget provides a diversified styling option that allows you to style each element of form as per your choice. You can add a hover effect on the subscription button, customize each section’s typography, play with background color, and much more.
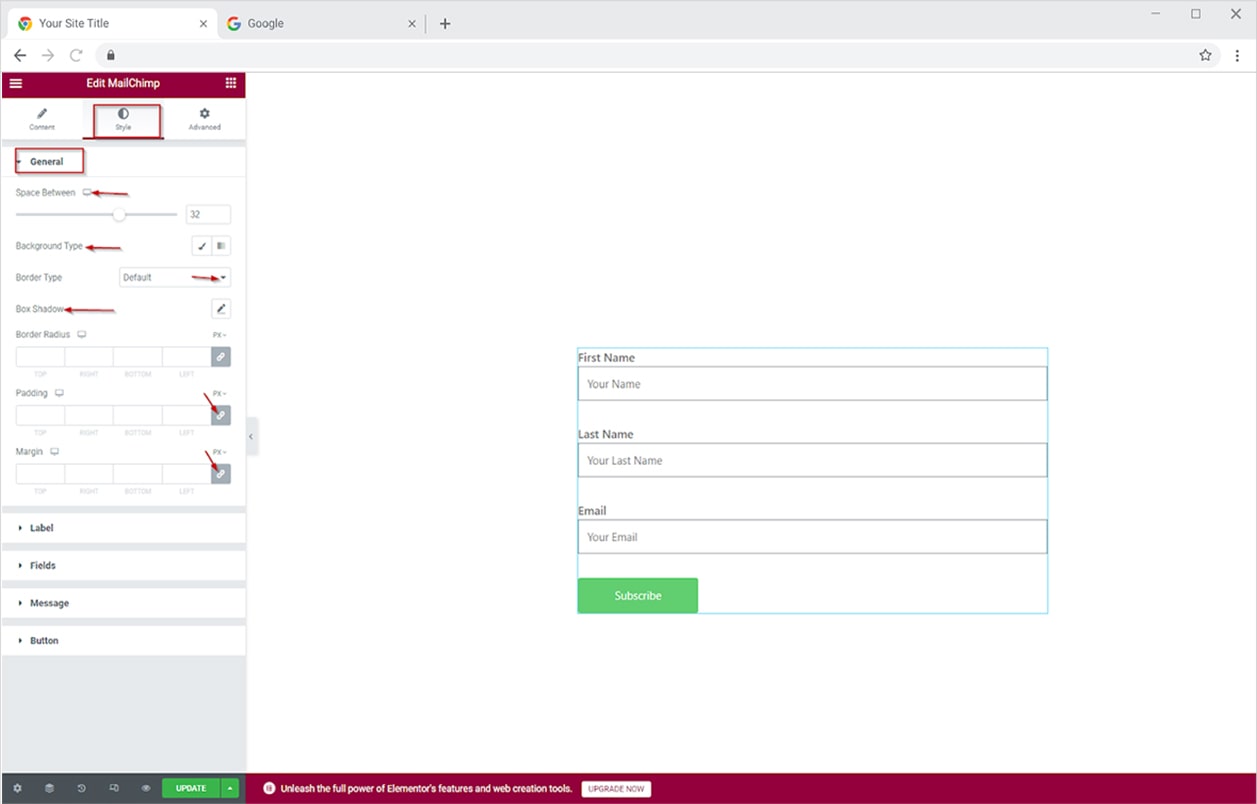
General styles
Space between: Adjust the space between form fields to make it look good to your website design.
Background color: Select between ‘classic’ and ‘gradient’ to add the color of your choice to the background.
Border type: Choose between five types of the border (solid, double, dotted, dashed, and groove) to give a perfect shape to form.
Box shadow: Choose the position ‘outline’ or ‘inset’. Give the desired color and fix it in a horizontal, vertical, blurred, or spread setup.
Border radius: Adjust the radius of the corner of any element. Add a rounded corner or give any shape as per your choice.
Padding and margin: Customize the inner space and surrounding space of an element by adjusting a suitable padding and margin value.
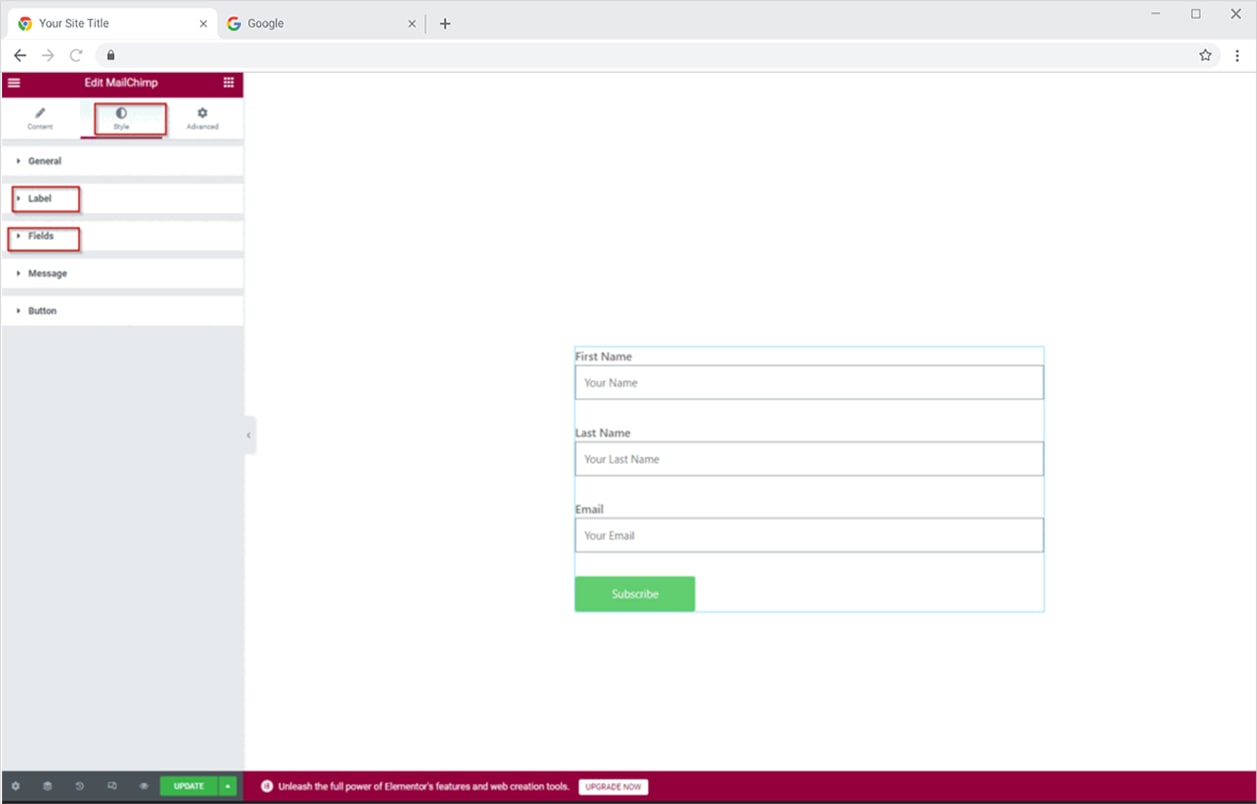
Style fields and label
Typography: Revamp the font family and size, add style and decor, adjust letter spacing and word spacing in both fields and label section to make your mailchimp form stand out in the crowd.
Color and spacing bottom: Change the color of the label text and adjust the spacing.
Placeholder color: Add placeholder color according to the background color of an element. If the background color is dark, choose a light placeholder color in the field section.
Background color: Add a background color of your choice to make your form look attractive.
Border setting: Choose the border type, add a box shadow, and adjust the border-radius and padding.
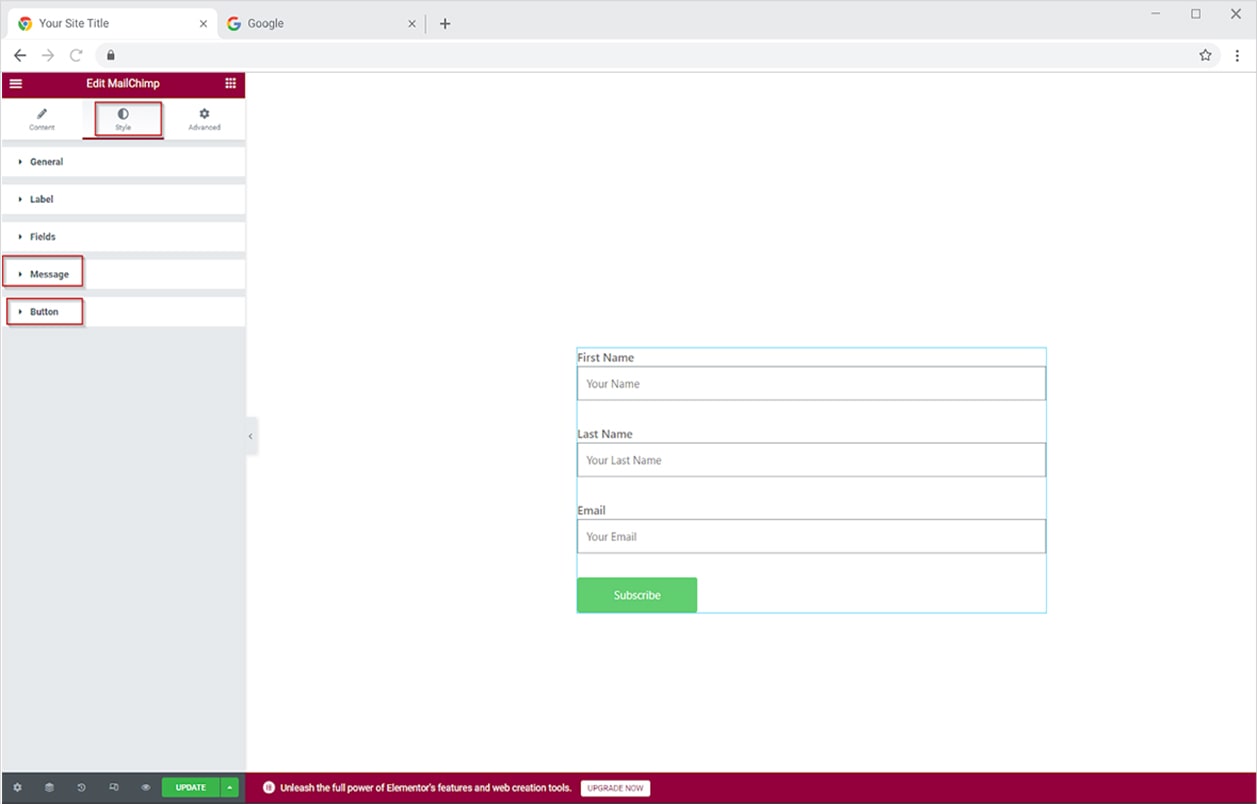
Style message and button
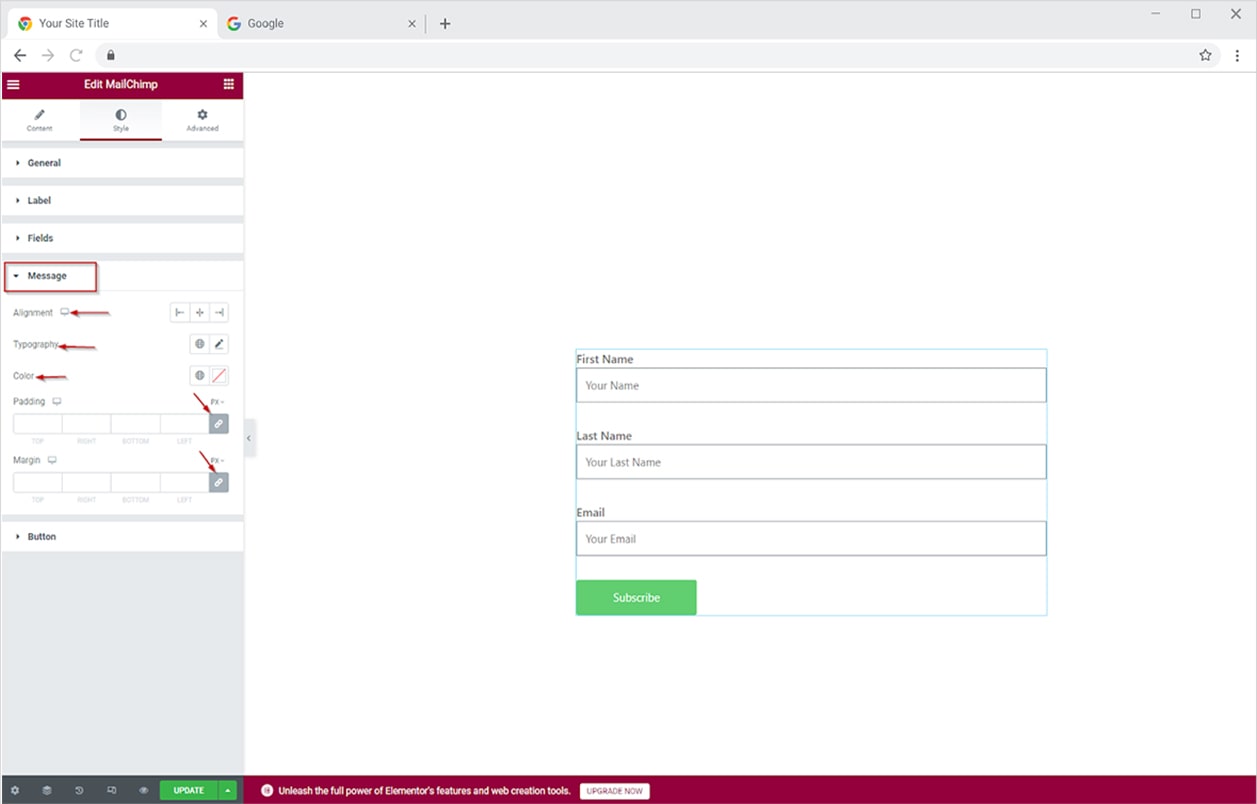
- In the message section, align text on the left, right, or center to make it go with your form style.
- Customize typography, add color, and adjust padding.
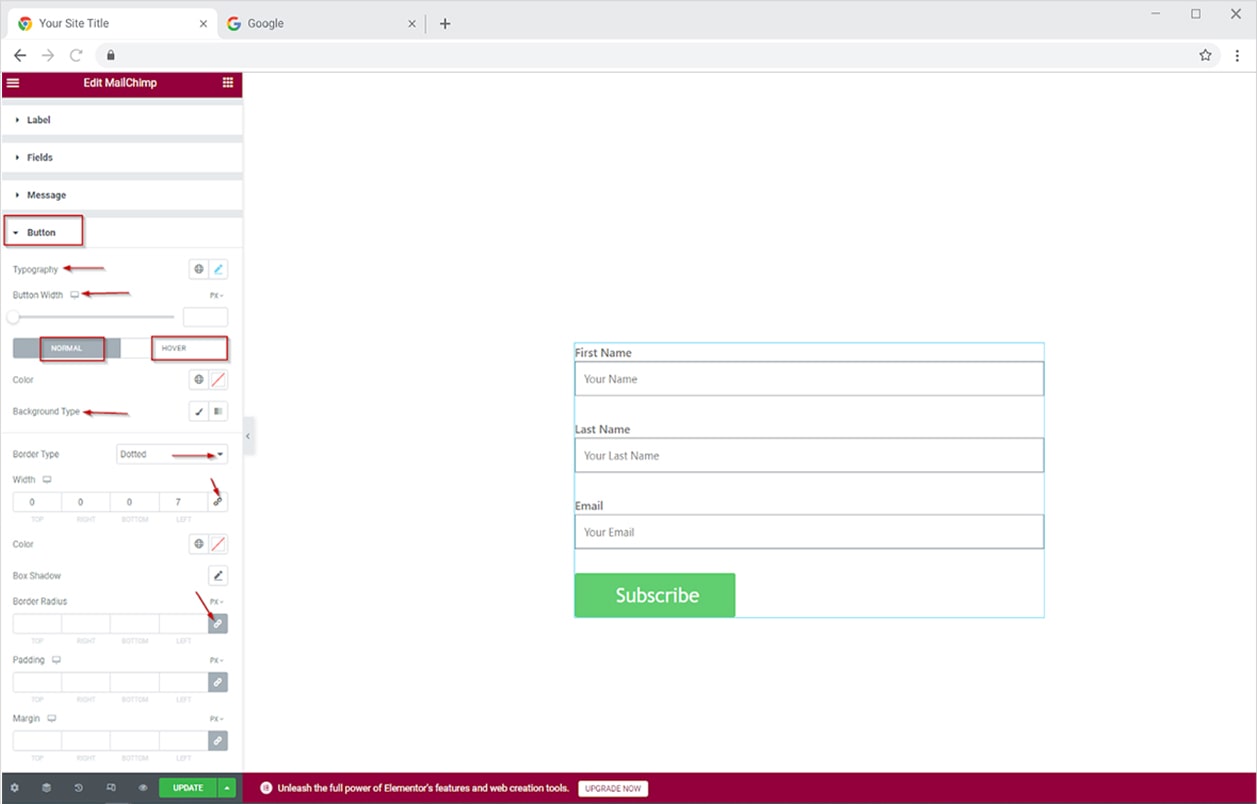
- In the button section, adjust the button width and customize typography to pop up subscribe button. You can also put a hover effect to make it visibly appealing to site visitors. In the end, adjust the border radius, and color and give padding value to stand out from other elements.
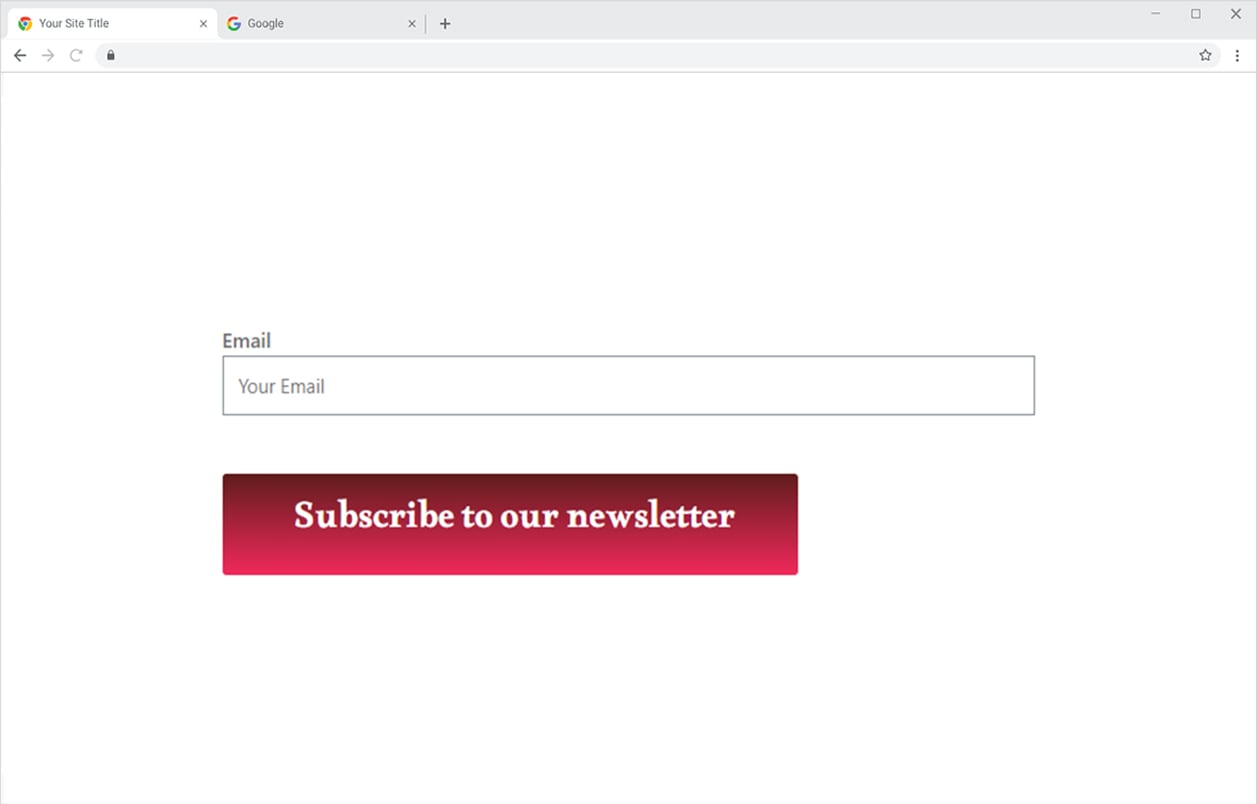
Achieve any design!
Best Mailchimp widget for Elementor
Here, you’re successfully done with the Xpro mailchimp widget for elementor!
We hope this documentation brings some easy guidance to your table. It may be your website journey, marketing campaign journey, or newsletter subscription journey. Xpro addons team works tirelessly to make this journey smooth for its users.
You can also check out our contact form 7 widget to design beautiful forms for your website. Moreover, the Xpro addon is providing more than 50+ free widgets for making your website design seamless and sleek. But if you have stepped into professional world then check out our other premium widgets with diversified styling options to make your website stand out in the business world.
Still stuck! How can we help?