Loop Carousel Widget
The Loop Carousel Widget’s extensive functionality expands the loop builder’s capability and elevates webpage design and user-friendliness. The Elementor Loop Builder allows you to create and customize a Theme for content listing that will appear on your website. The Elementor Loop Carousel Widget takes this to a next level by providing a carousel view to help users view the post listing in an appealing manner.
Although the Xpro Addons offer an Elementor Post Carousel widget and Elementor Woo Product Carousel widget, the loop carousel widget flexibility allows you to build the layout to your requirement. In the previous post listing widget, you have choices of up to 10 layouts to select from, however, this widget allows you to build a layout any way you want.
How to Install Loop Carousel Widget for Elementor
Requirement
You need to install and activate the Pro version of Xpro Elementor Addons. If you already have the plugin installed, just make sure the Loop Carousel Widget is ‘Enabled’ from the Xpro Dashboard so that you can find the widget in the Elementor editor.
To enable the widget, simply follow these steps:
Step 1
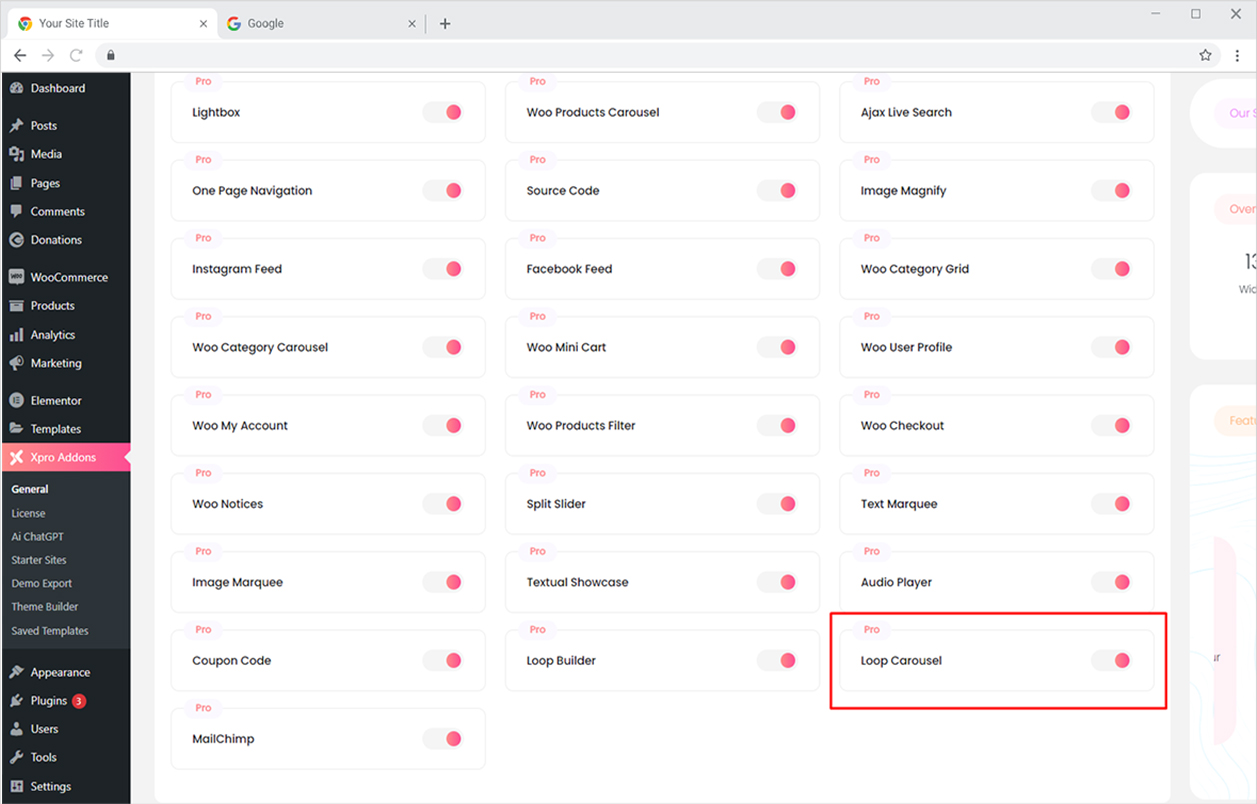
Click on the Xpro Addons option available on the WordPress Dashboard Menu.

Step 2
From the Xpro Addons Dashboard, click on the Widgets Tab, find the Loop Carousel widget, and finally, toggle the button ON to enable it.
How to Use Loop Carousel Widget for Elementor
The process of creating a looping carousel might be lengthy but it is not difficult. Unlike in the Post Carousel widget where you have choices of layouts, you have to create a layout for the use of this widget. Create a theme from the templates folder and drag and drop the widget to the Elementor page.
Let’s discuss in length how to use this widget.
How to Create a Template in Elementor
Step 1
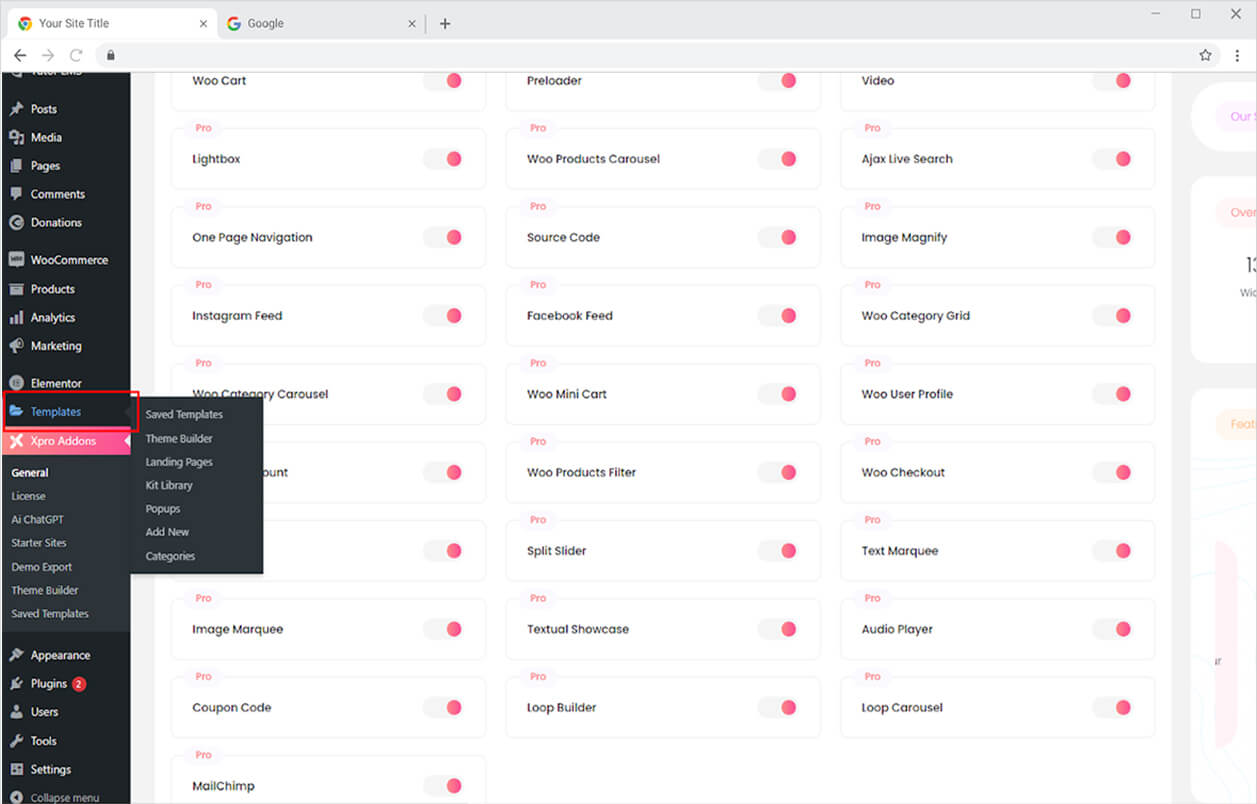
Go to the Template tab in your WordPress Dashboard.
Step 2
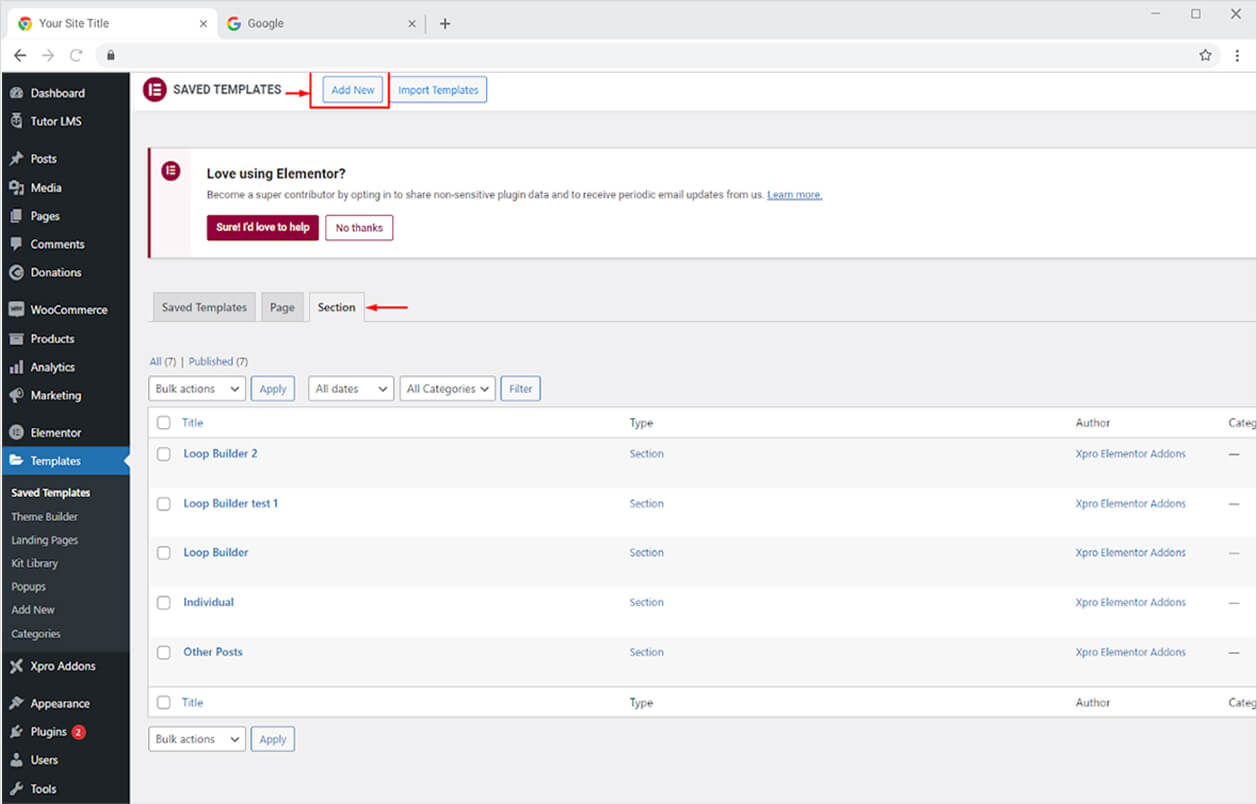
Create a new section from the Section tab.
Step 3
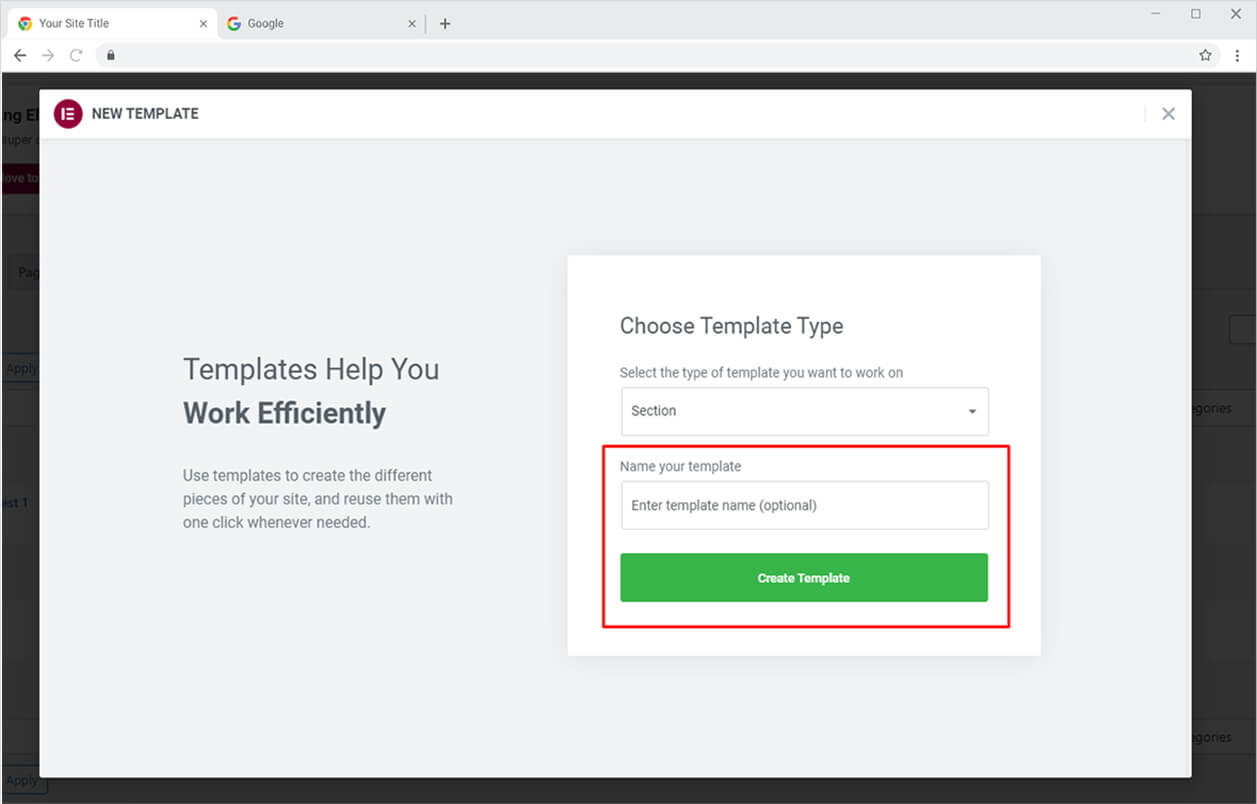
Give a name for the template so later it can be fetched by the widget. Click on the Create Template button and open an Elementor Page.
Step 4
From the Elementor Page, you can create a template that will be used to display on your webpage.
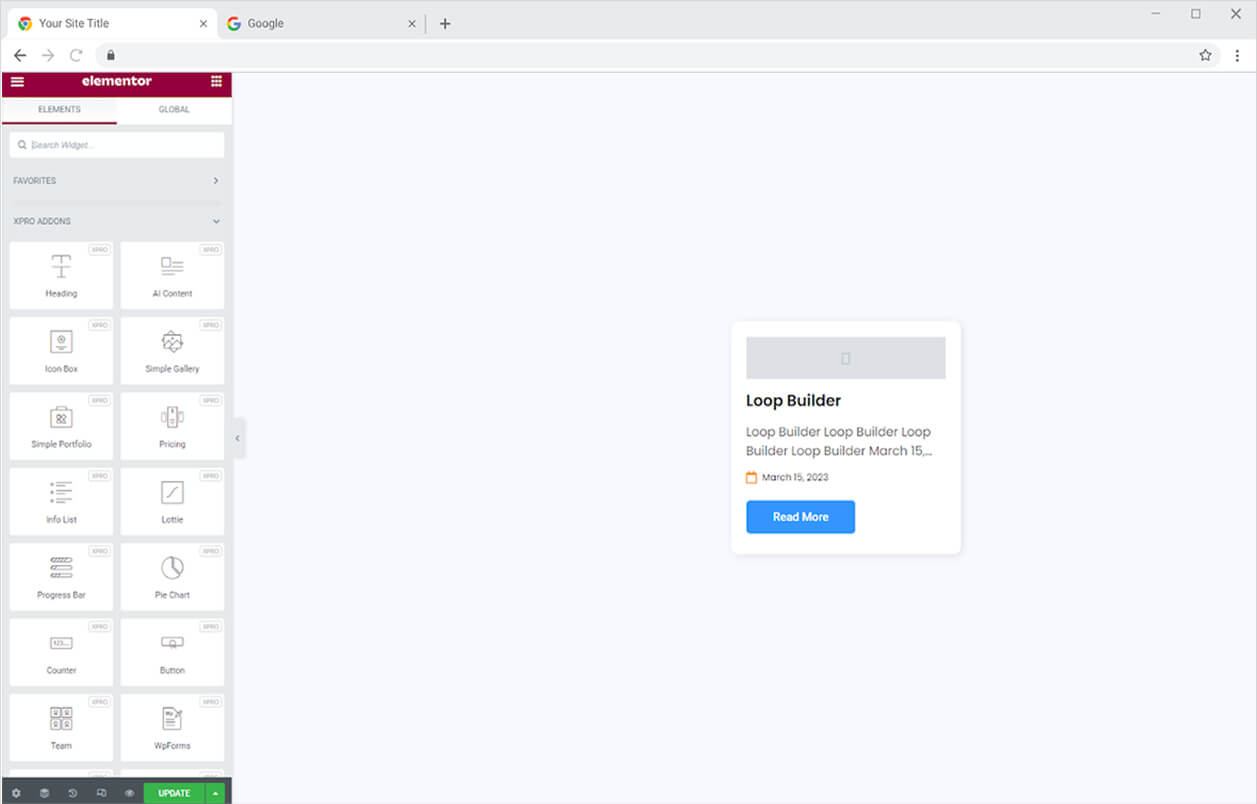
For this example, I have created a post theme. You can create a template for a product, post, listing, or anything you desire. I have created a single post theme so that the loop builder presents all the posts in the same template in a loop.
How to Add Loop Carousel Widget to the Elementor Page
Step 1
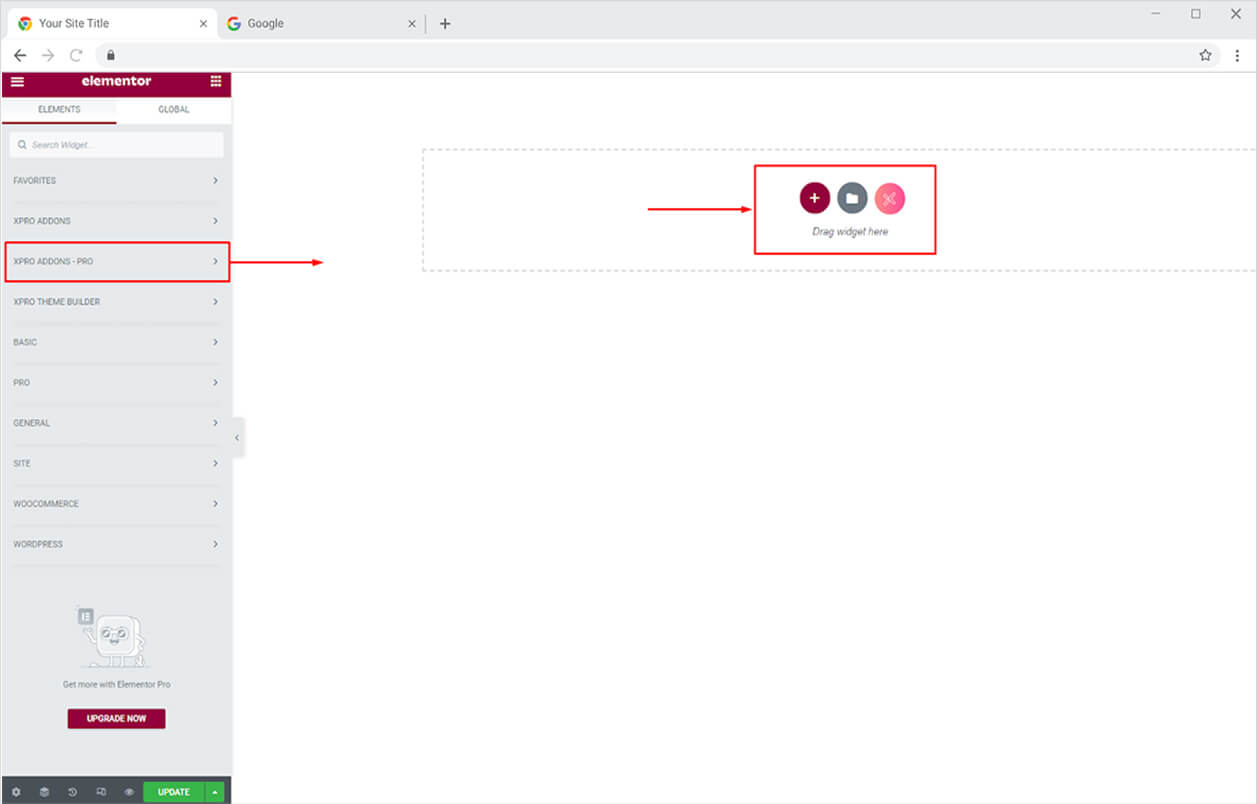
Open the Elementor page where you want to add the widget and click on Xpro Addons-Pro.
Step 2
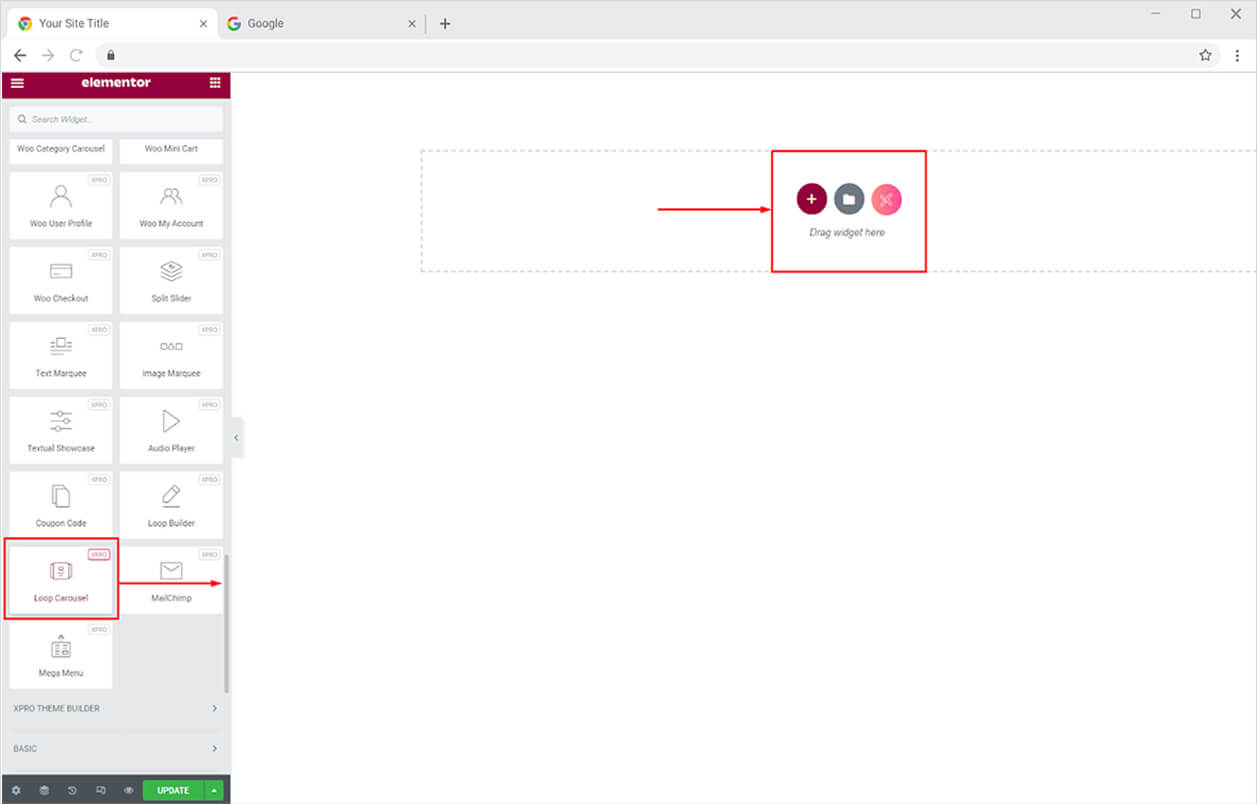
Search and locate the Loop Carousel widget and drag’n’drop it to your desired page location.
Step 3
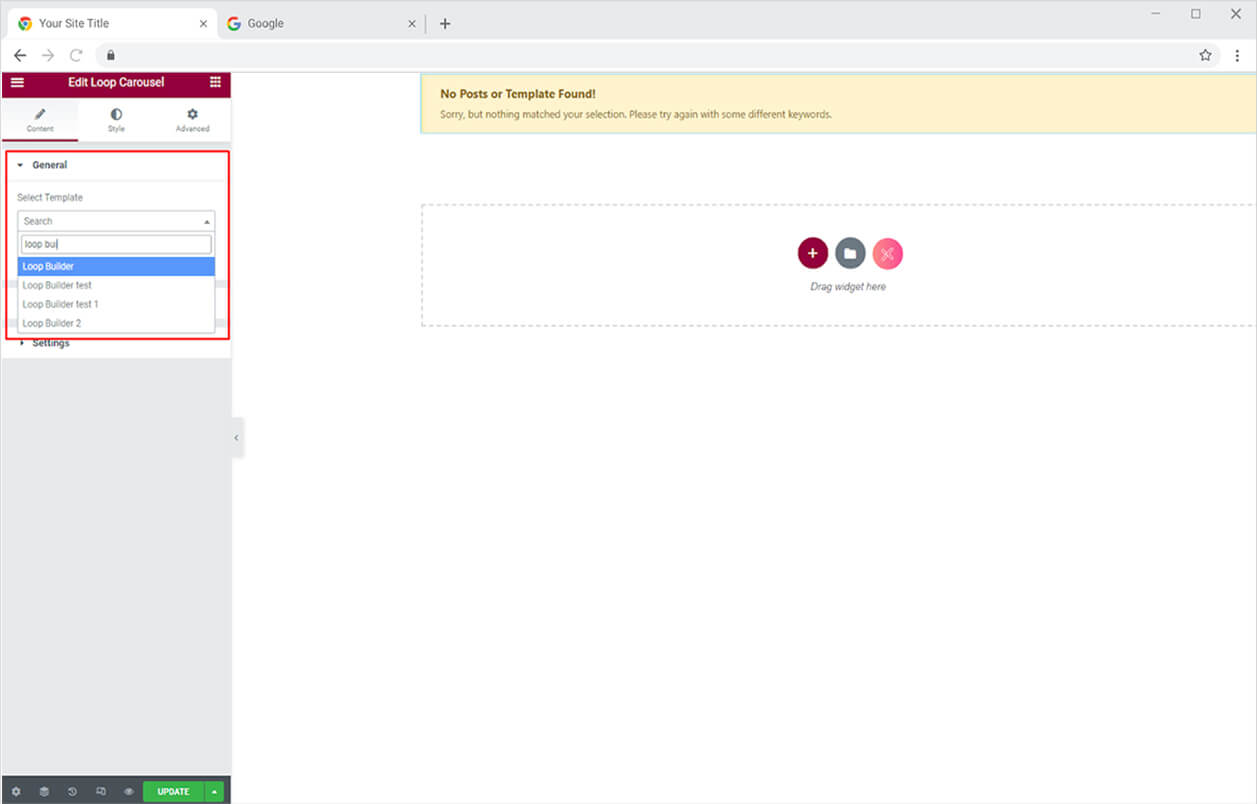
After you drag it to the page, select a template that you created and saved by searching its name under the general menu in the content tab.
How to Use Individual Features in Loop Carousel Widget
The individual feature allows the developers to assign a separate theme to any slide in your loop carousel. First, you need to create a separate theme with the same process as we did earlier and then activate the individual option.
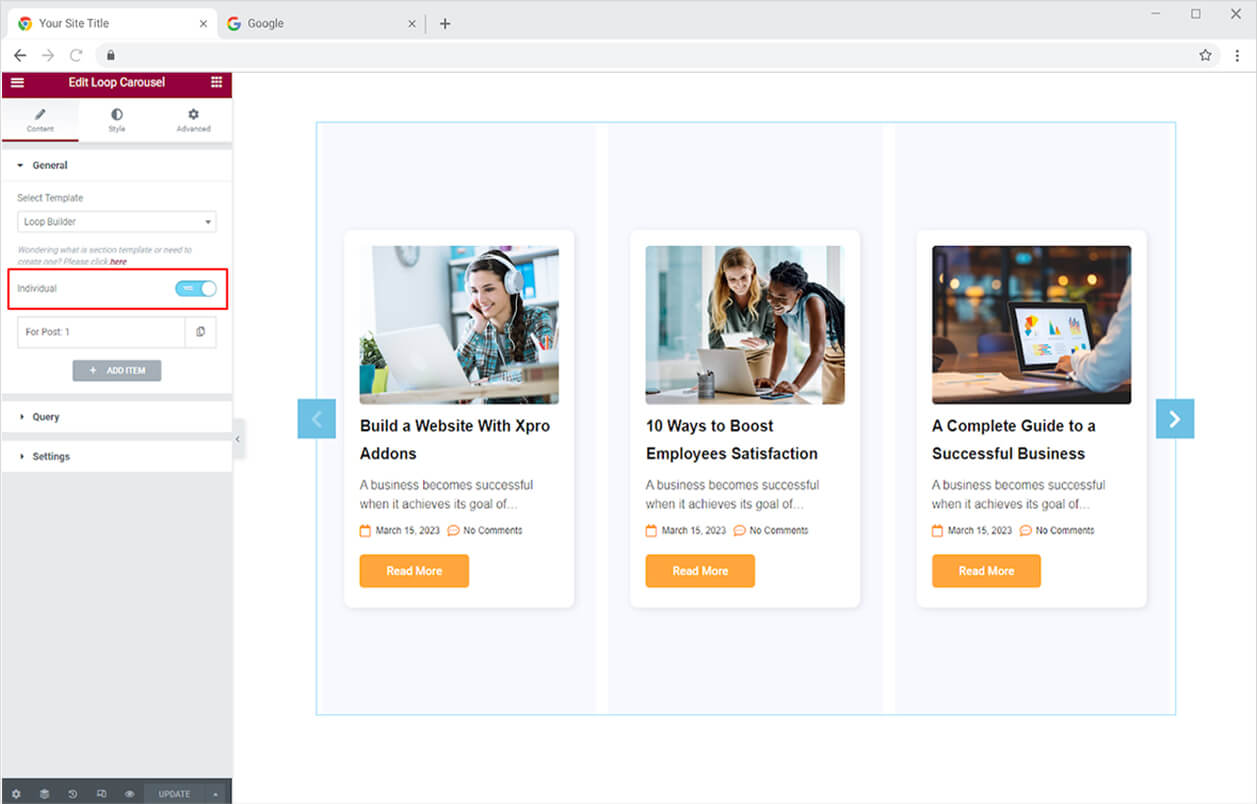
Select a post number where you want to implement another template and then choose a template.
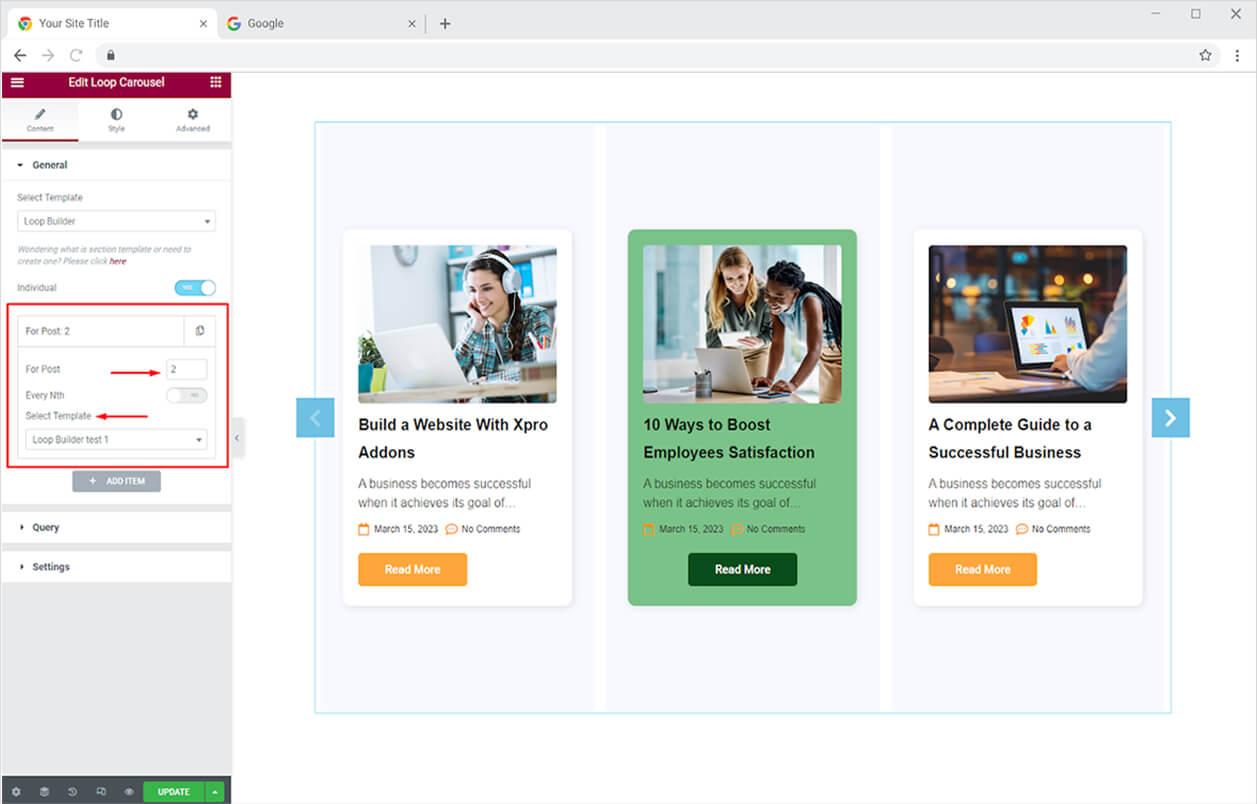
Click ‘+Add Items” to add different templates to different post lists. Or you have a feature where you can add a template to every Nth post. For Example, if you selected 2 For Post and enable the Nth option, it will change the template of every even number.
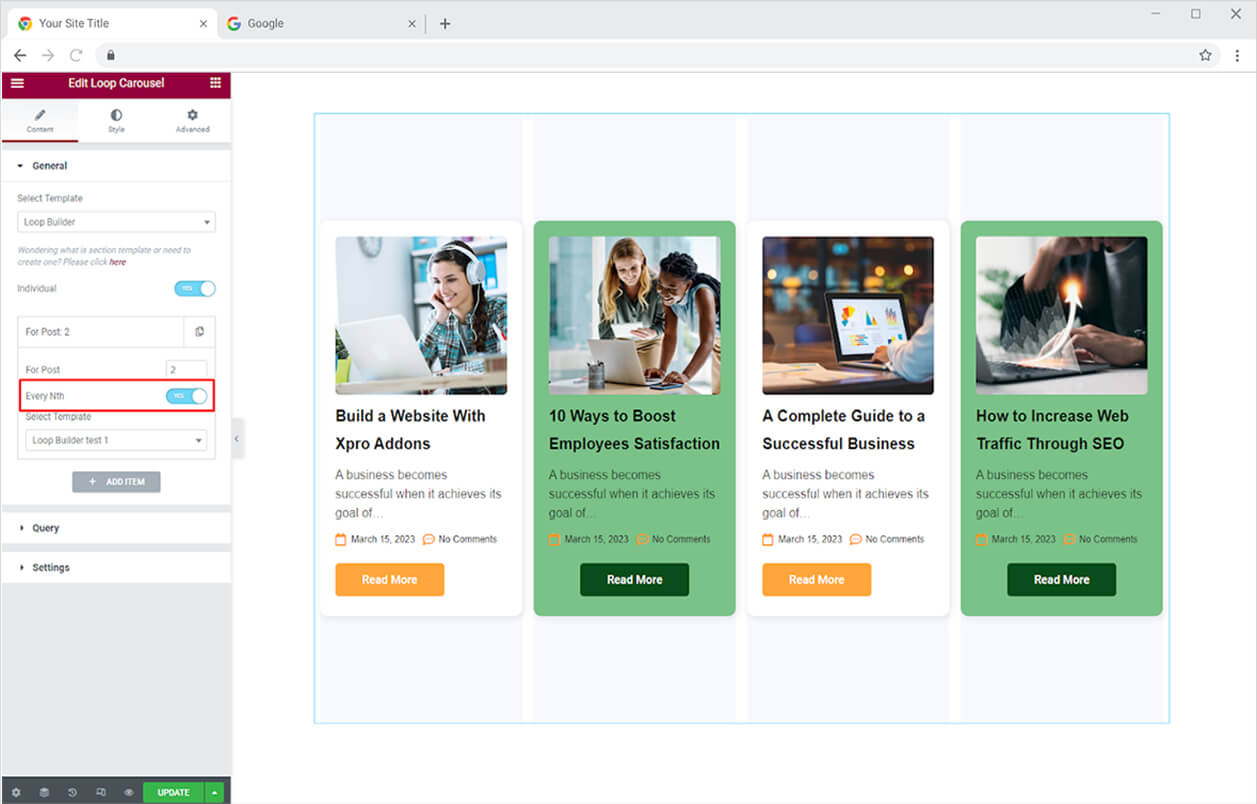
How to Manage Query for Loop Carousel Widget
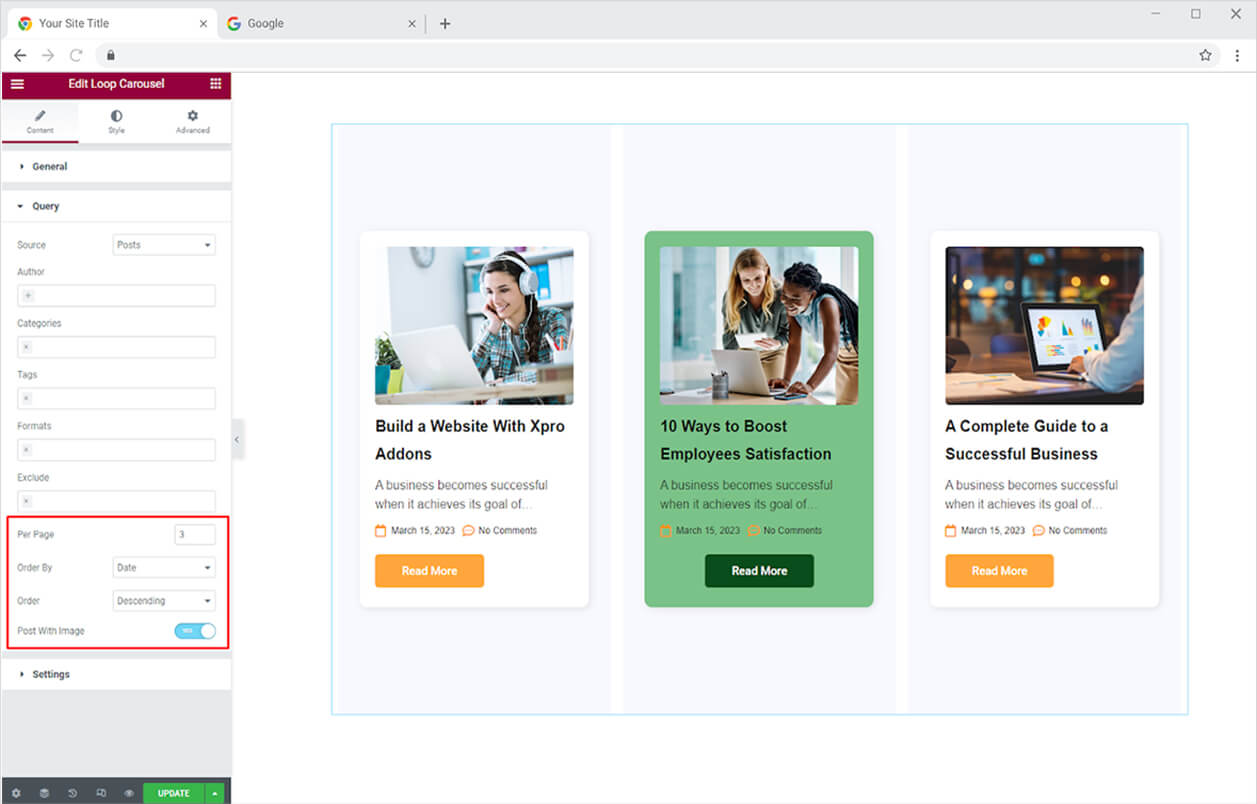
Click and open the Query option from where you can select the posts of your choice from the following settings.
Source: Select the source post like page, products, etc from the drop-down menu. The following options will be different for different sources. We are only talking about posts here.
Author: Select the author whose content you want to display.
Categories: Select the category of posts you want to display.
Tags: Select Post tags.
Exclude: Remove any posts that you do not wish to include.
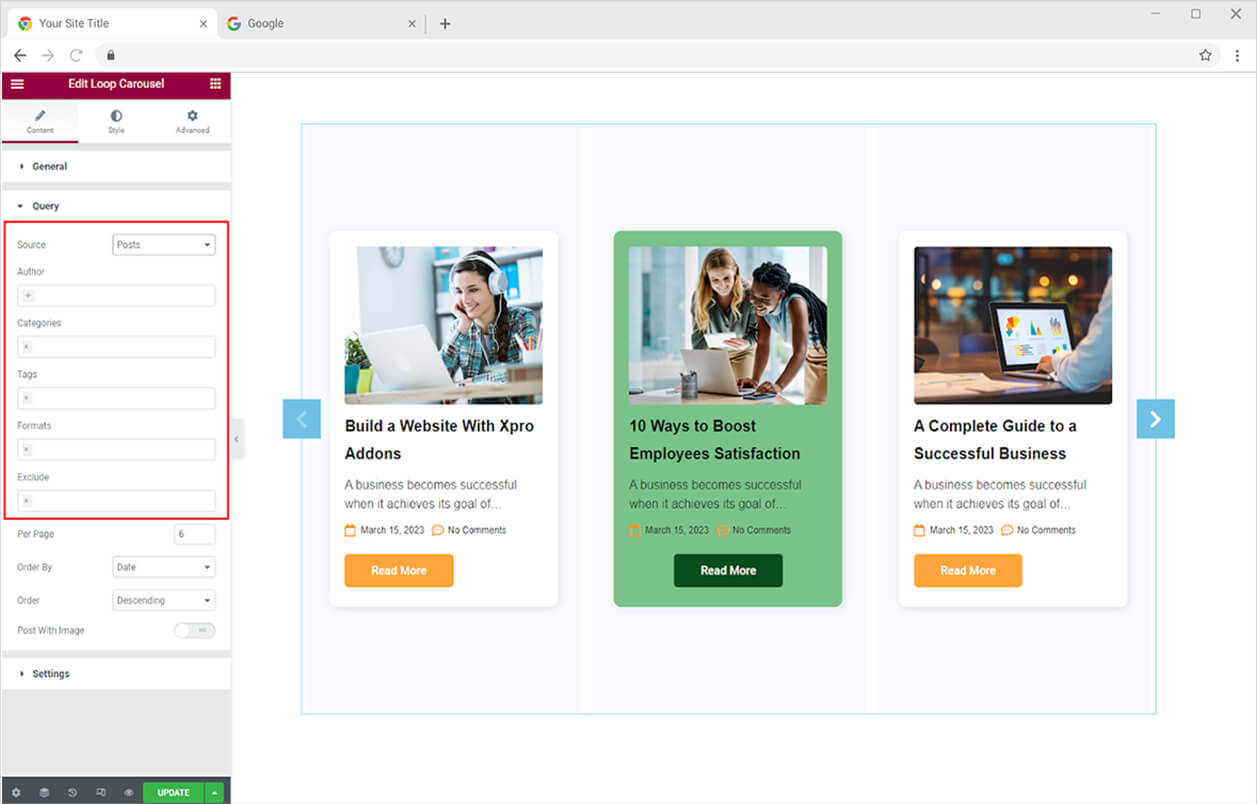
Furthermore, you have the following options to adjust the arrangement of posts.
Per Page: Select how many posts you want to display within one page.
Offset: When you increase the value the posts move forward to display the next post.
Order By: Select the order by date, ID, title, etc.
Order: Arrange posts in ascending or descending order.
Post With Images: Enable this option to only display posts that contain an image.
Moreover, the widget allows you to perform the following settings.
Items to Show: Adjust how many items will be shown in a row.
Margin: Manage the gap between each listing.
Loop: Make the first post appear after the last post to make it in a loop.
Auto Height: The slider will automatically adapt to its height.
Autoplay: Make the slider automatically move after a set period of time.
Show Nav: Showcase next and previous navigation icons.
Show Dots: Show navigational dots under the listing.
How to Style Loop Carousel Widget for Elementor
The style tab allows you to perform multiple customizations to the carousel which includes personalization of navigation and dots designs.
How to Style Nav in Loop Carousel Widget
Select a design for navigational arrows from the 8 different layouts. Adjust the icon and background size as well as the horizontal position.
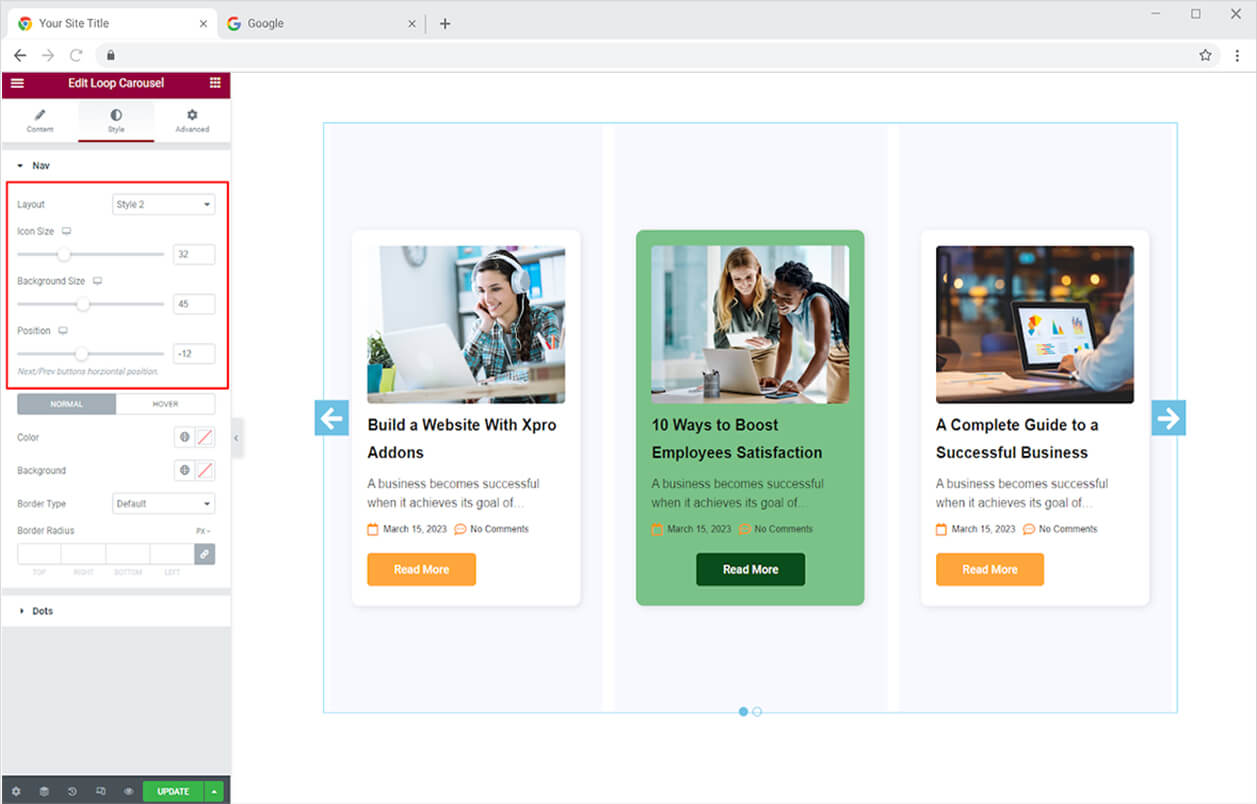
Add colors to the icon and background for their normal and hover state. Furthermore, you can add a border to the background by selecting a border type between solid, double, dashed, dotted, and groove. In addition, adjust the border width, radius, and color.

How to Style Dots in Elementor Loop Carousel Widget
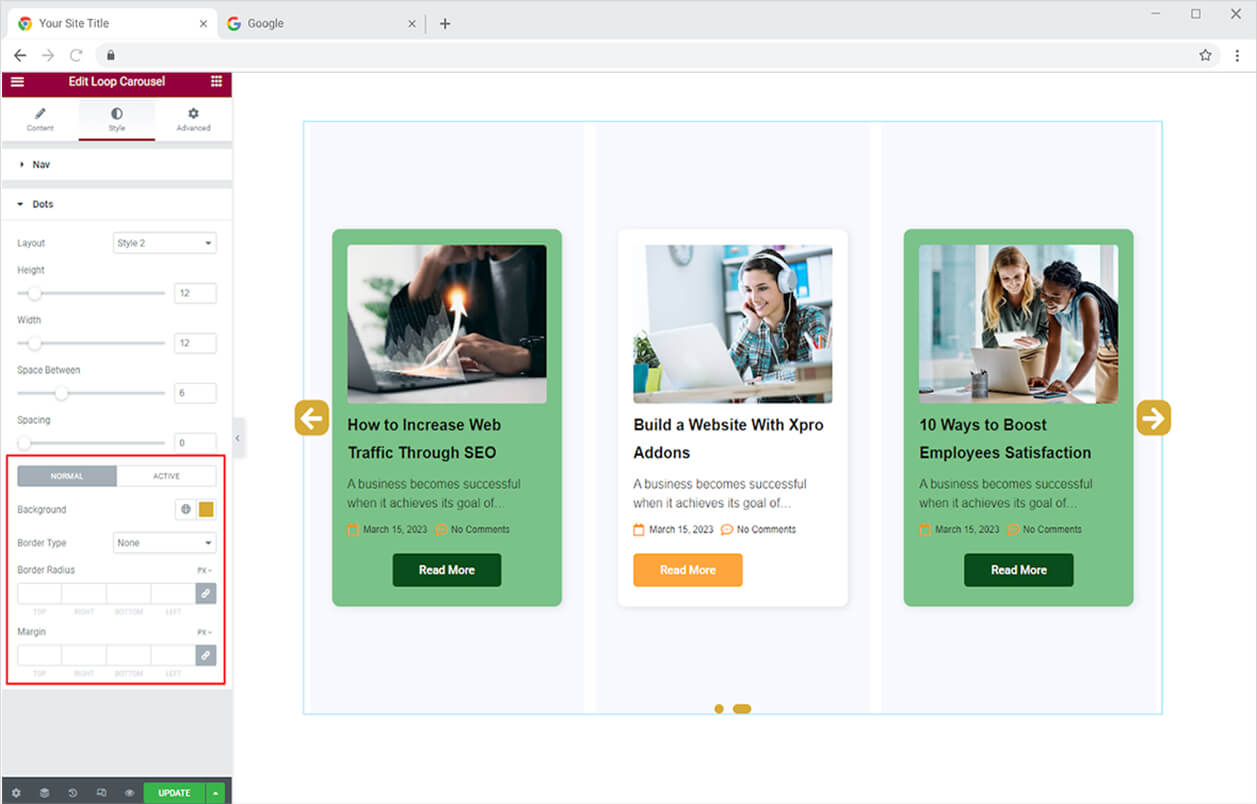
Select dots designs from three different style layouts. Adjust the size of the dots from the height and width options. Moreover, adjust the space of dots from each dot and the slider.

Add colors to the dot for their normal appearance and also when the user drags the mouse above. You can also make a border by selecting a border type and further choosing its width, radius, and color.
Best Loop Carousel Widget for Elementor
Utilize the powerful Elementor Loop Carousel widget to create a beautiful display of posts, products, pages, etc in a stunning carousel grid. Maximize the potential of the robust Xpro Addons widget by combining it with premium Elementor Addons such as the Creative Button widget for Elementor.
Xpro Elementor Addons consist of a stunning collection of widgets, features, and Theme Templates that allow the users to create an appealing website with no need for coding. View our list of impressive free widgets for Elementor and download the best Elementor Addons.