Loop Builder
The Xpro Elementor introduces the Loop Builder widget which is an advanced tool to help you create a custom dynamic content display. In simple terms, it allows you to create and design a template for repeated items such as listings and articles in a dynamic way. This Elementor Loop Builder provides the freedom of well managing repetitive content items on your website.
Even though Xpro offers an Elementor Post Grid widget, the benefit of this widget includes total freedom over the design and layout you want to create. You do not have to rely on the premade layout and instead can create your own design. Furthermore, it simplifies the creation of dynamic web pages and the updating of material on your website.
How to Install Loop Builder Widget for Elementor
Requirement
You need to install and activate the Pro version of Xpro Elementor Addons. If you already have the plugin installed, just make sure the Loop Builder Widget is ‘Enabled’ from the Xpro Dashboard, so you can find the widget in the Elementor editor.
To enable the widget, simply follow these steps:
Step 1
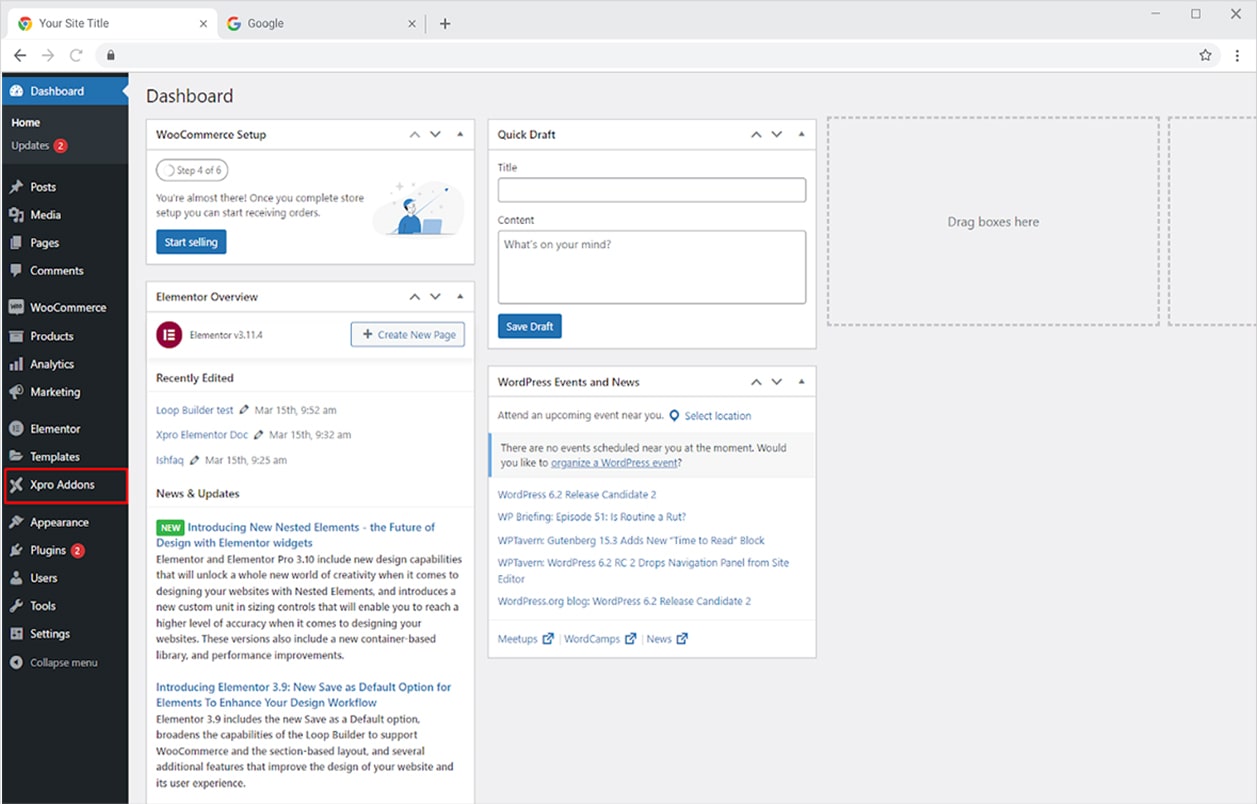
Click on the Xpro Addons option available on the WordPress Dashboard Menu.
Step 2
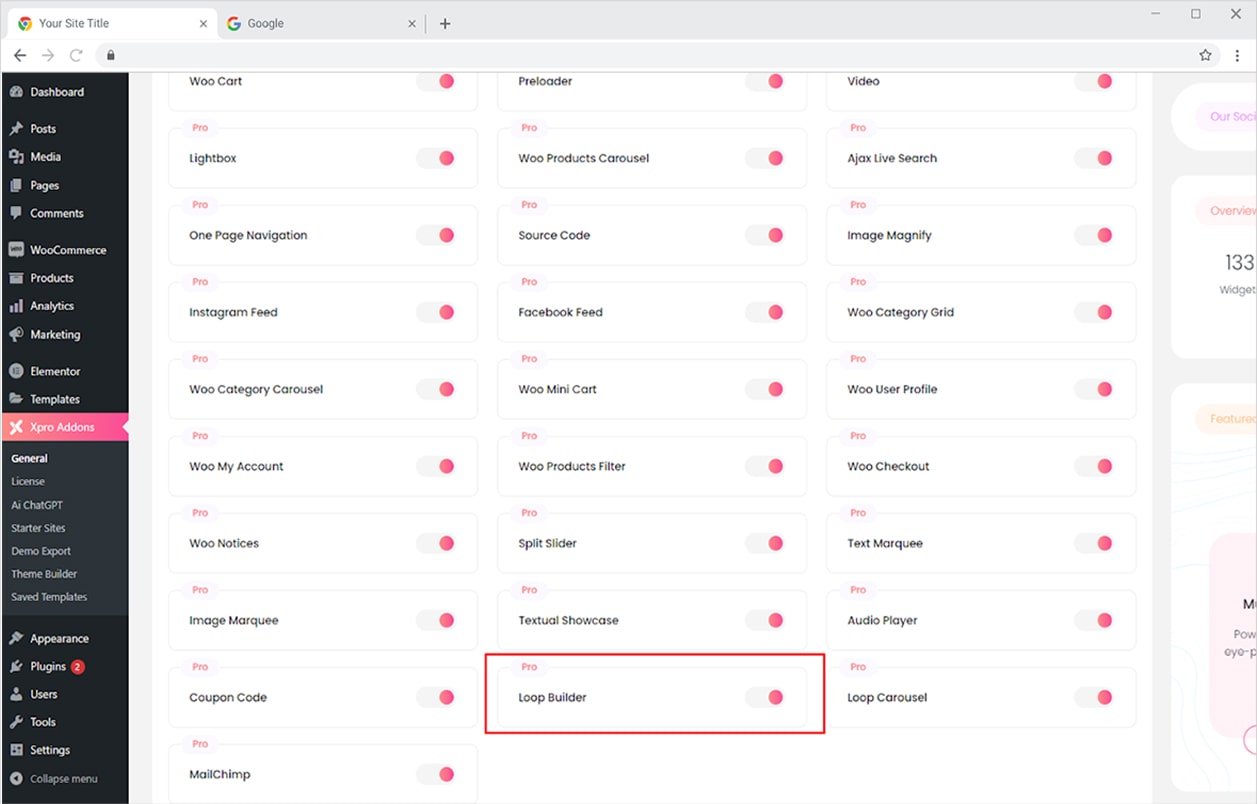
From the Xpro Addons Dashboard, click on the Widgets Tab, find the Loop Builder widget, and finally, toggle the button ON to enable it.
How to Use Loop Builder widget for Elementor
Developing a Loop Builder necessitates several process steps, such as building a template and incorporating it into the webpage. You need to customize the template from its original source as you won’t be able to make changes to the layout. You will be able to perform customizations to the query and include posts you want to display. Let’s go over how to use the Elementor Loop Builder widget in more detail.
How to Create a Template
Step 1
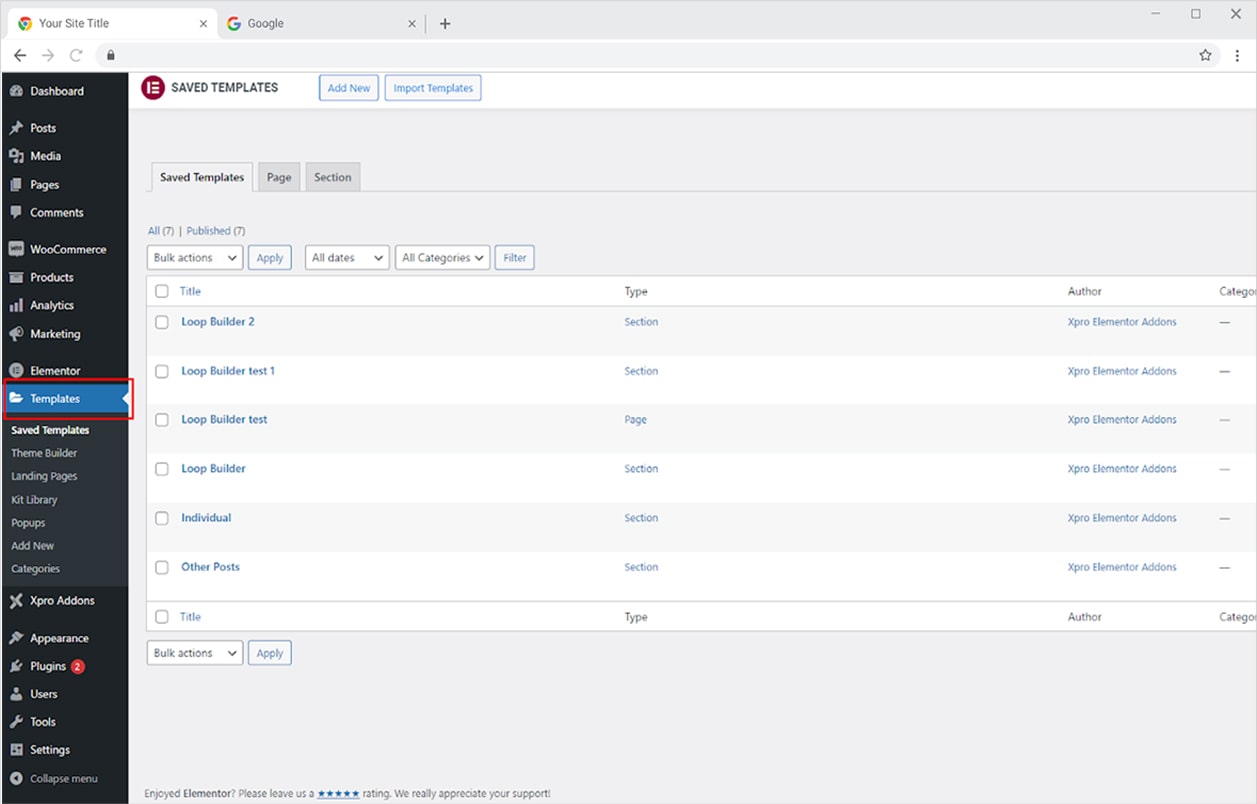
Open your WordPress Dashboard and go to the Template tab.
Step 2
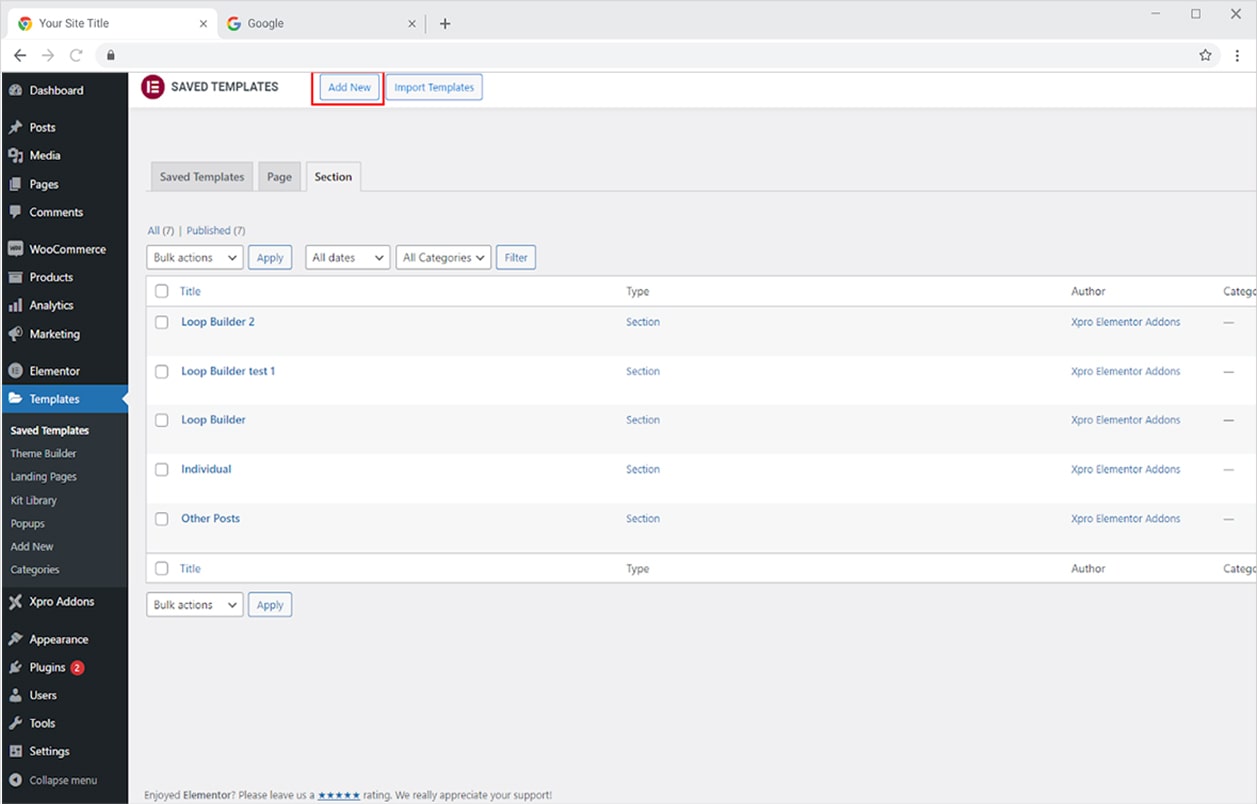
Go to the Section tab and Add a new section.
Step 3
A box with the “New Template” name will open where you select the template type as a section and assign it a name for further use. Click on the Create Template button to open the Elementor Page.
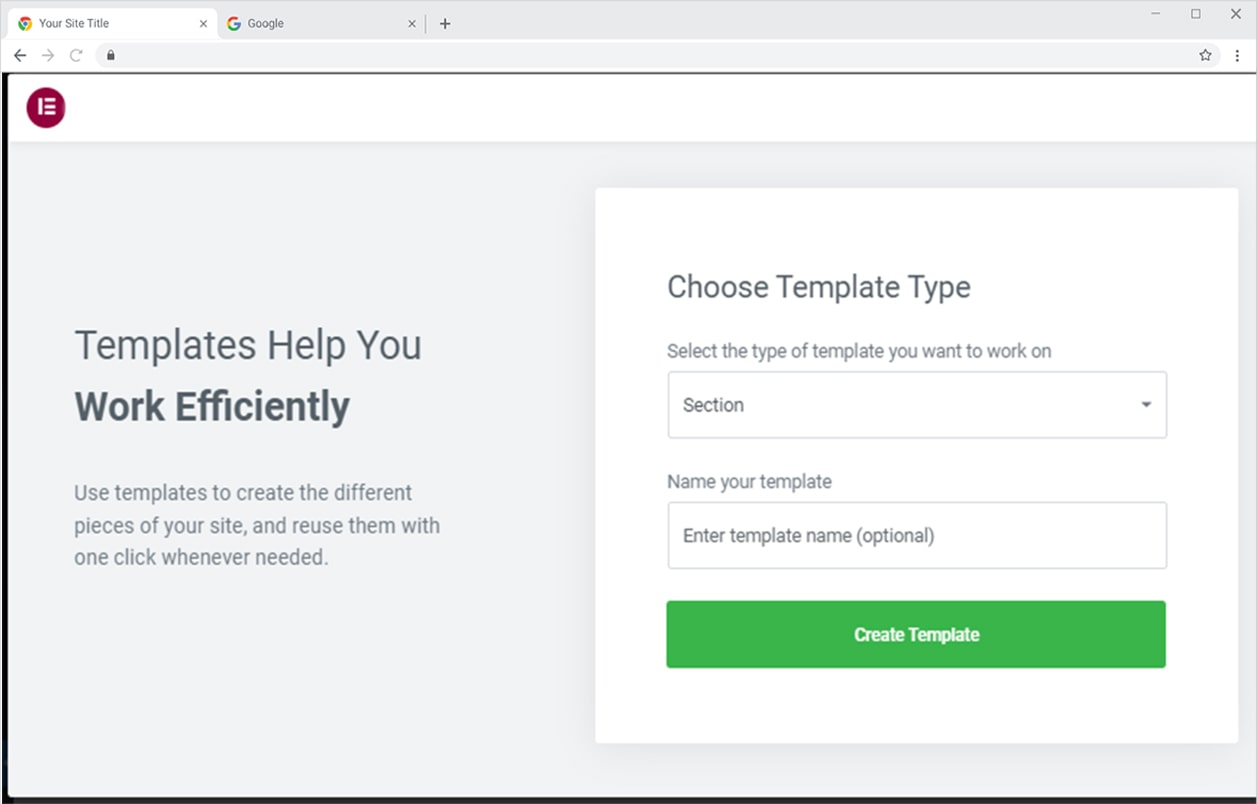
Step 4
From the Elementor Page, you can create a template that will be used to display on your webpage.
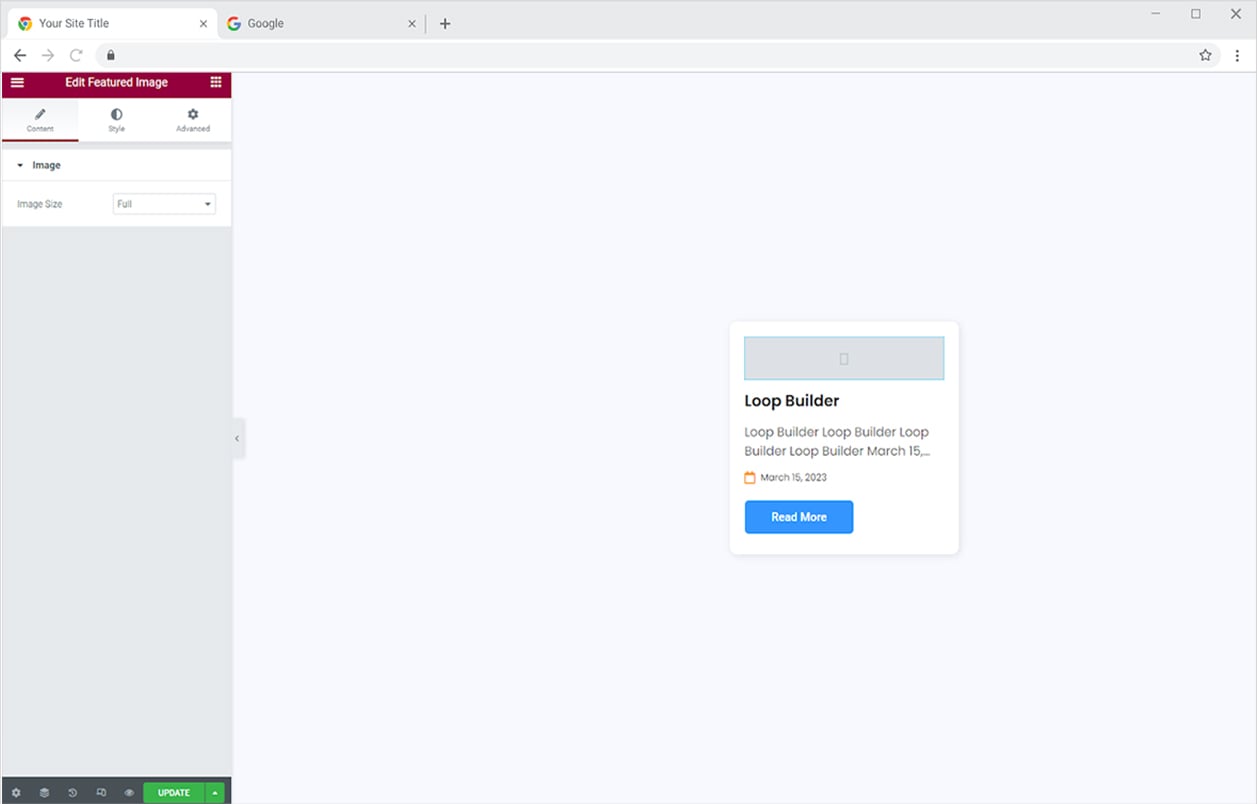
After you created a template press the update button to save it for further use. I have created a dynamic post template for this example. You can create a product, listing, or any kind of template you want.
How to Add Elementor Loop Builder Widget to the Webpage
Step 1
Open the Page with Elementor where you want to add the Loop Builder and click on the Xpro Addons – Pro in Elementor Editor.
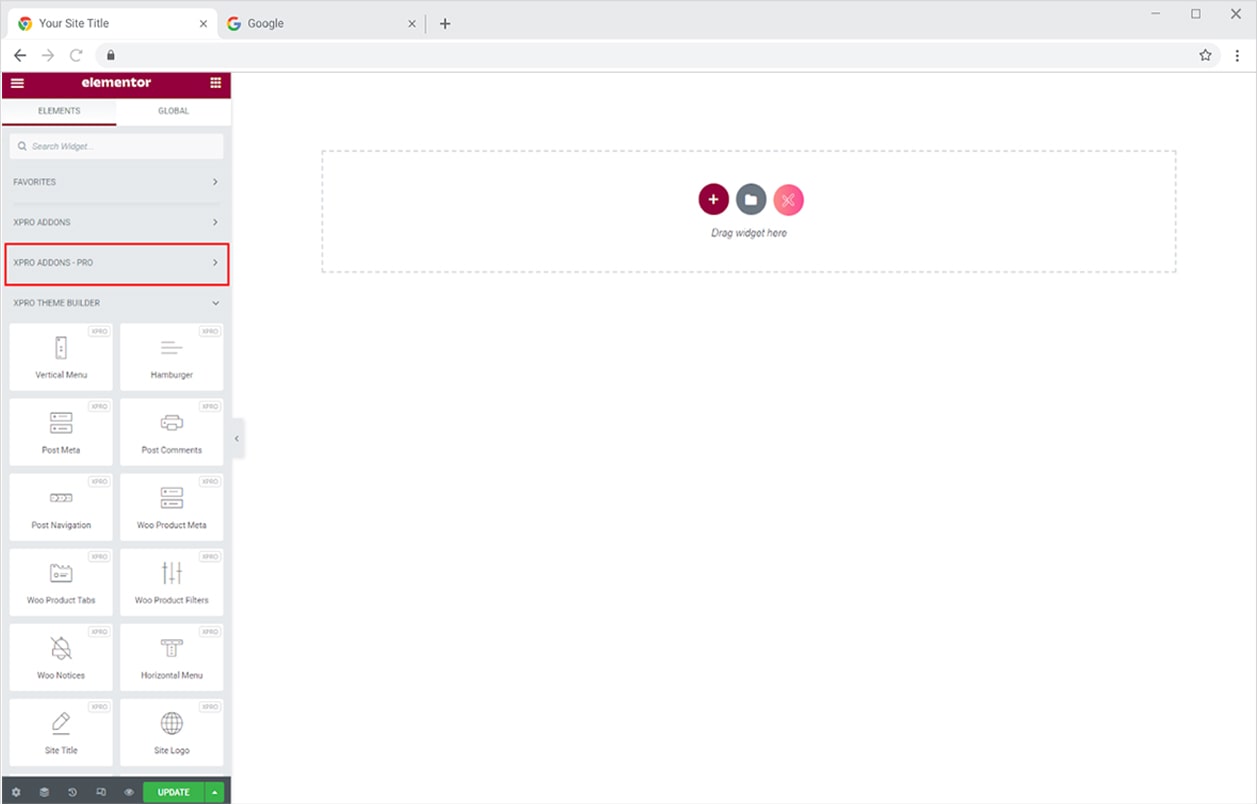
Step 2
From the Xpro Addons – Pro section, find and simply drag’n’drop the Loop Builder widget on your desired page location.
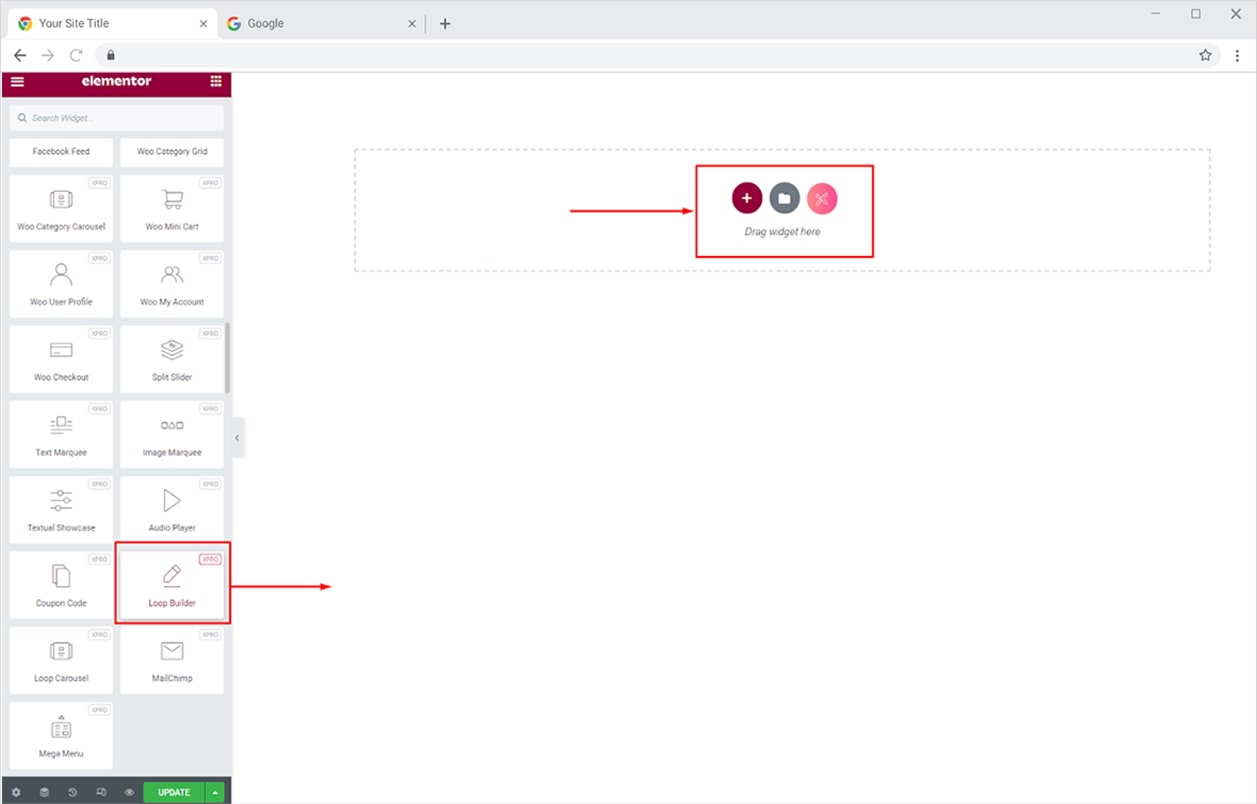
How to Select a Template in Xpro Loop Builder Widget
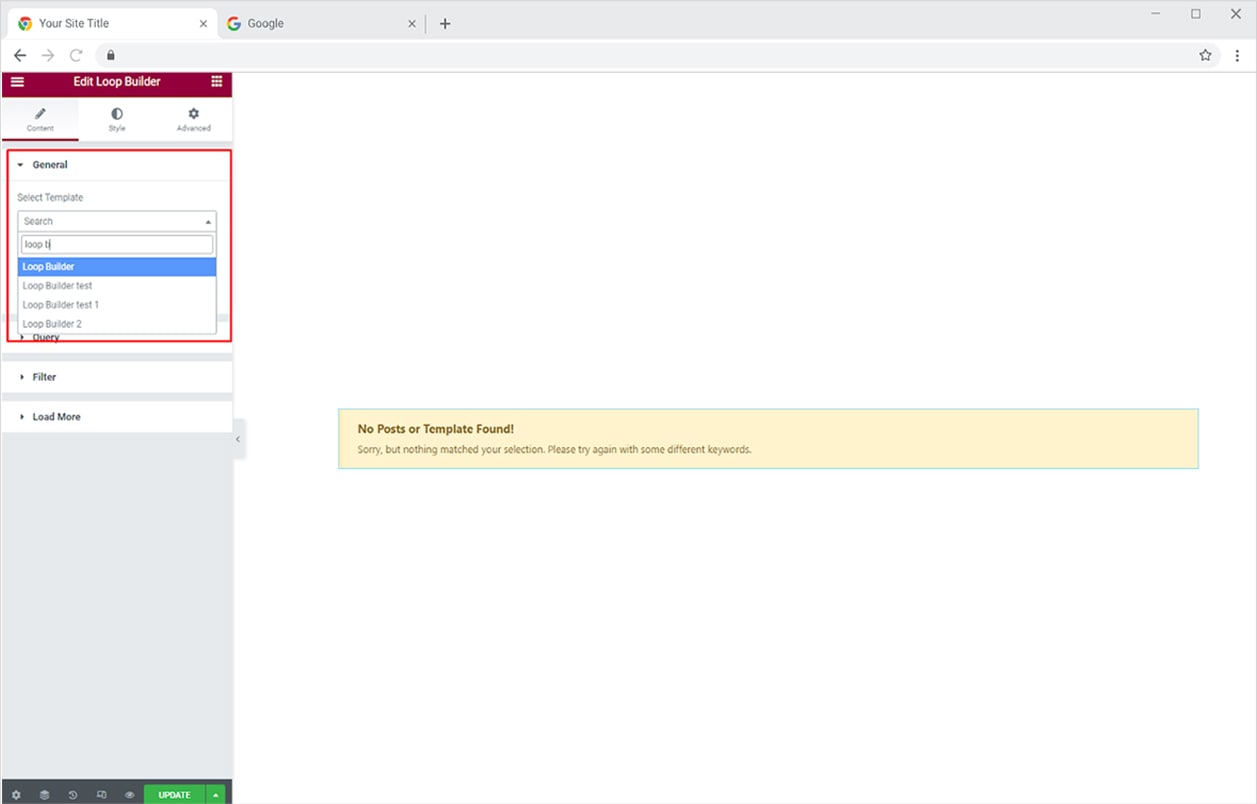
The default view of the widget after you drop it into the Elementor Page requires you to select a template. Go to the Content Tab and select a template by searching it in the Select Template search bar.
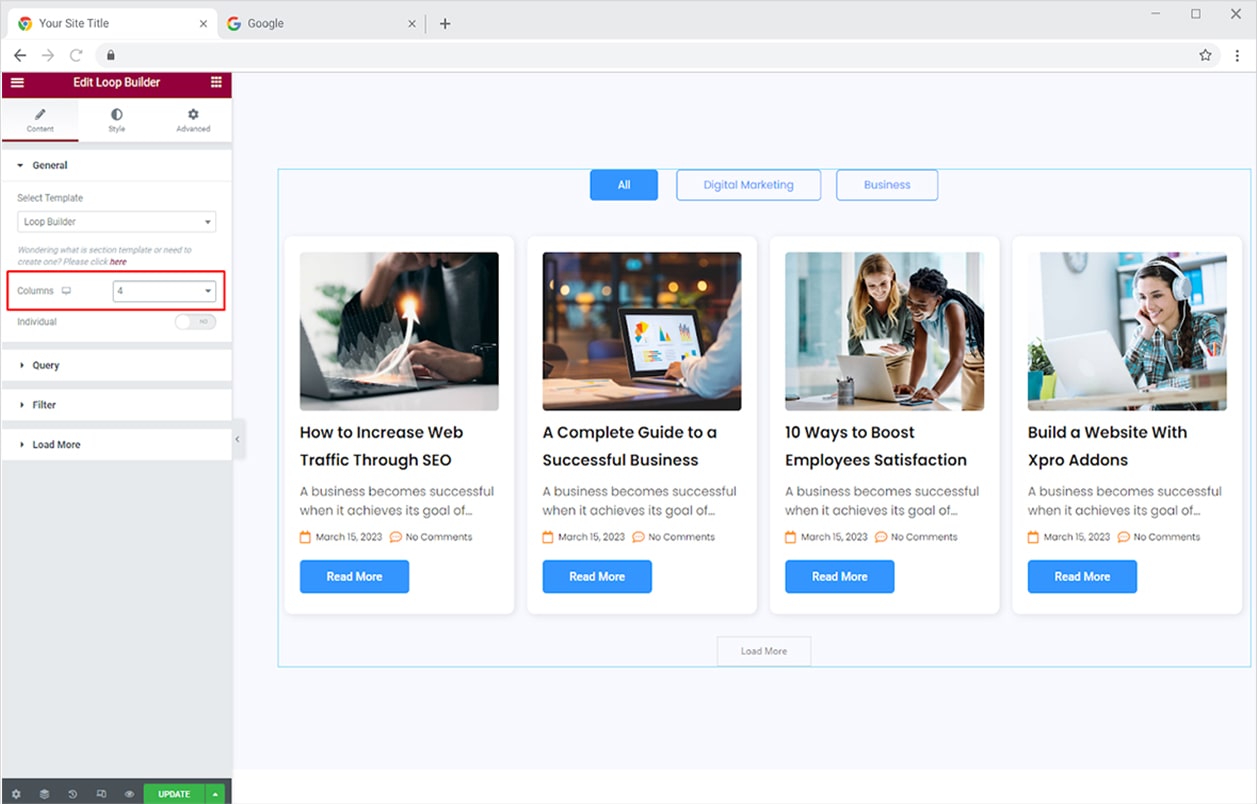
Select how many columns you want to display in the loop builder.
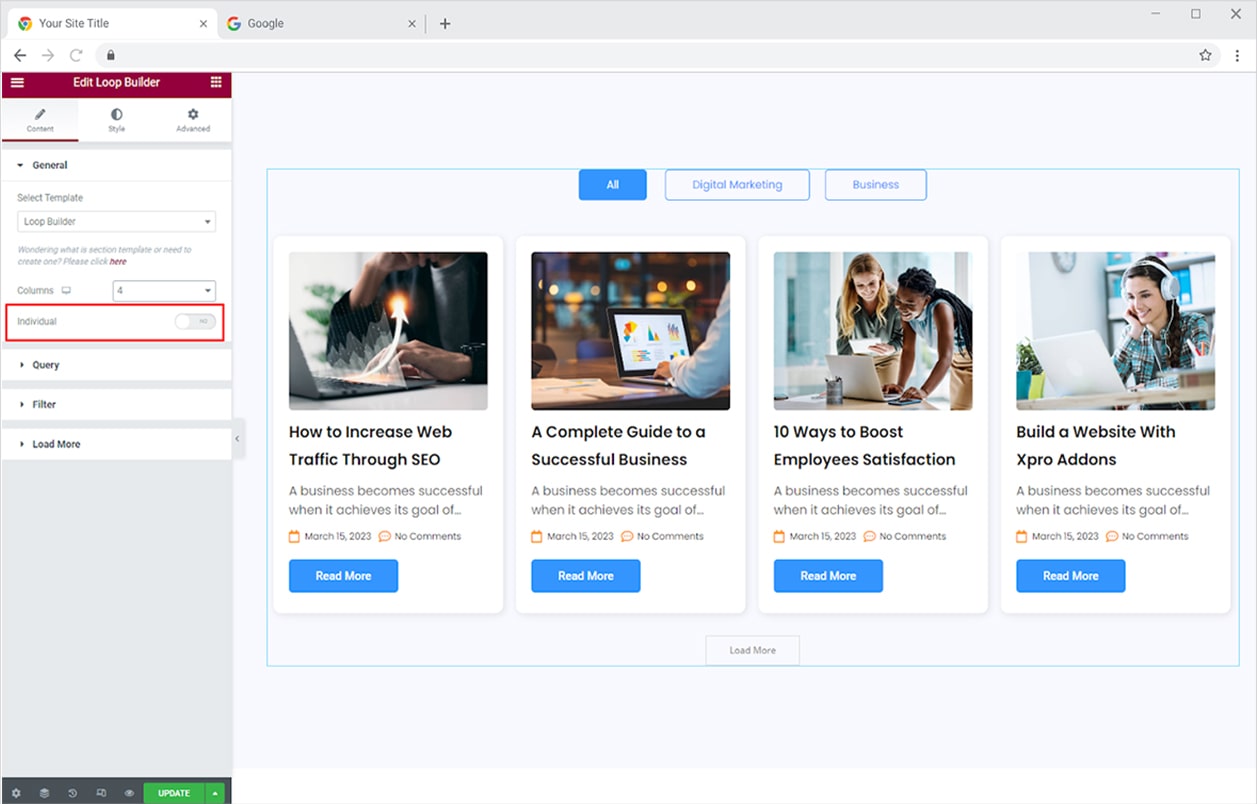
How to Change Theme for an Individual Post
The Xpro Loop Builder widget for Elementor provides you with a feature that allows you to implement a different theme for any specific post. For example, you want to highlight a post by displaying it in a different theme. All you need to do is create a template as we did before and enable the “Individual” option.
Select a template from the option below. Just like we did previously, search the template by typing in the name in the search bar.
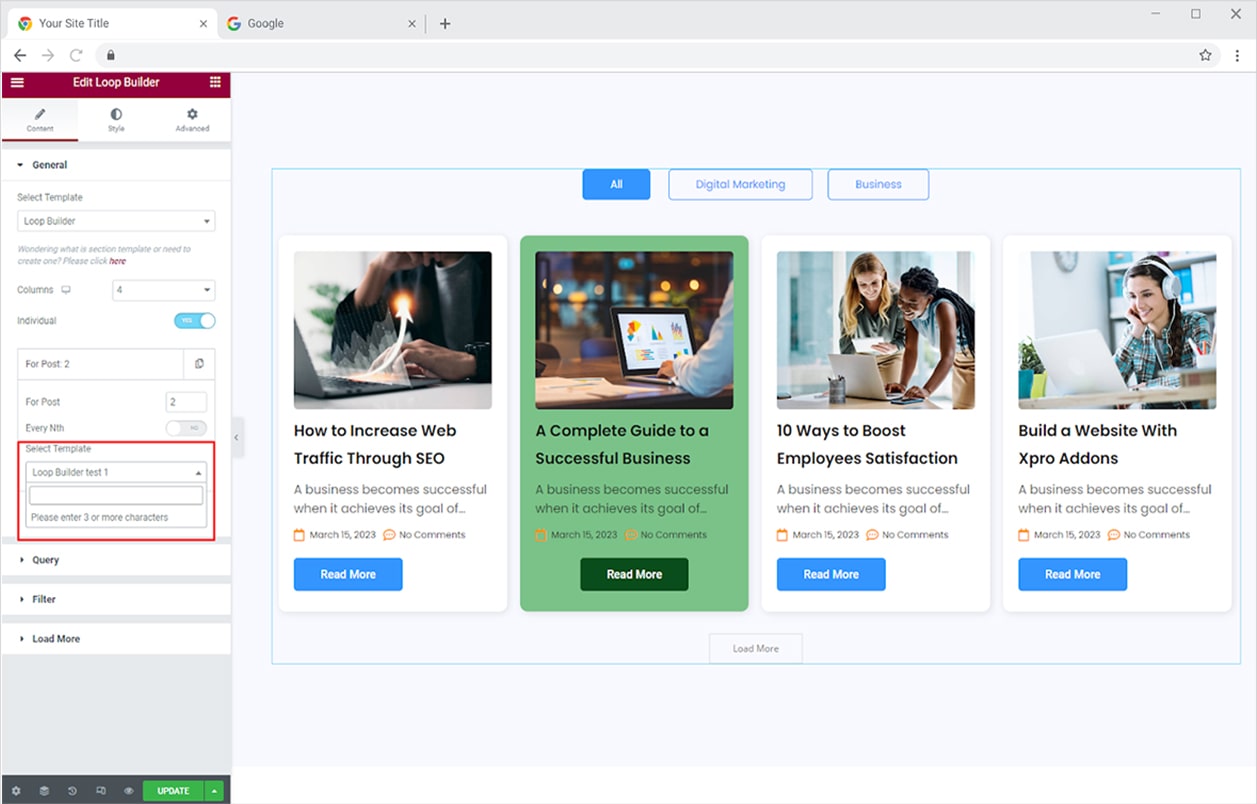
By typing the number in the “For Post” box, you can specify the post number where you wish to use that template. You may add this template for every Nth post, for example, modify the template of every even number by selecting 2 and enabling the Nth option.
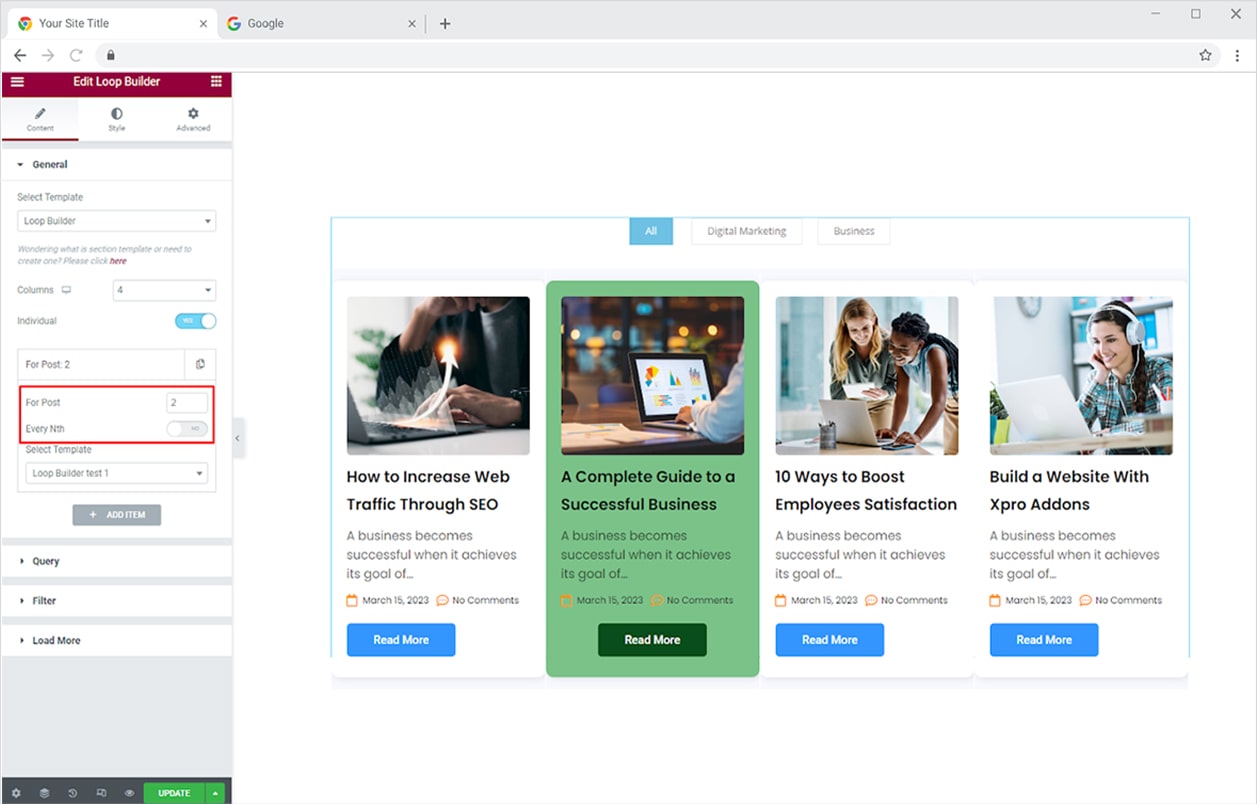
Transform the display of any theme with any template that you desire. Click on the “+ Add New” button and create modify the display according to your requirement.
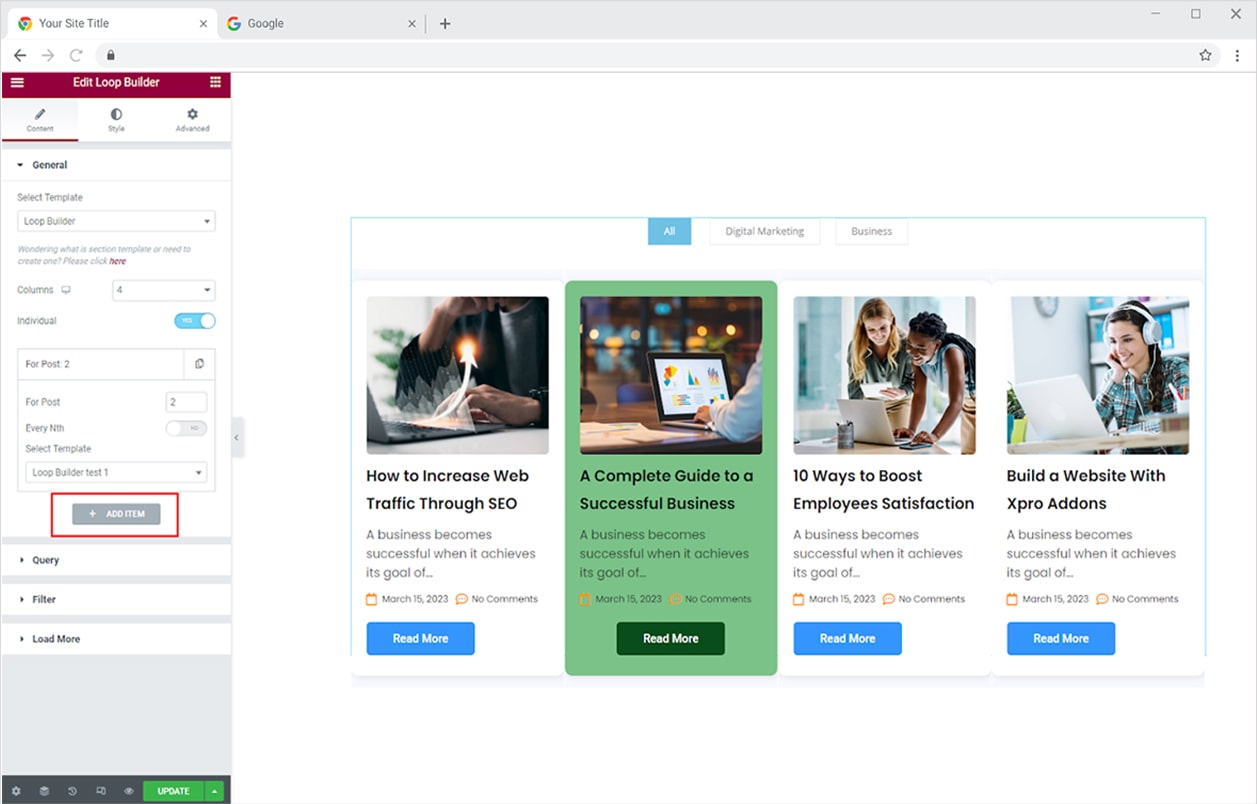
How to Display Posts of Your Choice in Loop Builder
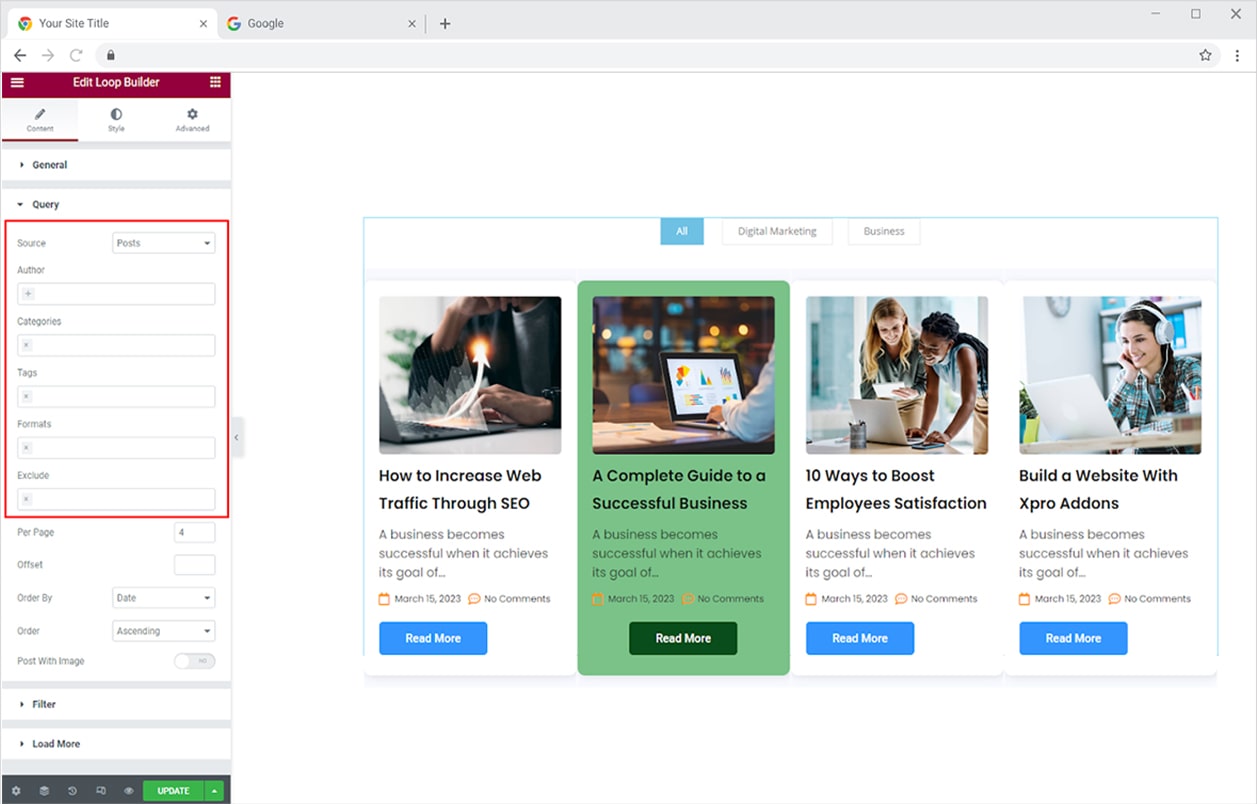
After creating a loop builder, you may want to showcase the posts of some categories or relevancy. Click and open the Query option from where you can select the posts of your choice from the following settings.
Source: Select the source post like page, products, etc from the drop-down menu. The following options will be different for different sources. We are only talking about posts here.
Author: Select the author whose content you want to display.
Categories: Select the category of posts you want to display.
Tags: Select Post tags.
Exclude: Remove any posts that you do not wish to include.
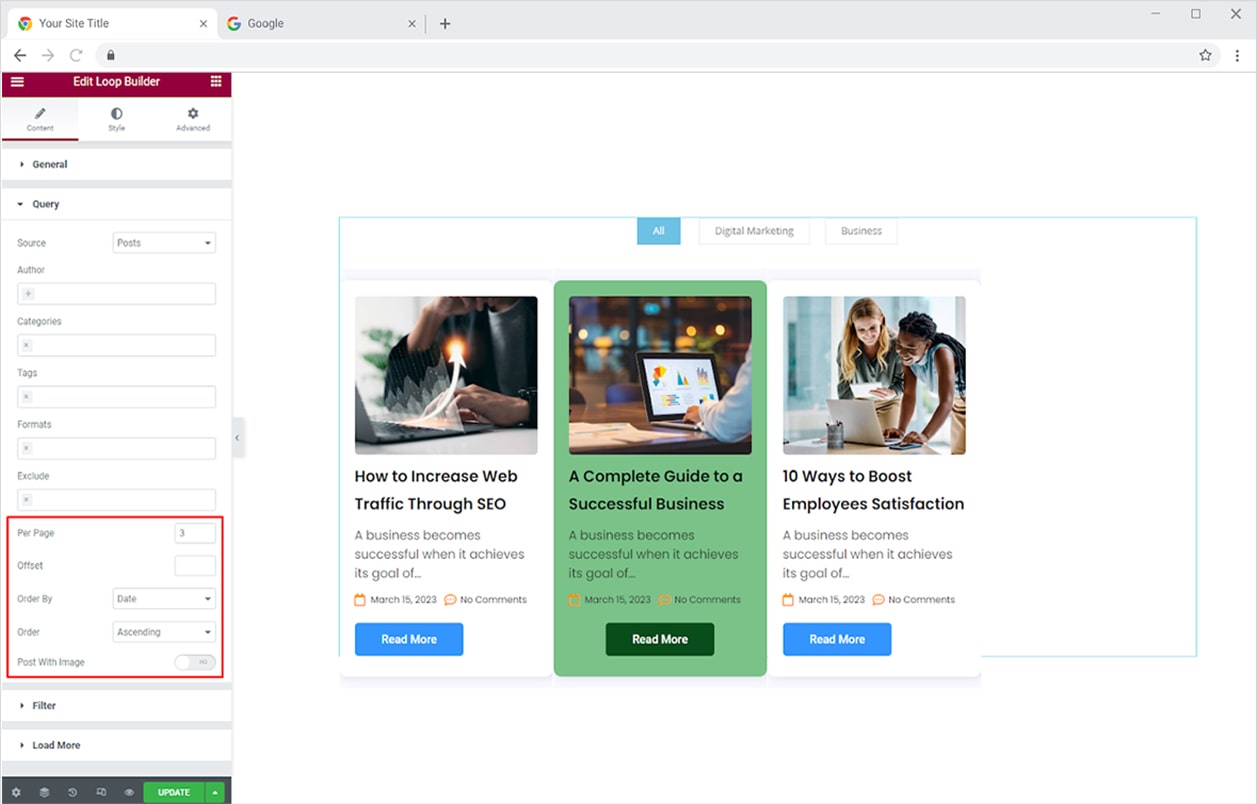
Furthermore, you have the following options to adjust the arrangement of posts.
Per Page: Select how many posts you want to display within one page.
Offset: When you increase the value the posts move forward to display the next post.
Order By: Select the order by date, ID, title, etc.
Order: Arrange posts in ascending or descending order.
Post With Images: Enable this option to only display posts that contain an image.
How to Add Filters in Elementor Loop Builder Widget
Differentiate each post by including filters so that viewers can simply locate the post they’re interested in. To display the filters, open the Filter menu and toggle the enable option.
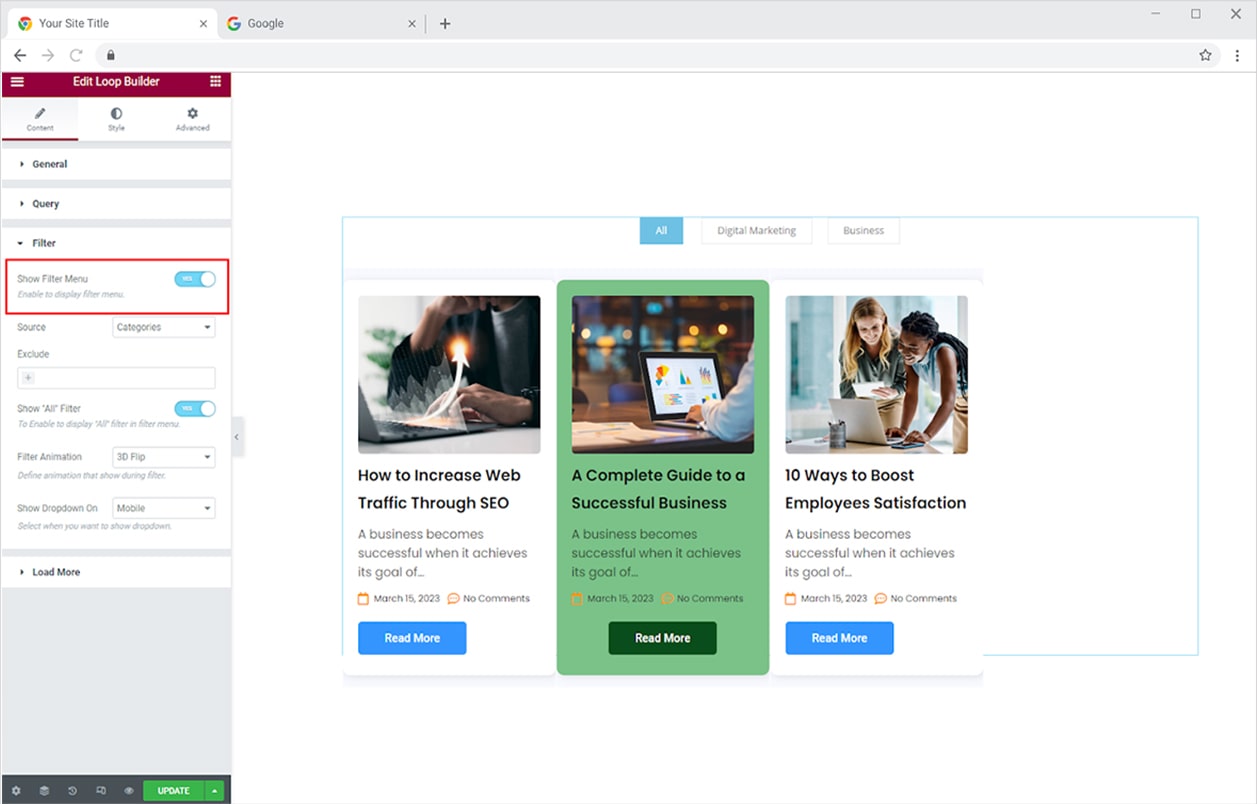
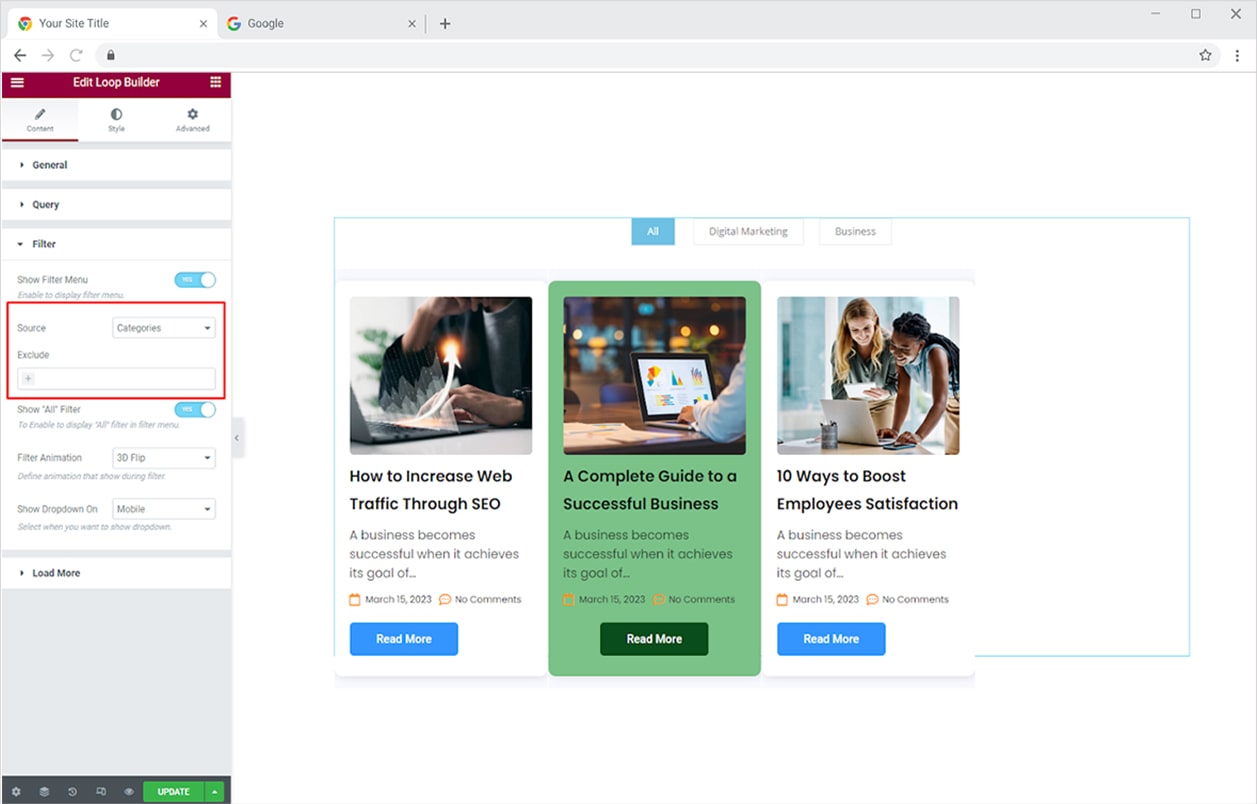
Select the source of filters to specify on what basis the posts or products will be differentiated. You may exclude any specific post from display by typing in the post title in the exclude bar.
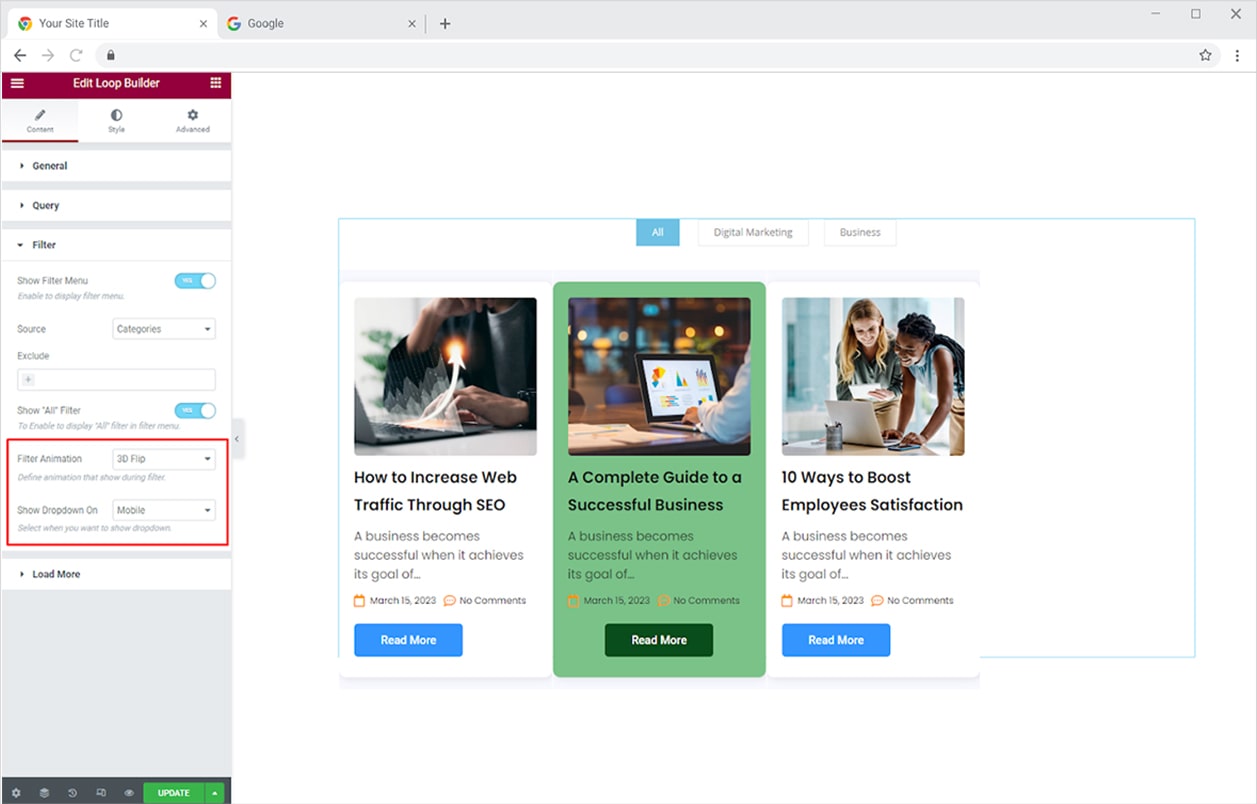
Entice users with fascinating animations when they switch between filters. The widget is fully compatible with mobile and tablet views so allow the widget to configure drop-down on mobile, tablet, or both devices.
How to Load More Posts in The Loop Builder Widget
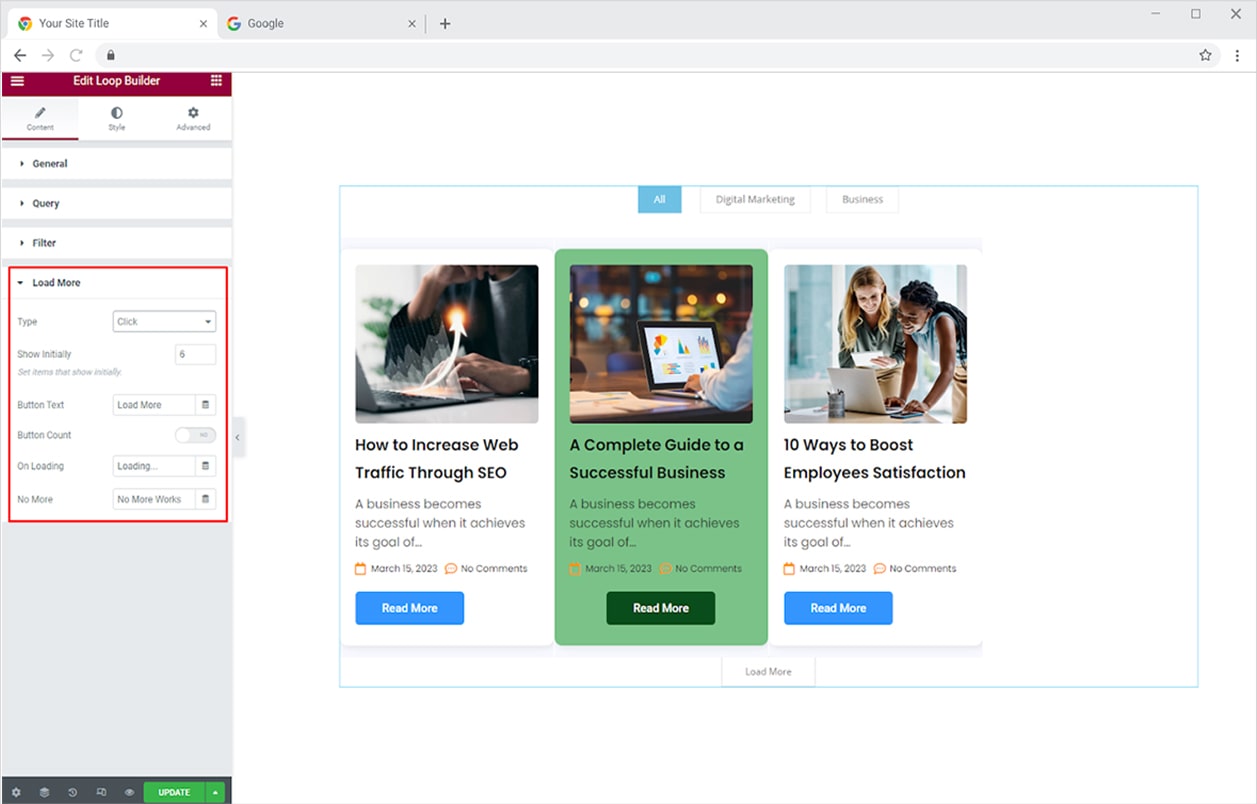
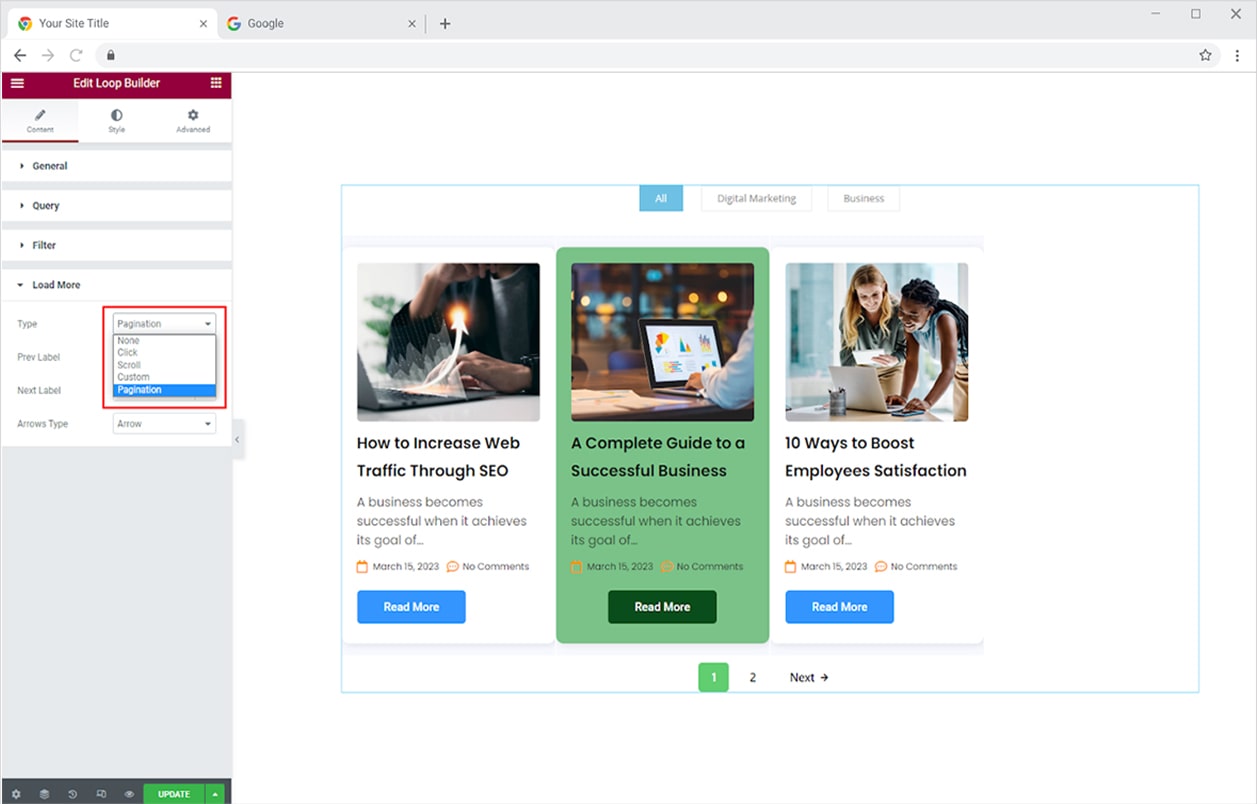
If you want your users to access all the posts while utilizing less space then use the load more feature. The Load More option allows the users to access all the posts if they are interested to see them. You can allow the user to load more posts in multiple ways such as click, scroll, custom, and pagination.
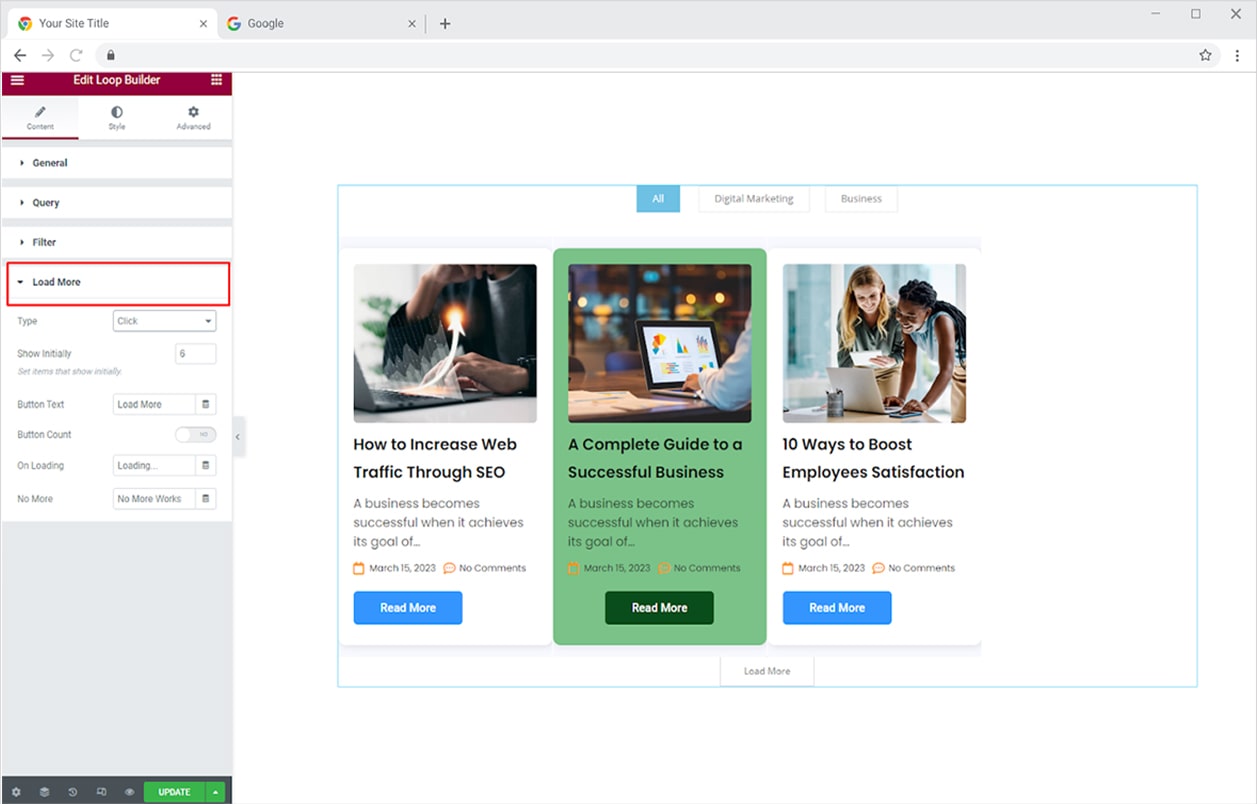
For Click and Scroll, set the number of items you want to show initially. Update the text for the load more button, on loading, and no more posts.
How to Add Pagination to Elementor Loop Builder Widget
Enable the Pagination option to enhance the posts display by allowing wider choices to your website users. Users can move forward or backward to access all the posts that you have to offer.
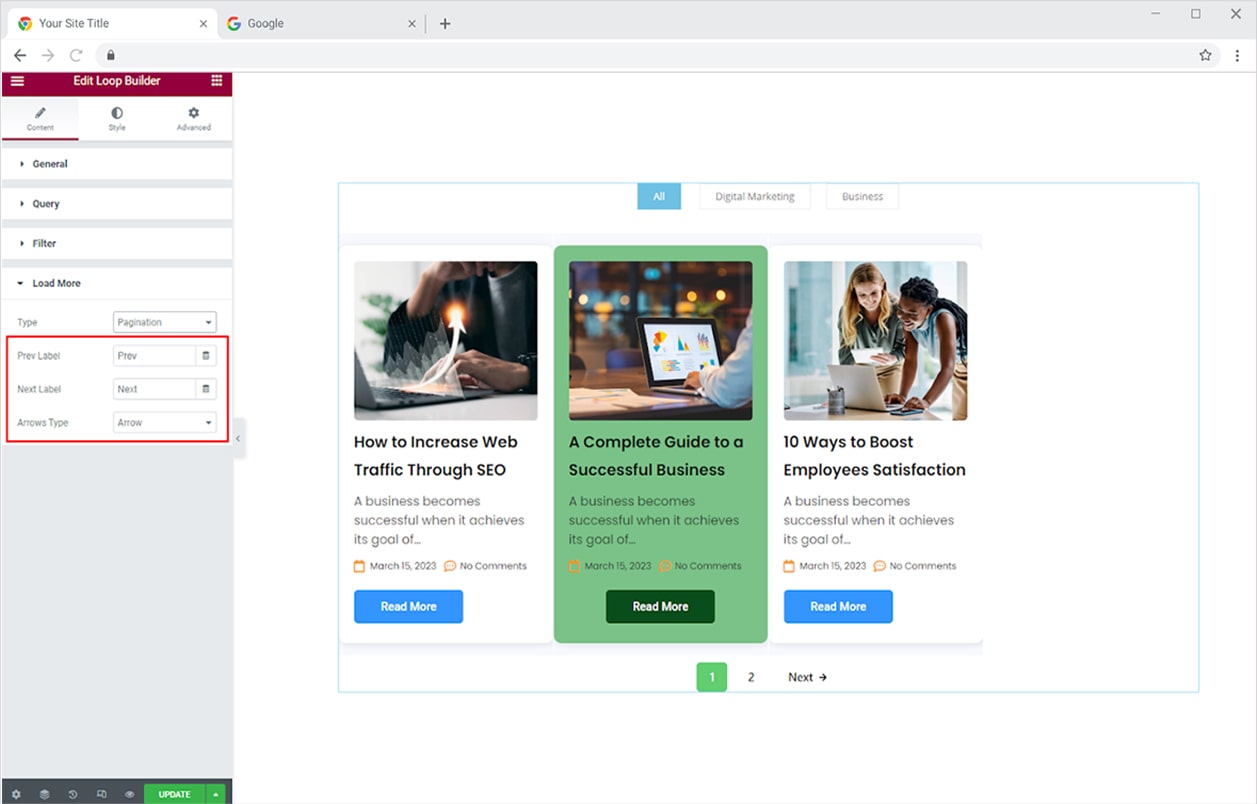
Moreover, add text to indicate users to move to the next or previous post display. You have the option of selecting the type of arrow from a larger selection.
How to Style Xpro Loop Builder Widget
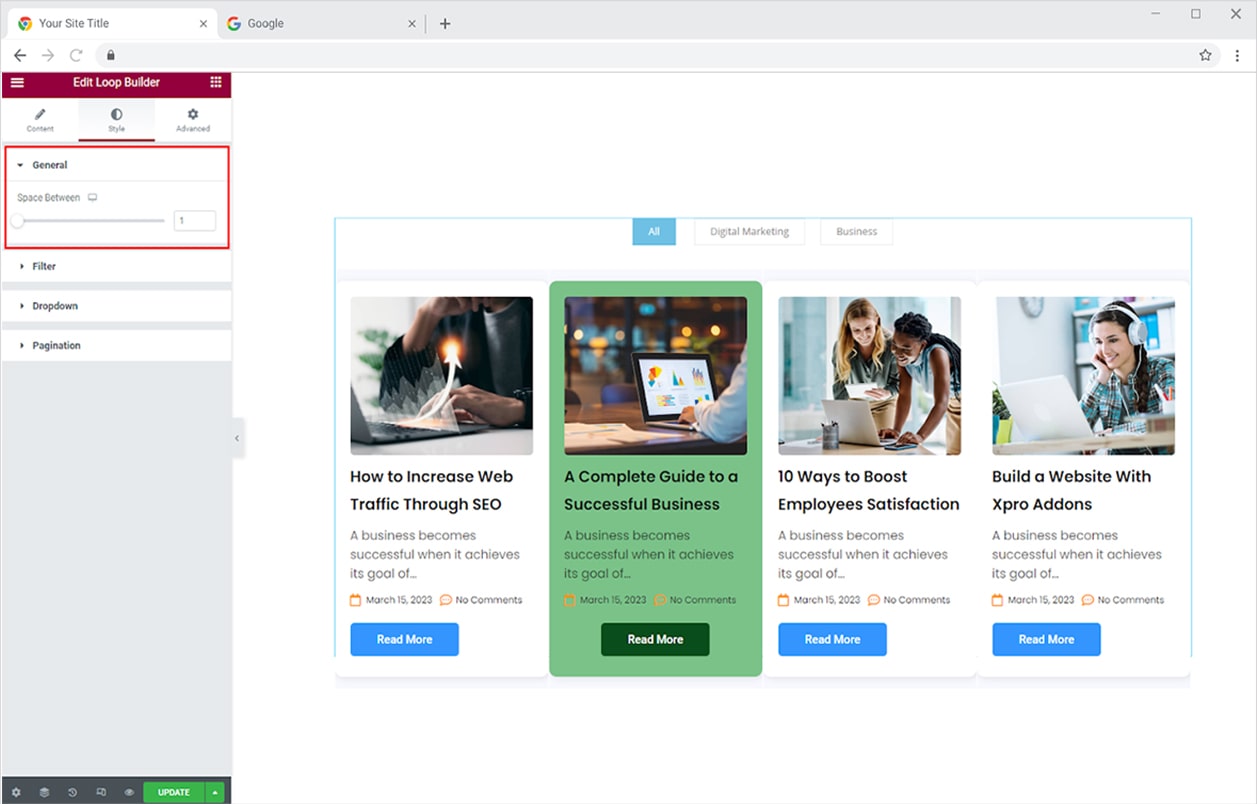
Open the style tab to adjust the space between posts. Write a value or move the circle to find the perfect space you desire.
How to Style Filters
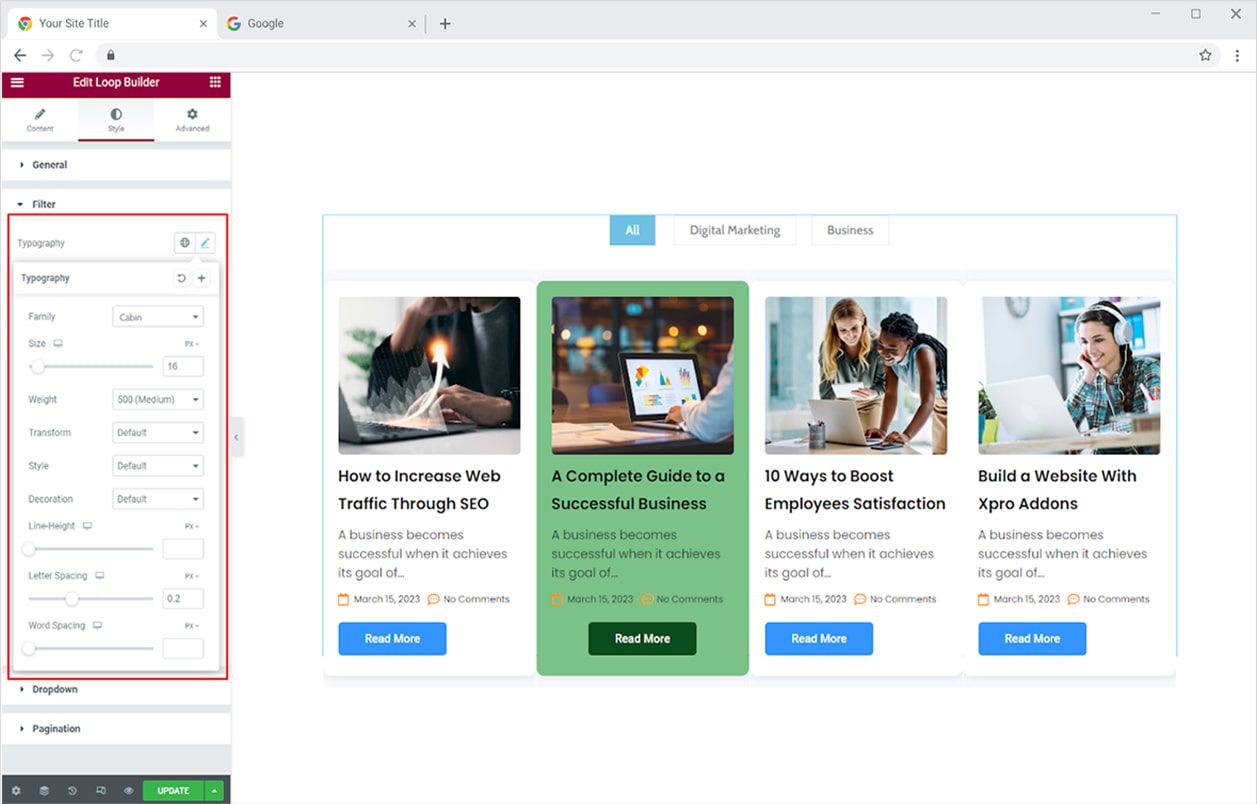
Click and open the filter menu to customize the design of the filter display. Perform multiple styling such as typography that allows you to change the font, size, spacing, and other personalizations to text.
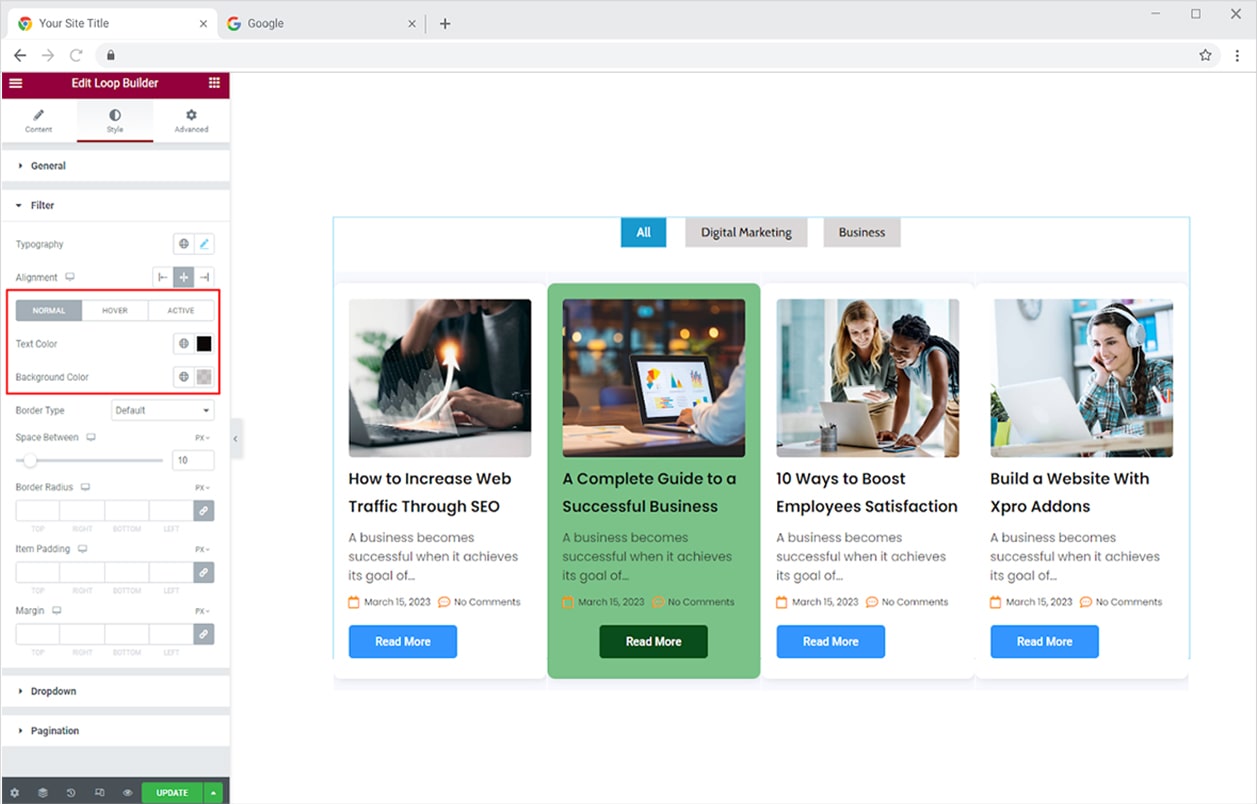
Move the filter to the left, right, or center with the alignment option. Furthermore, add colors to the text and background for normal, hover, and active states.
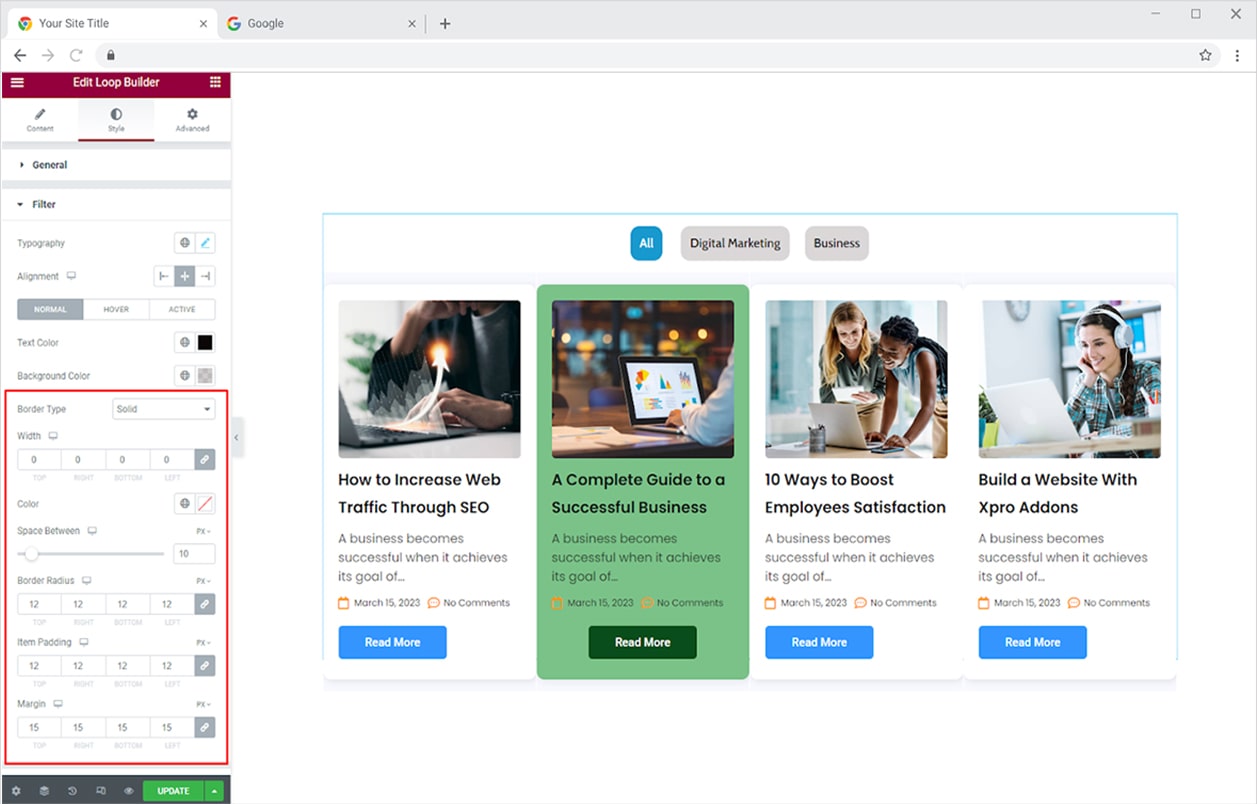
Create a border for each filter option by selecting a border type and further customizing its width, radius, and color. Moreover, adjust the space between each option to create a pleasant-looking filter section.
How to Style Drop-down Menu for Mobile View
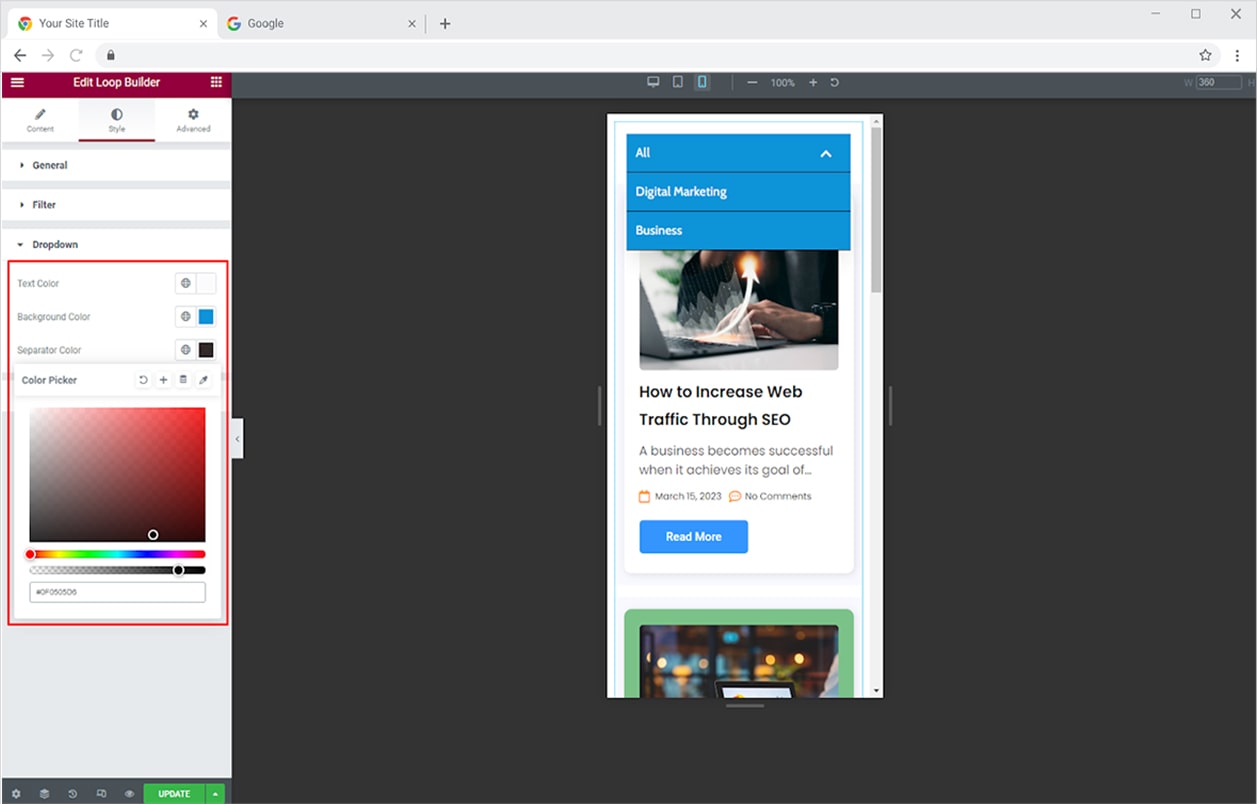
If you have enabled the option to showcase the drop-down menu on the mobile, tablet, or both devices then you have the option to customize their display. Click on the Responsive Mode and view the display in mobile or tablet view to get an idea of how it will be displayed on other devices.
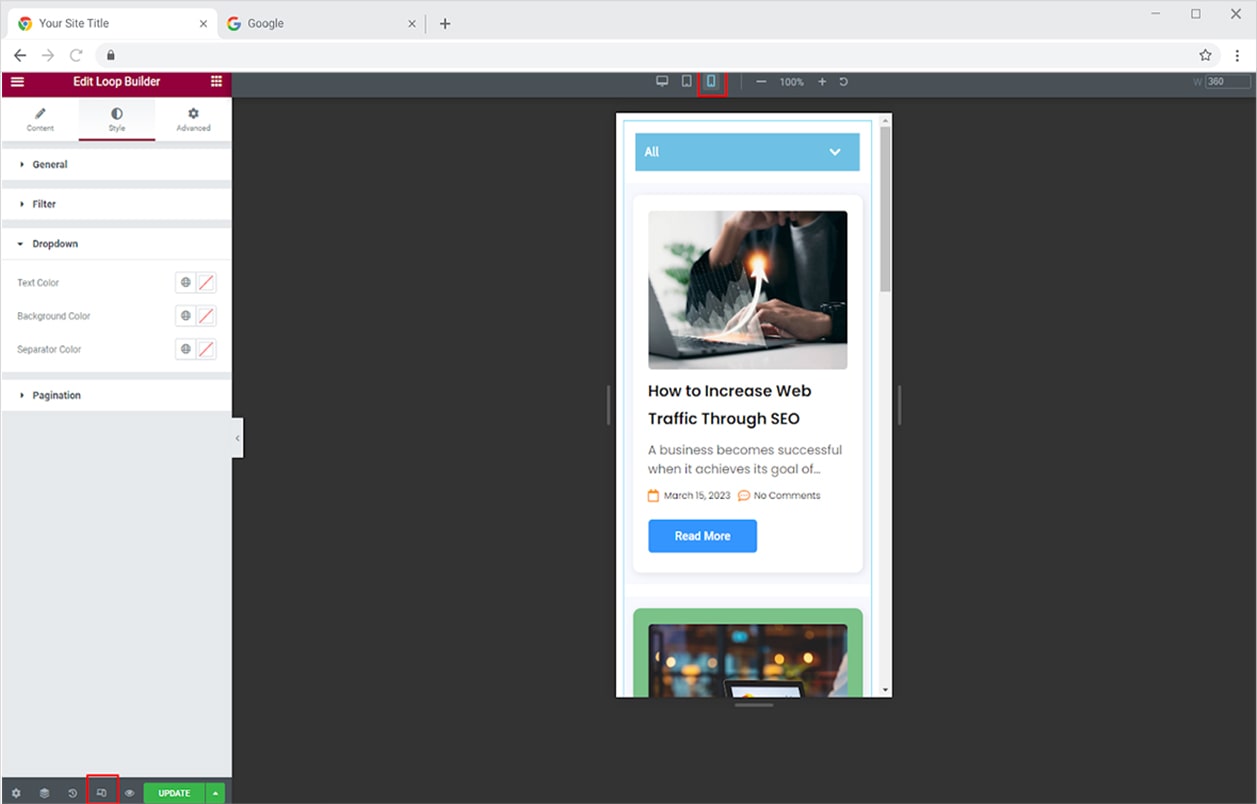
The drop-down styling menu consists of text color, background color, and separator allowing you to design the display according to your theme.
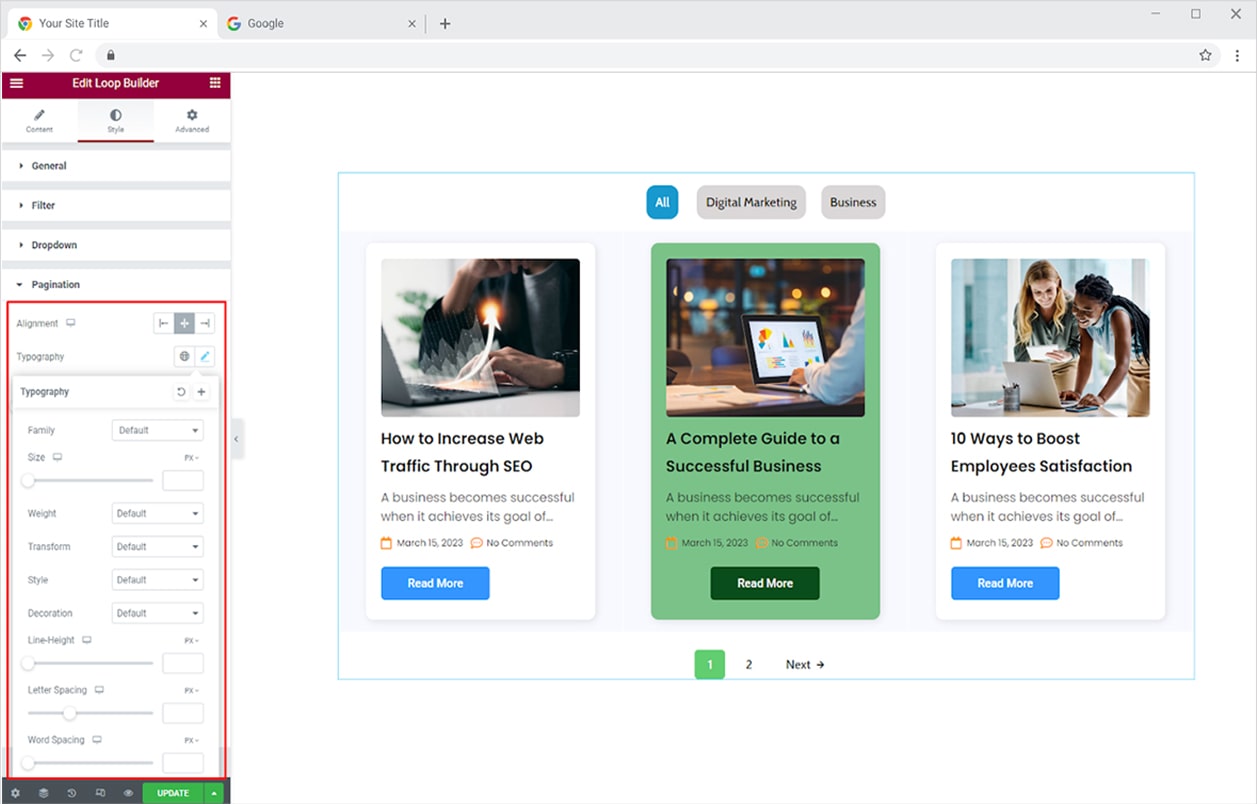
How to Style the Pagination in Loop Builder Widget
Adjust the alignment of the pagination display to left, right, or center. In addition, style the typography of the text in the pagination that indicates users to move next or back. The typography box allows you to perform font, size, weight, spacing, and other text customizations.
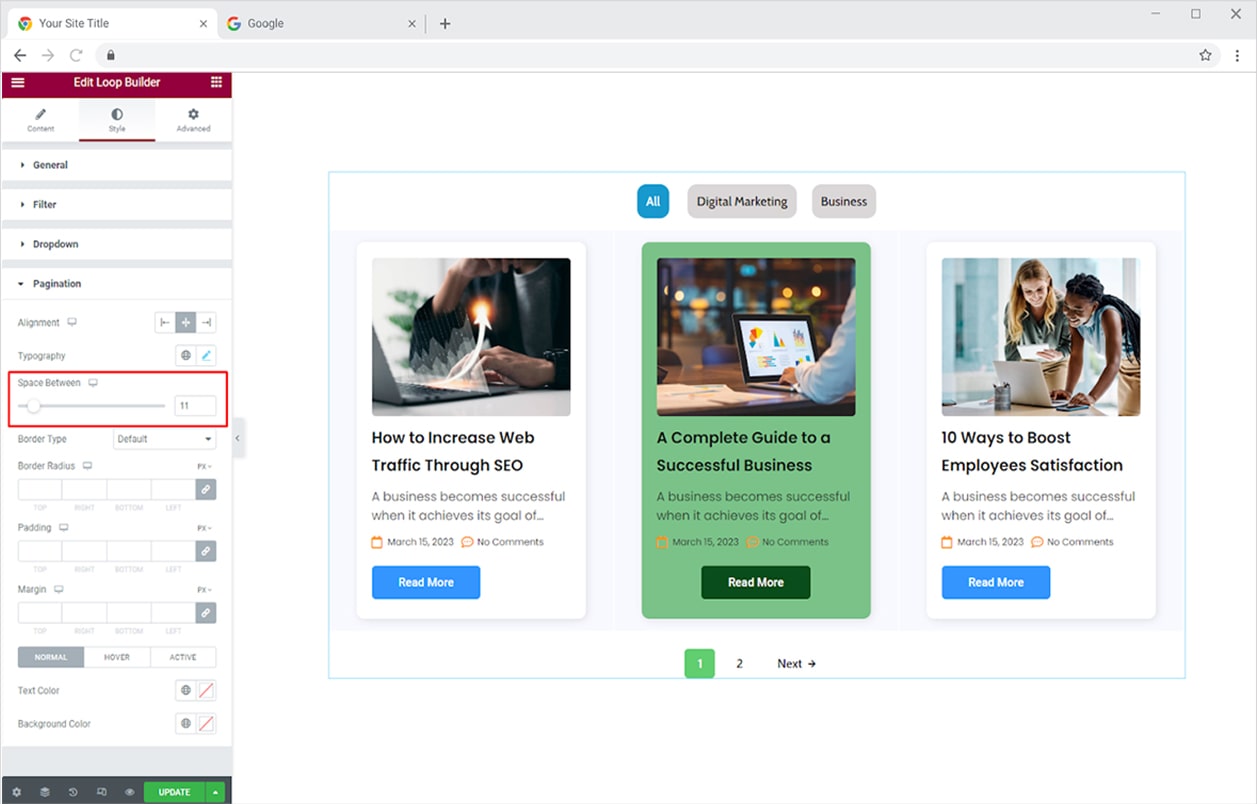
Adjust the space between each pagination option from the Space Between option.
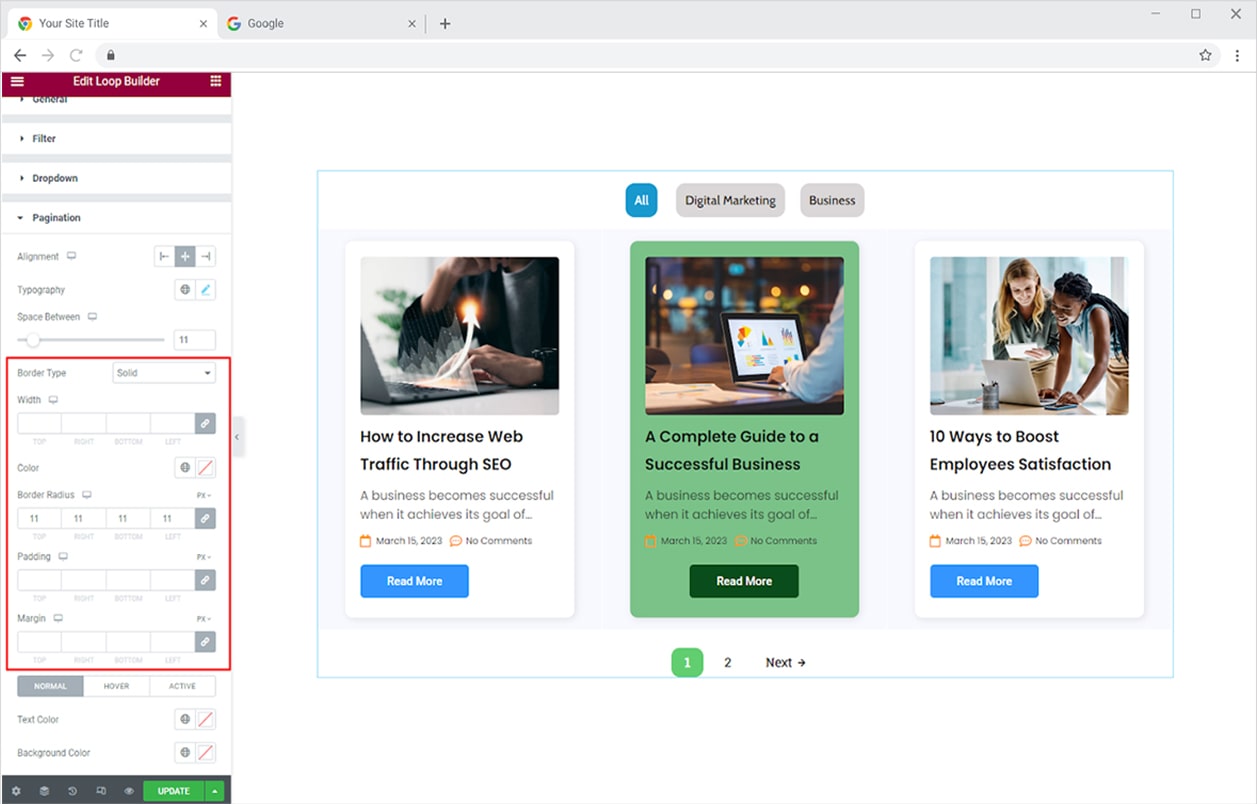
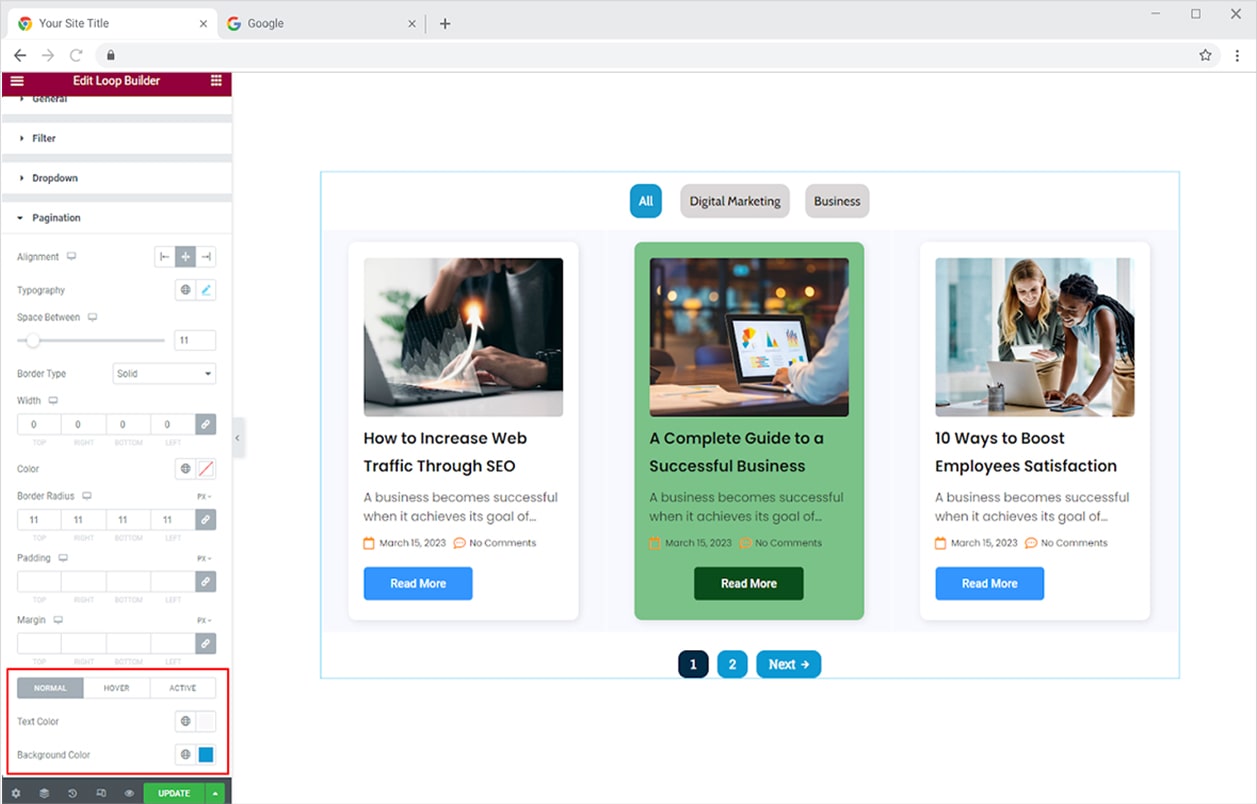
You may add a border by selecting a border type between solid, double, dashed, dotted, and groove. In further editing, you can customize the border width, color, radius, padding, and margin.
You can color the text and background for its normal, hover, and active display.
Best Loop Builder Widget for Elementor
This was all from the Elementor Loop Builder widget by Xpro. Utilize this widget to create a post, product, or any kind of listing. If you want to create a custom loop with carousel functionality then you can use another advance Xpro widget Elementor Loop Carousel. This widget enhances functionality with a more attractive user experience.
Xpro Elementor Addons consist of a wide range of widgets, features, and templates that help you develop a website with ease and without any need for coding. We offer more than 50 widgets in our Free Elementor Addon pack. If you want to create an advanced website then you must check out our Premium Elementor Addons.