Introduction
The logo Carousel widget by Xpro Elementor is a useful plugin to display the logos of your partners, sponsors, and clients logo. Websites use this amazing feature to build the value of their brand by showing logos of the companies they are working with. This premium widget by Xpro Elementor is easy to use and allows you to create a logo carousel in no time.
The Logo Carousel for Elementor is an essential tool for every business website. Xpro Elementor not only allows you to add logos, but it also allows you to execute different designs and modify them to match the theme of the website.
How to Install Logo Carousel Widget
Requirements
You need to install and activate the pro plugin by Xpro Elementor Addons. If you already have the plugin installed, just make sure the Widget is enabled so you can find it in the Elementor editor.
To enable the widget, simply follow these steps:
Step 1
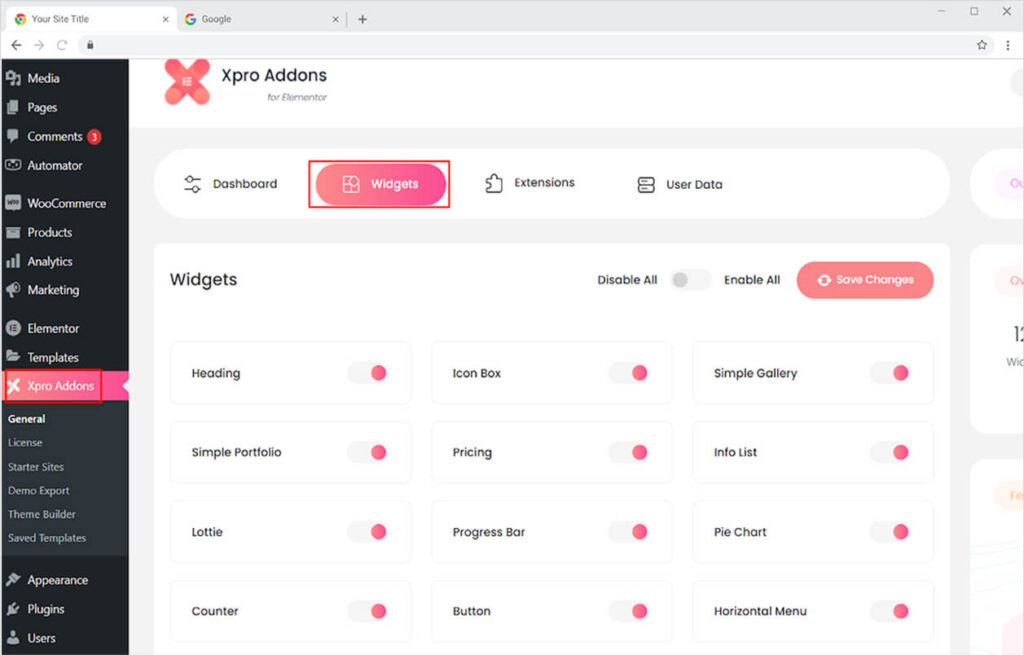
Click on the Xpro Addons option available on the WordPress Dashboard Menu.
Step 2
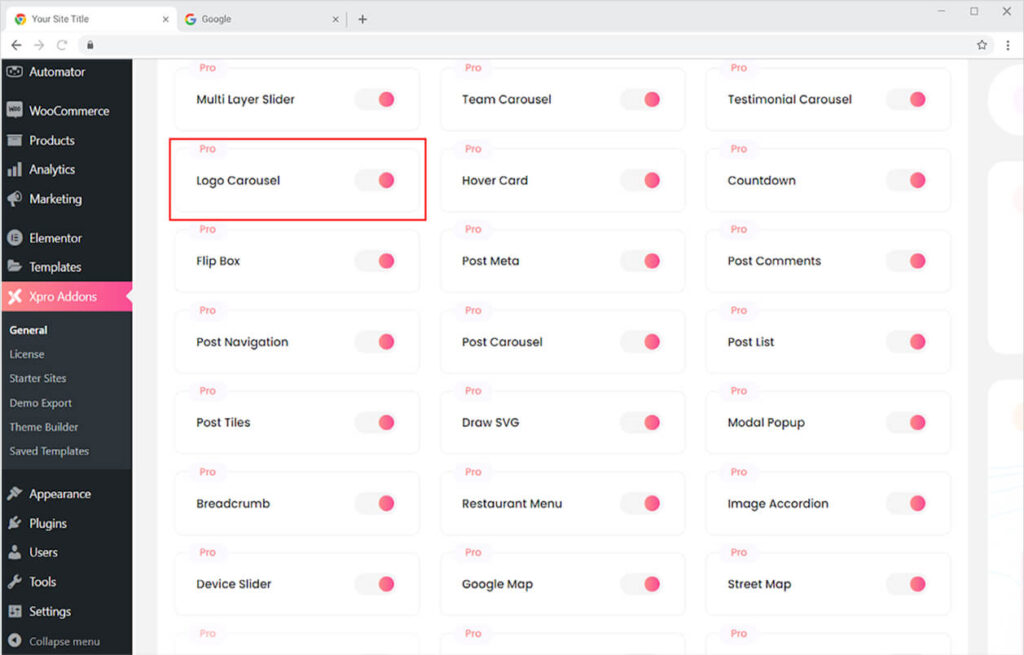
From the Xpro Addons Dashboard, click on the Widgets Tab, find the Logo Carousel widget, and finally, toggle the button ON to enable it.
How to Use Logo Carousel Widget
This effective widget will be extremely beneficial to your business and marketing efforts. Tell the visitors and your customers about companies you have served with your exceptional services. The logos on your site tell a story about the capability of your business service. Add many logos of the big firms you have worked with in the Logo Carousel Widget.
Step 1
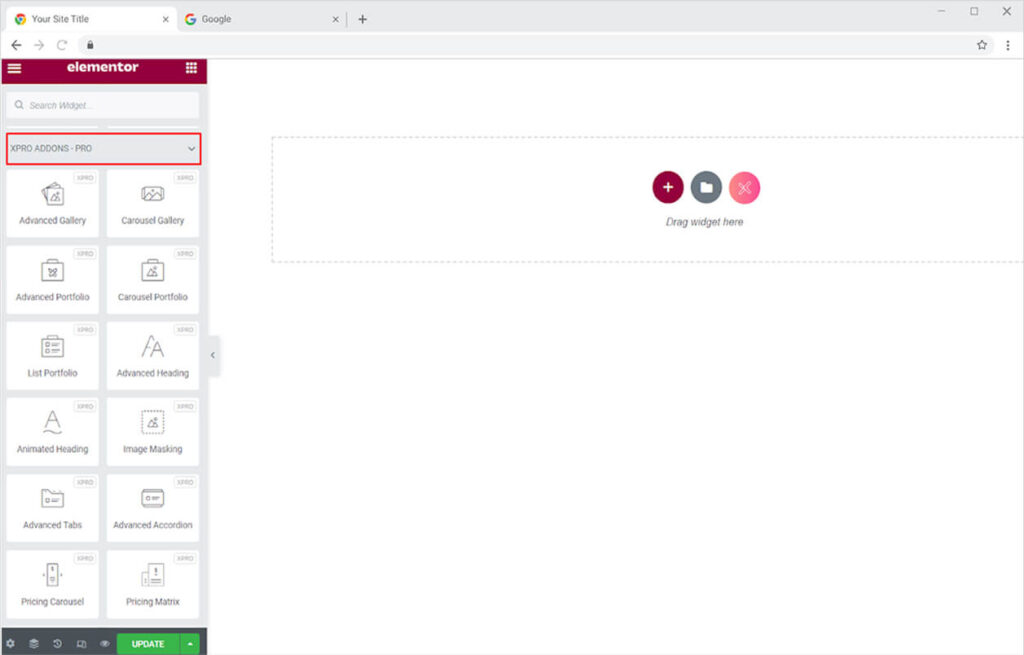
Click on the Xpro Addons – Pro section available in the Elementor Editor.
Step 2
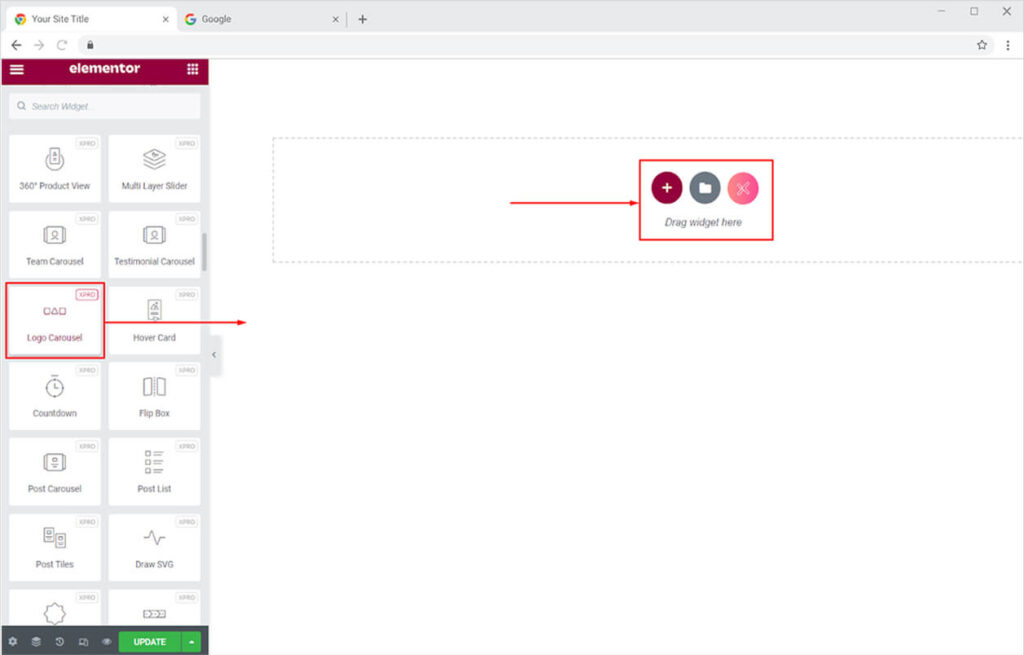
Search for Logo Carousel in the search bar and drag’n’drop the widget on your desired page location.
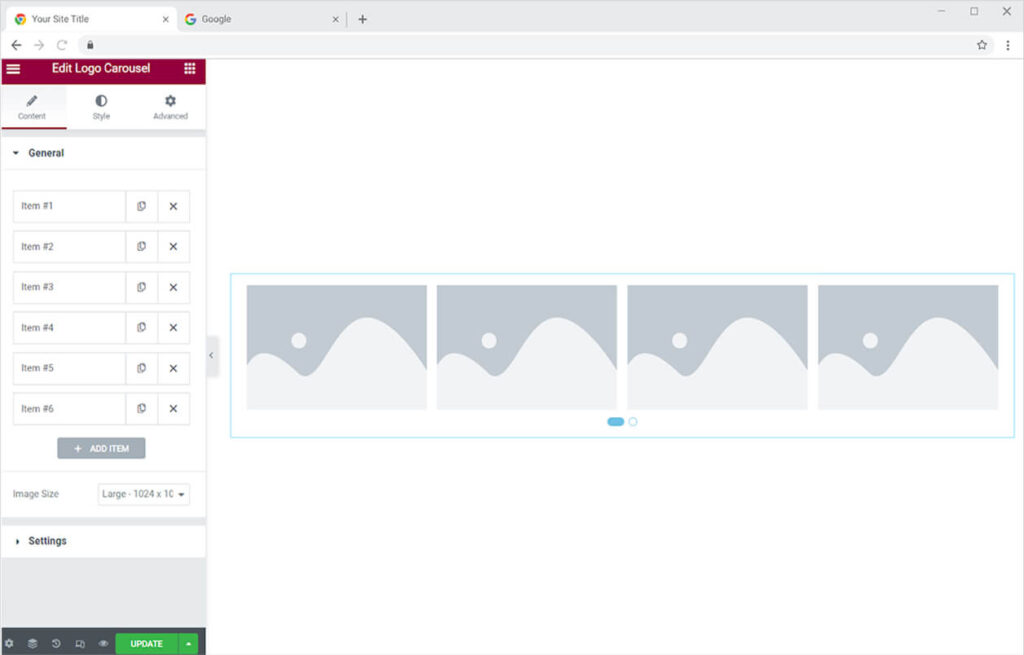
This is the default view of Logo Carousel.
How to Add Logo to The Logo Carousel Widget
You can see boxes with item numbers in the Content Section’s general settings. To add a logo to the widget, open these item boxes. You can upload an image from your computer’s media collection or from your desktop.
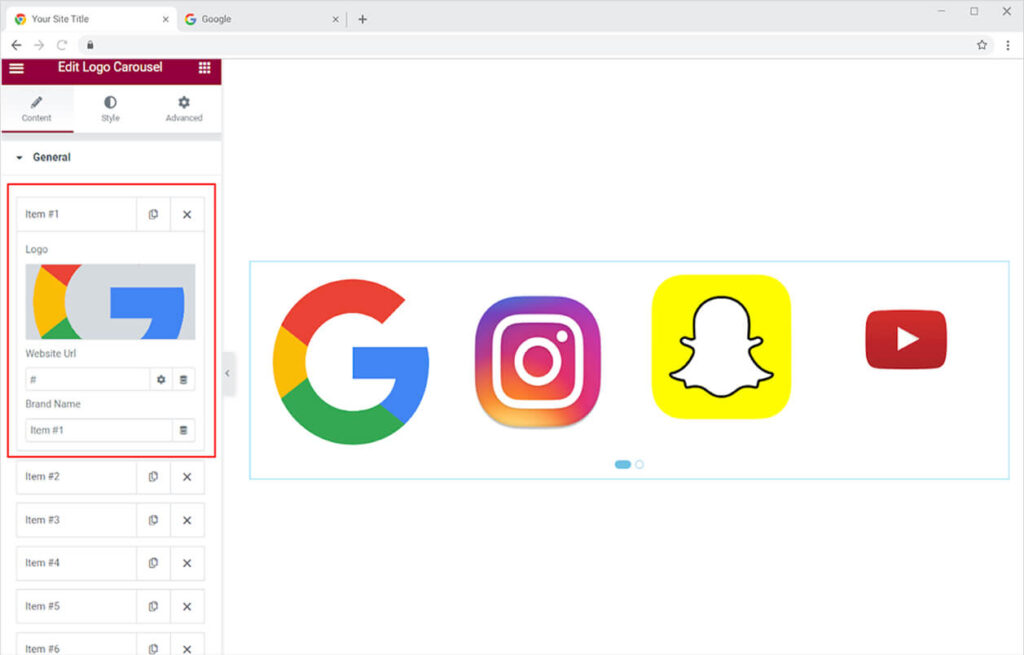
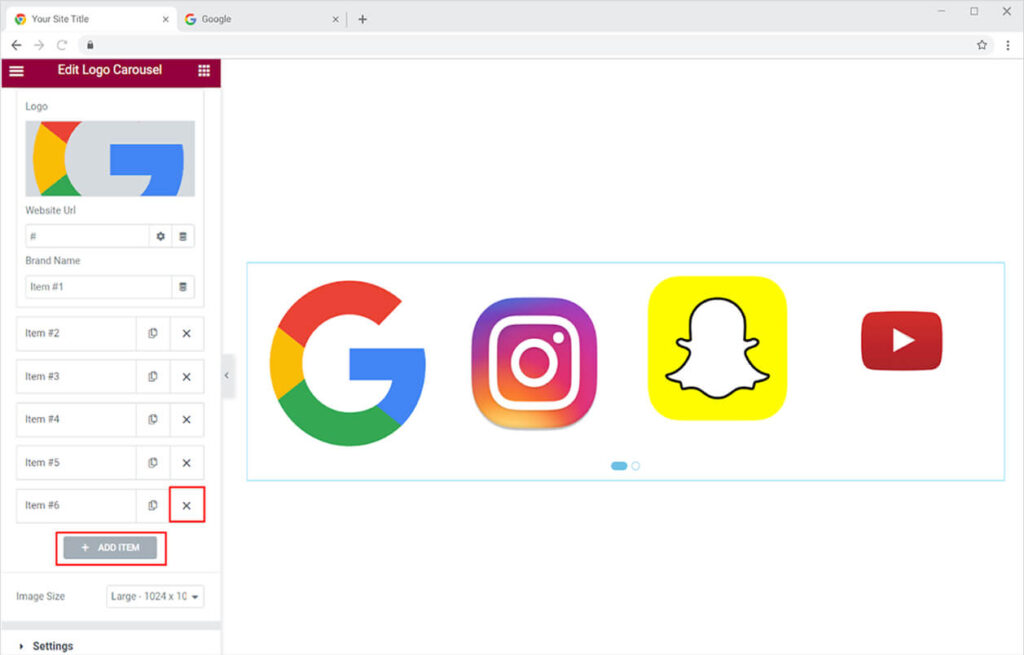
Add as many logos as you want. Click on the Add Item to add more boxes for adding images. And if you see an extra box and do not want to use it then cancel the box by clicking on x.
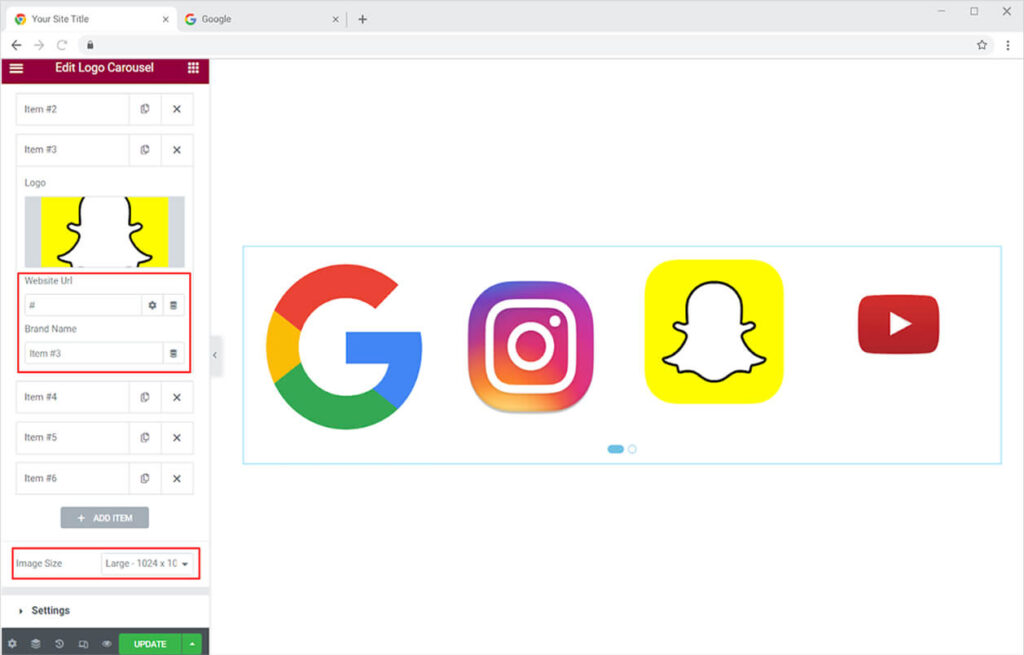
Add the business name of each and provide them with a link to their site. Adjust the size of the image with the Image Size option.
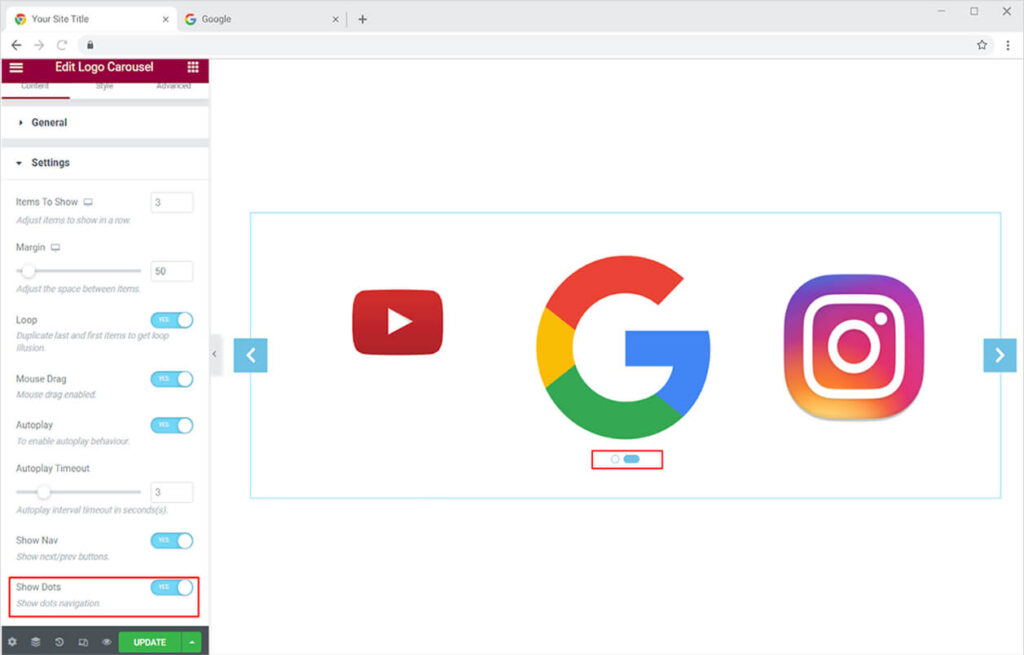
In the setting menu of the content section, you can manage how many logos can be displayed at once on screen. Set apart these logos by setting the margin between them.
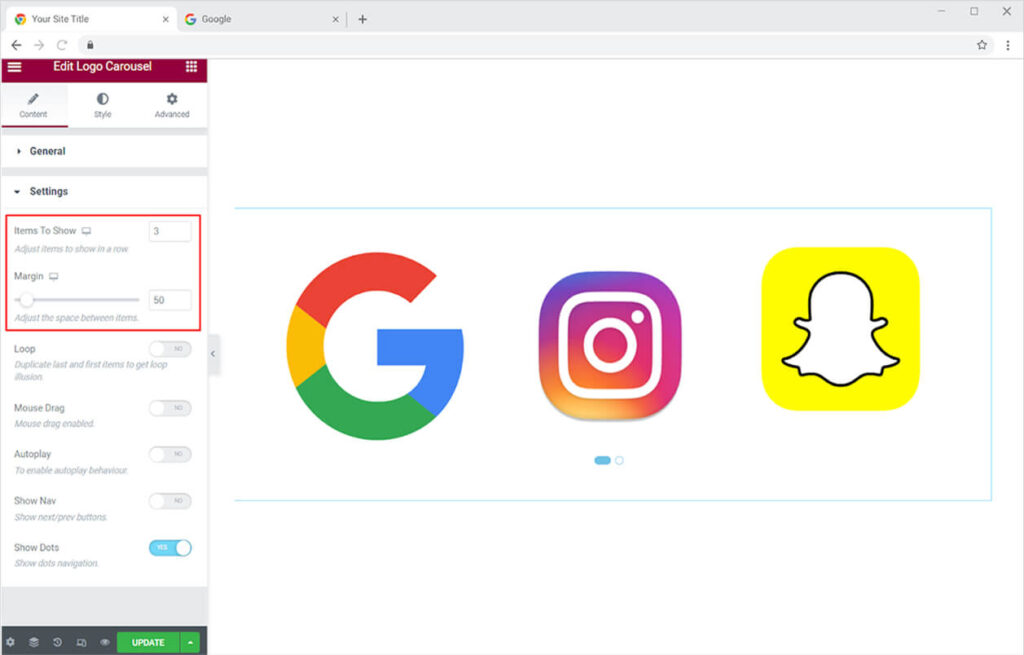
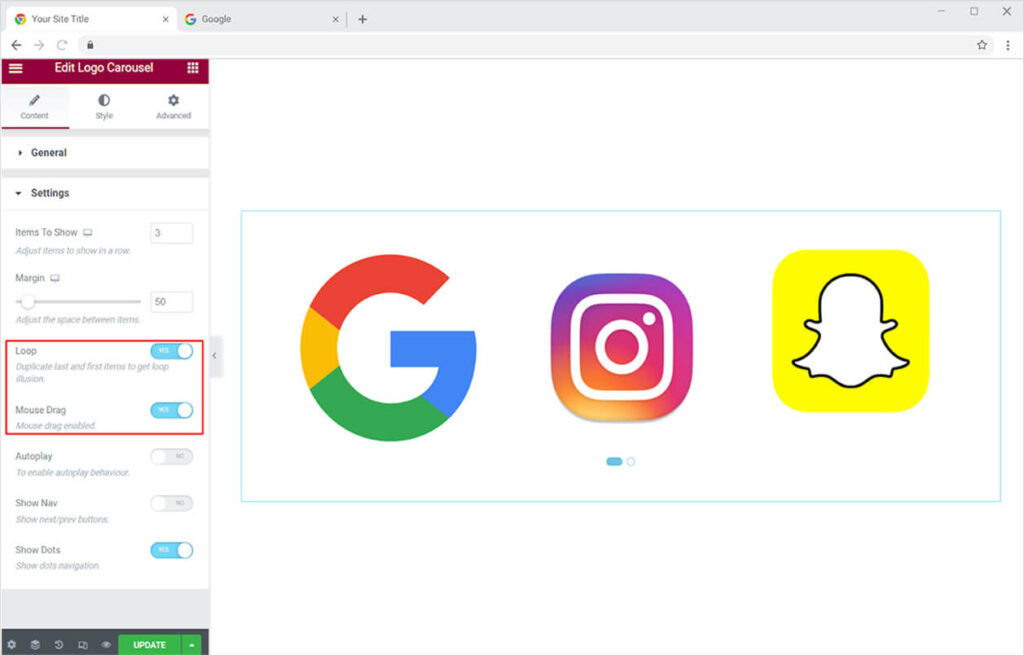
Set up a loop so that the first image appears after the last picture. You can allow visitors to swipe images by dragging the mouse on it. Enable the mouse drag option to let users play with it.
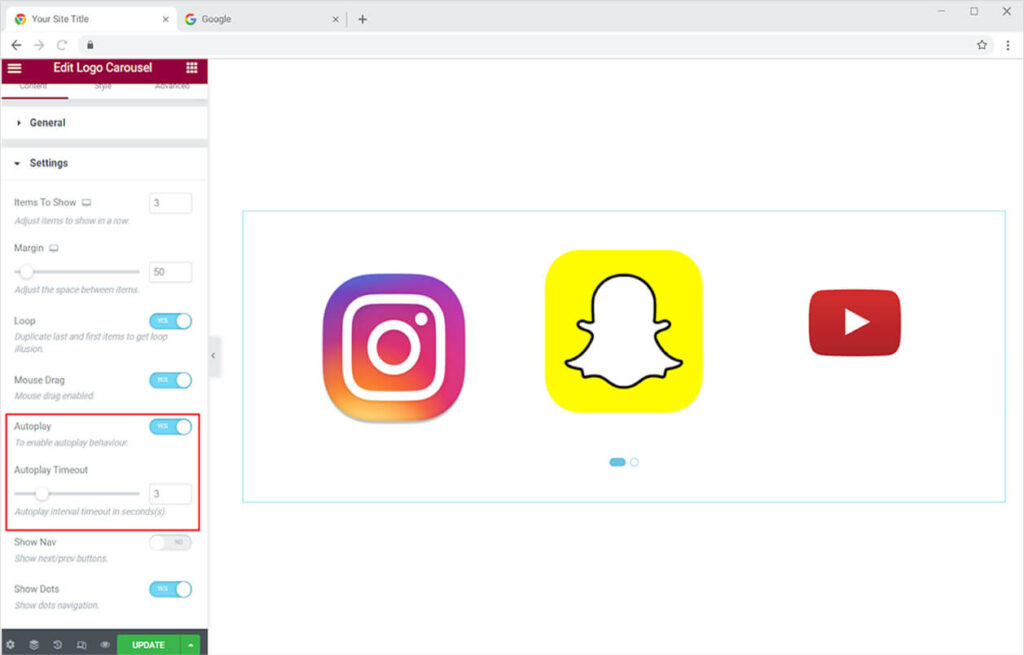
Allow autoplay to keep moving forward to the next image and display the visitor every shot without the need of clicking anything. Set the time for the interval between pictures.
You can also put navigational arrows to allow users to change images by just clicking on the left or right navigational keys.
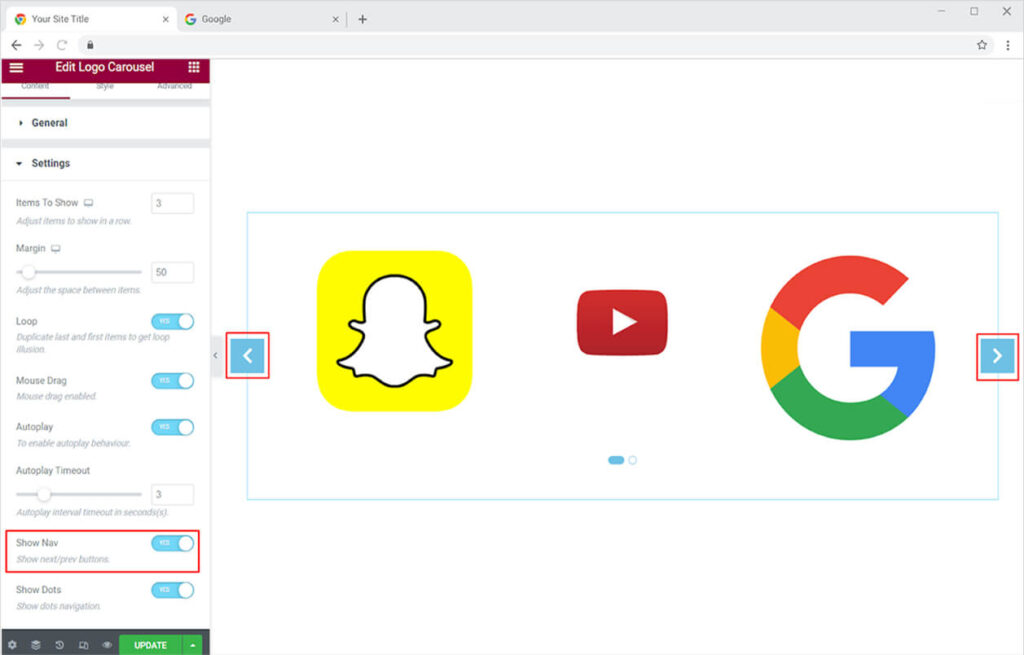
Display dots at the bottom of the logos to inform users of the location of the logo pictures they are viewing and to assist them in moving on to the next picture.
Style Section
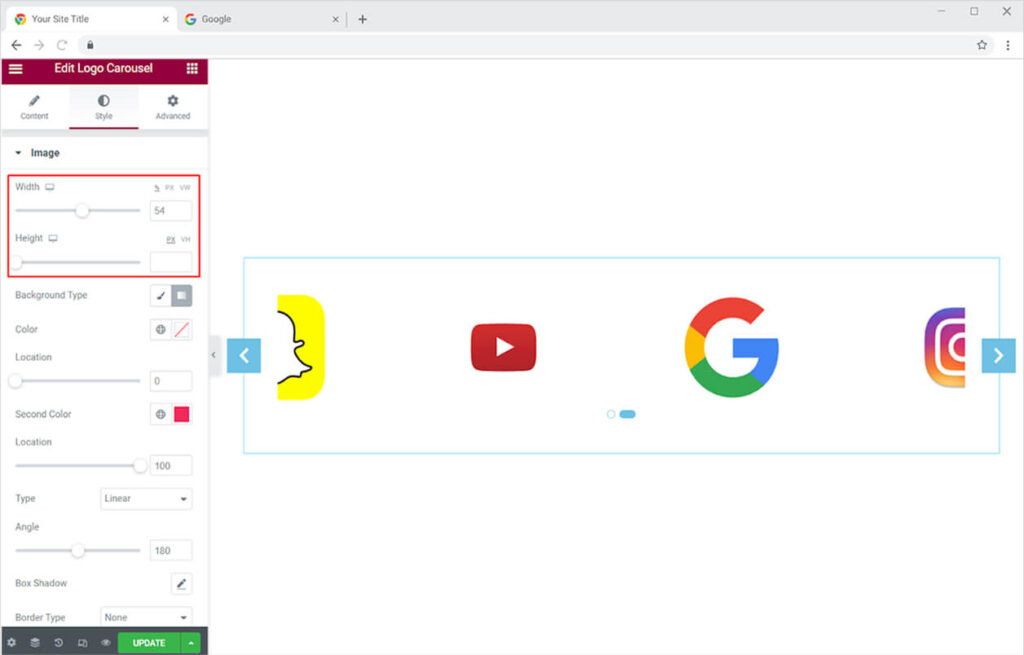
From the style section, you can perform further customizations to the widget to make it look suitable for your website theme and layout. Change the size of the logos with the options of width and height adjustment.
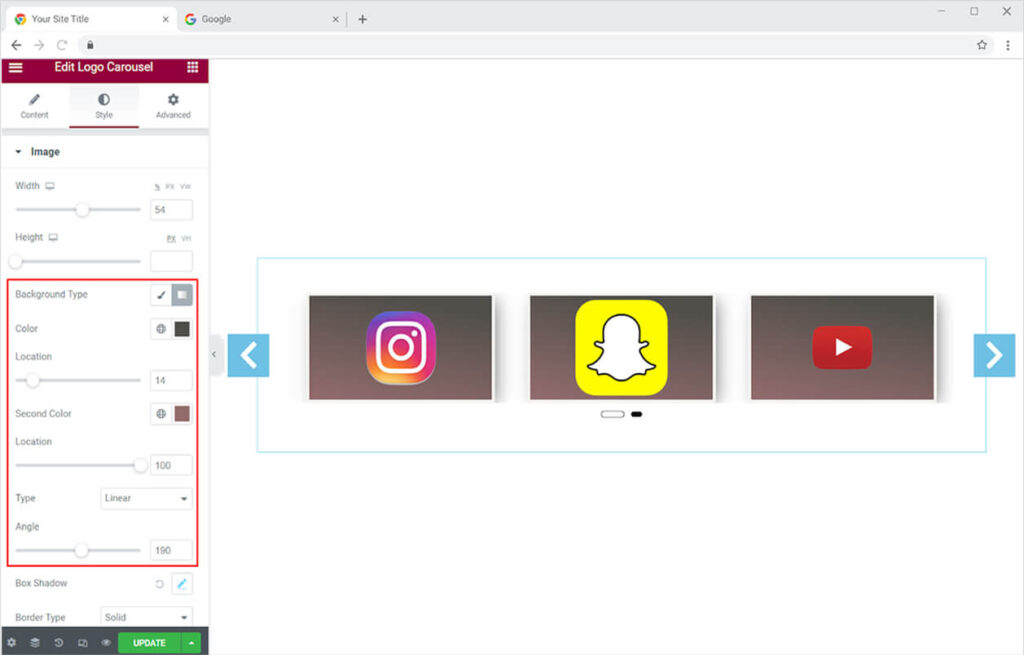
If you like, you can add a background to the logos. Put a classic or gradient color so that you can add two layers of colors and improve the widget’s beauty.
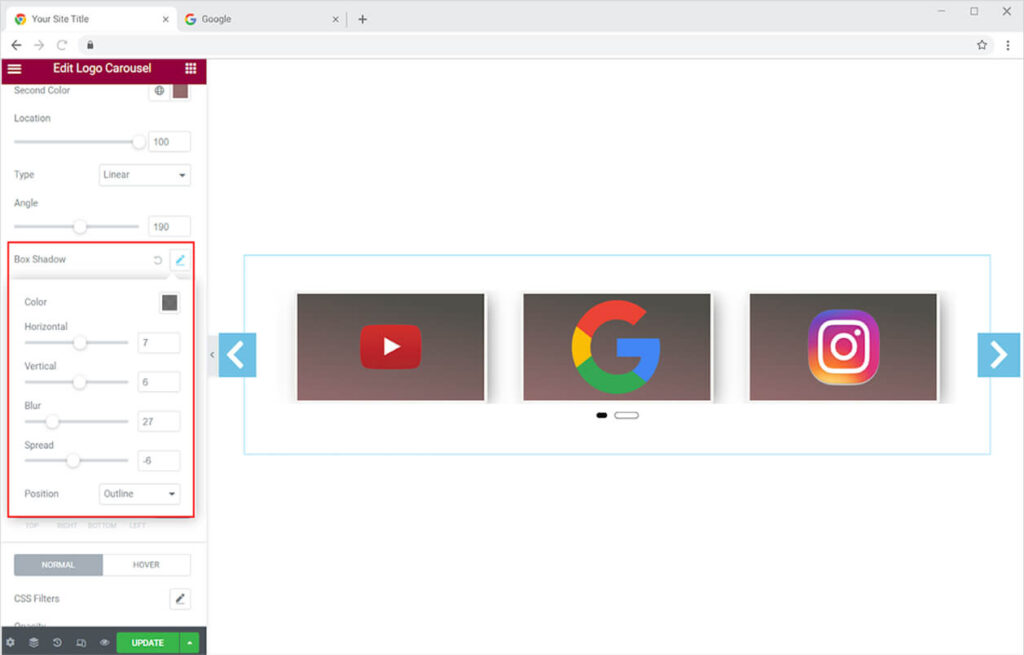
You also have the option of adding a shadow to each logo box with a shadow box. This might help you to make the images more appealing to your users.
Add a border to each box and adjust its width and radius. Fill up the border with a color that looks appropriate to the color of the background. Add these adjustments to the widget to improve its appearance.
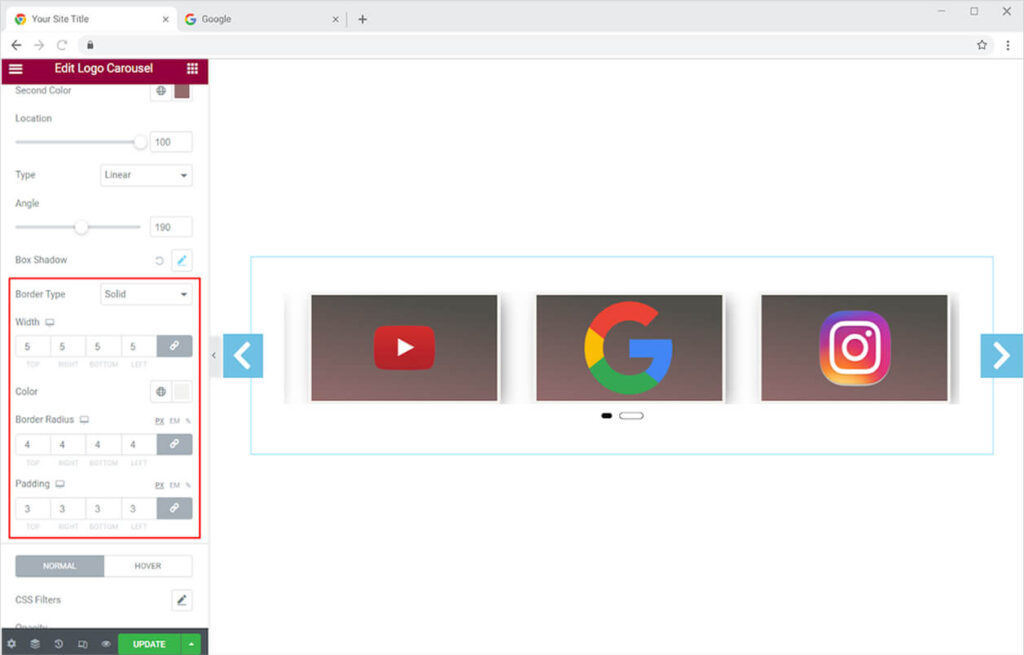
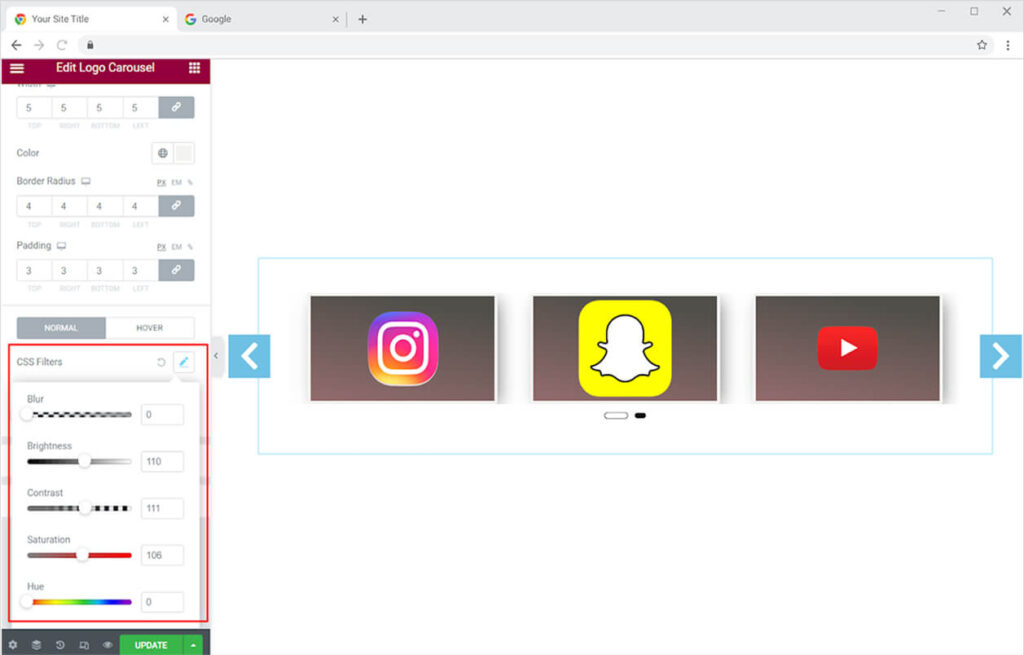
Add CSS filters for both normal and hover so that as the user moves the mouse above the logo, it changes. The CSS filters allow you to change the brightness, blurriness, saturation, contrast, and hue. You can also customize the logo’s clarity.
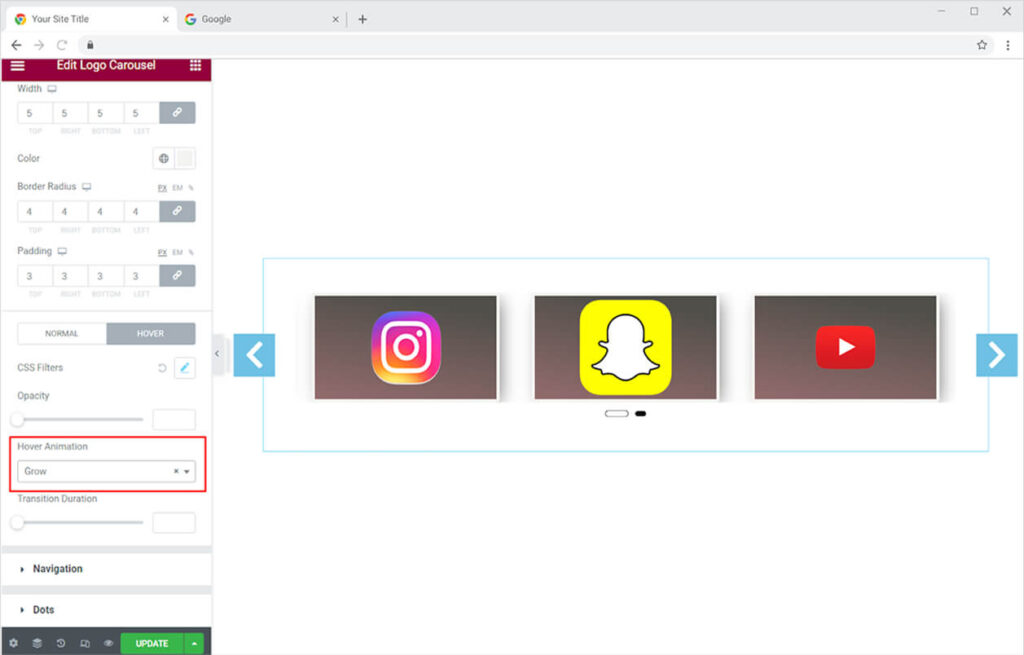
In the hover effect, you can also put a hover animation which will help you not just enhance the appearance of your webpage but also engage users in a much more effective way.
How To Style the Navigation Arrows in Carousel Logo Widget
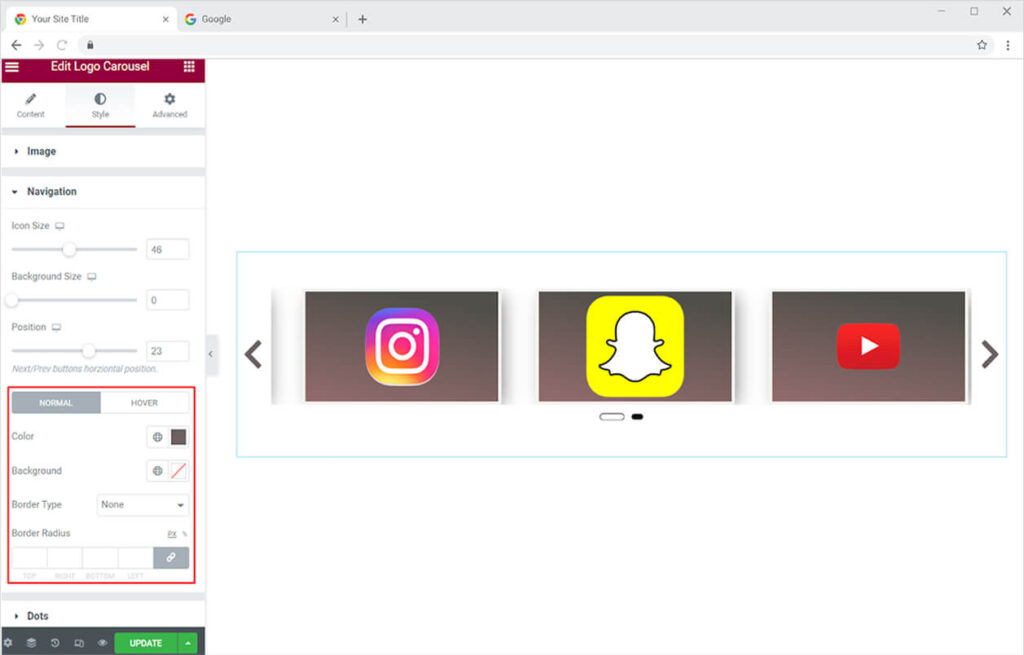
From the navigation menu, you can change the size of the navigation icon, and background and adjust the position of the navigation on the widget.
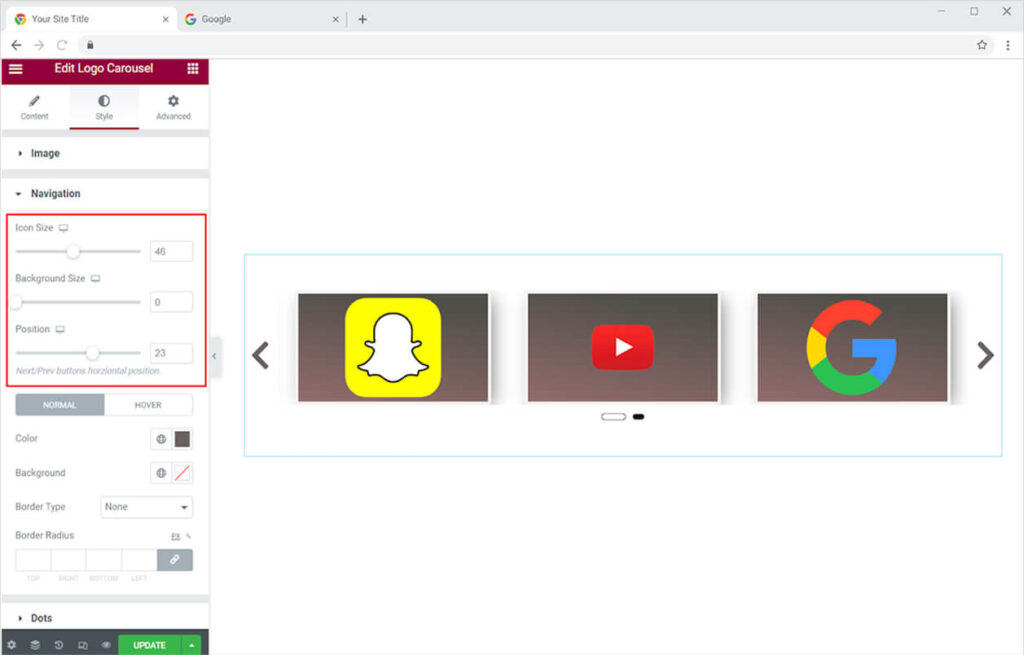
Color the navigation arrows and the background from below. You can alter the color effects for normal and hover so that they vary as the user drags the mouse above it.
How to Style the Dots in Carousel Logo Widget
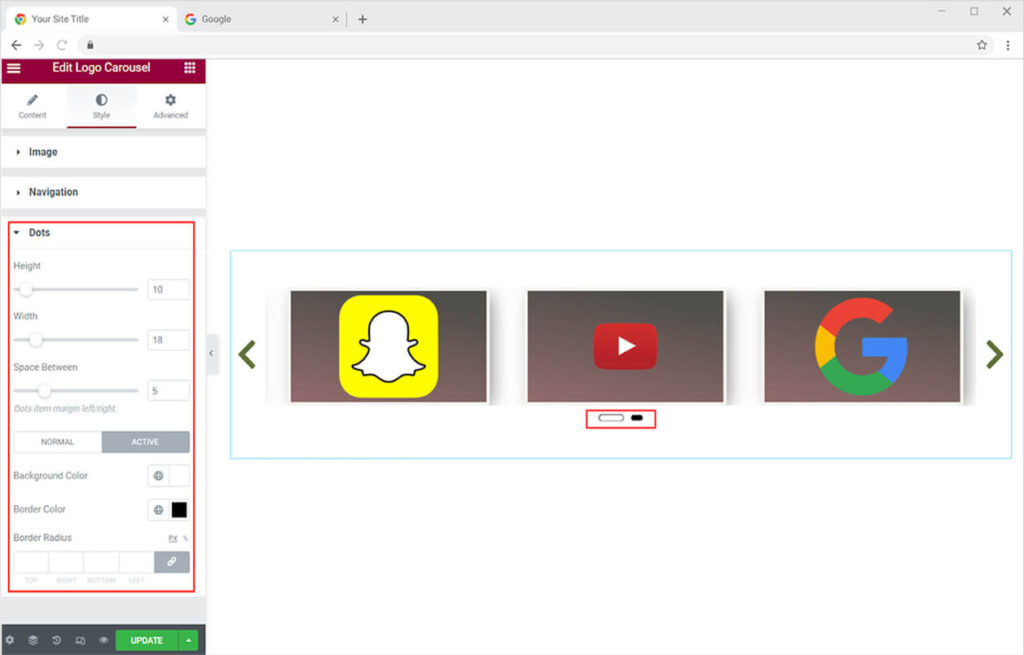
The dot menu allows you to change the height, width, and gap between dots. Color the dots according to your theme and layout. It also gives you the option of normal and active dots, with the active dots displaying a different display than the usual dots.
Best Elementor Carousel Logo Widget
This is all from the Xpro Carousel Logo Widget for Elementor. We hope that you fully understand the functionality and uses of this amazing element. Build an attractive webpage using this effective widget.
Xpro offers a wide range of widgets that help you develop a fully functional website without the need for coding. If you want to explore more widgets like the Carousel image then check out Carousel Gallery Widget for Elementor.