Introduction
The Elementor Hamburger widget allows you to add a three-line icon that displays menu items when users click on it. Usually, this widget is used for site navigation where you add pages to your website. Xpro Elementor Theme Builder, on the other hand, allows you to include any add-ons in the Hamburger widget.
The Xpro Hamburger widget for Elementor comes with seven fantastic layouts that enrich the website’s design and user experience. Change the background of the buttons and menus to match the theme of your page. The premium Xpro Theme Builder includes all of the stylistic choices you’ll need to create the best-looking layout.
How to Install Hamburger Widget
Requirement
You need to install and activate the Pro version of Xpro Elementor Addons. If you already have the plugin installed, just make sure the Hamburger Widget is ‘Enabled’, so you can find it in the Elementor editor.
To enable the widget, simply follow these steps:
Step 1
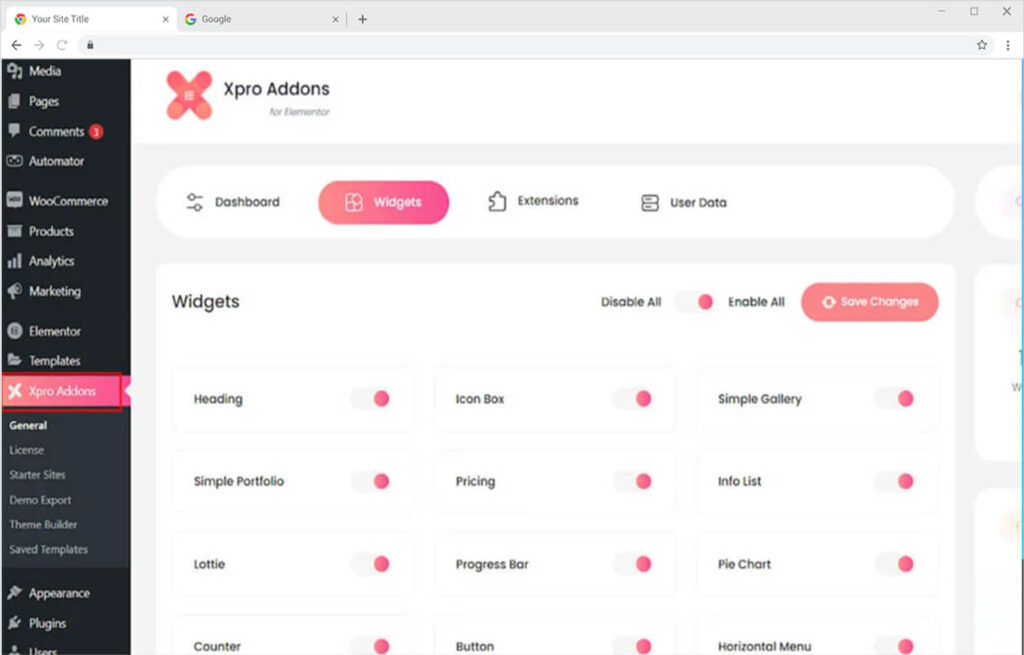
Click on the Xpro Addons option available on the WordPress Dashboard Menu.
Step 2
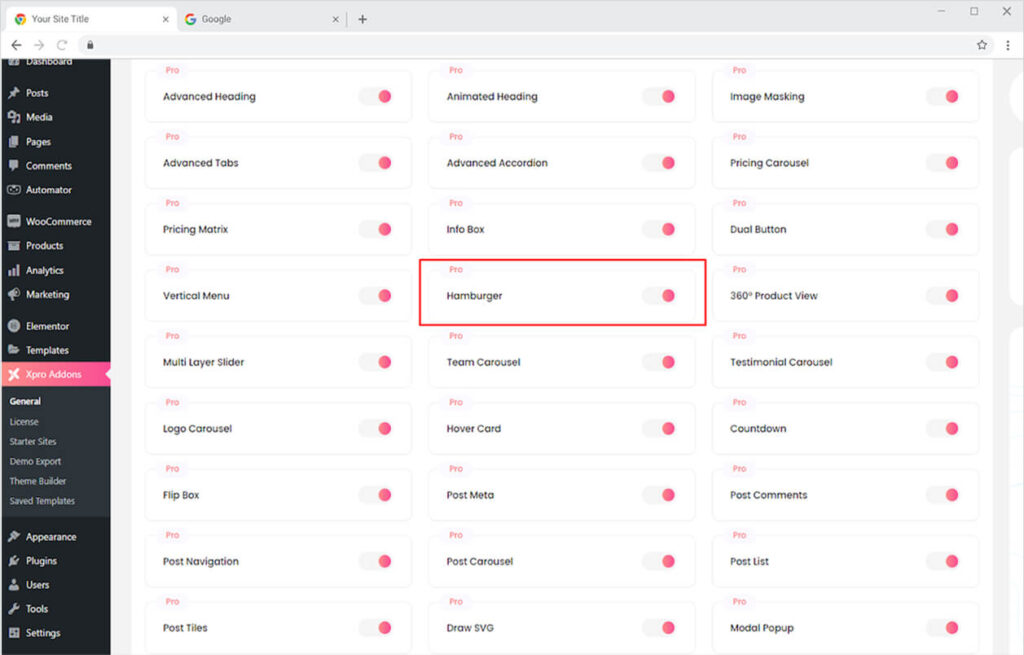
From the Xpro Addons Dashboard, click on the Widgets Tab, find the Hamburger widget, and finally, toggle the button ON to enable it.
How to Use Hamburger widget for Elementor
The Xpro Elementor Hamburger widget is used to display the menu which mostly includes options in a vertical list. These menus usually glide in from the left, but Xpro Elementor allows you to display the menu in a variety of ways. Let’s talk about how you can utilize this amazing Xpro Theme Builder.
Step 1
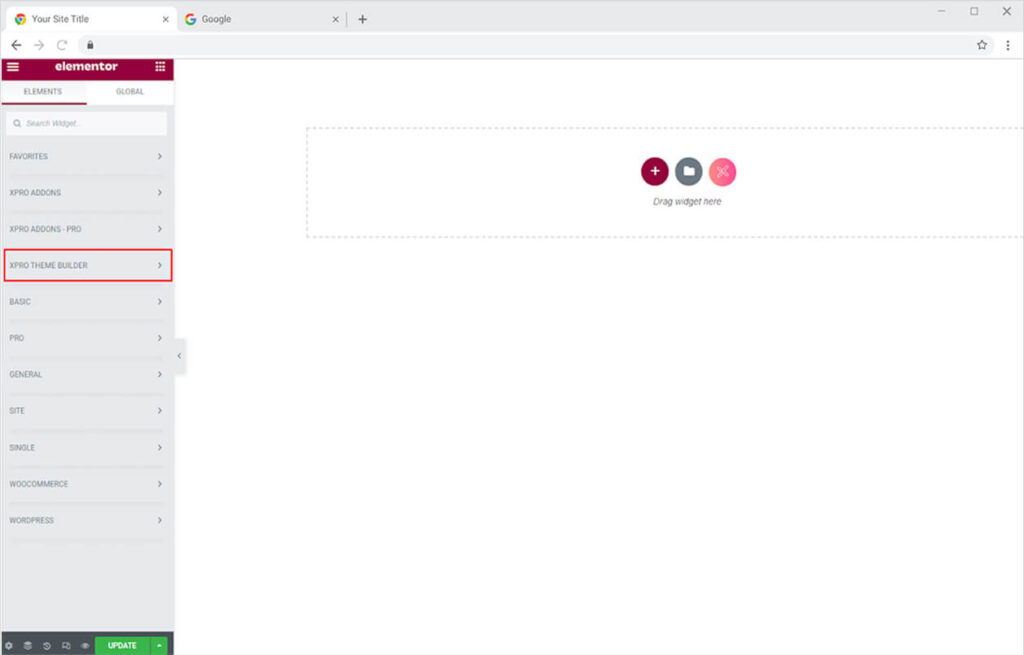
Click on the Xpro Theme Builder section available in the Elementor Editor.
Step 2
From the Xpro Theme Builder section, find and simply drag and drop the Hamburger widget on your desired page location.
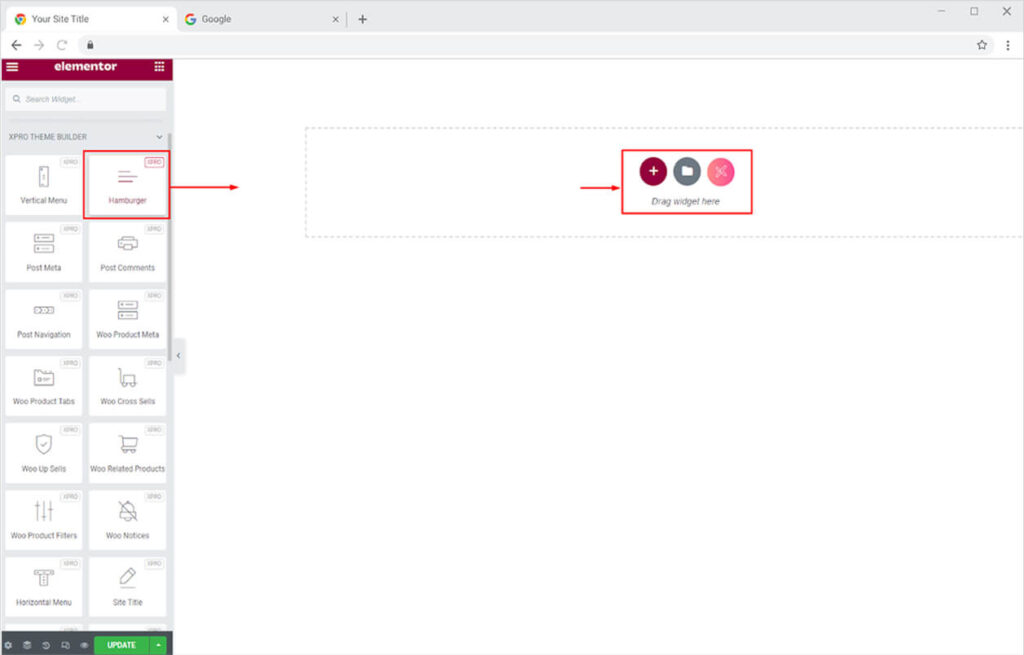
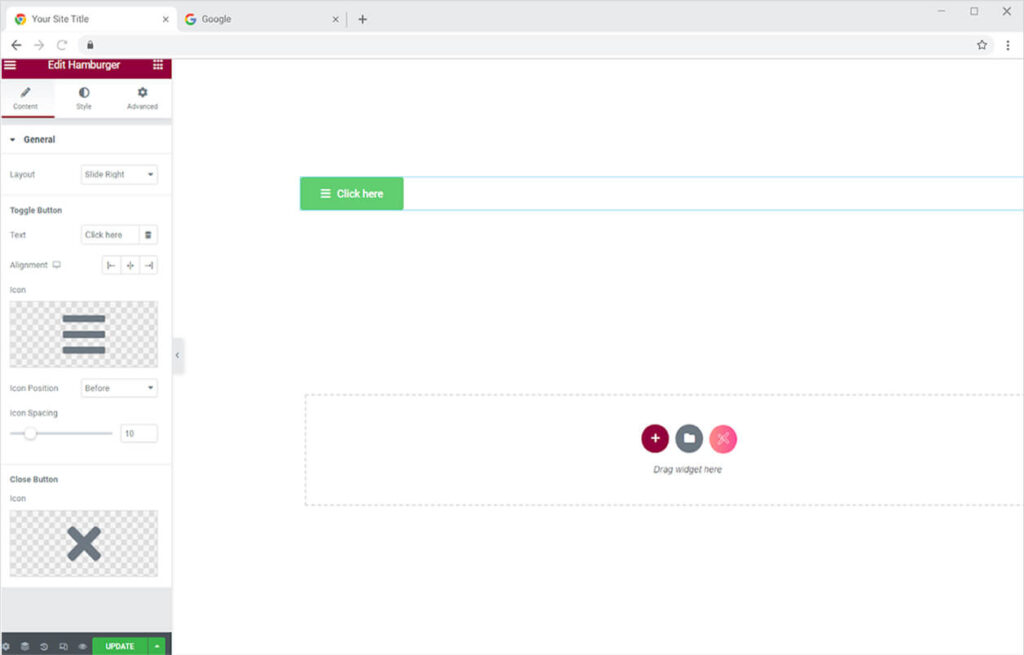
This is the default view of the Hamburger widget when you drag and drop it into the page builder.
How to Change the Layout in the Hamburger Widget for Elementor
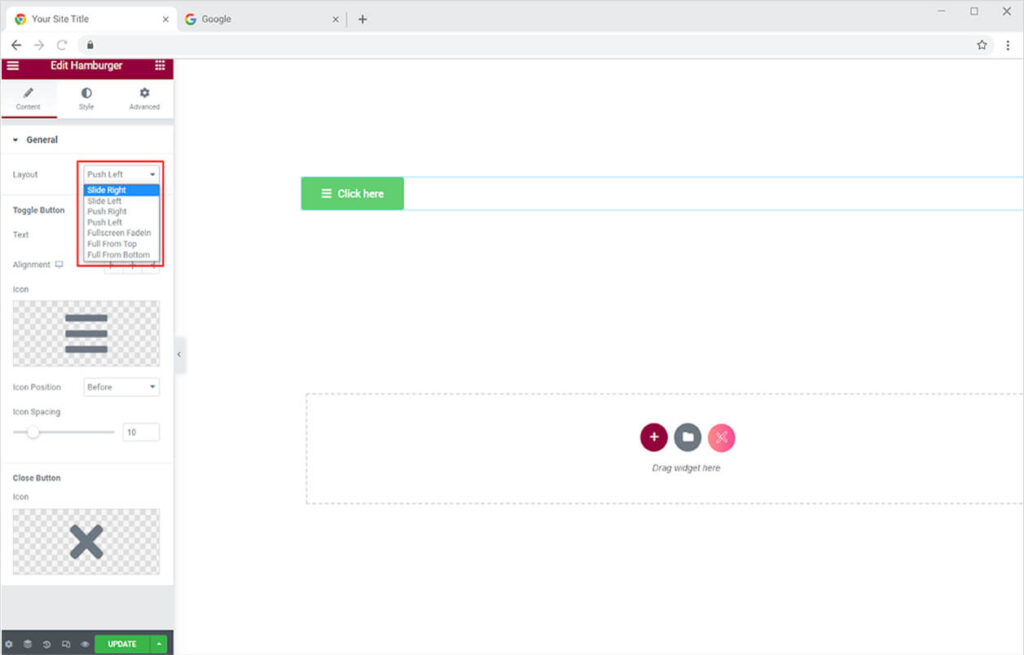
Xpro Elementor offers seven different and amazing layouts to choose from by which the menu will be displayed. When clicking on the icon, the menu will be shown to the users like you want. Simply click on the Layout option in the General Setting of Content Section.
How to Change the text for Button
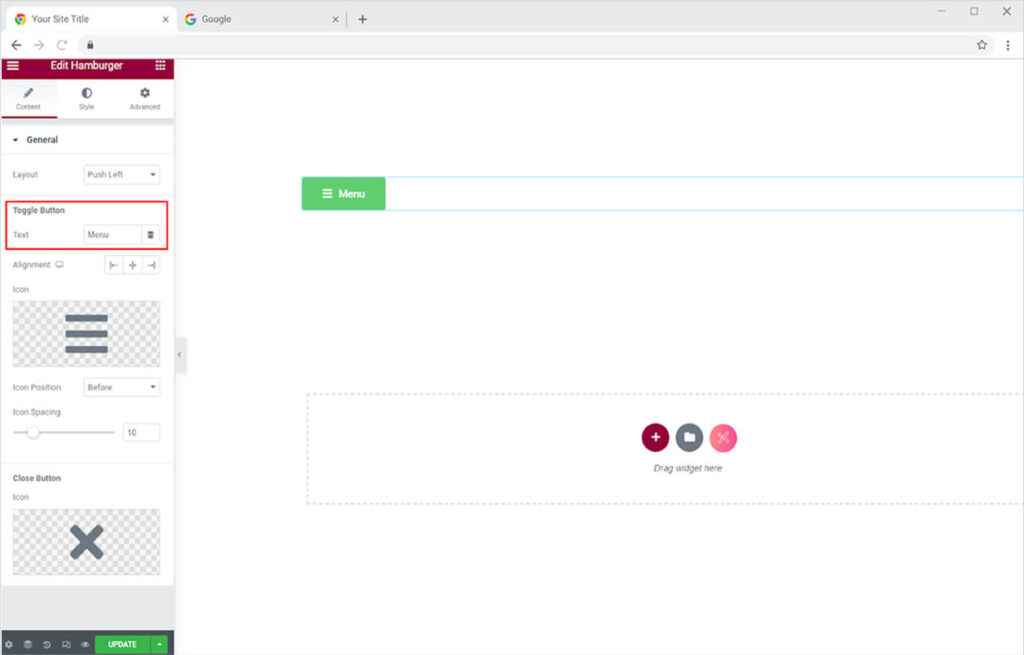
You can change the content in the button from the text option under the toggle button section.
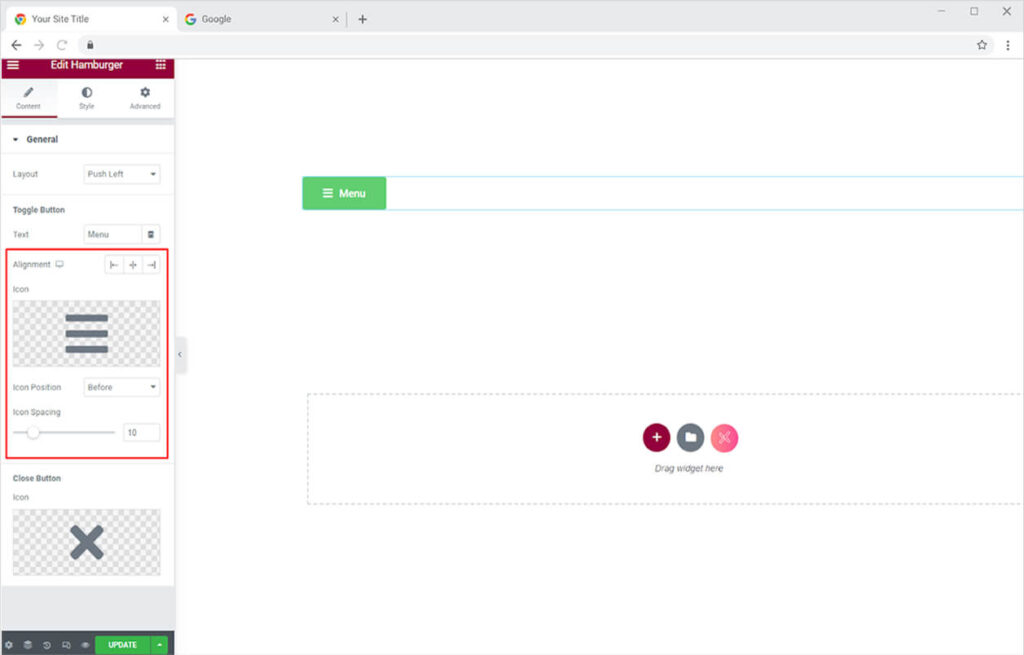
Set the button’s placement to the left, right, or center of the page. Furthermore, you can modify the display icon by picking any icon from the icon library or desktop. Position the icon before or after the text and manage the space between.
How to Add content to the Menu
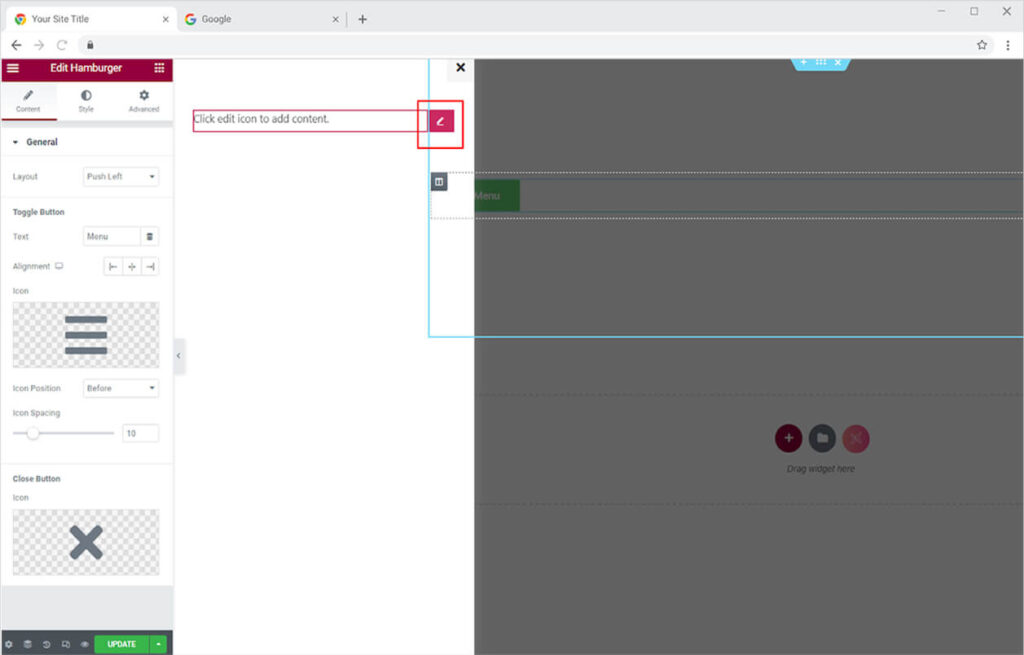
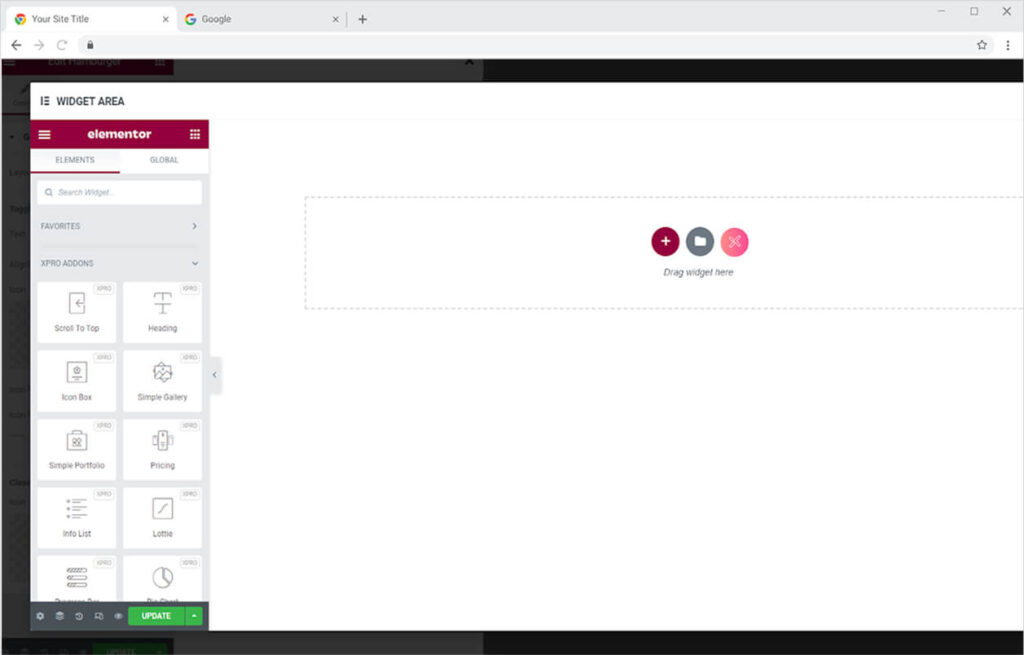
To access the menu, click on the toggle button. A slide with the option “Click the edit icon to add content” will be displayed. Clicking the icon will launch a page builder from where you can add material to the menu.
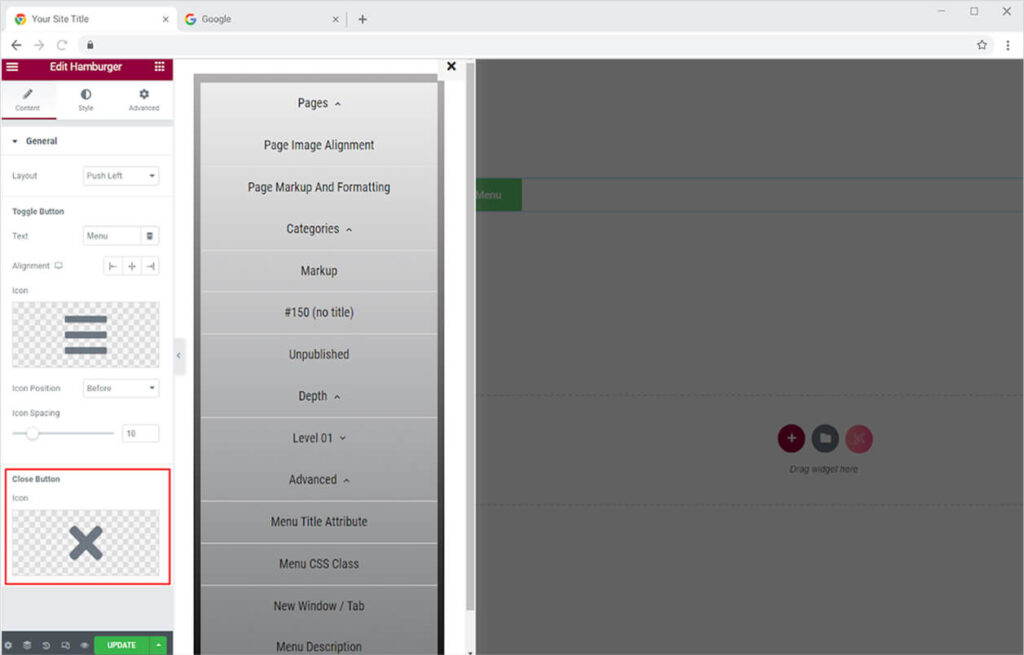
Just like the icon in the button, you can also modify the close icon for the menu. Select and change the icon from the icon library or from upload from your desktop.
Style Section
How to Style the Menu in the Hamburger widget for Elementor
Style the menu by adjusting its width and coloring the background in the background menu display. Color the background with either classic or gradient.
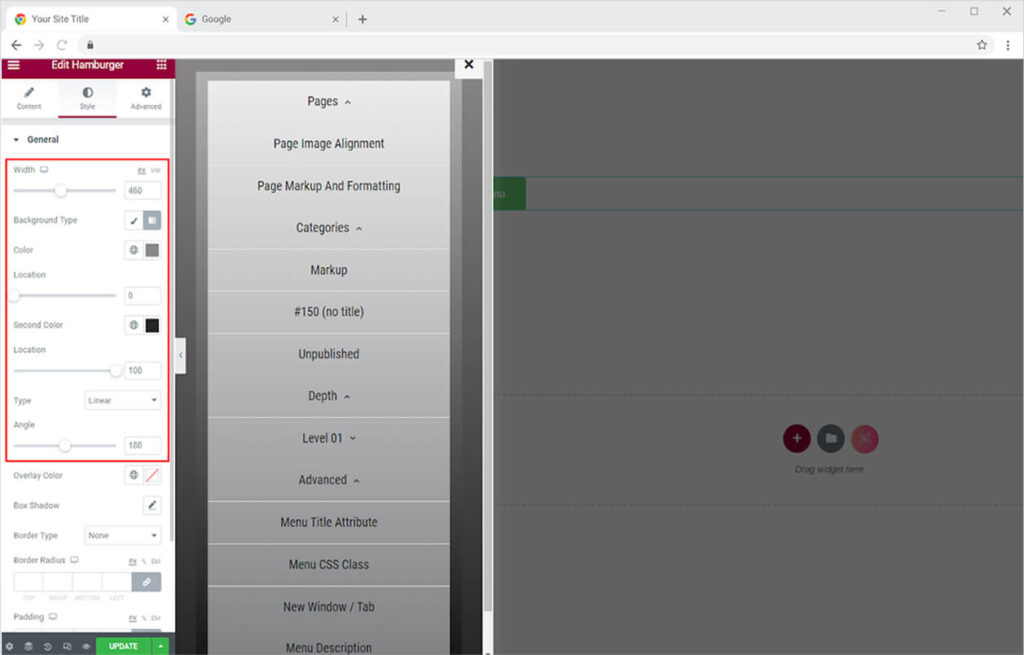
You can also set an overlay color that will color the rest of the screen other than the menu. The addition of this functionality will allow users to focus on the details in the menu and blur the rest of the display.
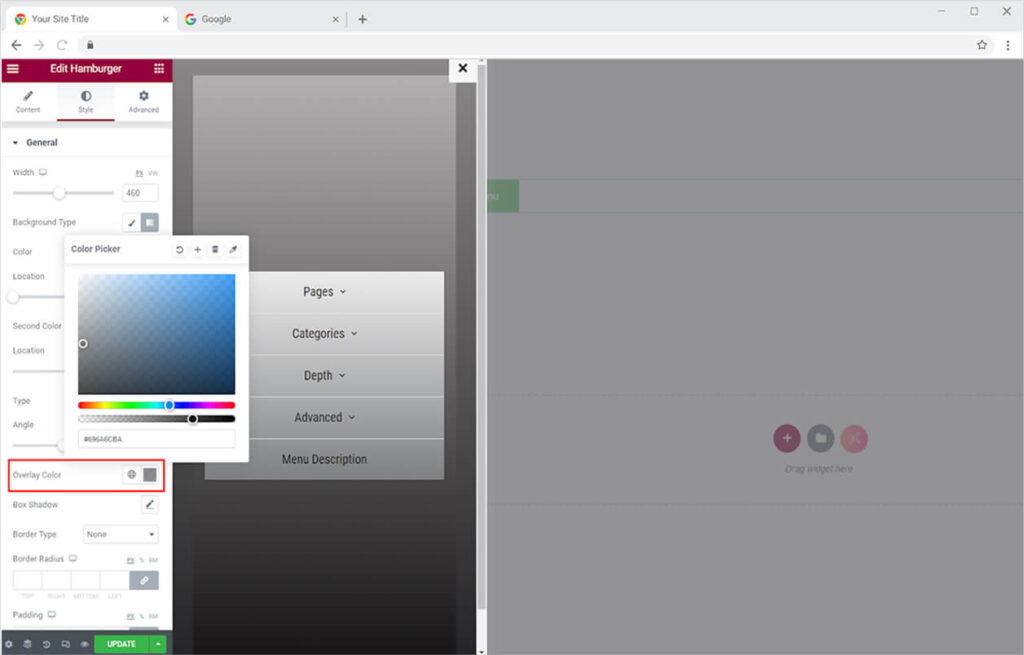
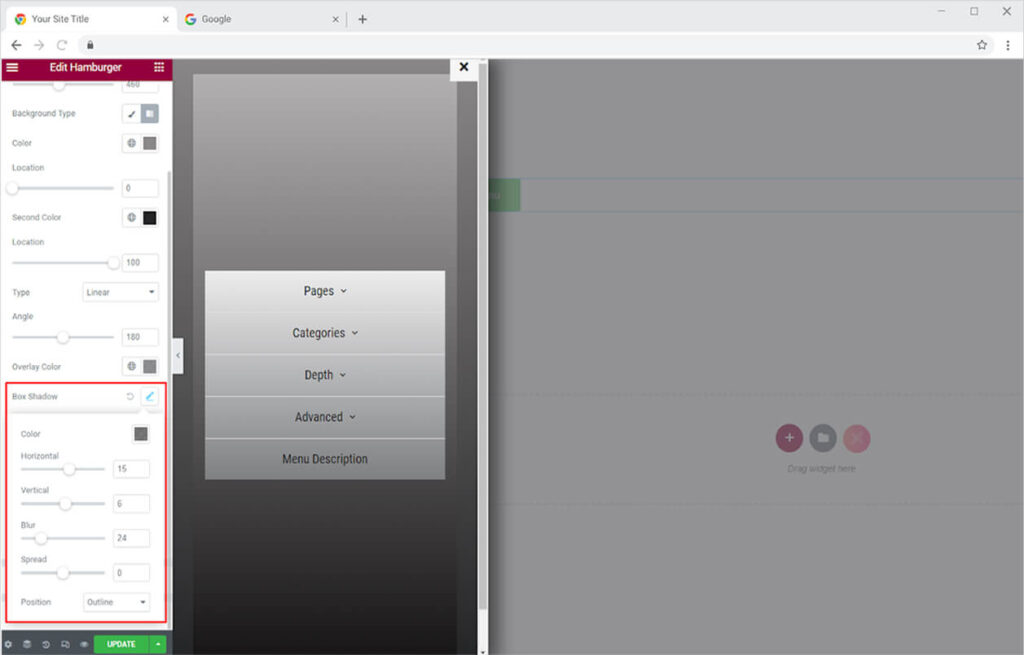
Apply a shadow to the menu as well to enhance its appearance. From the shadow box option, you can add a shadow and manage its appearance.
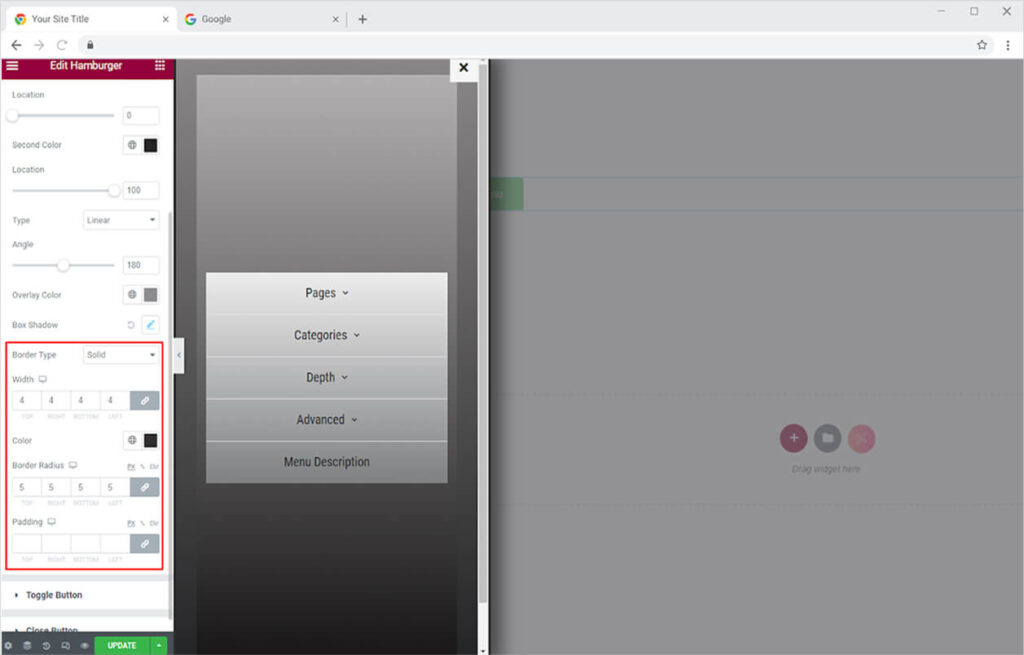
Make a border around the menu by selecting the border type. Style the border by adjusting its radius, width, and padding.
How to Style the Toggle Button in the Hamburger Widget
Style the typography of the text in the button by changing its font, size, weight, style, and much more. Additionally, you can change the size of the icon as well.
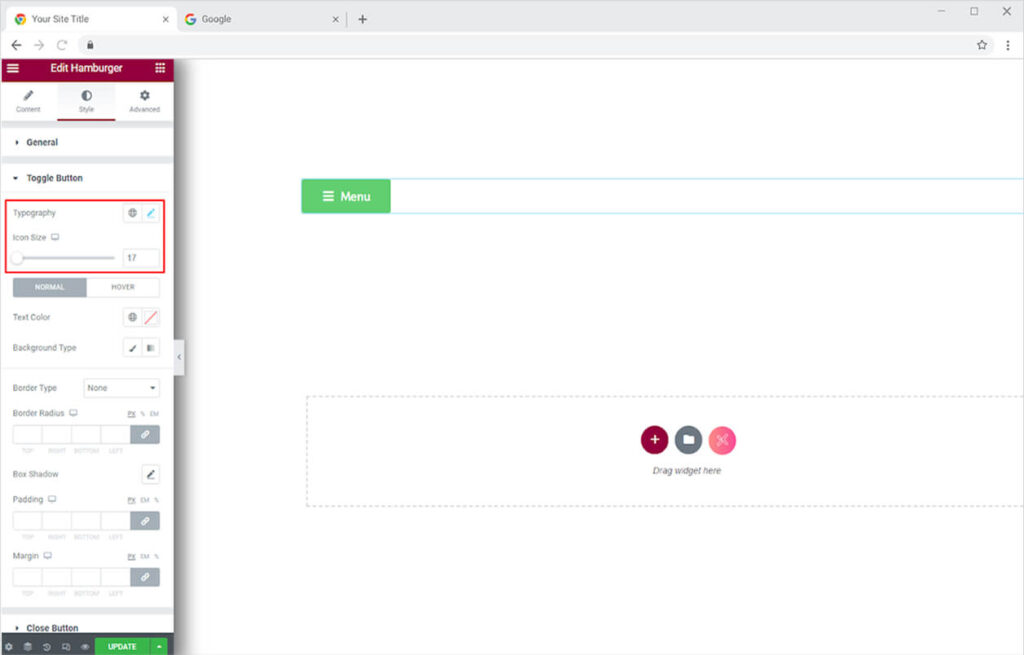
Set the text color and the background color for Normal and Hover Effect. Make the best use of this feature to enhance the appearance and improve user experience.
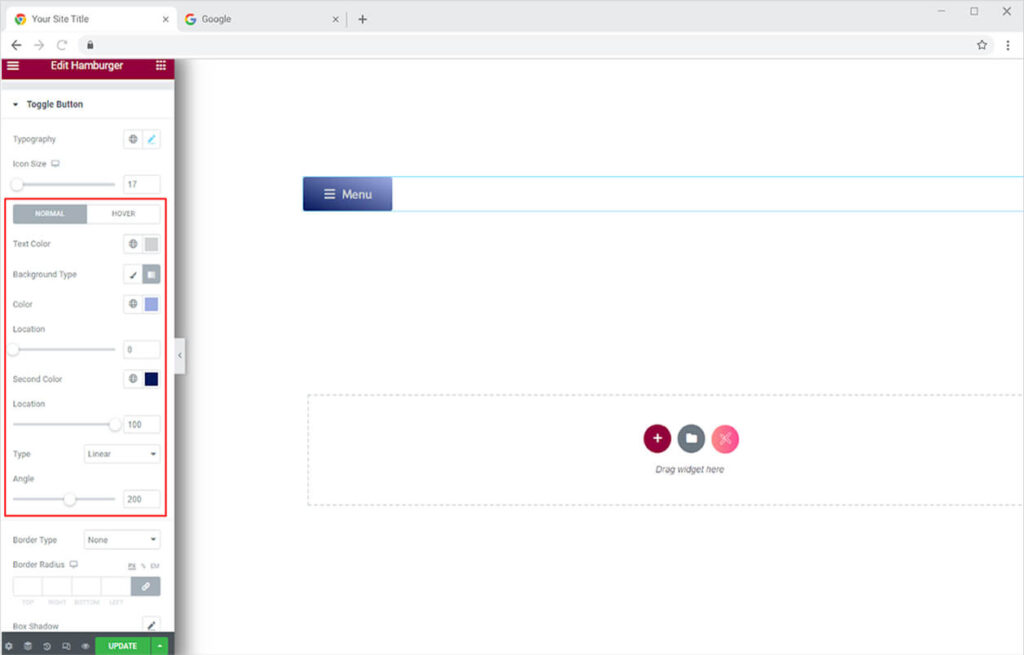
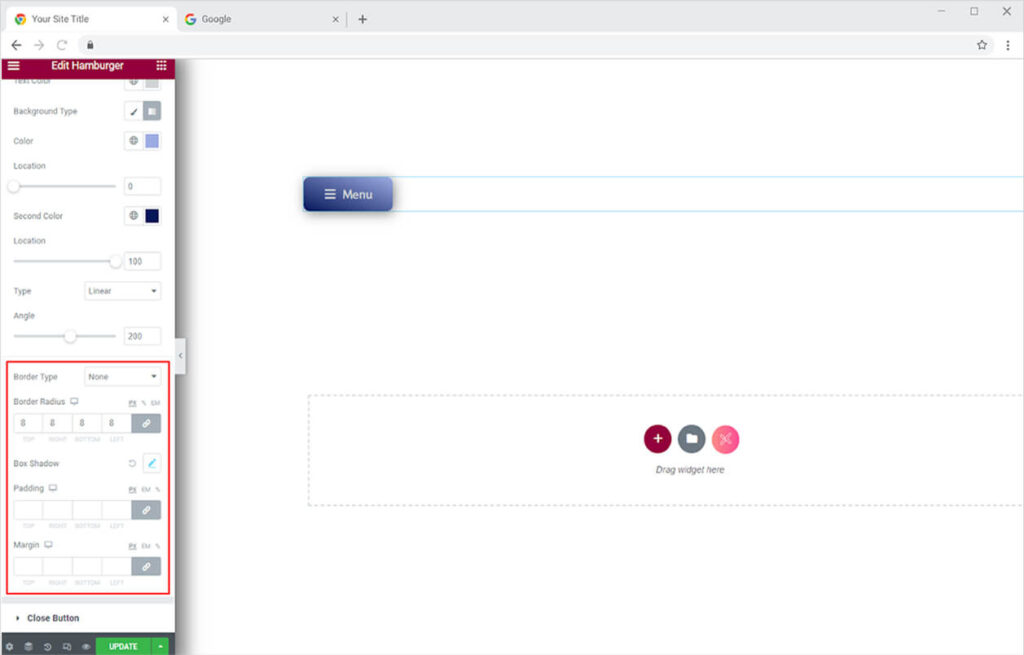
You have the option to add a border to the button by selecting the border type. Adjust the border width, radius, padding, and margin. Moreover, you can add a shadow to the display from the shadow box as well.
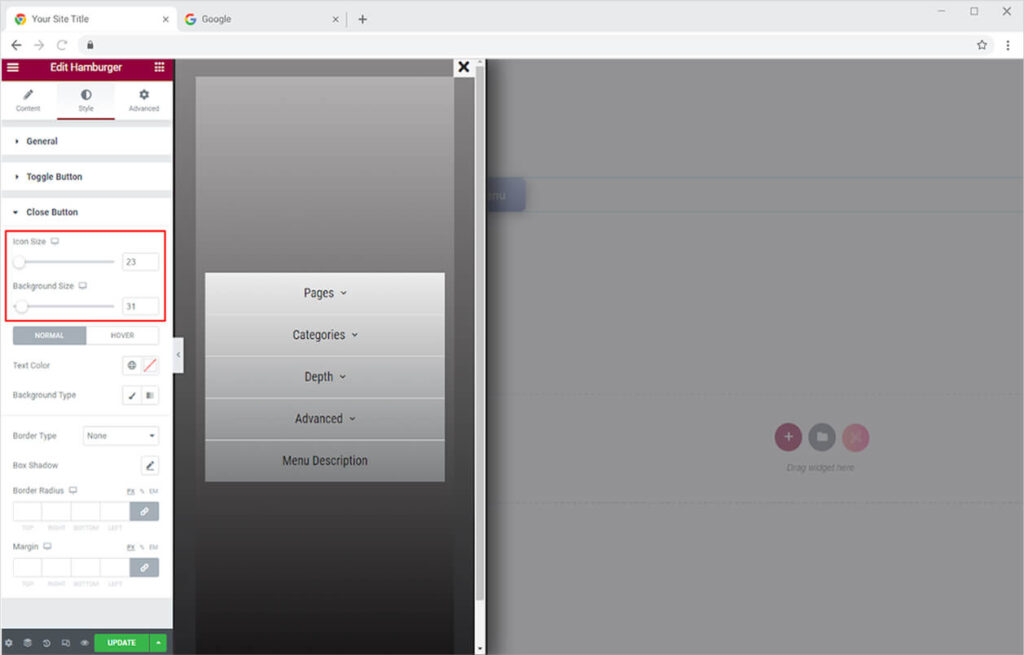
How to Style the Close Button in The Hamburger Widget
Start with the adjustment of the icon and background size. Drag the bar to find the perfect size to you believe will look perfect with the display.
Color the icon and background for Normal and Hover so as the user drags the mouse above the box it changes its appearance. Additionally, you can also add a border color as well.
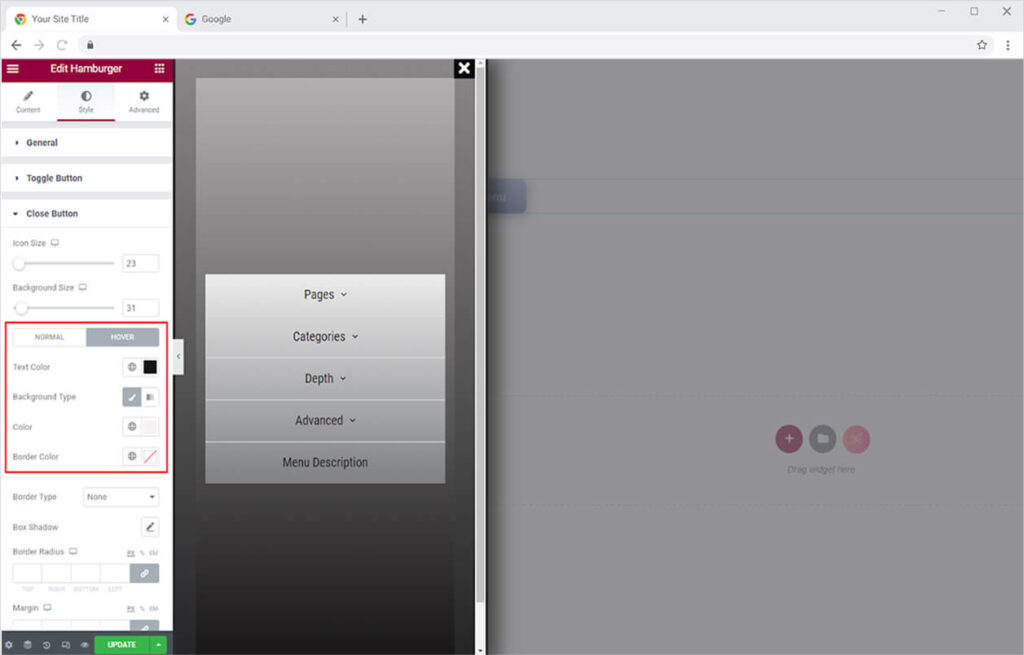
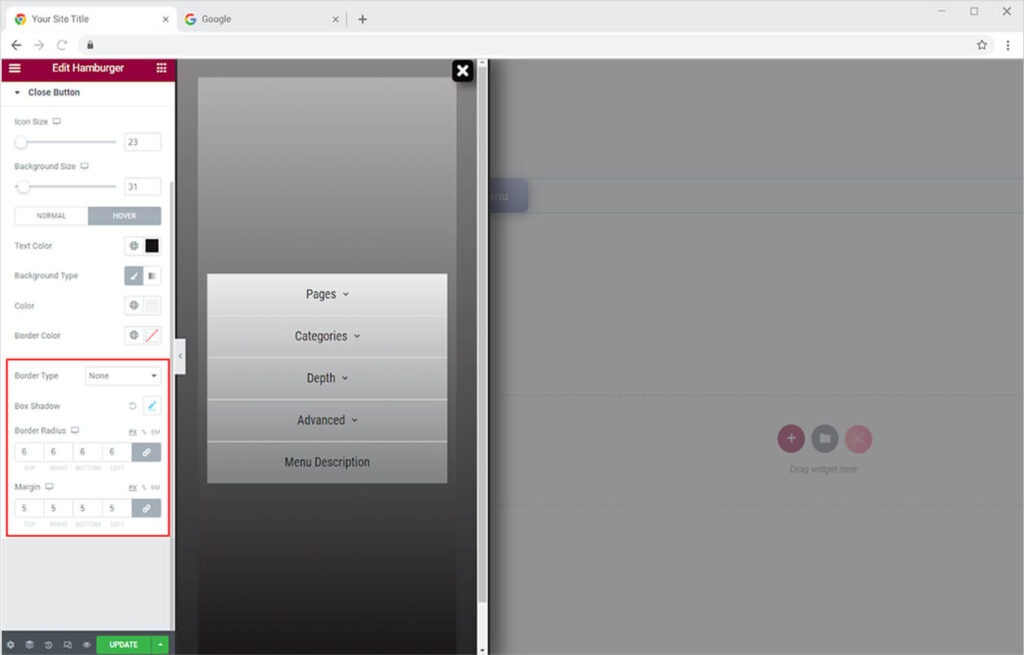
You may also make the close button have a border. You can apply the same stylistic options to the close button as you did earlier. You can also apply a shadow to the box, like with the previous functionality.
Best Hamburger Widget for Elementor
This is all from the amazing info Xpro Hamburger for Elementor. We hope that you have fully understood the functionality and complexity of this powerful tool. Utilize this widget to create the best-looking website.
Xpro Elementor offers a wide range of widgets, theme templates, and box template for Elementor that helps you create a fully functional website without any need for coding. If you want to know more about amazing widgets like Hamburger then check out the Verticle Menu for Elementor. Check our 50+ free Elementor Addons which are enough to create a professional WordPress website. If you want to explore and add more attractive Elementor widgets then check our complete list of Pro Elementor widgets and download our Pro Elementor addons right now.