Introduction
Another amazing tool by Xpro Elementor Addons is a Dual Button which allows you to attractively display two buttons. The Elementor Dual Button widget consists of two fancy buttons where both buttons can be customized individually. Add this widget when you offer two different options for example two ways of purchasing a product or service. Save time for users by making them instantly make a decision and select the option.
The Dual Button widget for Elementor comes with a variety of customization options to help you create an appealing display result. Make the best use of styling to personalize the user experience Separately style each button and adjust the separator between them.
How to Install Dual Button Widget for Elementor
Requirements
You need to install and activate the Pro version of Xpro Elementor Addons in order to use our Dual Button widget. If you already have the plugin installed, just make sure the Dual Button Widget is ‘Enabled’ from the plugins section of Xpro Dashboard, so you can find & use the widget in the Elementor editor.
To enable the widget, simply follow these steps:
Step 1
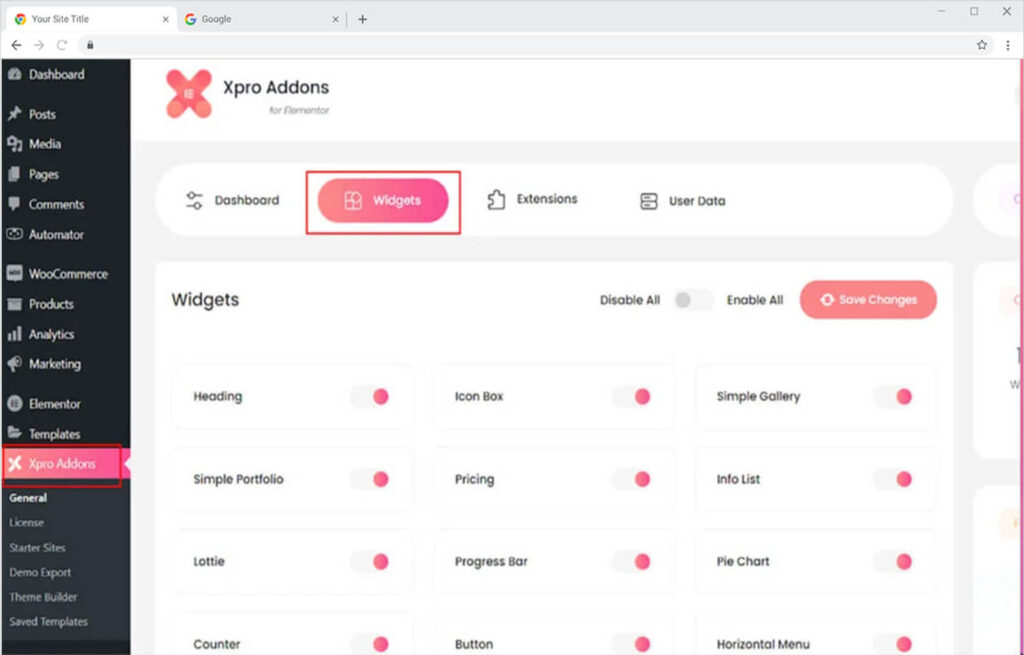
Click on the Xpro Addons option available on the WordPress Dashboard Menu.
Step 2
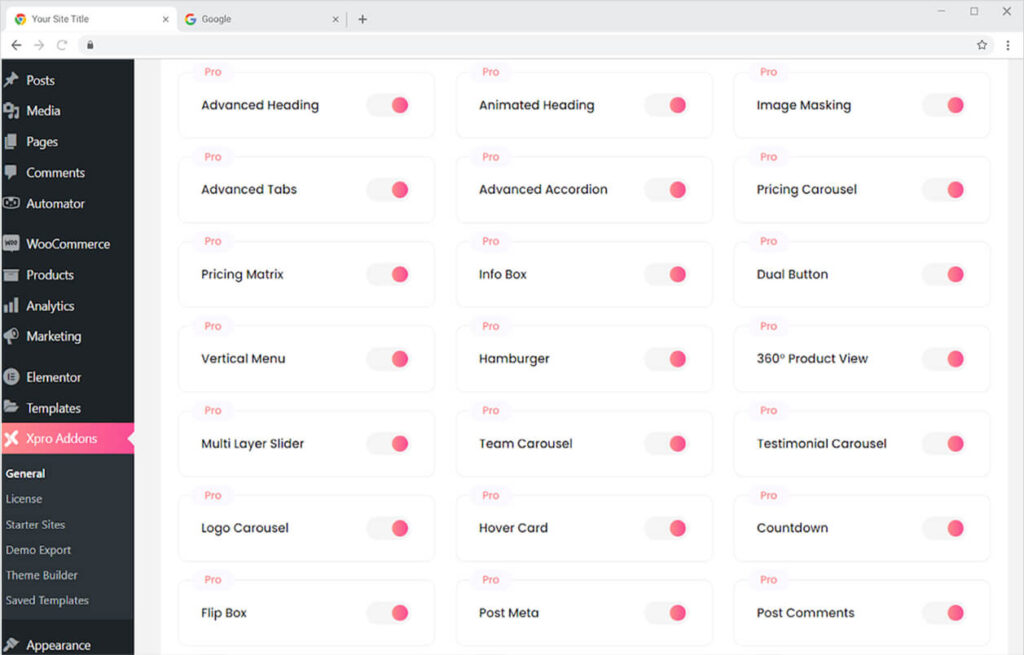
From the Xpro Addons Dashboard, click on the Widgets Tab, find the Dual Button widget, and finally, toggle the button ON to enable it.
How to Use Dual Button Widget for Elementor
A dual Button is an efficient approach to provide two offers in the same category at the same time. For example, if you are selling a product with free delivery within 5 days or the consumer may pay $5 for delivery within 24 hours. To save the consumer time and instant decision-making, use the Xpro Dual Button widget for Elementor to display both alternatives.
Elementor Dual Button by Xpro comes with all the necessary styling requirements that you need to build an attractive layout. Customize both buttons separately and engage users with your display.
Step 1
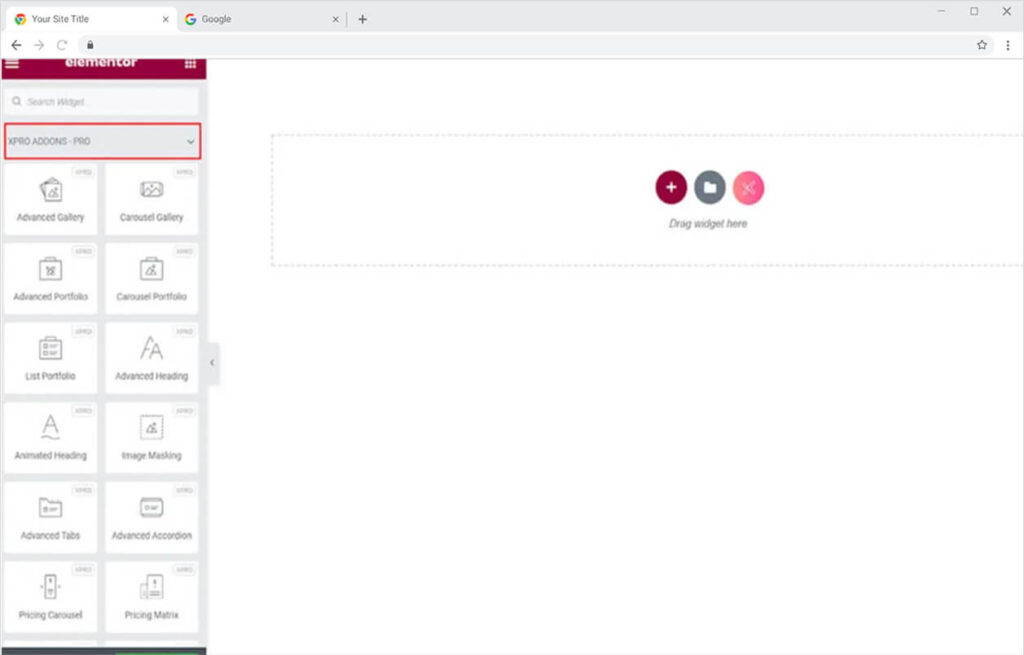
Click on the Xpro Addons – Pro section available in the Elementor Editor.
Step 2
From the Xpro Addons – Pro section, search for the ‘Dual Button’ in the search bar and simply drag and drop the widget to your desired page location.
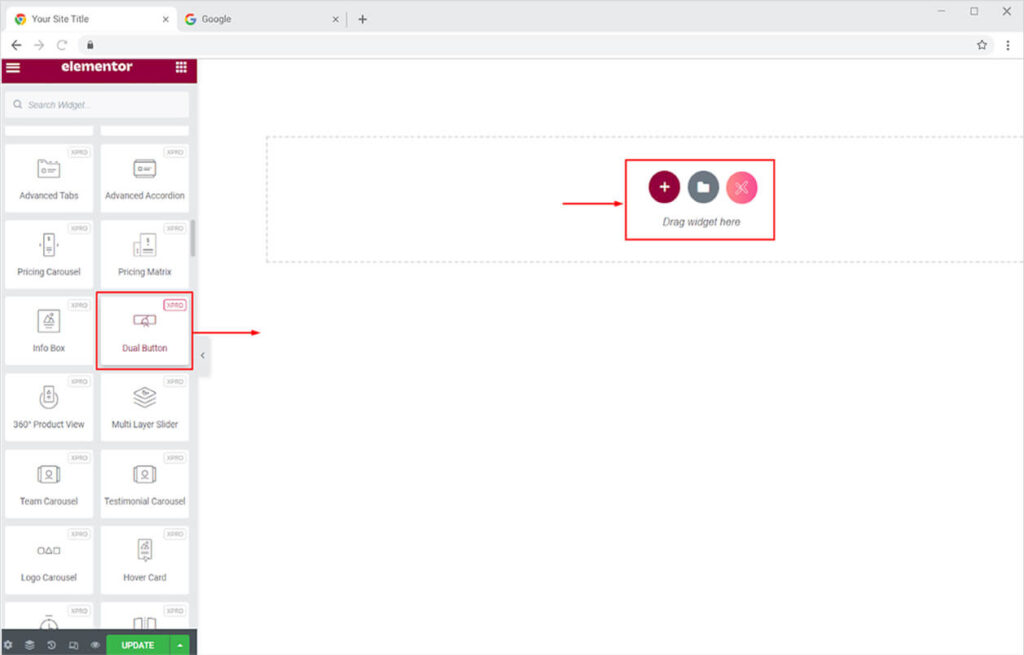
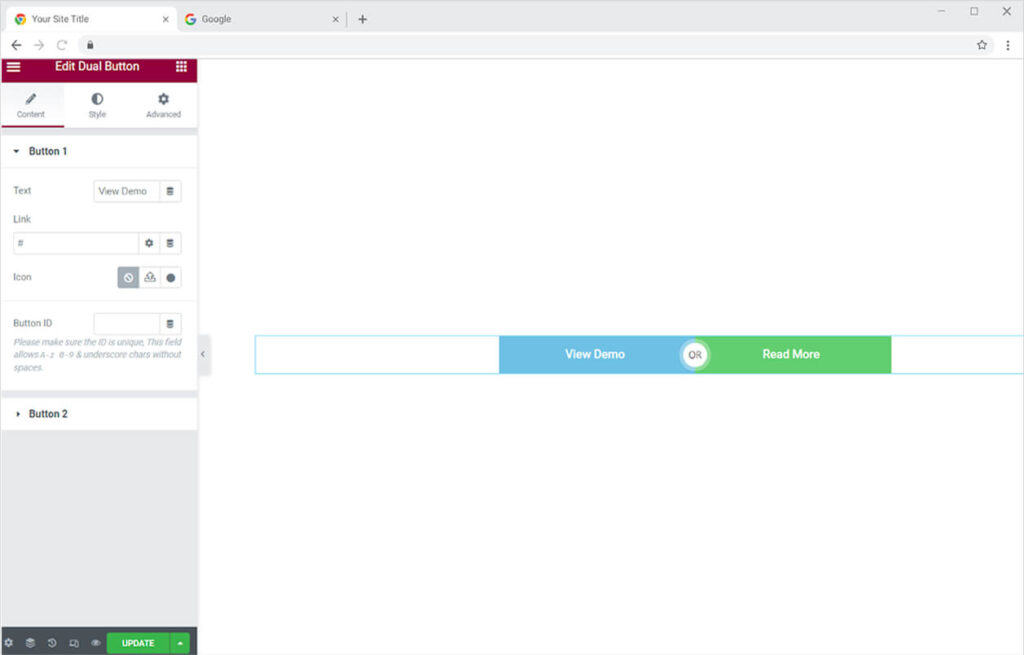
This is the default view of the widget after you drag and drop it to the position in the Elementor page builder.
Content Section
How to Change the Text in the Buttons
As you can observe, the bar beside the text allows the option to add and change the content on the button. From the Button 1 menu, you can edit the text for the button on the left, and from the Button 2 menu, you can change the text for the button on the right.
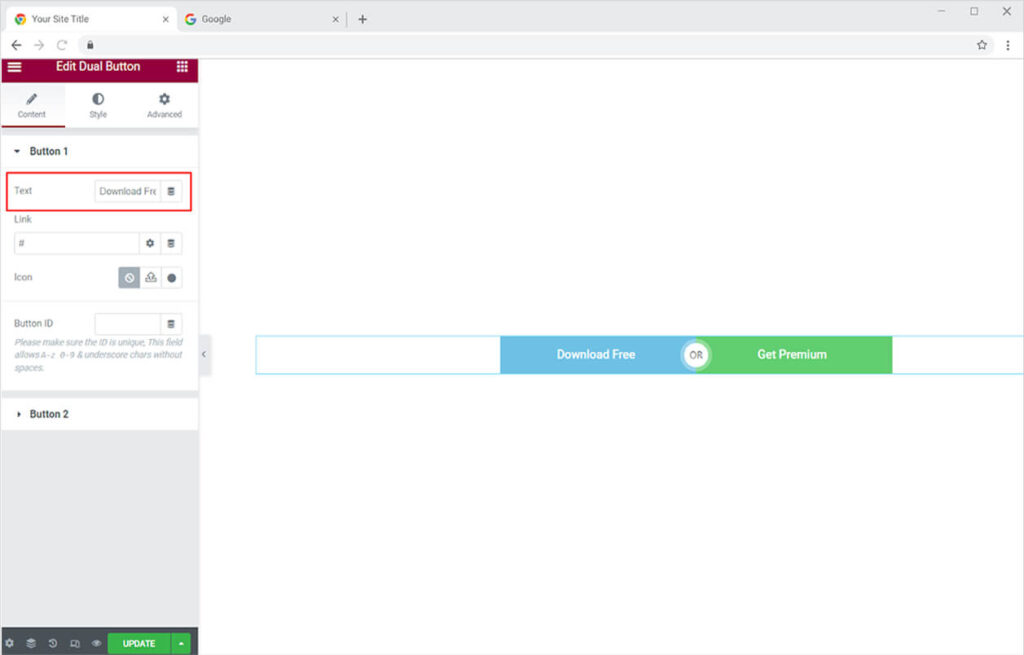
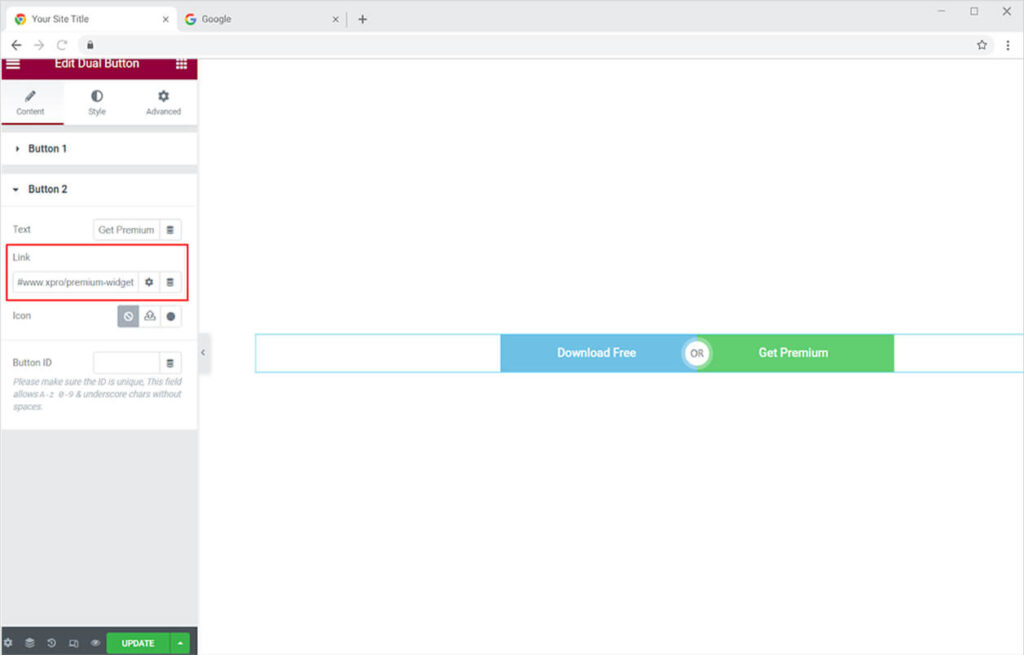
Add a link to each button to direct users to the page where they want to go. Add a link below in the bar for the link.
Add any icon or SVG to the button if you want. Add an icon or SVG from the library or upload it from your desktop.
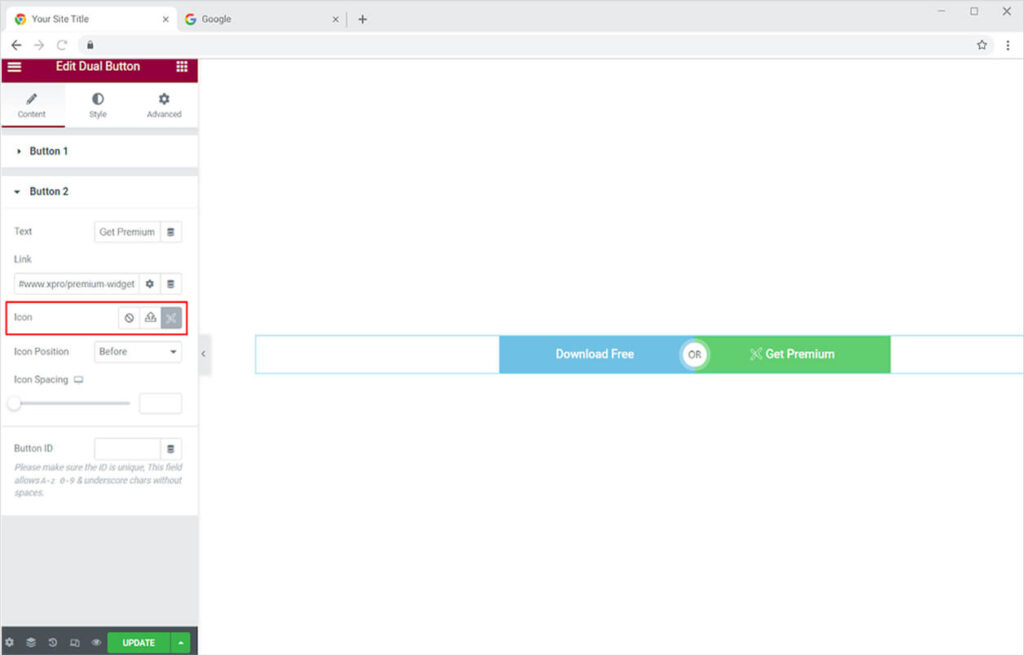
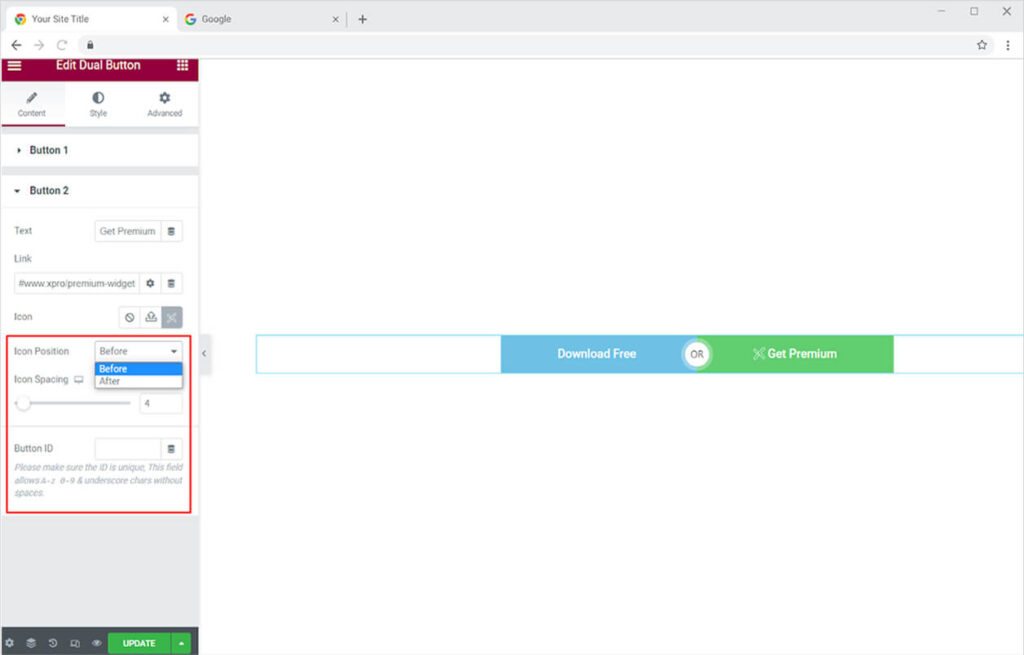
Position the icon before or after the text and also adjust the space between them. Moreover, set a button ID for the button as well.
Style Section
How to Style the Dual Button for Elementor
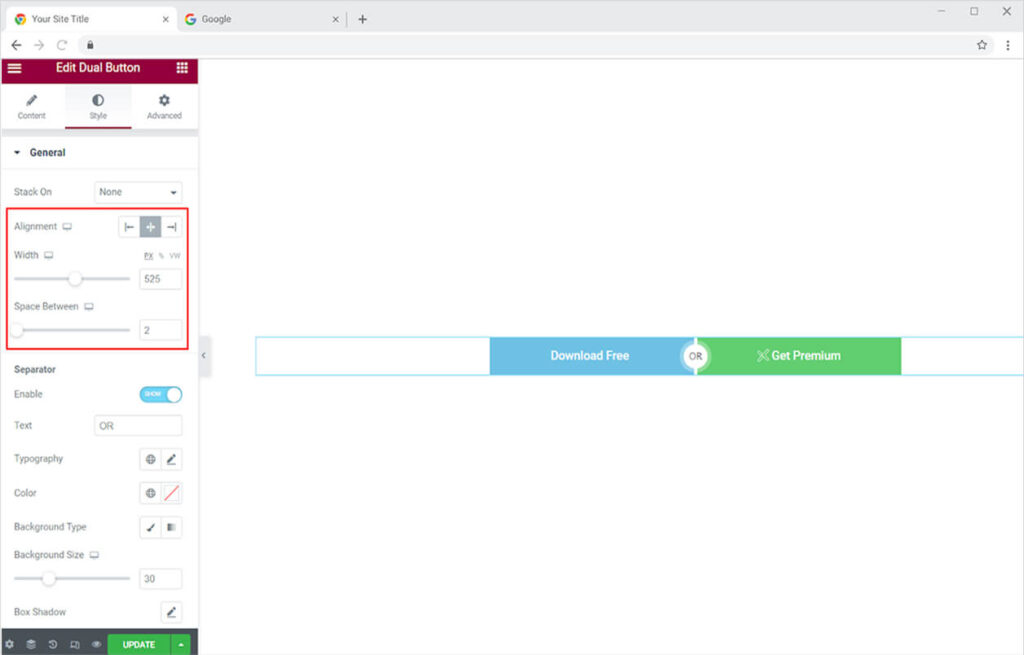
The dual button by Xpro Elementor provides a wide range of customization possibilities to help you create an appealing layout. Set the widget’s alignment to the left, right, or center of the page. Adjust the width of the widget to change the size. You can also make a gap between the two buttons through the Space Between option.
How to Style the Seprator in Dual Button
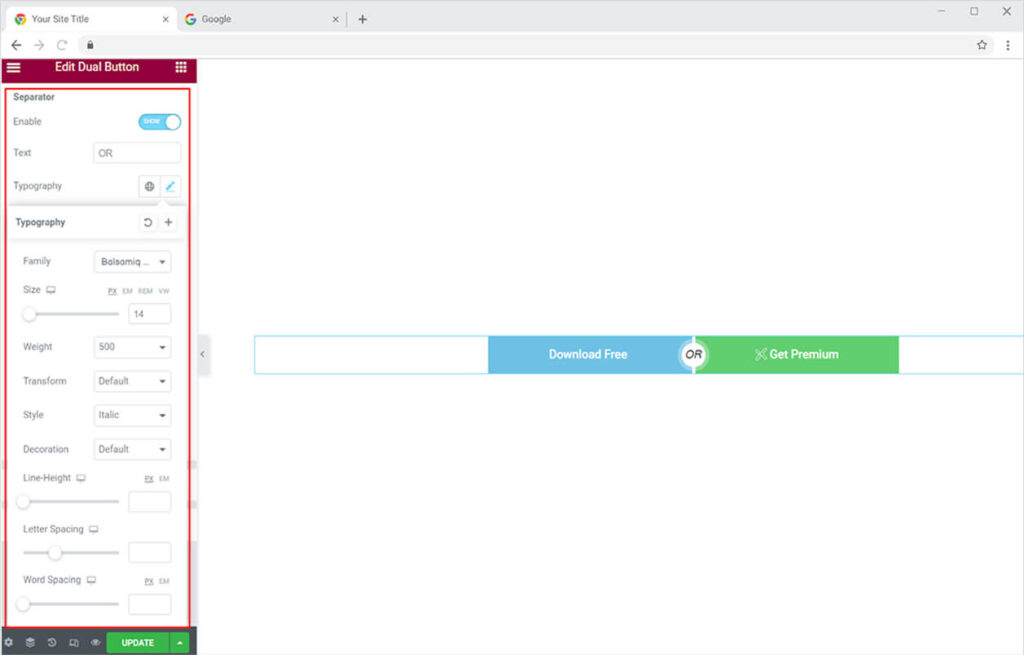
Enable the separator between the two buttons and put text in it to make your users understand the situation. Style the typography and change the content font, size, letter spacing, and much more.
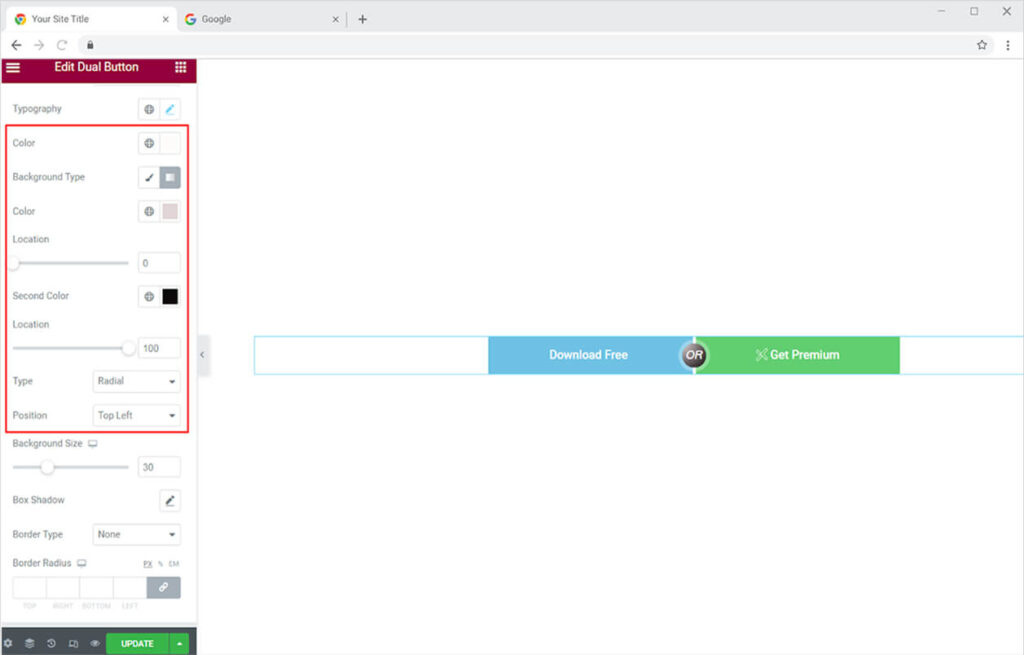
Color the text within the separator and also color the background to enhance the appearance of the display. For the background, you have the choice of classic or gradient colors.
Change the size of the separator through the background size option. Add a shadow to the separator if you want. To change the shape of the separator, select a border type and change its radius. You can also change the width of the border as well.
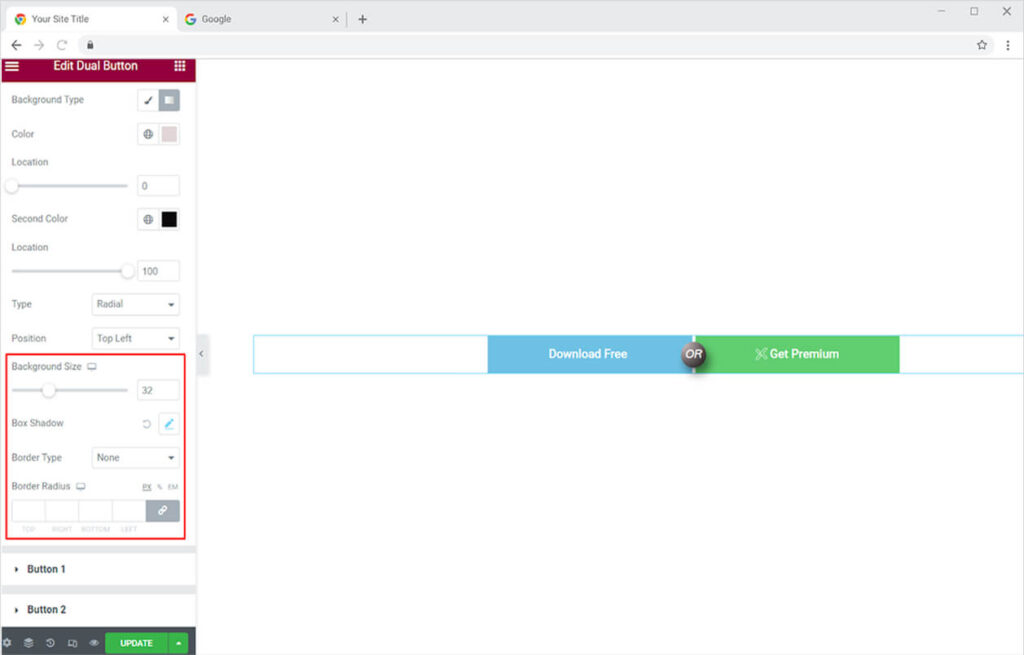
How to Style Each Button in the Dual Button Widget
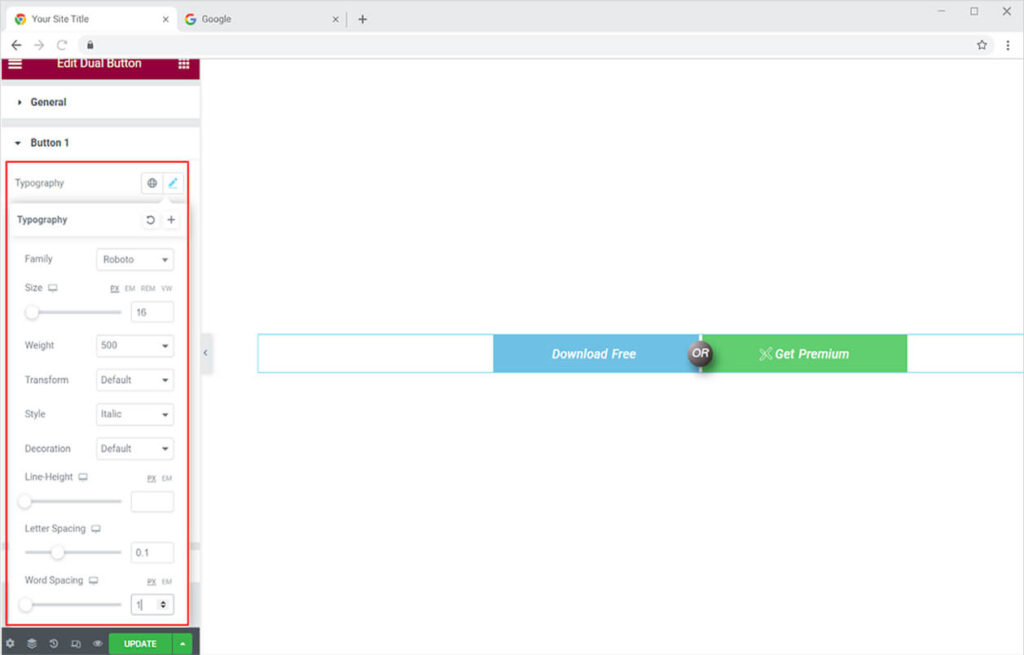
Each button styling menu offers the same customization options for you to design the best result. Set the typography of the text by changing its font, size, letter spacing, and much more.
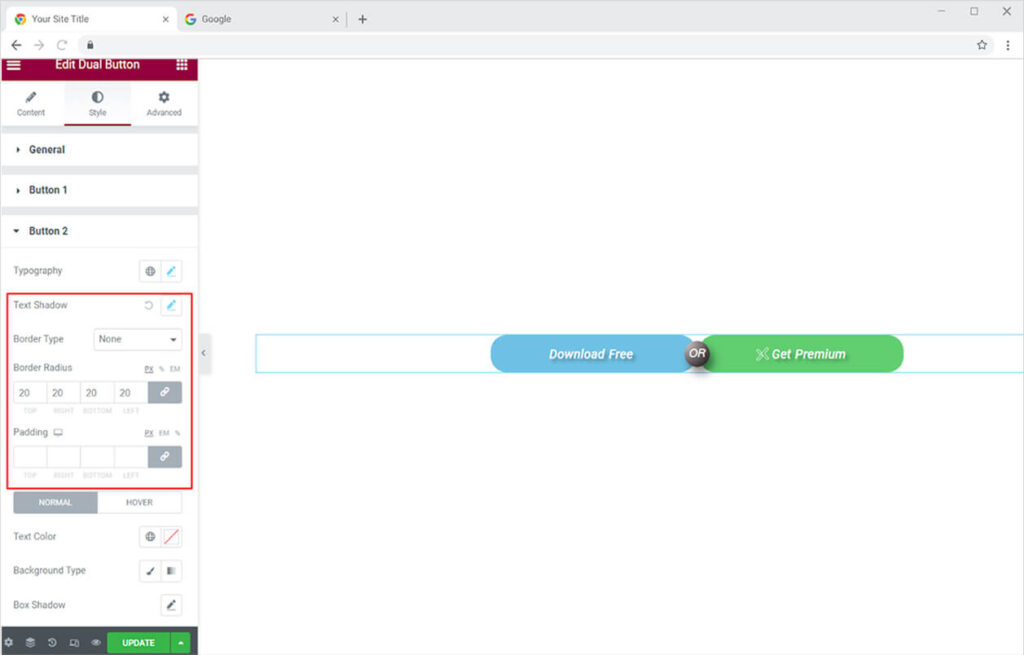
Add a shadow to the text from the text-shadow. If you like to add a border to the button then you can select a border from the border type. After adding the border you have the option to adjust its width, radius, and padding.
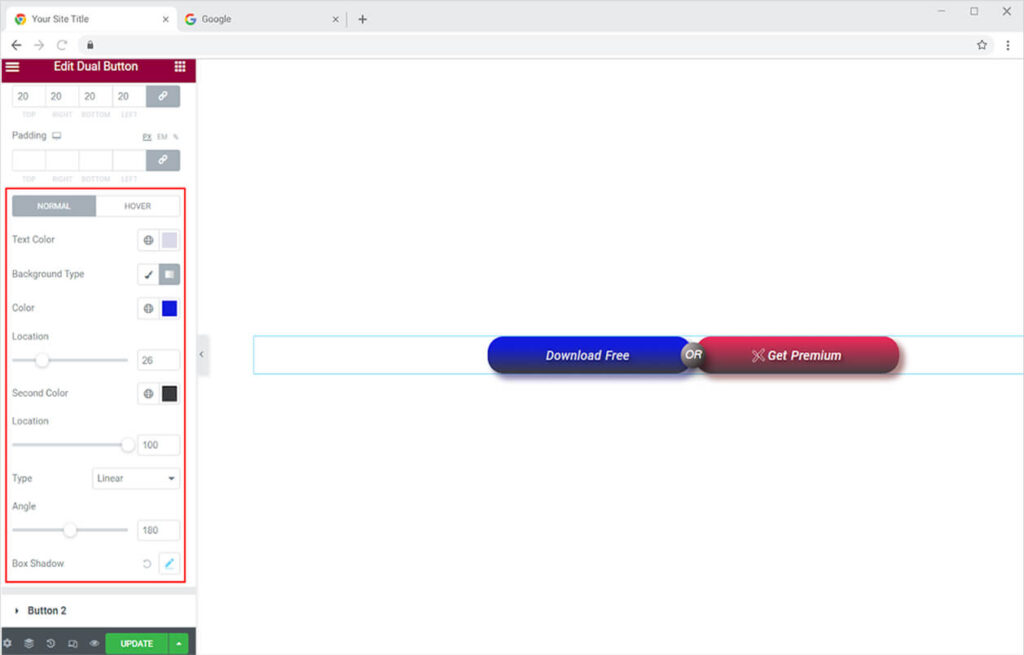
Colorize the button’s text and background using the Color and Background Type options. Enhance the appearance of the display and user interaction by changing the normal and hover states such that when the user drags the mouse above it, the appearance changes. Make a shadow to the box if you want from the shadow box option.
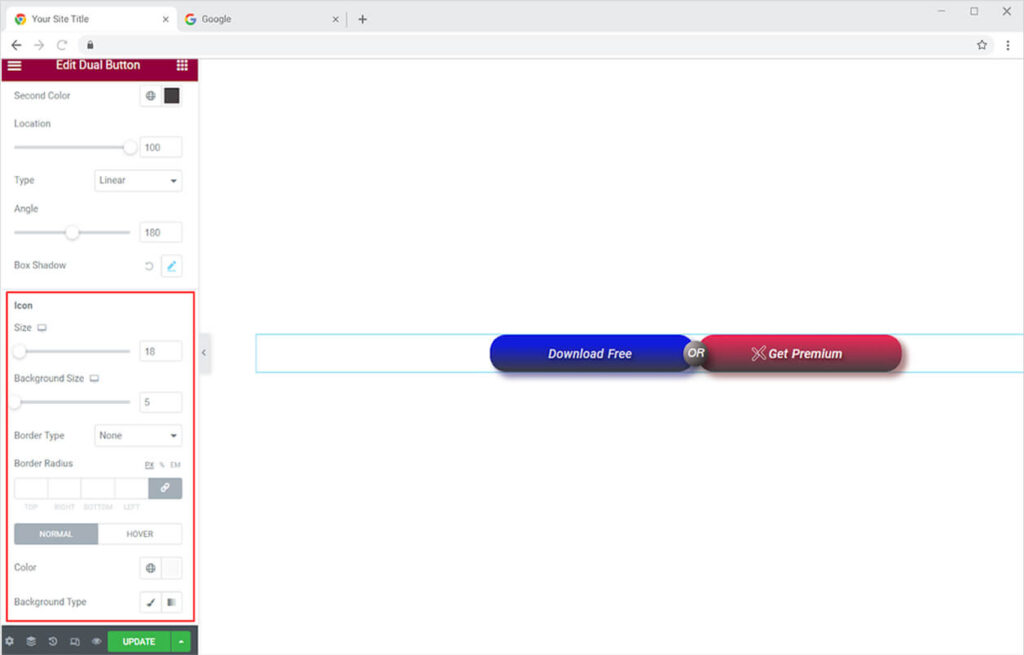
For the icon in the button, you can adjust its size from the size option in the icon menu. You can change the background and add a border to the icon as well. Just like with any other border type, you can change the border width and radius as well. Color the text and background for normal and hover effects.
Best Dual Button widget for Elementor
This is all from the Elementor Dual Button widget by Xpro. We hope you fully understand the functionality and implications of this superb widget and will be able to construct a fantastic loading page. Check out the Creative Button for Elementor that let you design buttons with amazing animations.
Xpro Elementor Addons offer a wide range of widgets, Elementor templates, and features that help you develop an attractive site. Check our 50+ free Elementor widgets which are enough to create a professional WordPress website. If you want to explore and add more attractive Elementor widgets then check our complete list of Pro Elementor widgets and download our Pro Elementor addons right now.