Woo Category Carousel
Xpro Woo Category Carousel for Elementor is another fantastic offering in the Xpro WooCommerce widgets. The widget allows you to create an appealing layout to display the categories of the products you are offering. This helps the customers to only see the products that they are looking for. Display categories and make it easy for customers to view products related to that category.
Xpro Elementor Addons consist of a wide range of widgets and features that allow developers to create an appealing site easily. Xpro understands the value of an online business and provides a wide range of Xpro WooCommerce widgets for Elementor so businesses can create an effective online website.
Easily add categories to the widget display dynamically and enhance the appearance by customizing the layout to your requirement. Customize the typography of the text, make a border, style a button, and much more. In order to use any Xpro WooCommerce widget, you must have installed WooCommerce widgets installed in your WordPress.
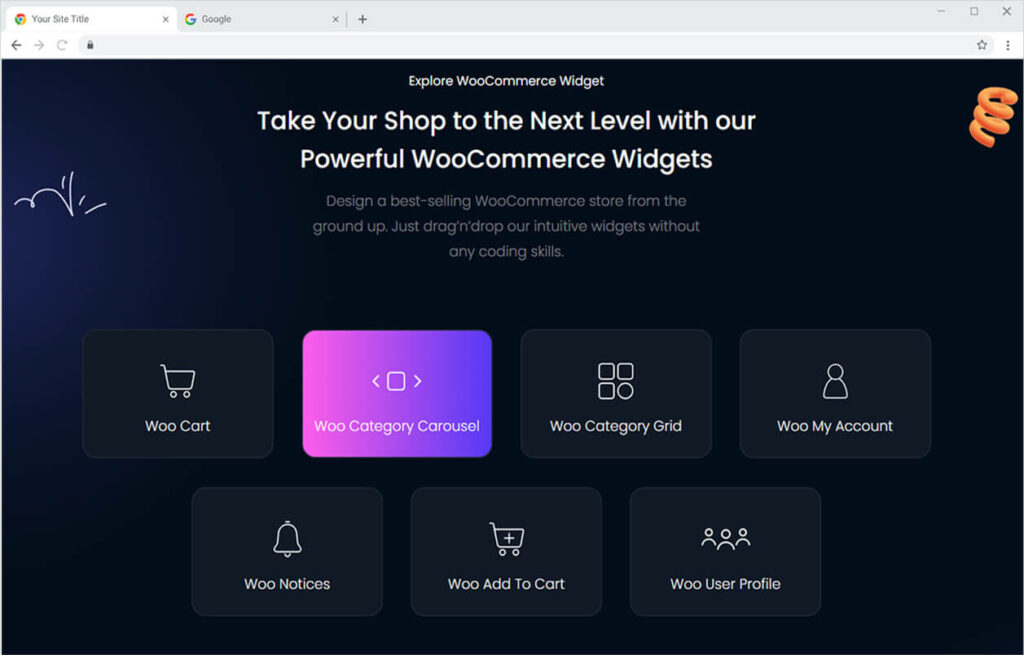
How To Install Xpro Woo Category Carousel Widget for Elementor
Requirement
Download and activate the WooCommerce plugin. You need to install and activate the Pro version by Xpro Elementor Addons. If you already have the plugin installed, just make sure the Woo Category Carousel Widget is ‘Enabled’, so you can find it in the Elementor editor.
To enable the widget, simply follow these steps:
Step 1
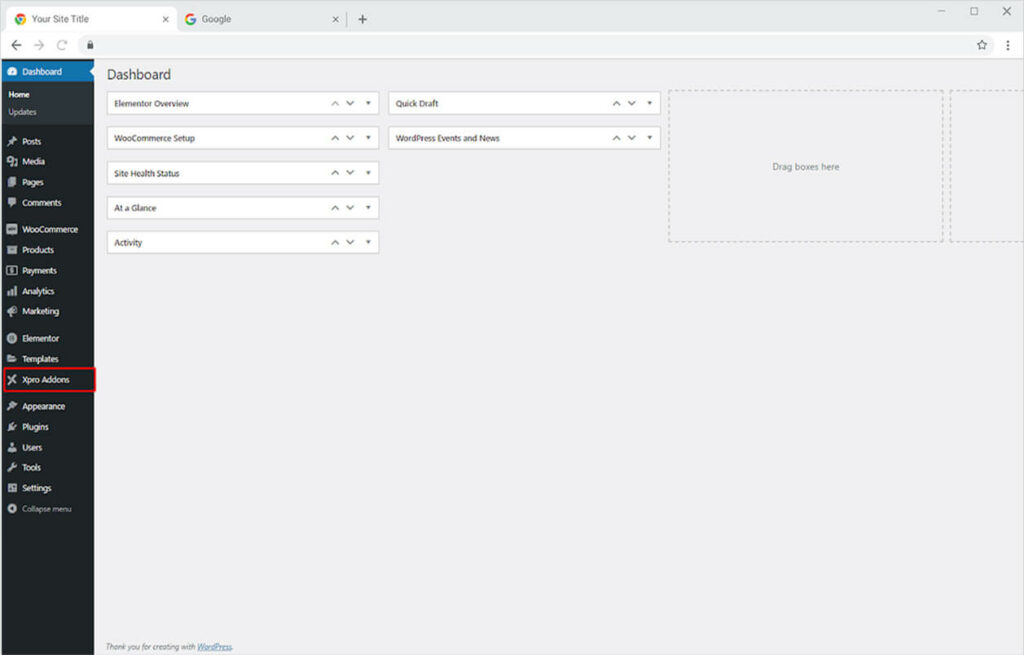
Click on the Xpro Addons option available on the WordPress Dashboard Menu.
Step 2
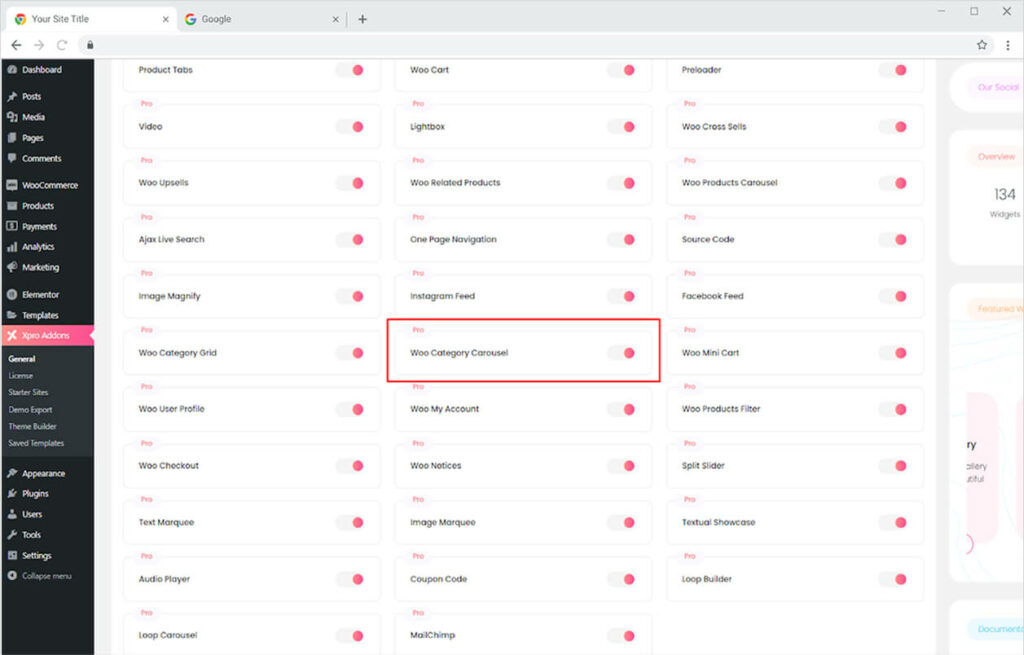
From the Xpro Addons Dashboard, click on the Widgets Tab, find the Woo Category Carousel widget, and finally, toggle the button ON to enable it.
How to Use Xpro Woo Category Carousel Widget for Elementor
The majority of customers visit a website with a specific product or category in mind. Make it simple for the user to navigate and find the item they seek. Create categories from the WooCommerce plugin and easily display them using the Xpro Woo Category Carousel widget. Drag and drop the widget to Elementor Page and customize it through the Content and Style Tab.
Step 1
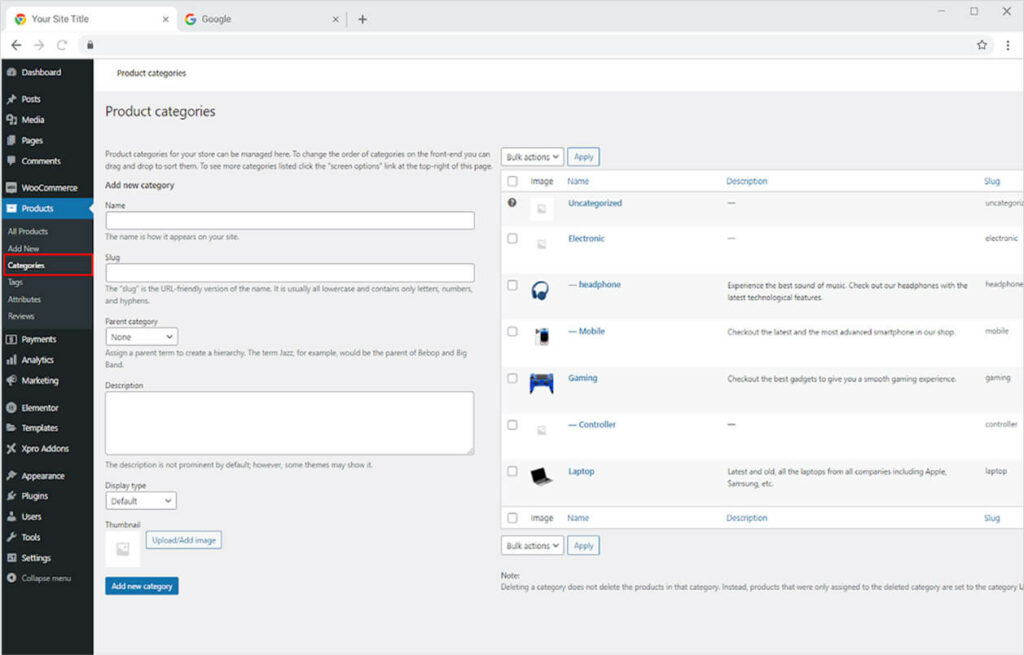
Create categories from the WordPress Dashboard > Product > Categories Tab.
Step 2
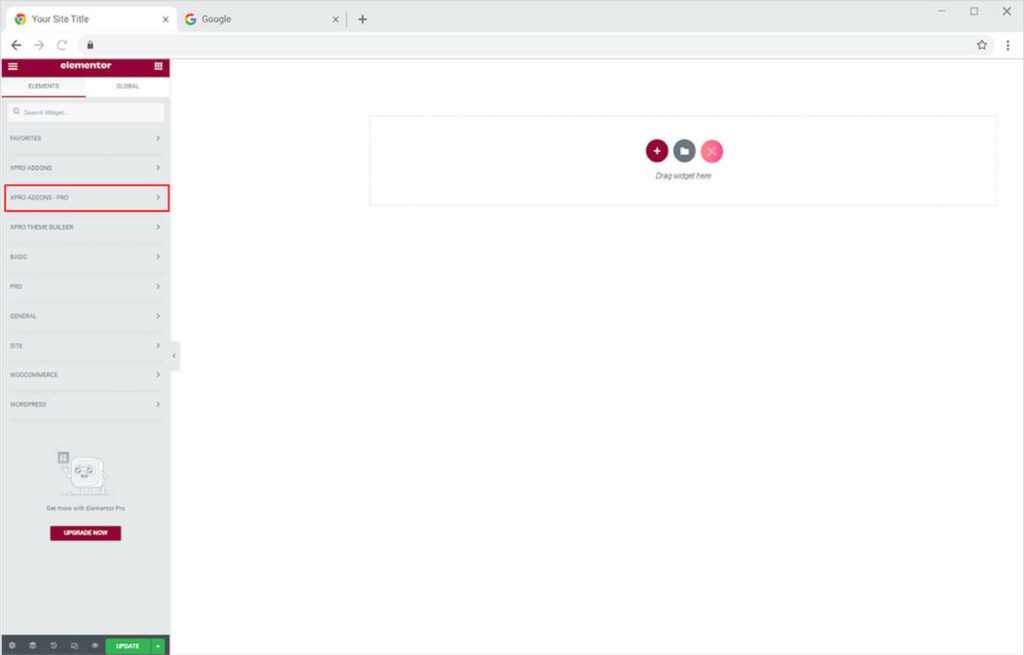
Click on the Xpro Addons – Pro section available in the Elementor Editor.
Step 3
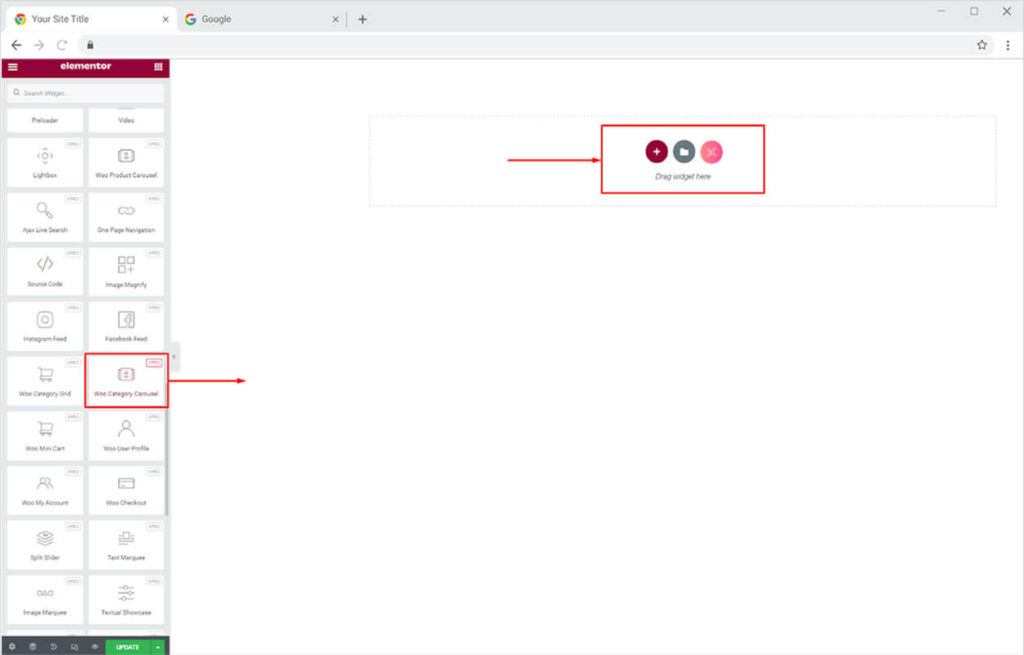
From the Xpro Addons section, simply drag’n’drop the Woo Category Carousel widget on your desired page location.
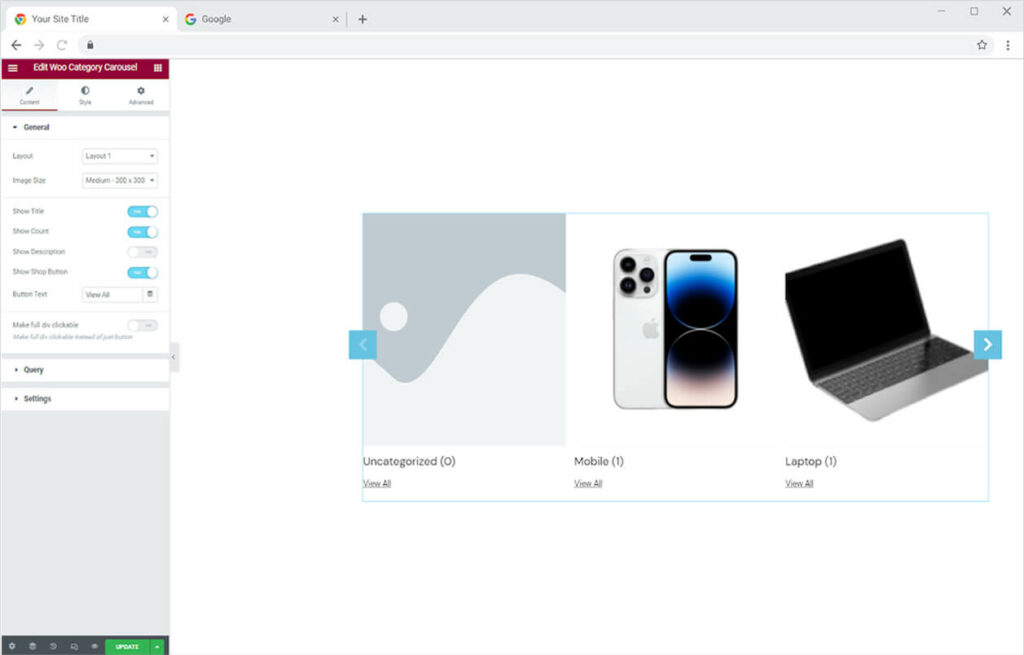
The default view of the widget will display the recent categories after you drag and drop it into the Elementor Page.
Content Section
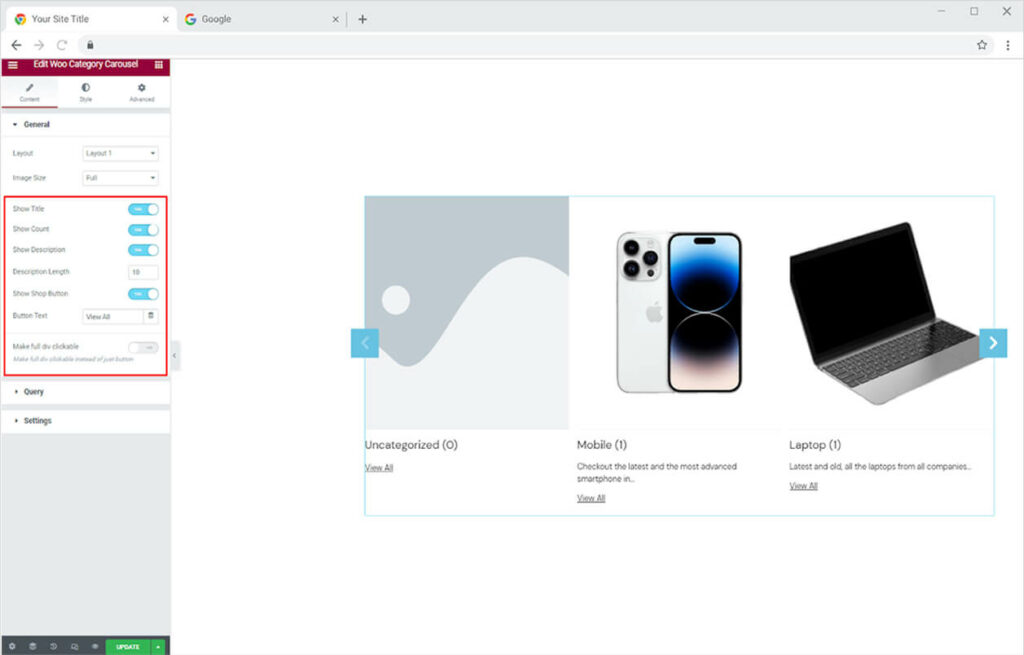
Select any of the given 10 layouts to display the categories under the Content Tab. Moreover, adjust the image size from the Image Size option.
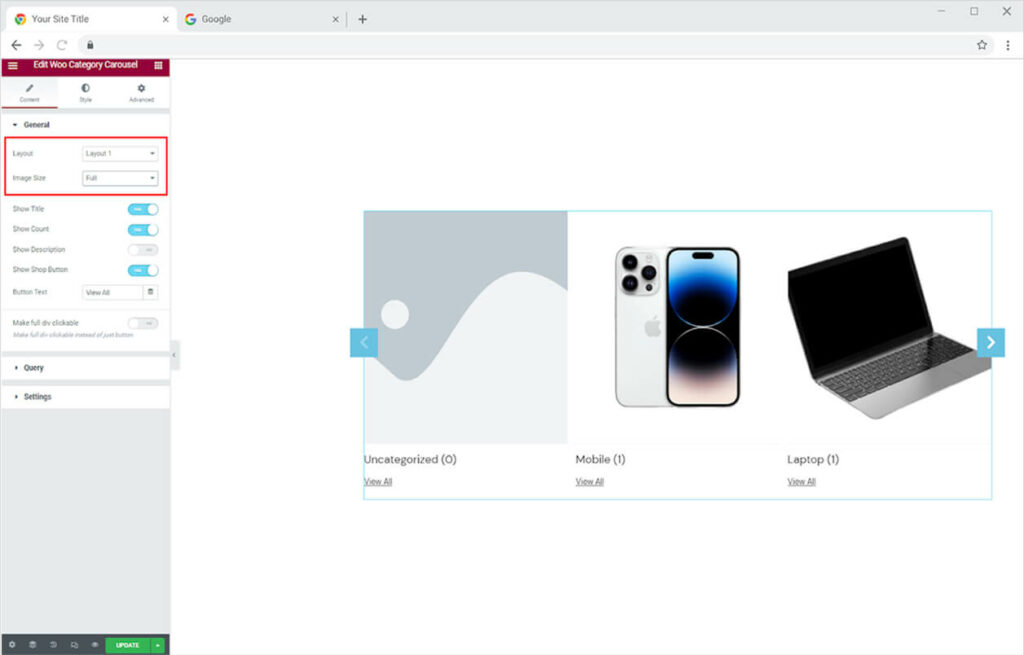
Enable the following options to make it display in the widget display.
- Show Title: Display the name of the category.
- Show Count: Display the number of available product offerings in that category.
- Show Description: Enable to show a description of the category and adjust its length.
- Show Shop Button: Display a button at the end to direct customers to that category page.
You have the option to change the text for the button. Simply write the text in the Button Text bar. Furthermore, allow users to move to the category page by clicking anywhere on the display instead of just the button.
How to Manage the Query in Xpro Woo Category Carousel
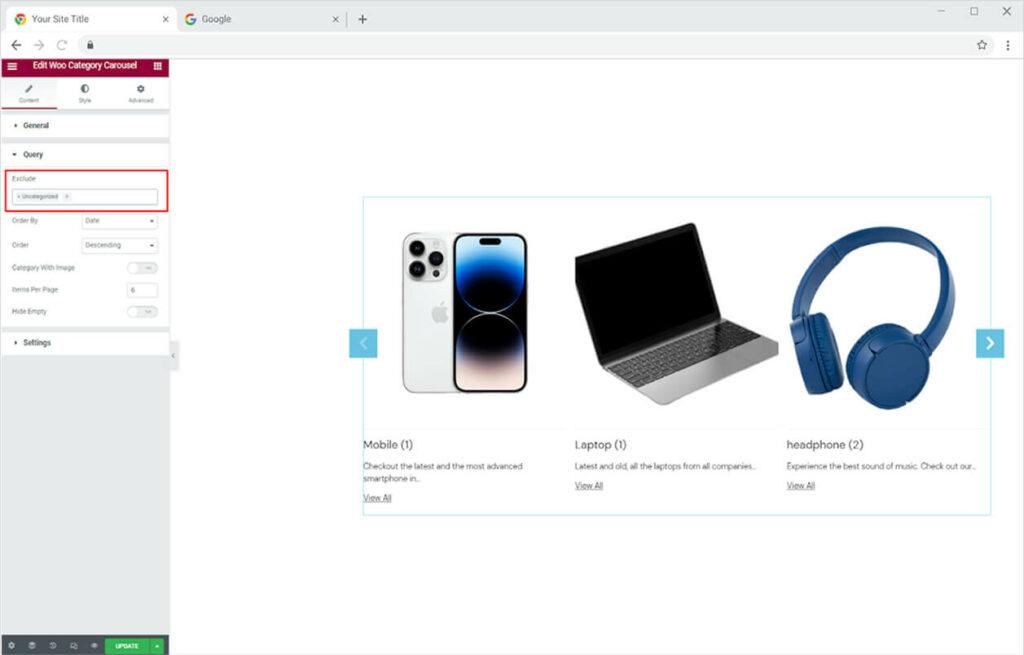
You can select which categories to display and which not to display from the Query menu. Simply enter the name of the category you don’t want to show in the exclude field to easily exclude it.
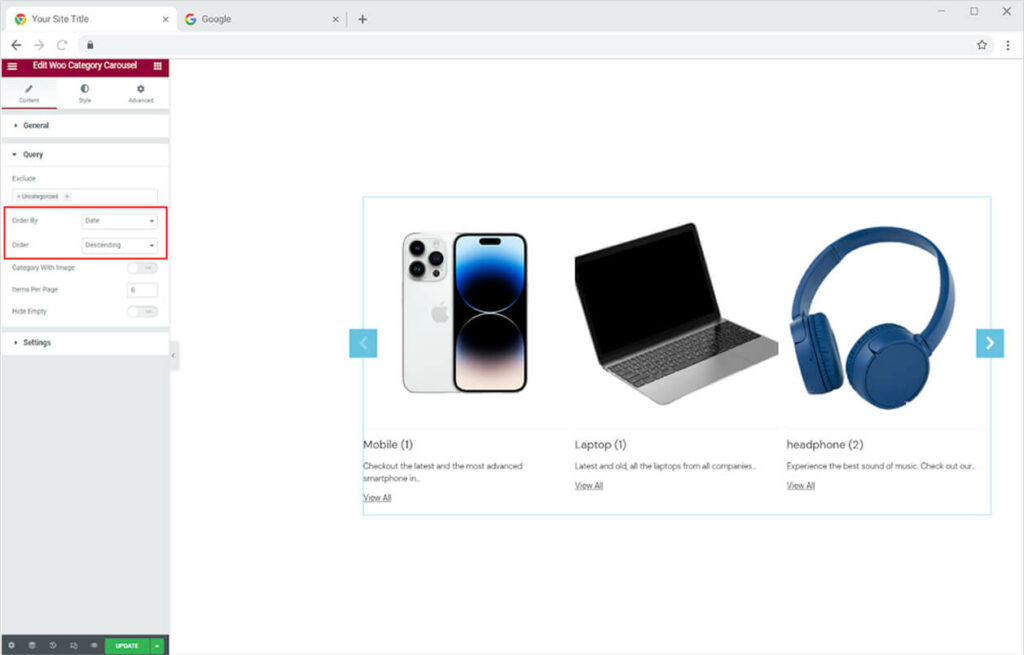
Set the order of the category display from the Order By and Order option. From the Order By option, you can adjust the order in Date, Post Id, Title, etc. The Order option allows you to arrange data in ascending or descending order.
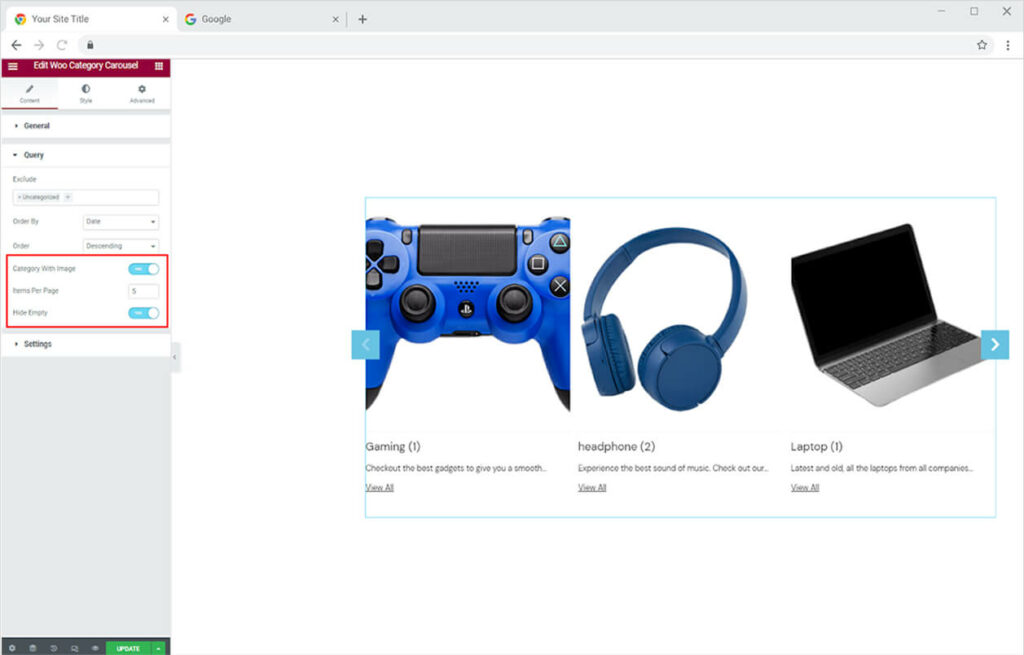
Allow only the category with images to show in the display. Mage the items that will be shown on one page. Furthermore, hide the empty space to make the display look better.
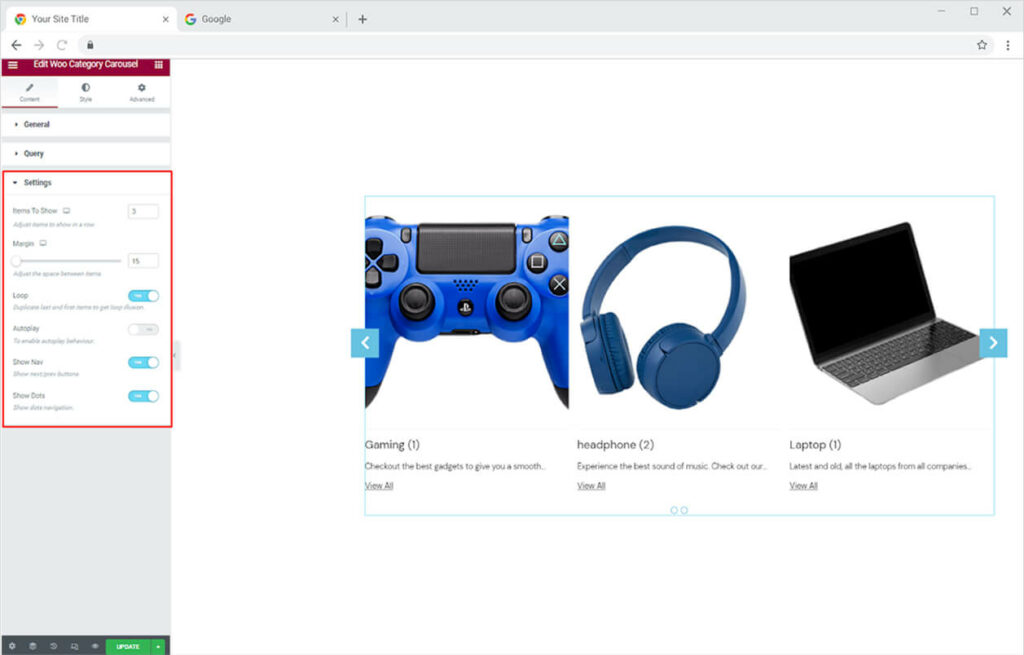
Click and open the setting menu to adjust the following settings of the widget.
- Items to Show: Number of categories in the display.
- Margin: Space between each item.
- Loop: Makes the first and last categories the same to make a loop.
- Autoplay: Makes the carousel automatically change posts.
- Show Nav: Display Navigational arrows to allow users to view more categories.
- Show Dots: Show dots below for the navigation.
How to Style Xpro Woo Category Carousel Widget for Elementor
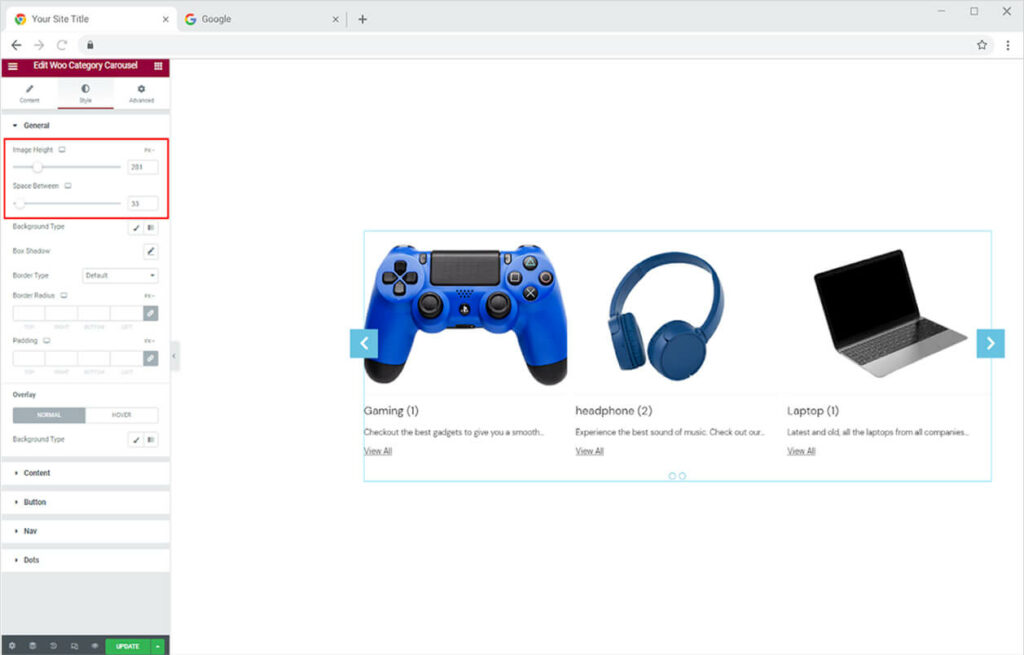
Adjust the height of the image and the space between each item from its specified option.
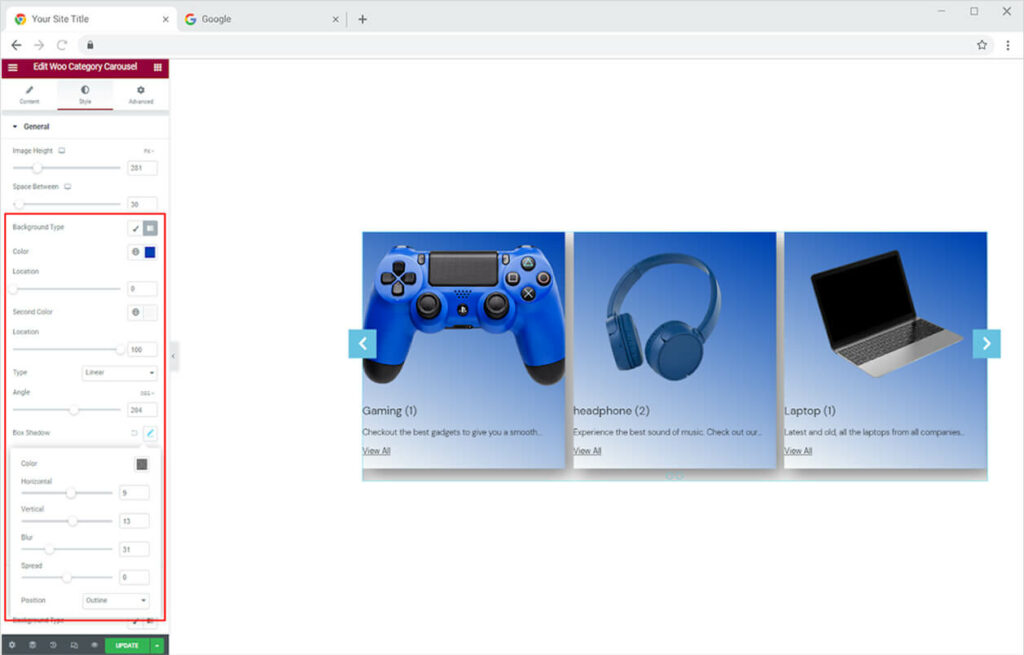
Color the background with classic or gradient colors. Make a shadow from the shadow box and its appearance horizontal and vertical.
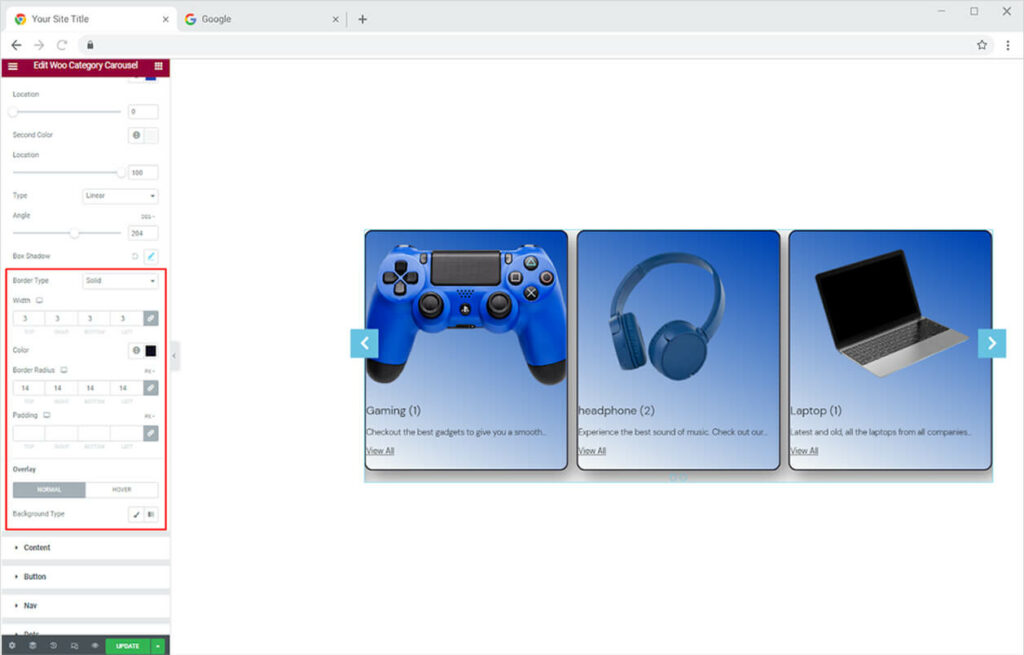
You can also change the border of the boxes to make them more visually appealing. You can choose from five different types of borders.
- None
- Solid
- Double
- Dotted
- Dashed
- Groove
Change the width and radius of the border to match your preferences. You can also change the border color. Furthermore, select an overlay color for normal and hover states.
How to Style the Content in Woo Category Carousel Widget
Set the alignment of the content for its vertical and horizontal display. Position the content to left, right, and center of the box.
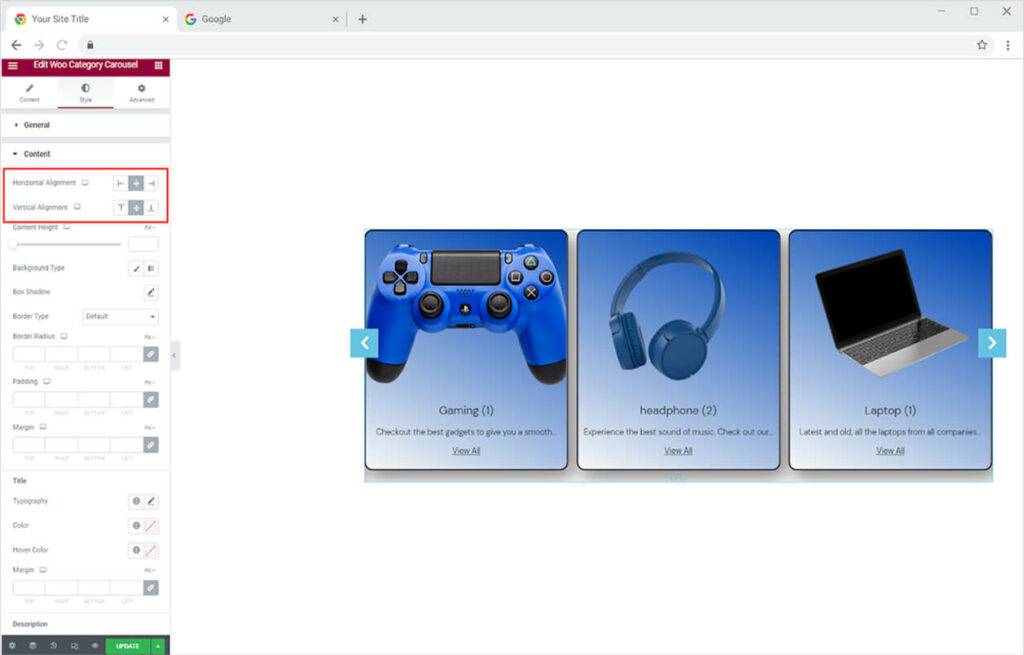
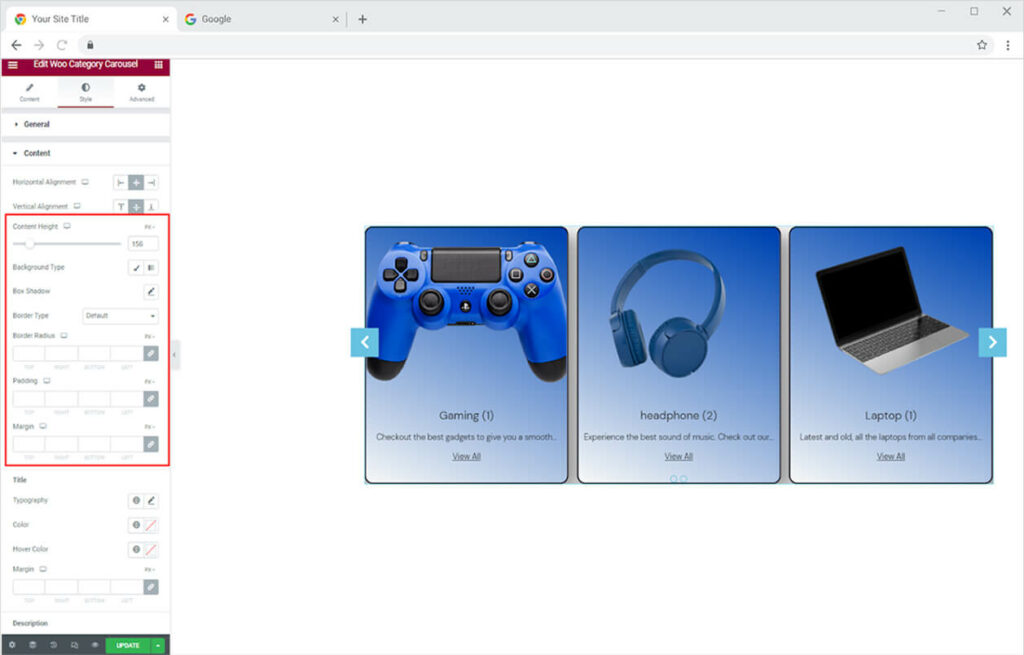
Adjust the content height from its given option. You can also give a separate color to the content background and further make a shadow and border to the content box.
How To Style Title and Description in Category Carousel Widget
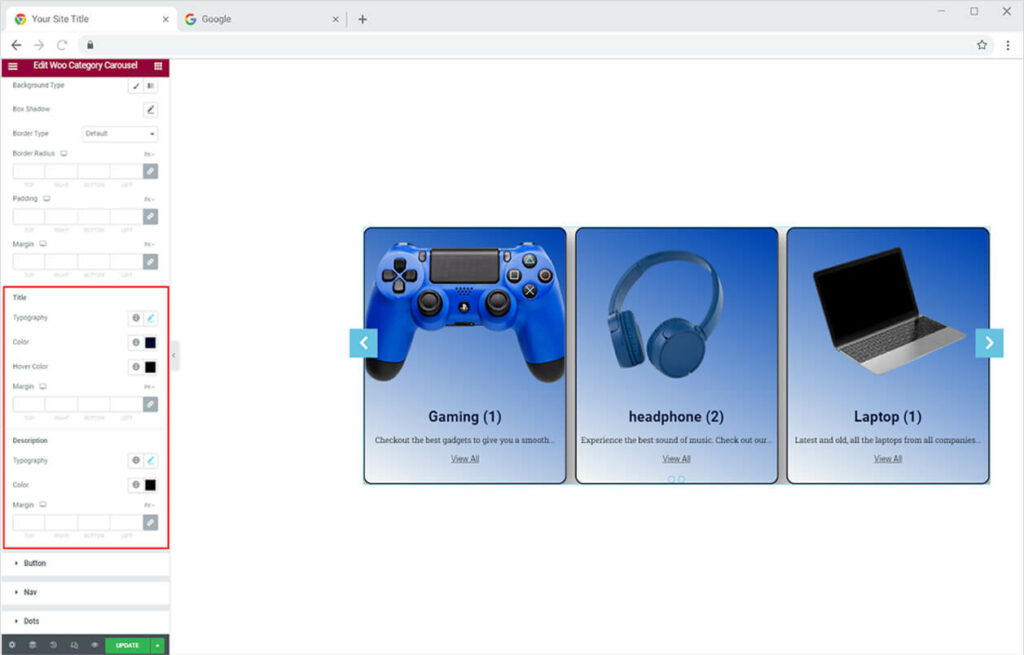
Customize the text in the title and description from its given section. Style typography from the typography box where you can change the font, size, weight, spacing, and other text customizations. Moreover, you can color the title and description. For the title, you can give it a hover color.
How to Style Button in Xpro Woo Catagory Carousel Widget
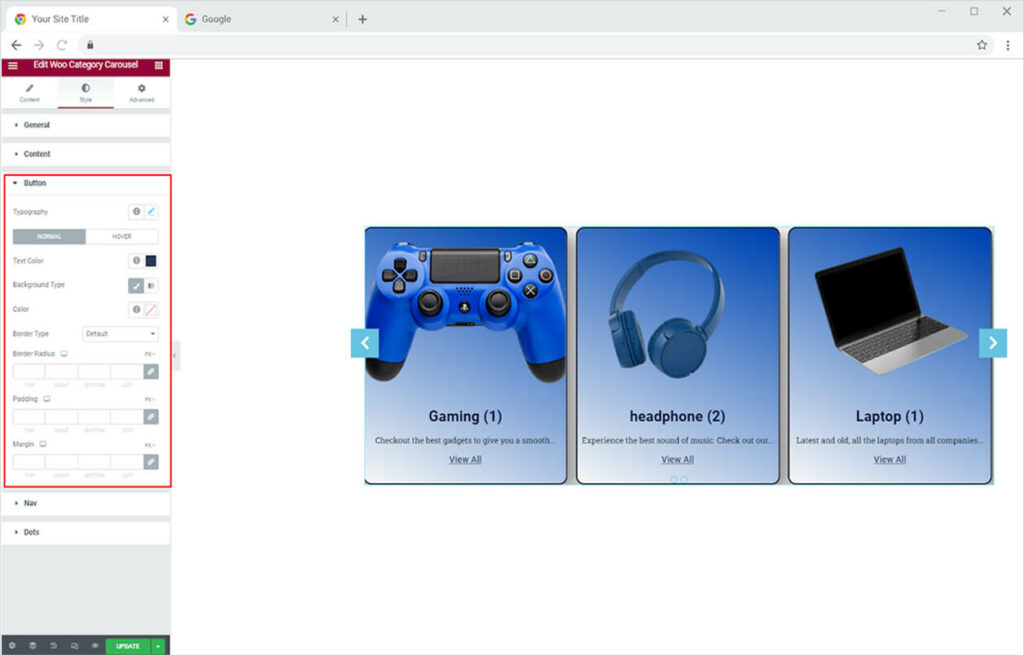
Style the button display from the button menu. Click and open the button menu to style the typography of the text. You can color the text and background for normal and hover displays. Furthermore, make a border and adjust its width, radius, and color.
How to Style Navigation in Xpro Woo Category Carousel Widget
Select between seven given layout designs for the navigational arrows. Adjust the icon size, background size, and position of the navigational arrow by moving the circle in the bar.
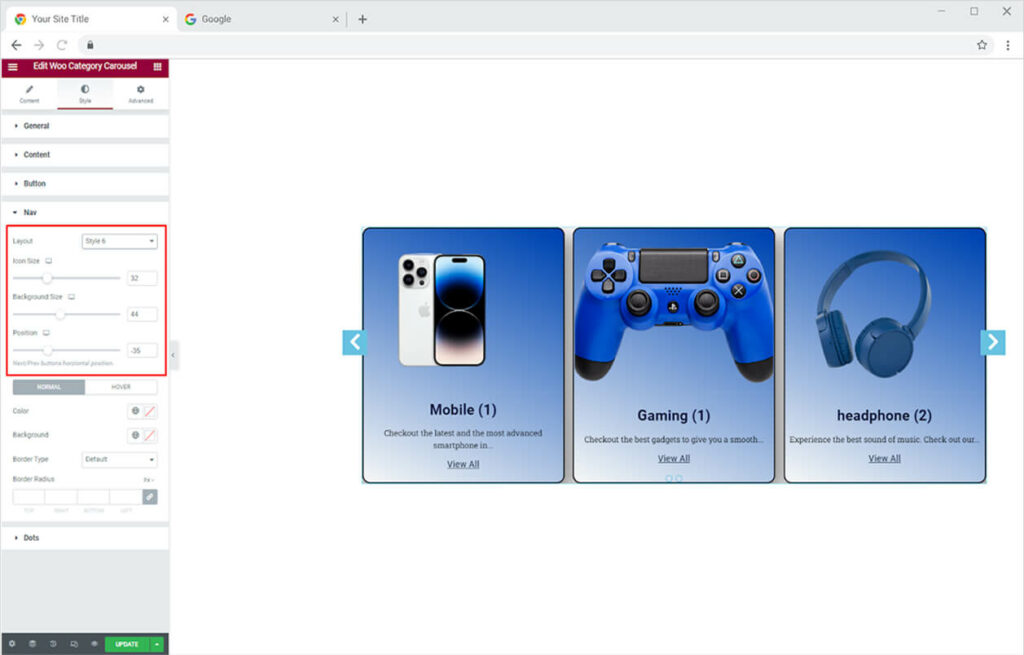
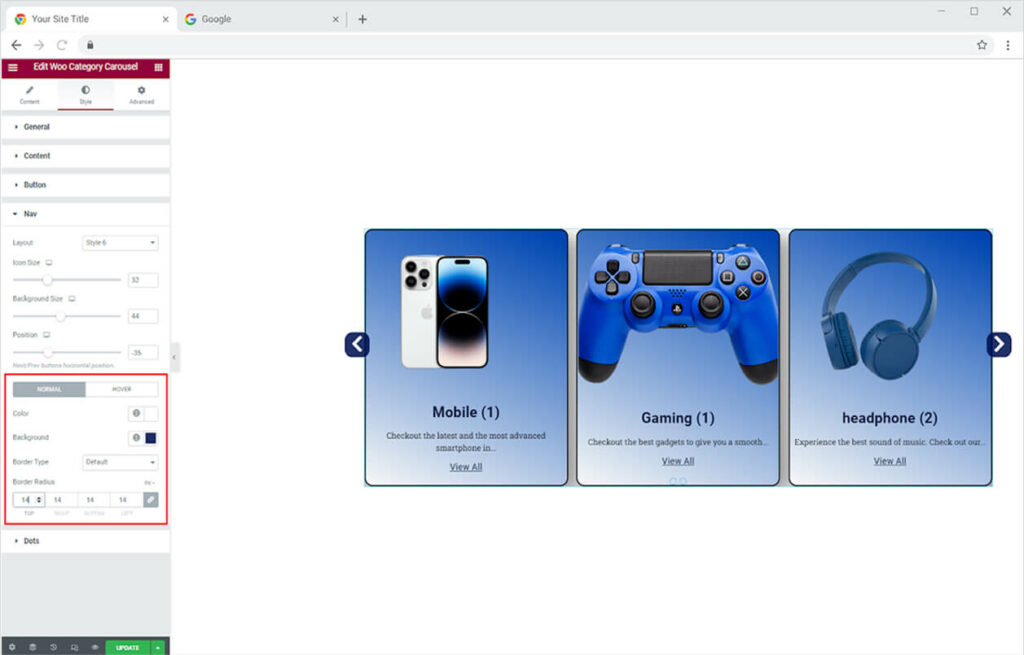
Select the color for the icon and background for its normal display and when the user drags the mouse above it. In addition, you may add a border and customize its appearance.
How to Style Dots in Xpro Woo Category Carousel Widget
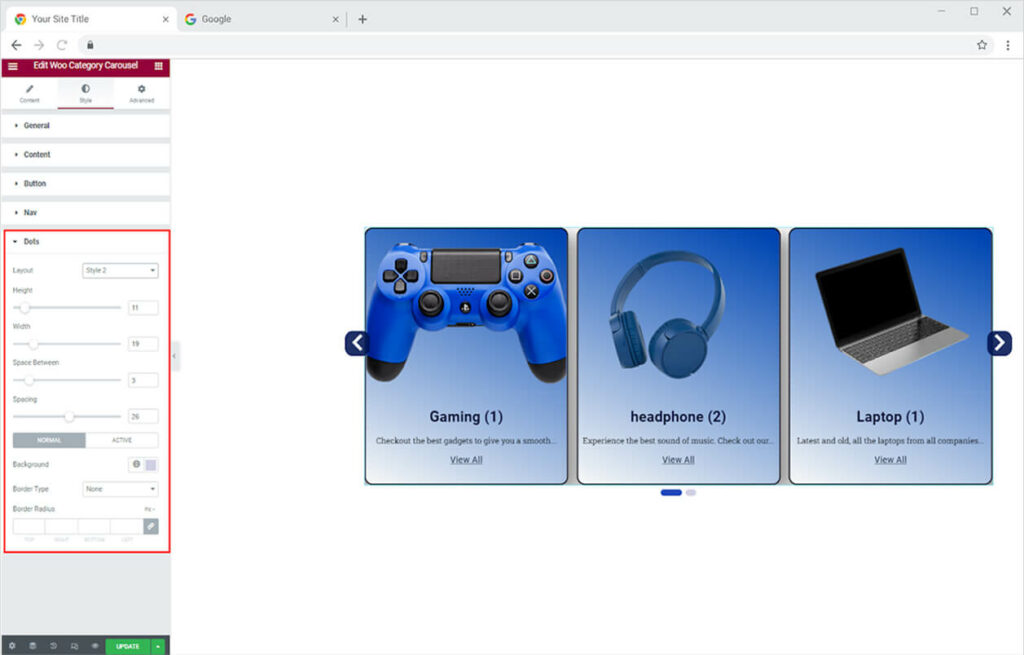
Select any of the 3 layout designs given. Adjust the size of the dot with the height and width options. Also, adjust the space between each dot and the widget. Moreover, give a color to the dot for its normal display and the dot that is active. Make a border if you want and further adjust its width and radius.
Best Woo Category Carousel Widget for Elementor
That is all from our Elementor Woo Category Carousel Widget by Xpro. I hope now you have a better understanding of how to fully utilize our easy-to-use Category Carousel widget by Xpro and create a good-looking product category display. This widget allows you to showcase your important categories and allow users to easily access them.
If you want to explore and add more attractive Elementor widgets then check our complete list of free Elementor widgets and download our free Elementor addons now. Moreover, check out our other promising Woo widgets like the Woo Product Grid widget for Elementor, Woo Add to Cart Elementor, Woo Mini Cart for Elementor, and Elementor Woo Product Tab. You will be surprised how easily you can customize Xpro Elementor Addons for your WordPress websites.