Advanced Post Widget
The Xpro Elementor Advanced Post widget is a powerful widget that displays your dynamic source WordPress posts, products, and pages in a visually appealing grid or list layout with all the necessary customization options. What makes this widget different from the Elementor Post Grid widget is the inclusion of filters that organize your layout with post categories, tags, and more. To make it more attractive, the filter transaction consists of 20+ animation effects to enhance user interaction.
Build an advanced filterable post grid by utilizing this premium Elementor Widget. The Advanced Post widget for Elementor comprises the posts in a grid or list that shows all the necessary information such as images, titles, excerpts, meta, etc. With the widget’s advanced post queries feature, you can showcase any posts in the arrangement that you desire.
How to Install Xpro Advanced Post Widget for Elementor
Requirements
You need to install and activate the Pro version of Xpro Elementor Addons. If you already have the plugin installed, just make sure the Advanced Post Widget is ‘Enabled’ from the Xpro Elementor Addons dashboard. So, you can find it in the Elementor editor.
To enable the widget, simply follow these steps:
Step 1
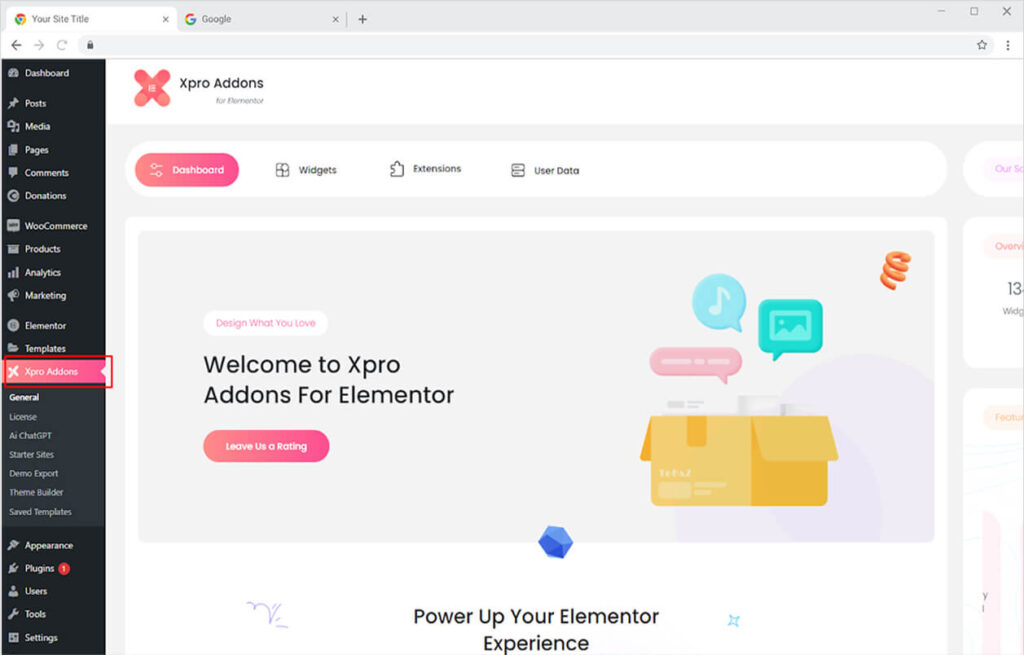
Click on the Xpro Addons option available on the WordPress Dashboard Menu.
Step 2
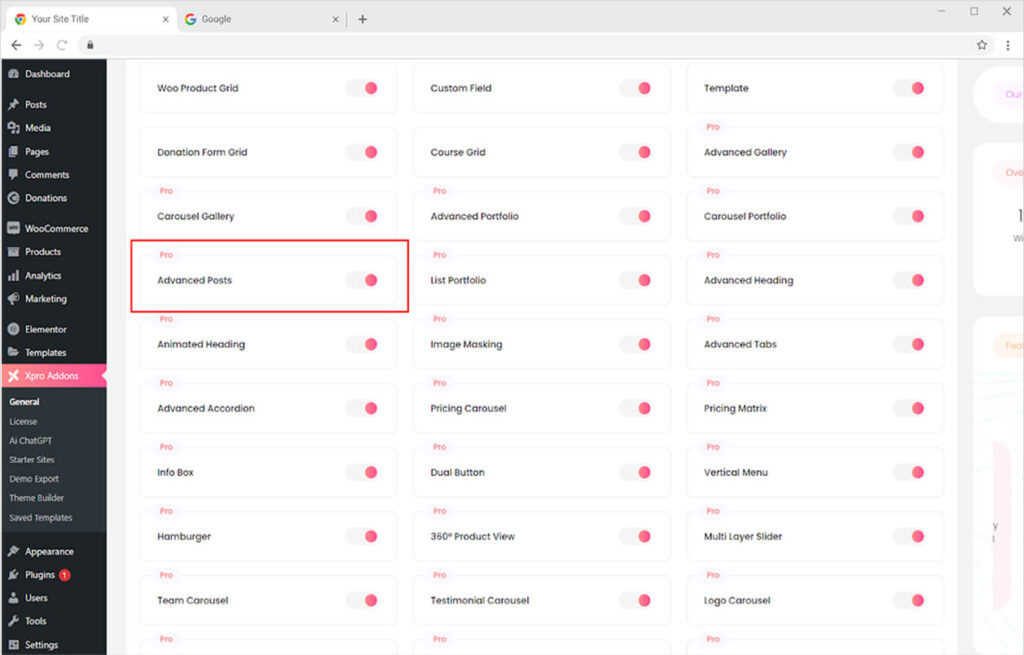
From the Xpro Addons Dashboard, click on the Widgets Tab. Scroll down and find the Advanced Post Widget, and finally, toggle the button ON to enable it.
How to Use Elementor Advanced Post Widget
The Advanced Post widget is used to dynamically display your posts, pages, or WooCommerce products in a layout that you had uploaded on your WordPress. After publishing your posts in WordPress, drag the widget onto the Elementor Page Builder and it will automatically retrieve your data from WordPress and display it in a grid. You can further perform a wide range of customization to build a layout that matches your site theme and branding.
Step 1
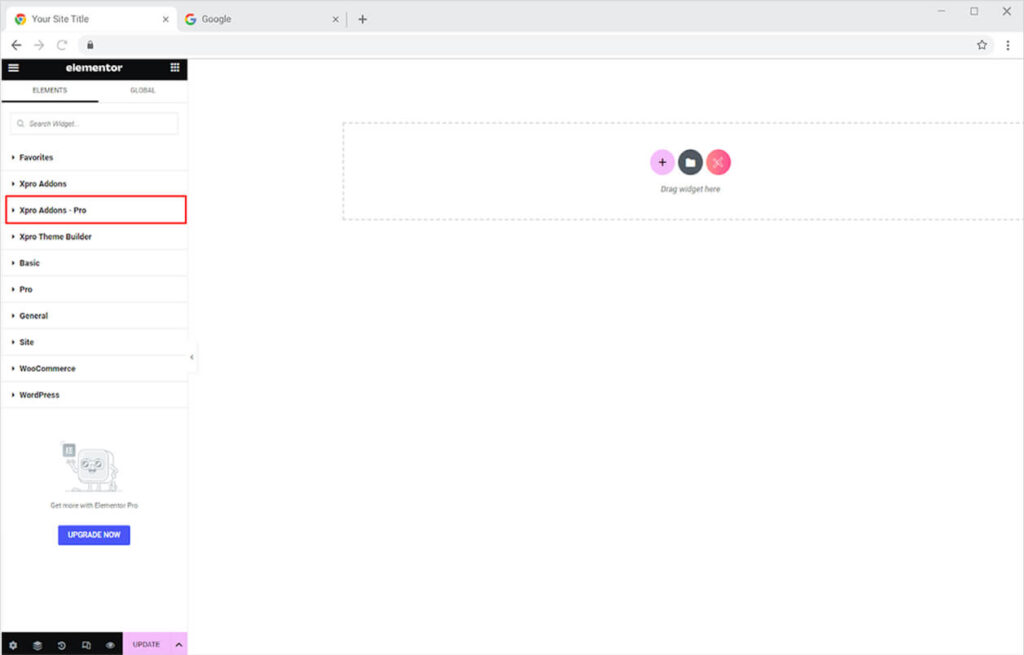
Click on the Xpro Addons – Pro section available in the Elementor Editor.
Step 2
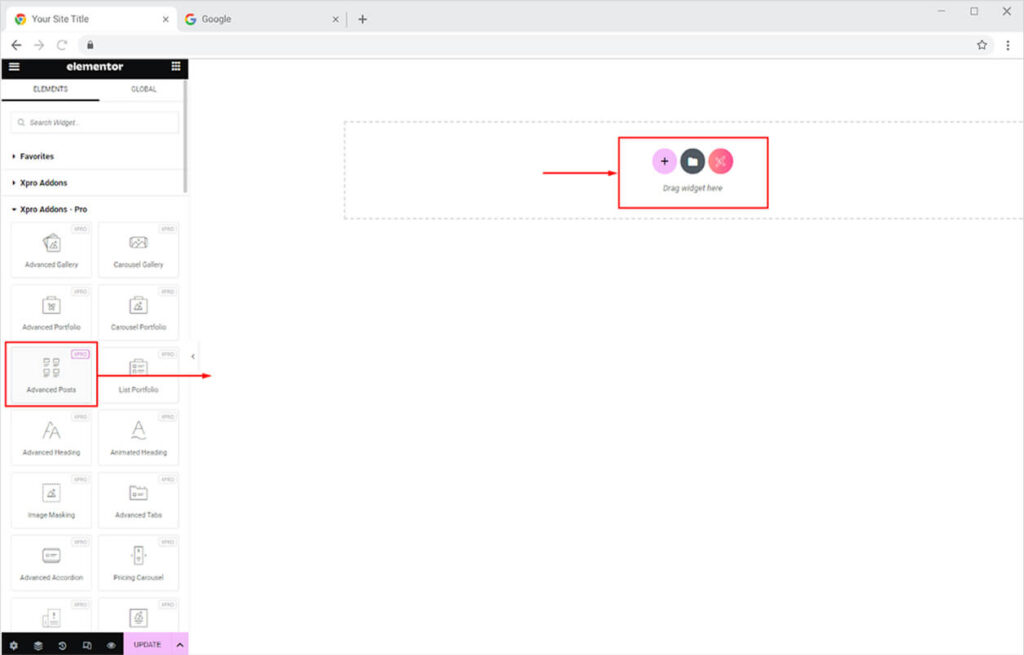
Scroll down the Xpro Addons – Pro section, to find the Advanced Post widget. Simply drag’n’drop the widget to your desired page location.
The default view of the widget will fetch the recent posts published and show them in a filterable grid.
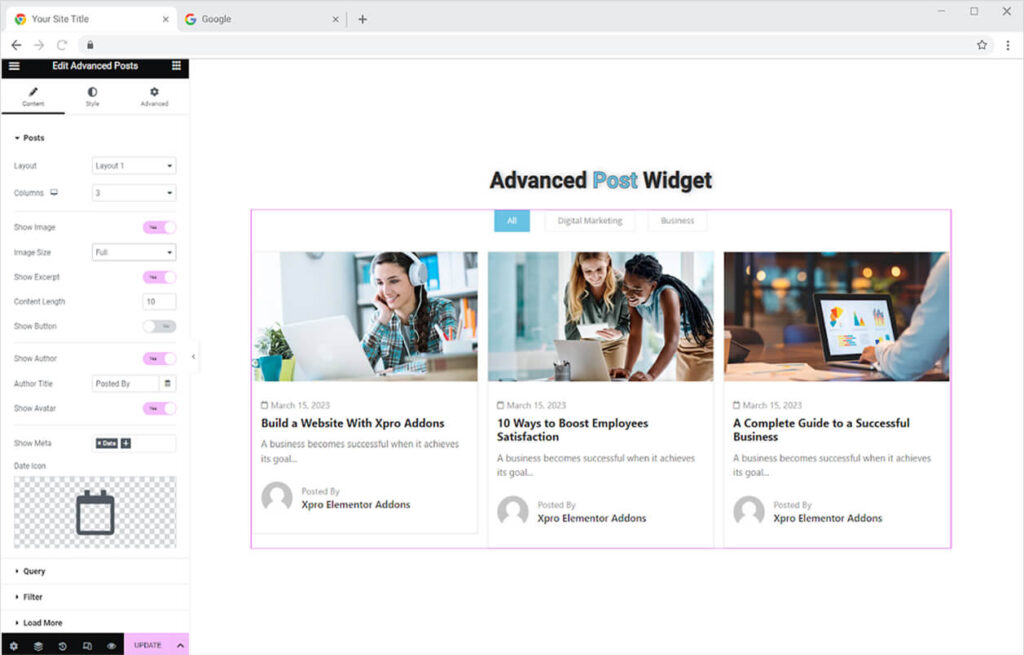
Content Tab
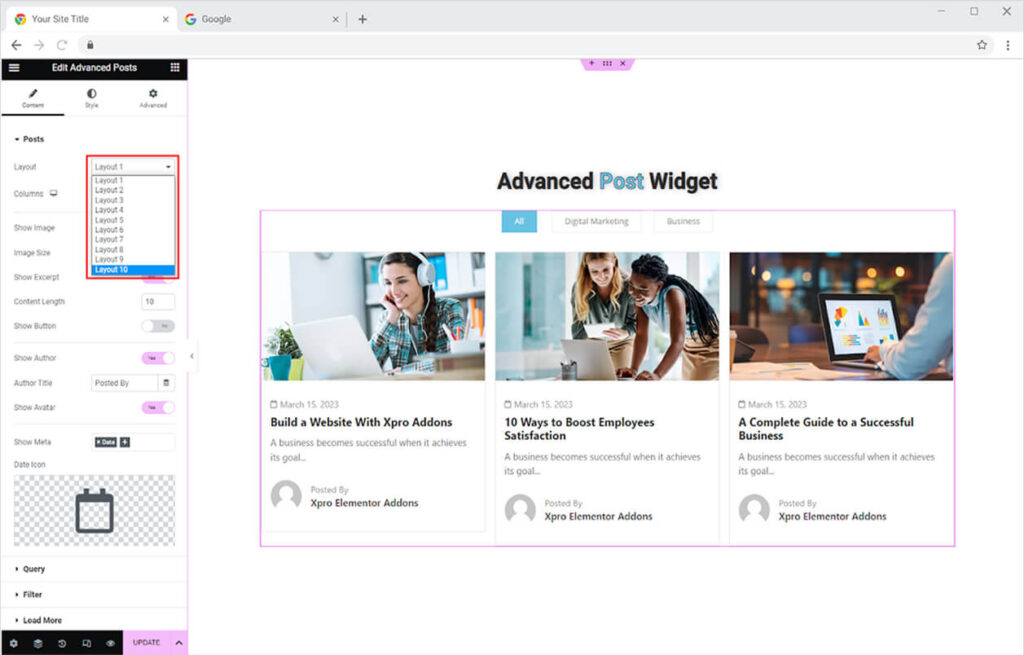
The Advanced Posts widget allows the designers to display the posts in 10 different layouts. Select the layout that you believe will look perfect with your website.
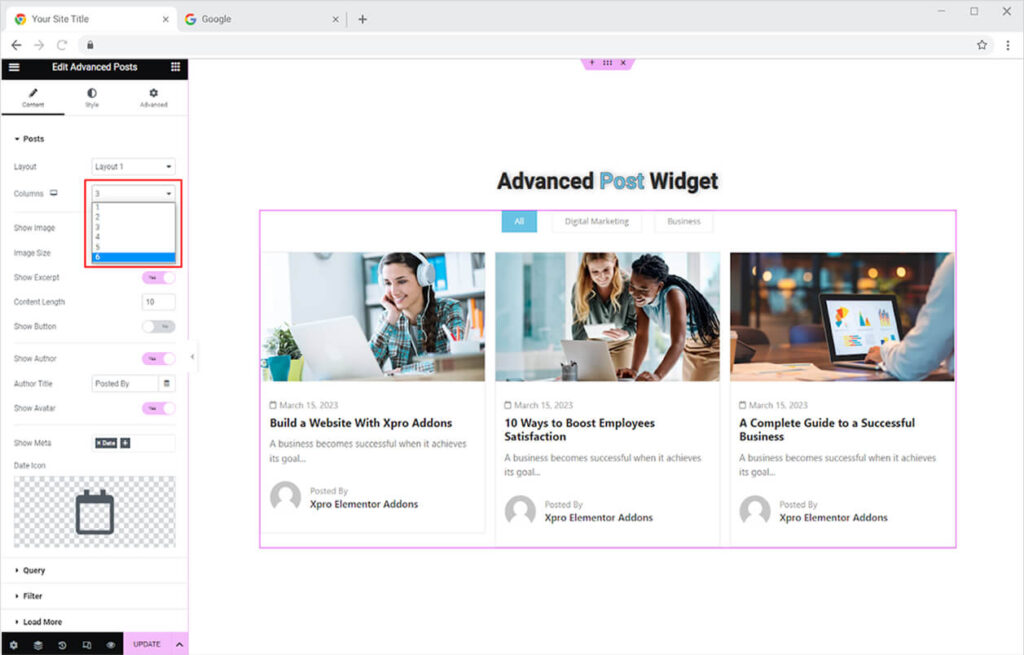
Create up to 6 columns to show your posts on a single page.
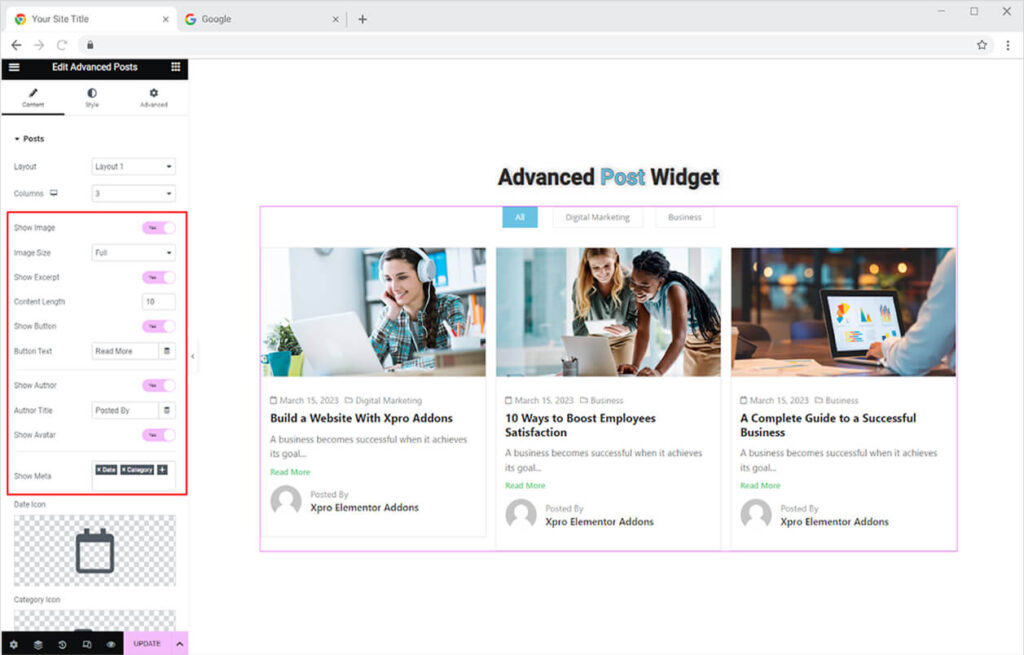
How to Show or Hide Elements in Elementor Advanced Post Widget
The Advance Post widget allows you to show or hide the elements in the widget as per your requirement. Allowing a widget to be shown will further provide you with the option to adjust its display. Following are some key elements that you can show or hide in the widget display.
Image: Enable Show Image will display the featured image of the post or page. This further allows you to manage their size.
Excerpt: Enabling Show Excerpt will display short text or summary of the post. You can further adjust the content length.
Button: Display CTA that will guide the visitor to that particular post or page.
Author: Show the name of the author who added that content on WordPress.
Avatar: Show the image or avatar of the author.
Meta: Display post meta such as date, tags, and comments as well as their icons.
How to Add Post Queries in Advanced Post Widget
The widget comes with a feature of advanced post queries for Elementor that allows you to select the source for the widget display and manage their arrangement. Select the source from the drop-down menu from where the widget will retrieve data.
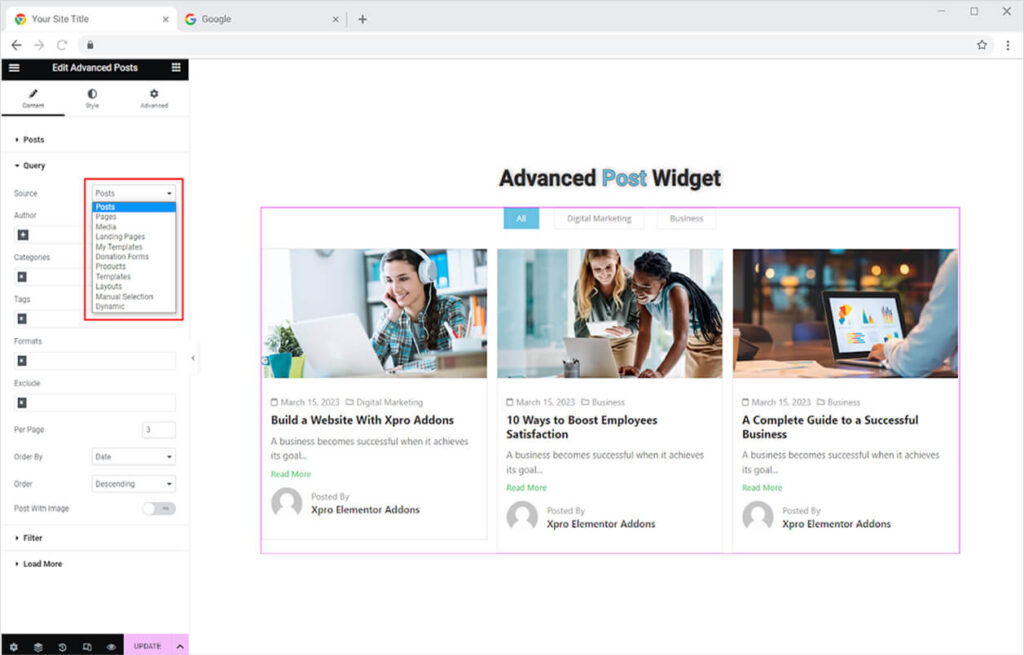
Different sources will provide you with different options to manage their display and arrangement. For example, selecting a post source will allow you to manage the following options.
Author: Select which author post to be shown.
Categories: Select what categories of posts are to be shown.
Tags: Include posts on the bases of tags.
Format: Select the format of the post.
Exclude: Provide what post is not to be shown.
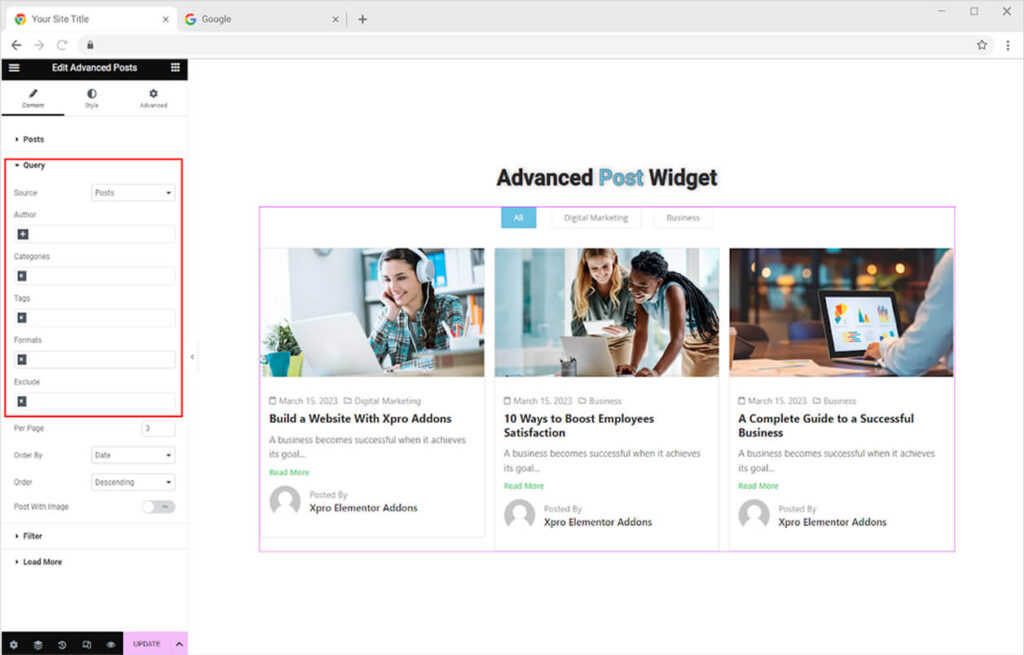
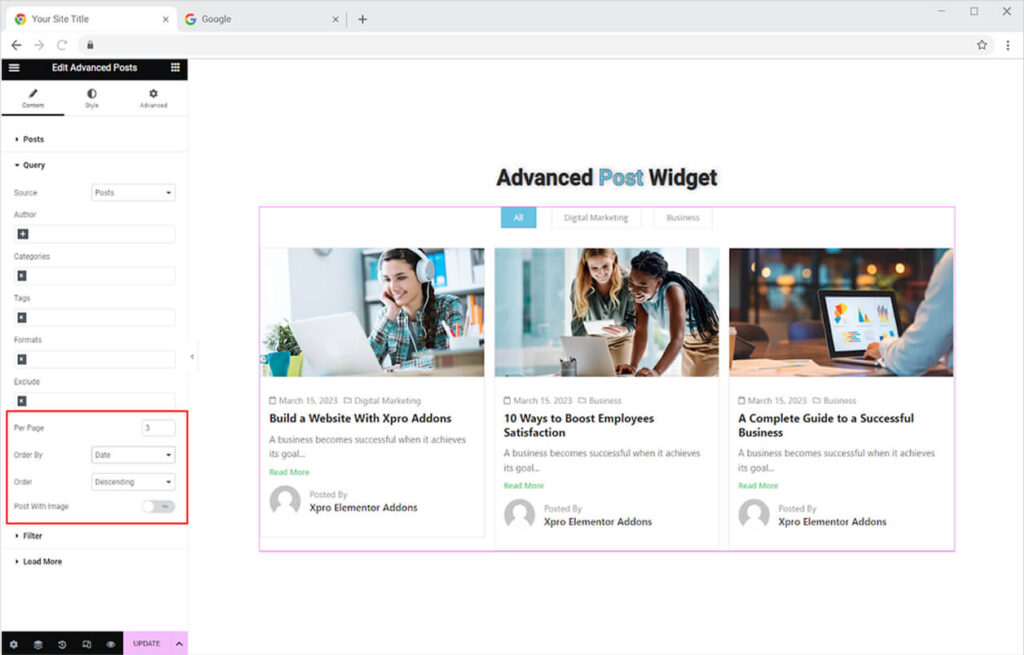
The following options allow you to manage the arrangement of the grid widget.
Per Page: Select how many posts are to be shown on a single page.
Order By: Select the order of the post by date, title, author, etc.
Order: Organize the posts in ascending or descending order.
Post with Images: Only include posts that consist of a featured image.
How to Display Filter in the Filterable Post Widget
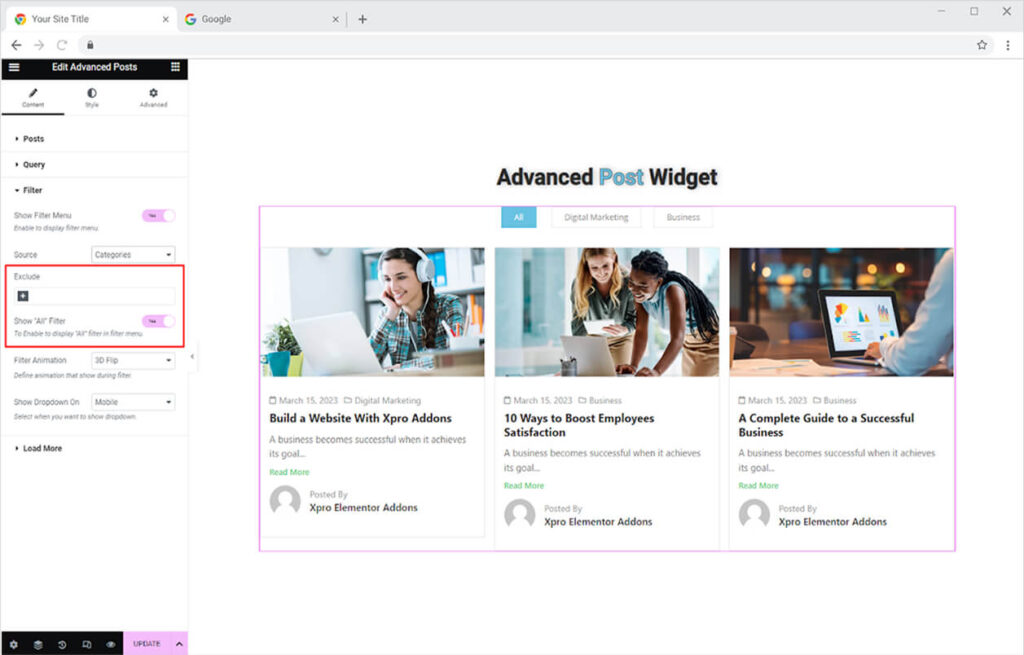
Allow the Elementor widget to showcase filters so that the reader can access only those posts that they are interested to read. These filters can be organized through different sources such as categories, tags, formats, product categories, product tags, and product shipping classes.
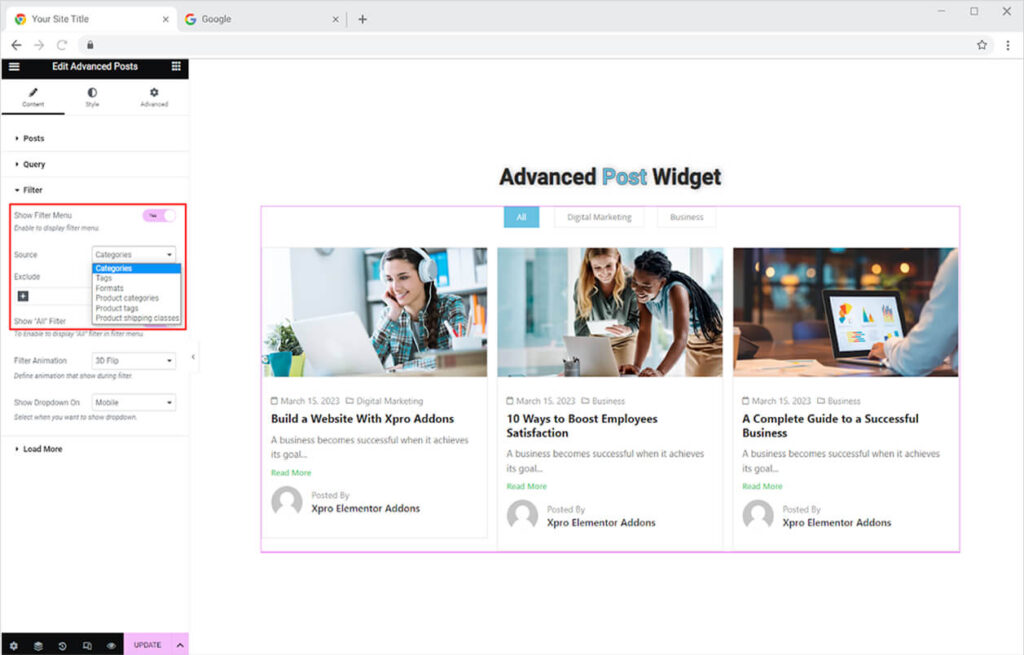
Simply fill in the name of the category to omit it from being displayed in the widget. To include every category or tag, simply toggle the show all filters switch.
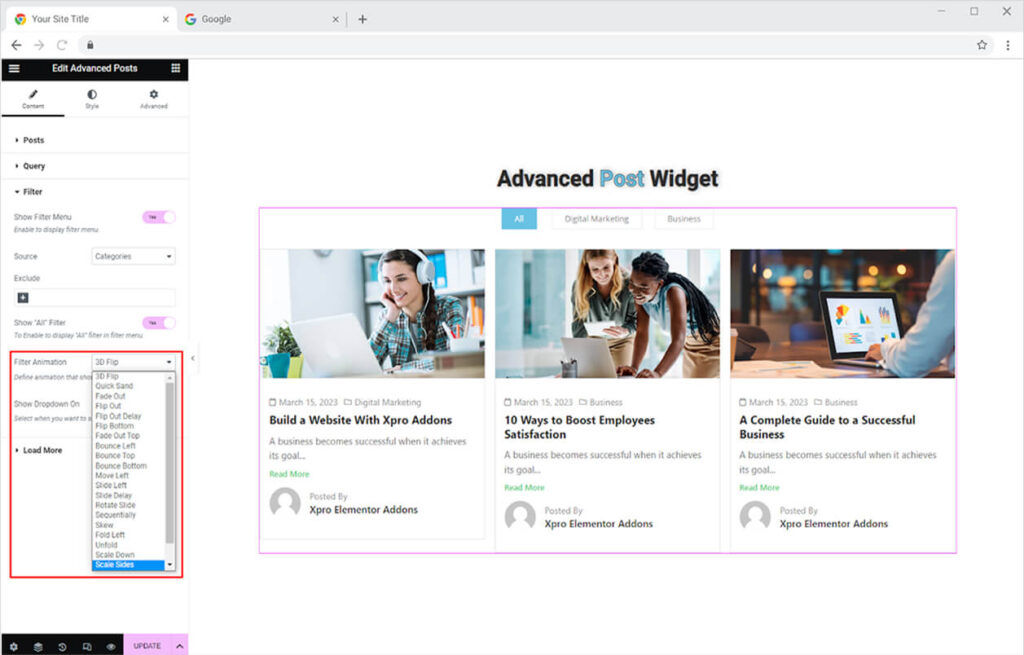
Enhance the experience for users by selecting an appealing filter animation from over 20 effects for filter switching.
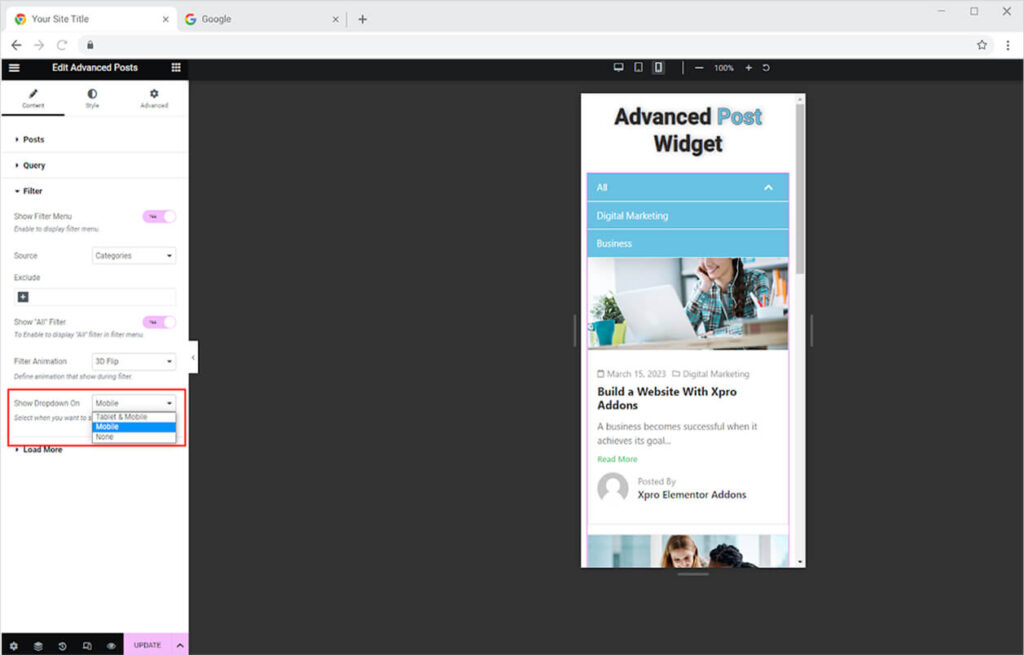
Manage how the widget will be displayed in the mobile and tablet view by adding a filter drop-down in mobile, tablet, both, or none.
How to Add Load More Option
There must be many posts on your WordPress that you need to show in this Xpro widget. To show it all, add a load more option so that visitors can gain access to all of your published posts. The widget provides many ways by which the visitors can access the other posts such as Load More Button, scroll, custom, or pagination.
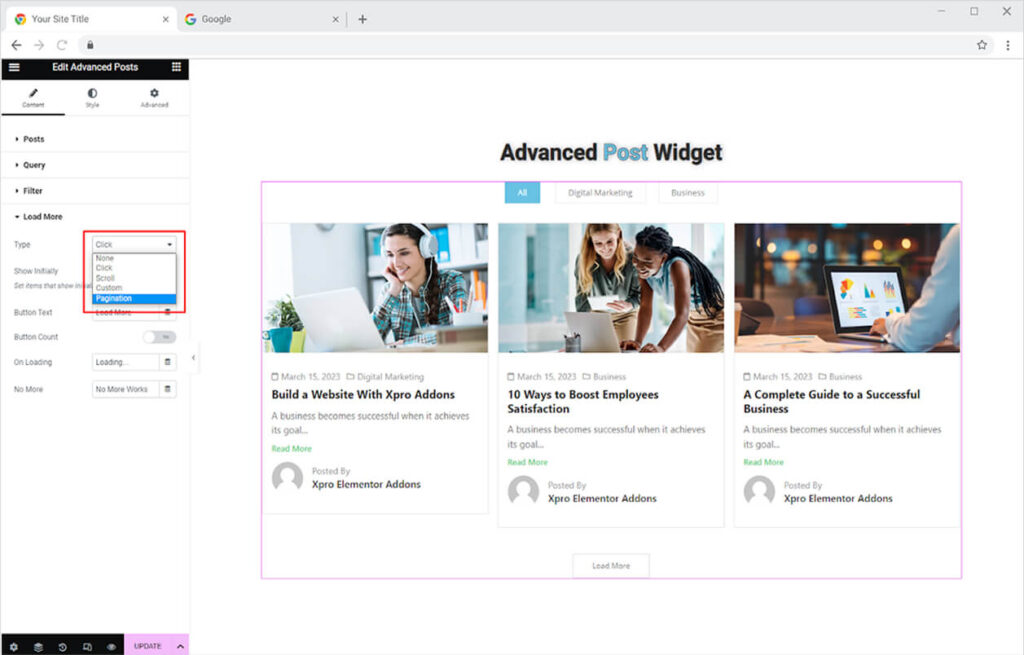
Each of these loads more options comes with different settings. For example, choosing pagination will allow you to change the text for the previous and next buttons as well as the arrows shape.
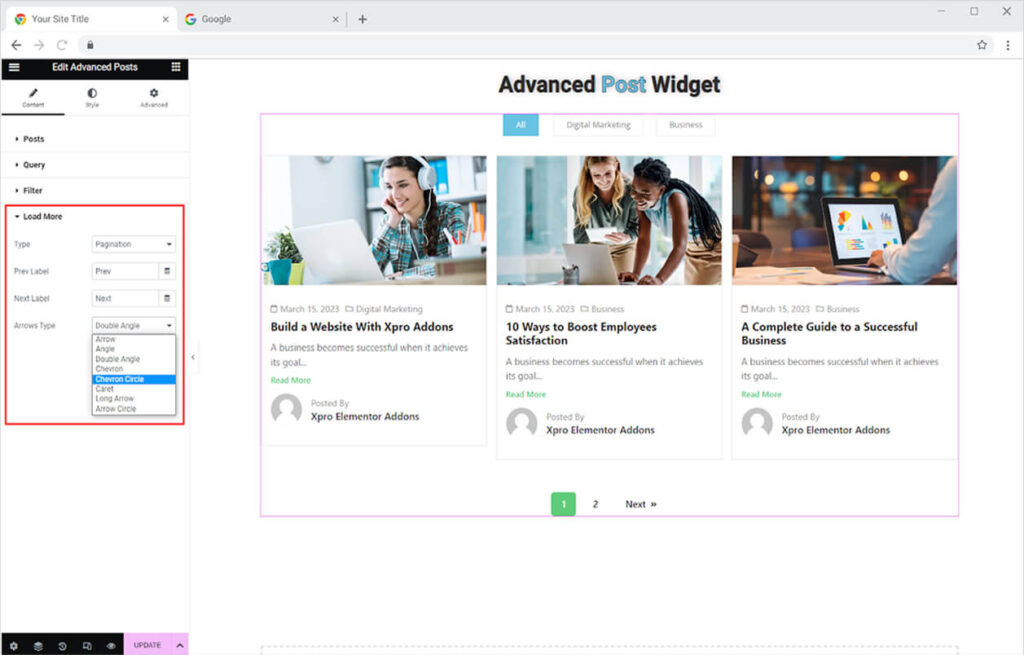
How to Style Elementor Advance Post Widget for Elementor
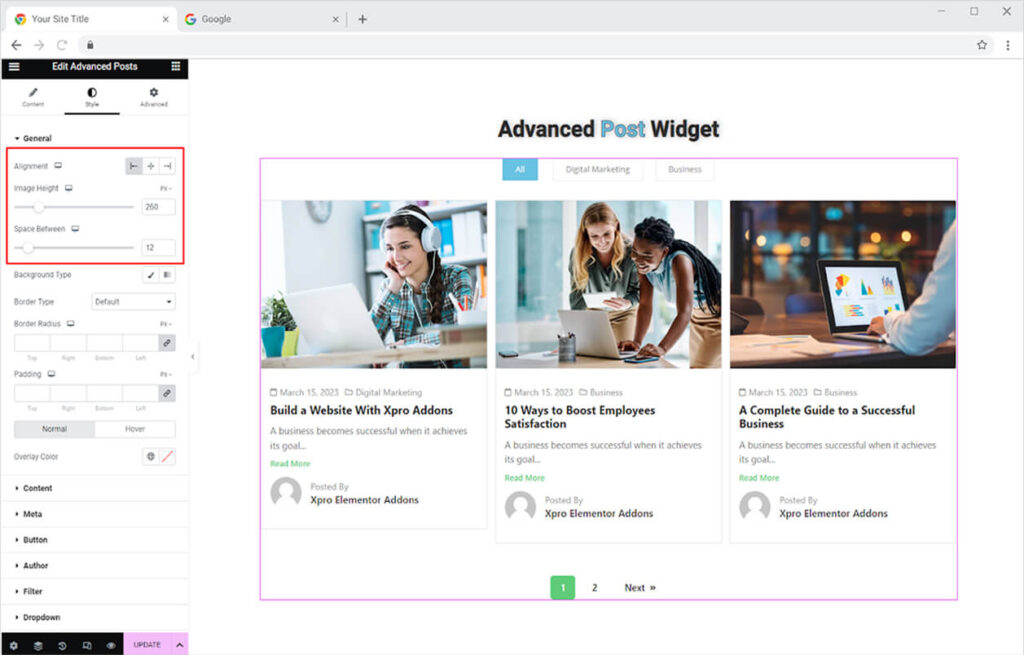
Customize the display of the widget to make it consistent with the theme and layout of the site. Start with setting the alignment of the content to left, right, and center. Adjust the image size through the image height option and manage a gap between each listing through Space Between.
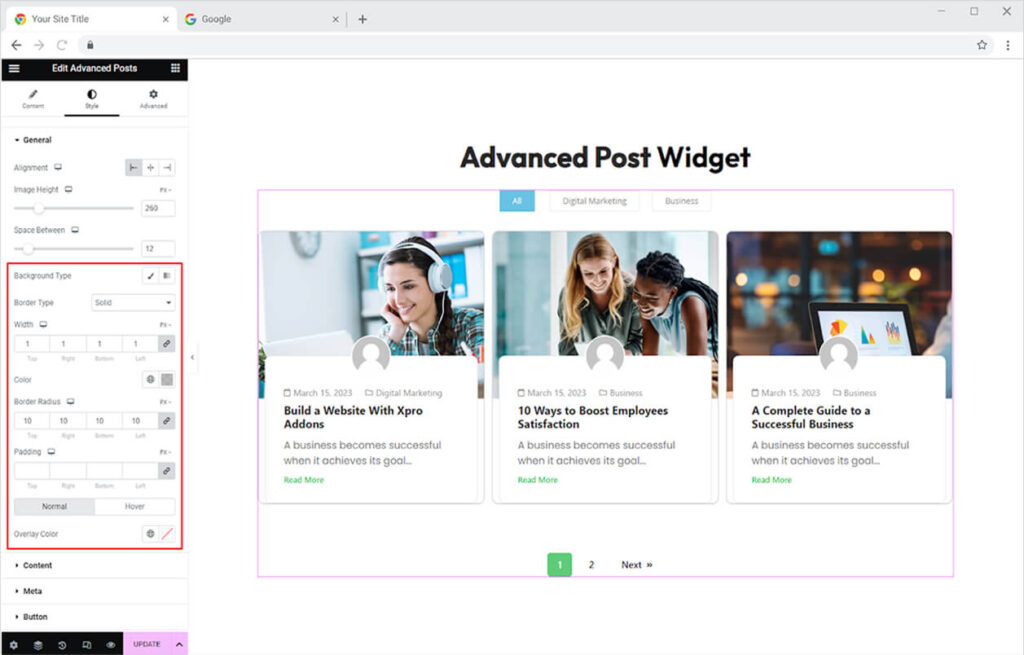
Furthermore, you can add a background color to the listing from a classic color or gradient color option. It even allows you to create a border around the boxes by selecting a border type between solid, double, dashed, dotted, and groove. Moreover, customize the border width, radius, and color. In addition, you can give it an overlay color for normal and hover displays.
How to Style Content in Advanced Post Widget for Elementor
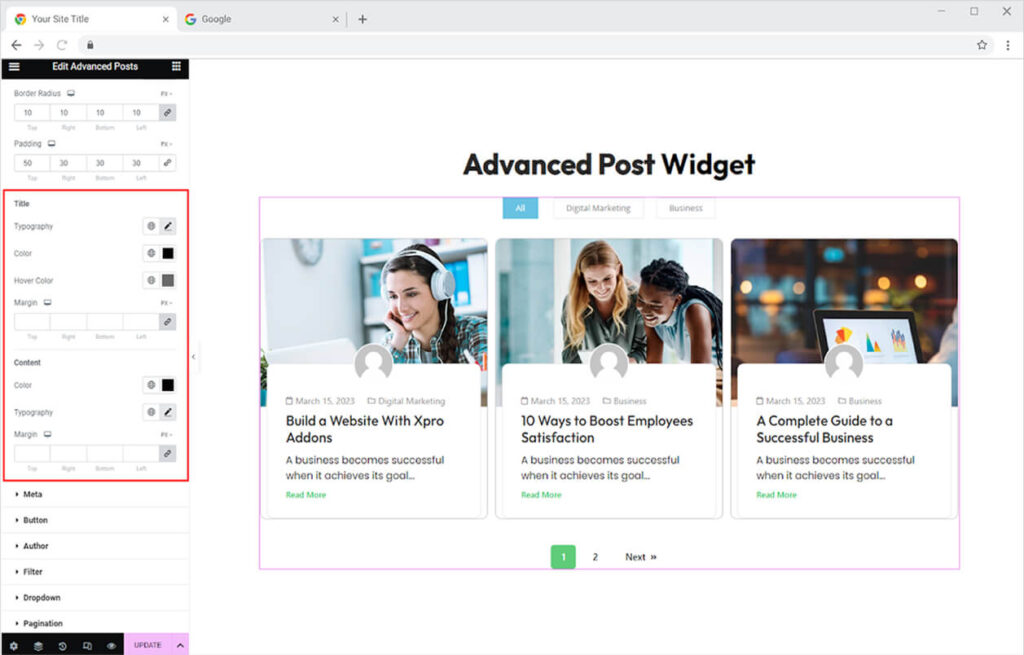
Click and open the content menu from where you can customize the display of text and layout within the content section. Adjust the height of the content box by dragging the min-height cursor. Just like in general styling, you can add colors and borders.
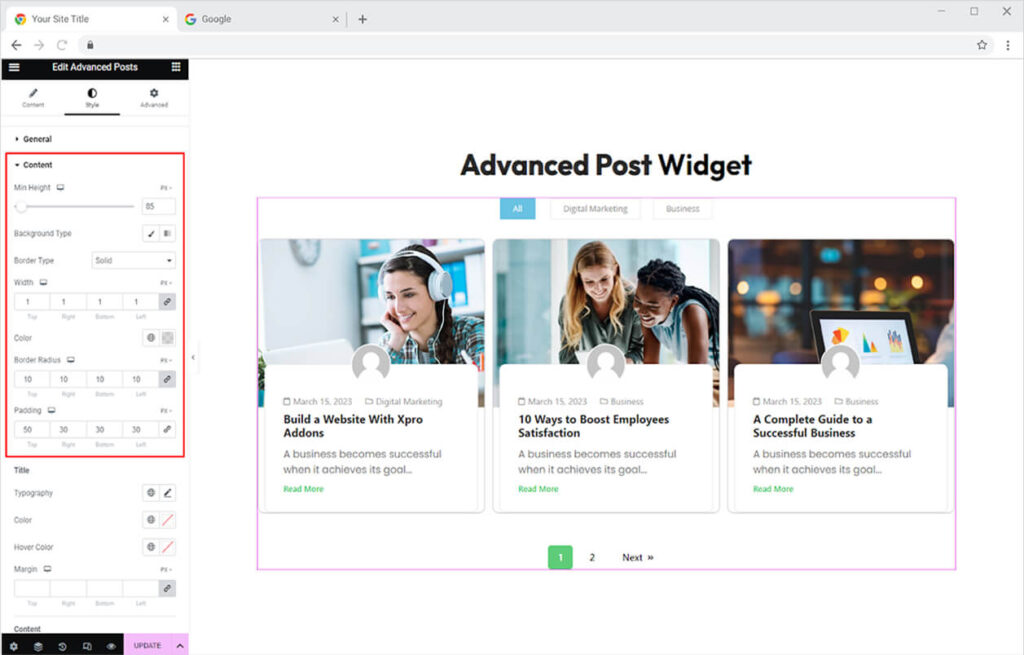
Style the typography of the title and content in the section by customizing the text typography that allows you to change the font, size, weight, spacing, and other text customizations. Add colors to the text in the content and you can also add a hover color for the title.
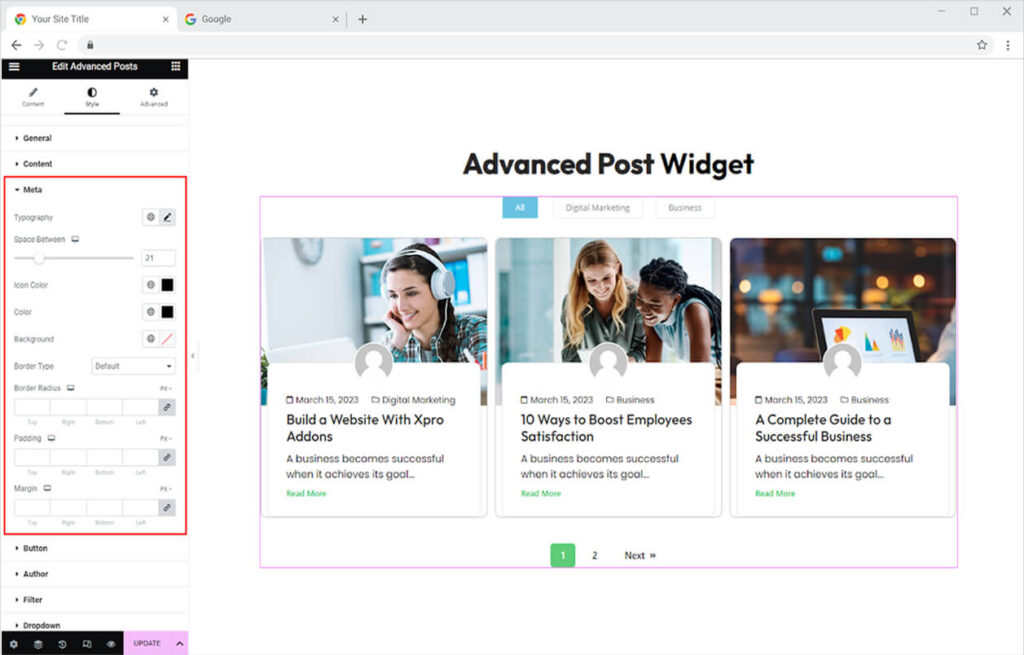
How to Style Meta in Xpro Advanced Post Widget
If you have enabled the option to include meta in the widget display then you can style it as well. The Meta menu allows you to perform the following stying; typography, space between, icon color, text color, and background color. Furthermore, you can create a border around each meta by selecting a border type and customizing its width, radius, and color.
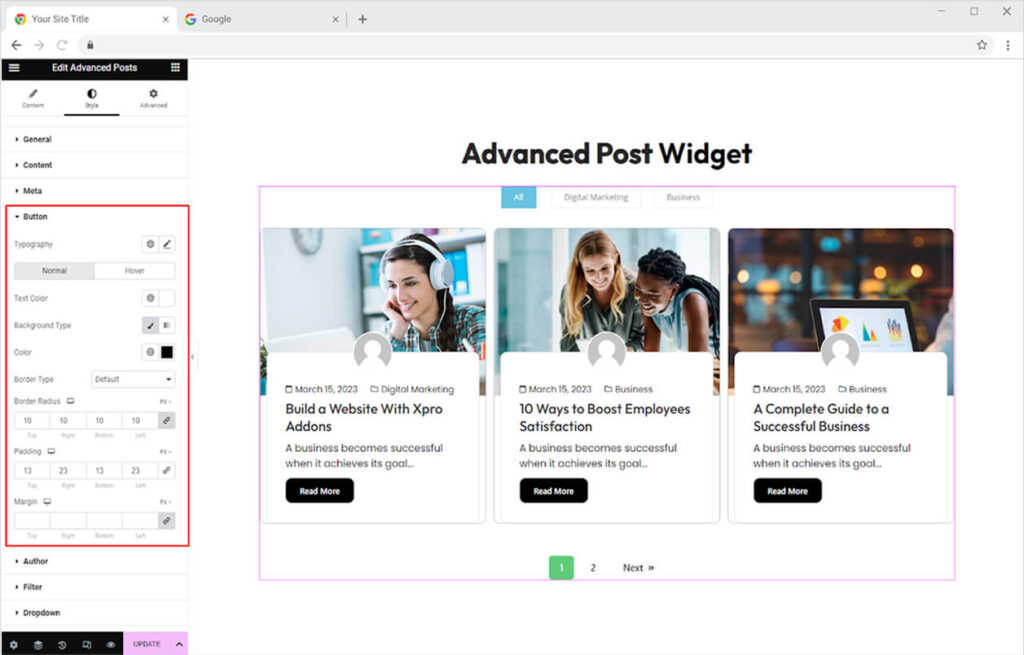
How to Style Button
The button in the content section is a call to action for visitors to direct them to a particular post. To style this dynamic button, style the text typography in the button. You can choose text and background for its normal and hover state. Furthermore, you can choose to add a border around the button and customize its width, radius, and color.
How to Style Author Display
For the Author styling, you can style it from its given section. There you can perform multiple customizations like adjusting the size of the avatar and the space between the image and text. In further editing, you have the option of choosing between solid, double, dotted, dashed, and grove border types. You can change the color, radius, and margin for the border.
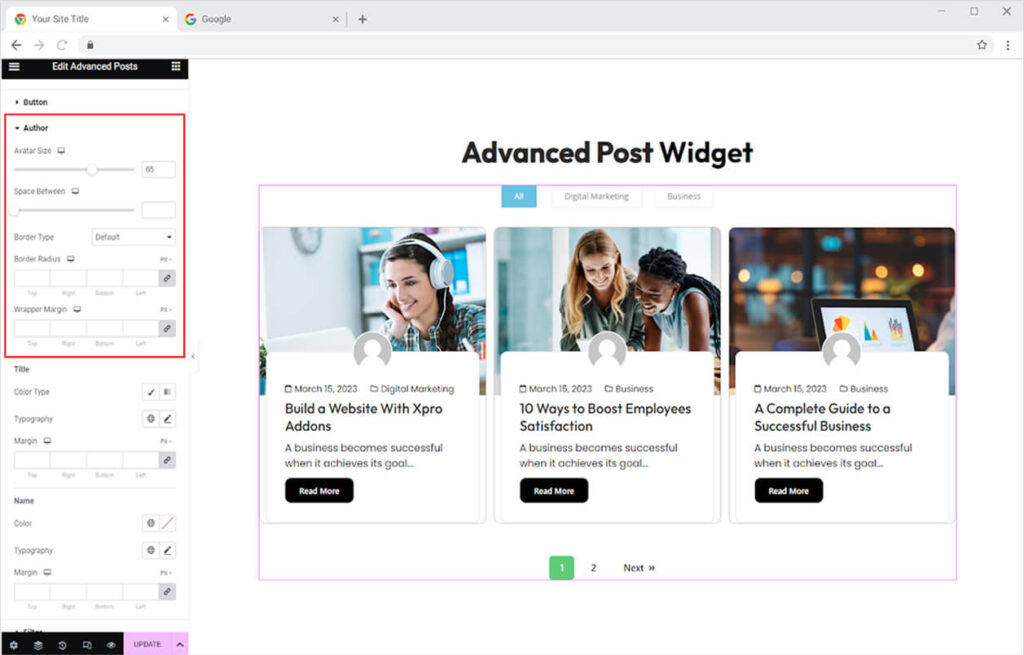
The title and name in the author section can be personalized by defining their color and customizing text typography through the typography option.
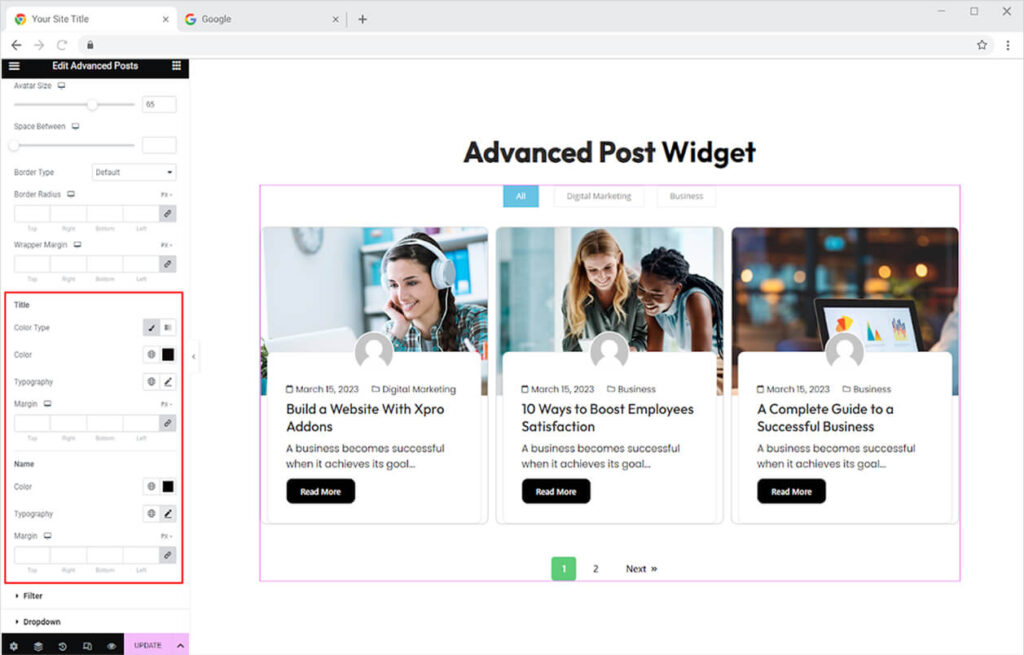
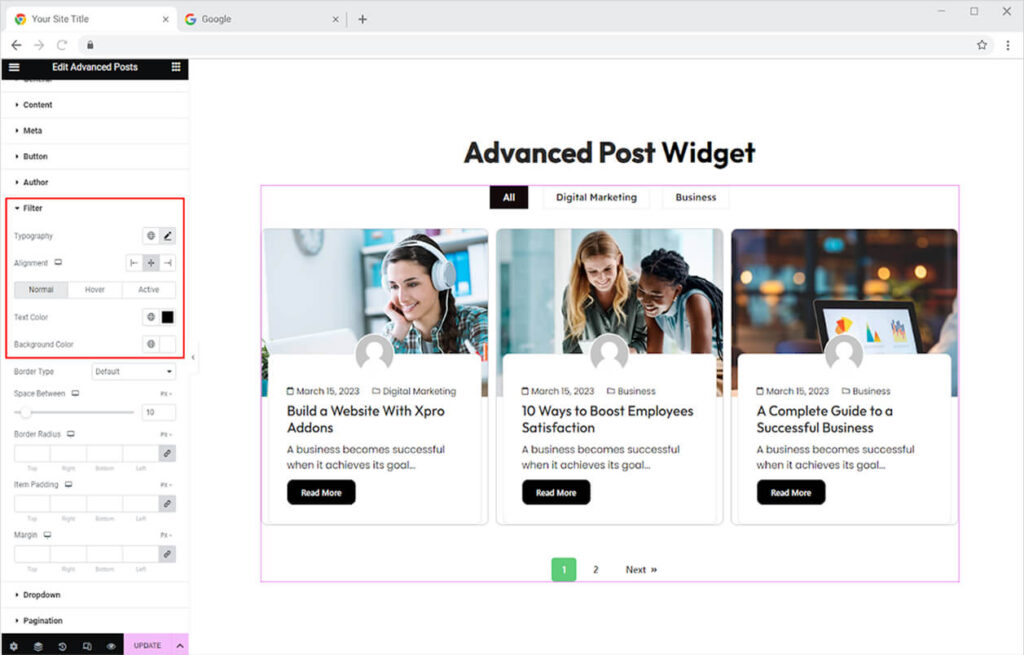
How to Style Filters in Advanced Post Widget
Style the filter display for this advanced filterable post widget by personalizing its typography and setting the alignment to left, right, or center. Furthermore, you can select multiple colors for the text and background depending on the situation, such as normal, hover, and active.
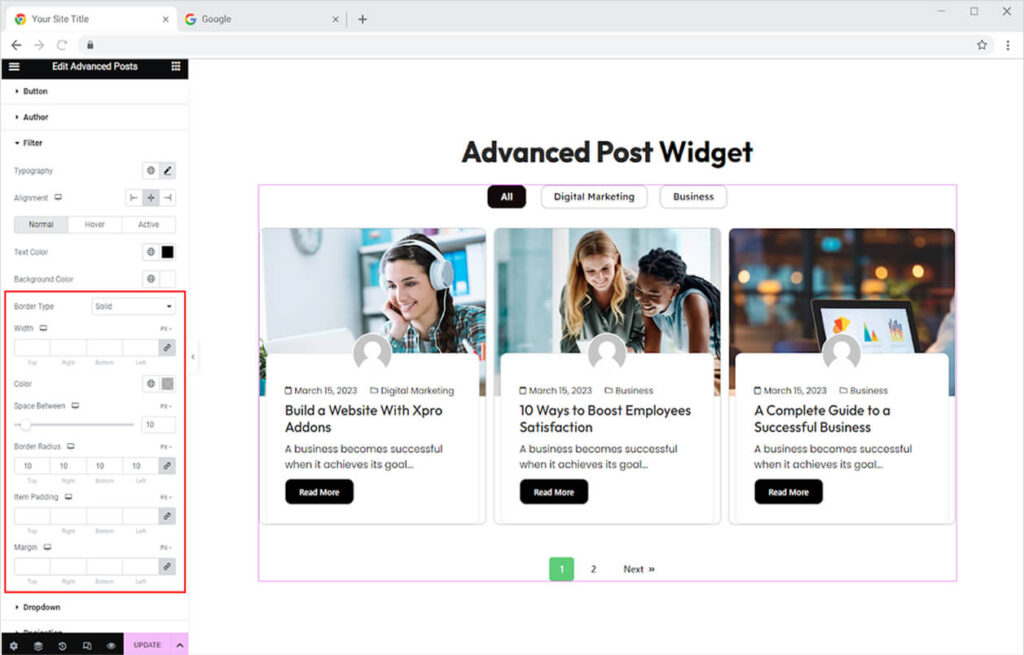
In addition create a border by selecting a border type between solid, double, dashed, dotted, and groove. After you select a border, you can change its width size and color. Manage the gap between each filter option from the Space Between option. In order to adjust the border and its placement, customize the radius, item padding, and margin.
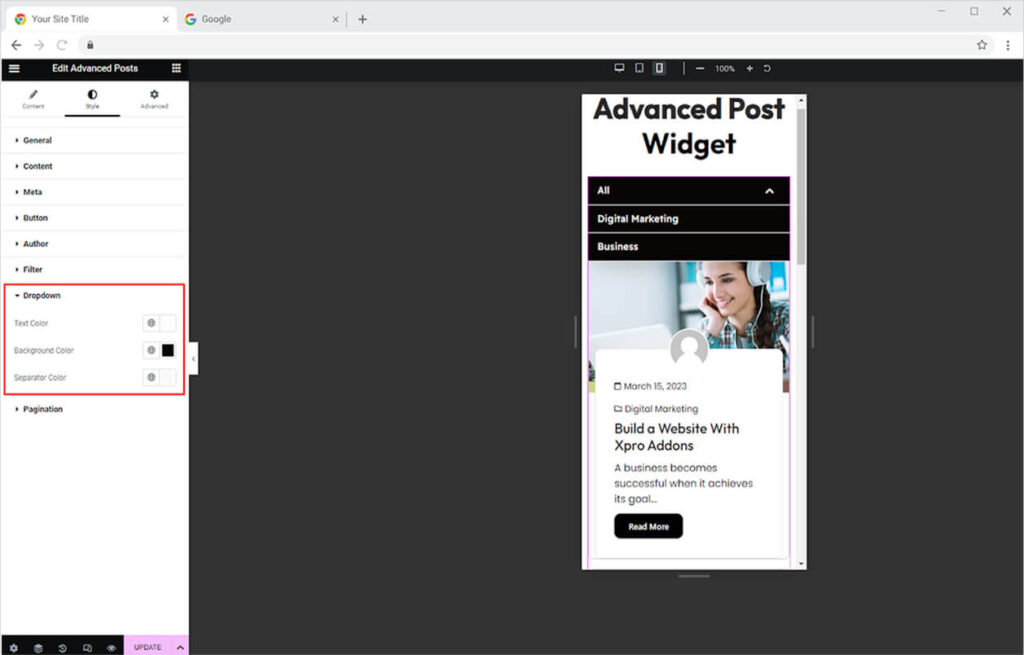
How to Style Drop-Down Menu for Mobile View
Customize the display of drop-down filters in mobile view by selecting colors for text, background, and separator.
How to Style Pagination
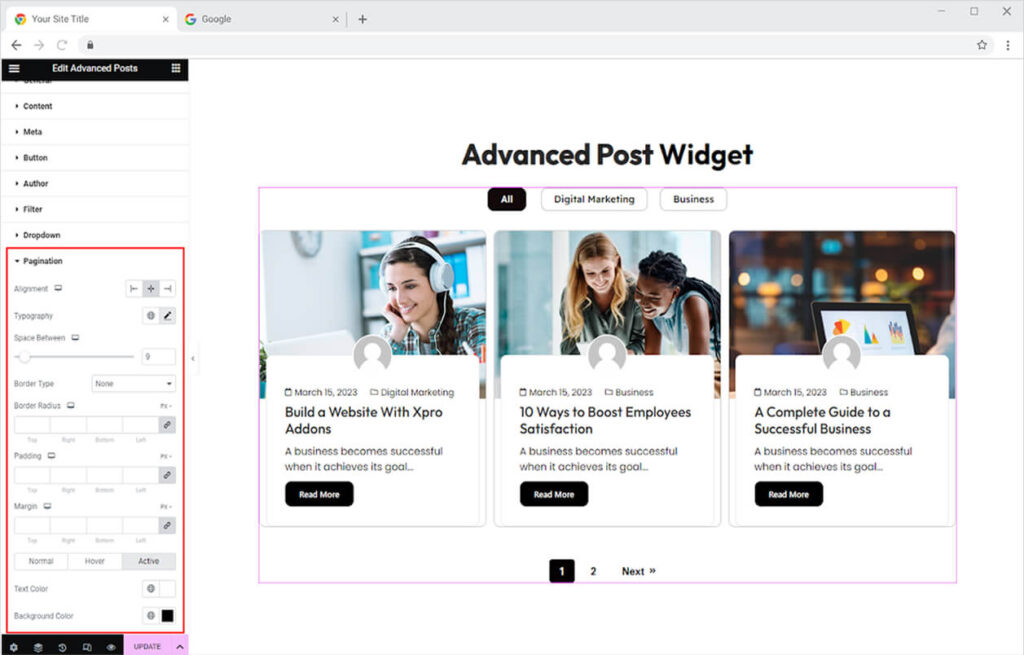
If you have included pagination for post navigation then style its display as well to make it look suitable with the rest of the widget layout. Set the pagination alignment to left, right, or center, personalize the typography, adjust the space between each number, and create a border. It also allows you to add multiple colors for the text and background for its normal, hover, and active state.
Best Advance Post Widget for Elementor
This is all from the Elementor Advance Post widget. We hope you now have a better understanding of the functionality and usage of this powerful widget. Take a look at our advanced widgets for enhancing user experience such as Elementor 360 Product Viewer.
Xpro Elementor Addons consist of stunning widgets, features, and theme template collections that can help you create a professional website without a need for any coding. Utilize our Free widgets for Elementor for creating a beautiful site. Download our full collection of premium Elementor Addons to build an interactive website with advanced features.