How to Install Elementor Scroll Effect Extension
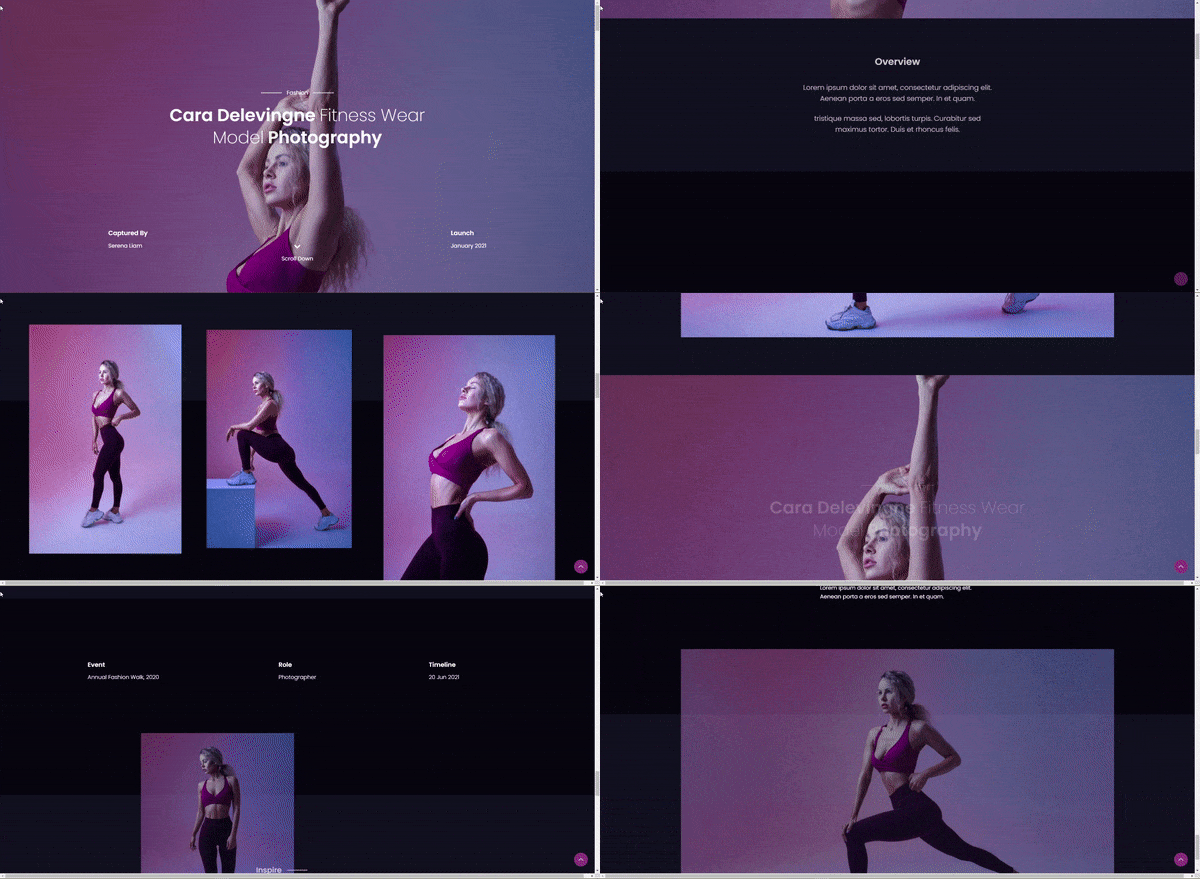
Xpro Scroll Effect for Elementor is a premium extension that lets you add enticing scroll effects to different widgets, sections, and columns of your website. The scroll effect basically makes your website incredibly appealing to site visitors because at every scroll you can add amazing animations to the content. You can make your widgets and sections move in a vertical or horizontal position, rotate or scale in a custom-defined position, and fade them out on all touchpoints.
The extension also gives you the freedom to enable or disable the scroll effect on mobile & tablet views or mobile views only. Our scroll effect eliminates the deep-level CSS knowledge and lets you add incredible effects and animations to any element of your website. The extension comes with the Pro version of Xpro Elementor Addons. You buy any Pro plan that’s suitable for you here. It’s super easy and fun to set up. Let’s try all features of the Xpro Scroll Effect for Elementor.
Requirements
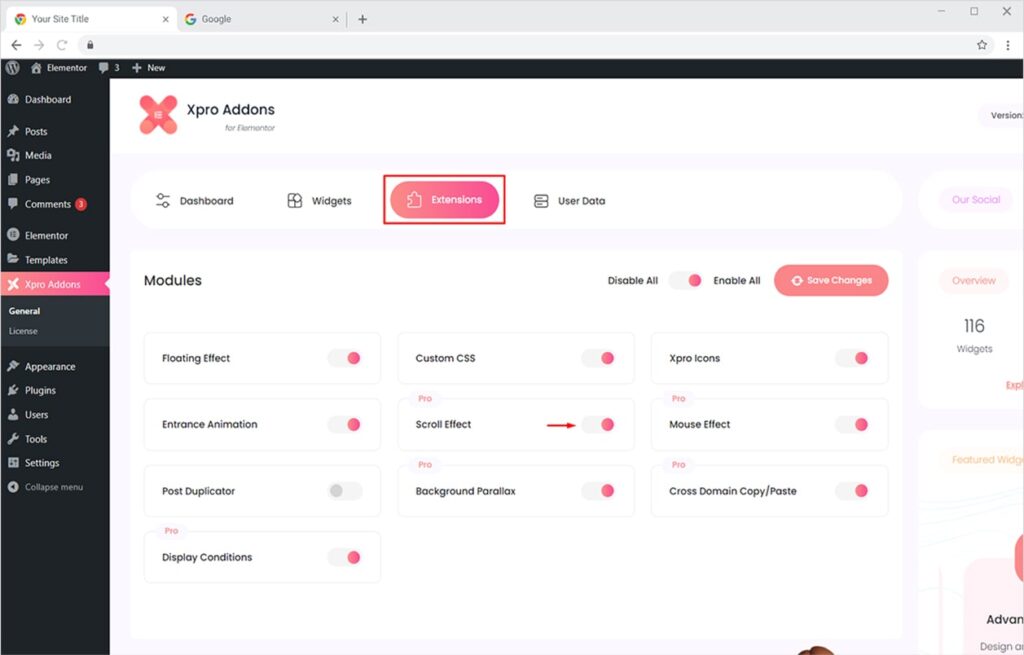
You need to install and activate the Pro version of Xpro Elementor Addons to use our Scroll Effect for your WordPress websites. Once the plugin is installed, just make sure Xpro Scroll Effect is ‘Enabled’ from the Extensions tab of the Xpro Dashboard. This way you will easily find & use the effect in the Elementor editor.
Follow the steps below to enable the extension:
Step 1
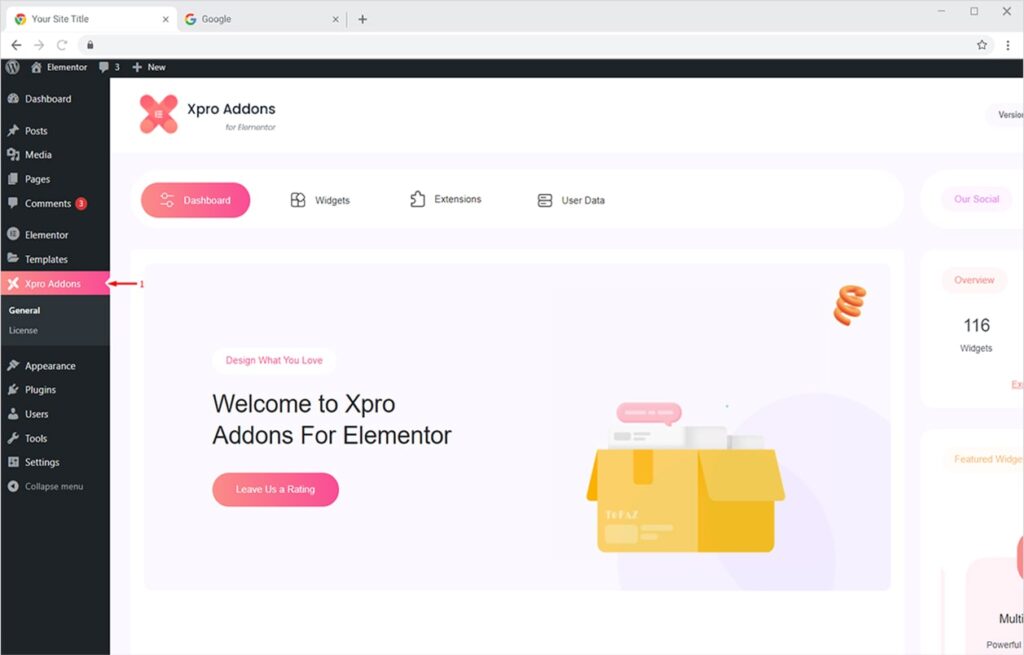
Click on the Xpro Addons option available in the WordPress dashboard menu.
Step 2
From the Dashboard, click on the Extensions Tab, find the Scroll Effect, and then toggle the button ‘ON’ to enable it.
How to Use Scroll Effect of Xpro Elementor Addons
Once your Pro version of Xpro Elementor Addons is installed and activated, you can easily add attractive scroll effects to widgets, sections, or columns in no time. It’s fun, saves tons of your time, and doesn’t require any coding skills. Let’s see how you can use premium Xpro Scroll Effects for Elementor.
First, you will have to turn on the Scroll Effect from the Elementor editor. Simply select the widget, section, or column you want to apply the scroll effect on, and then click the Advanced tab to find our Pro Scroll Effect section. Now toggle the button to Yes to enable and use the feature.
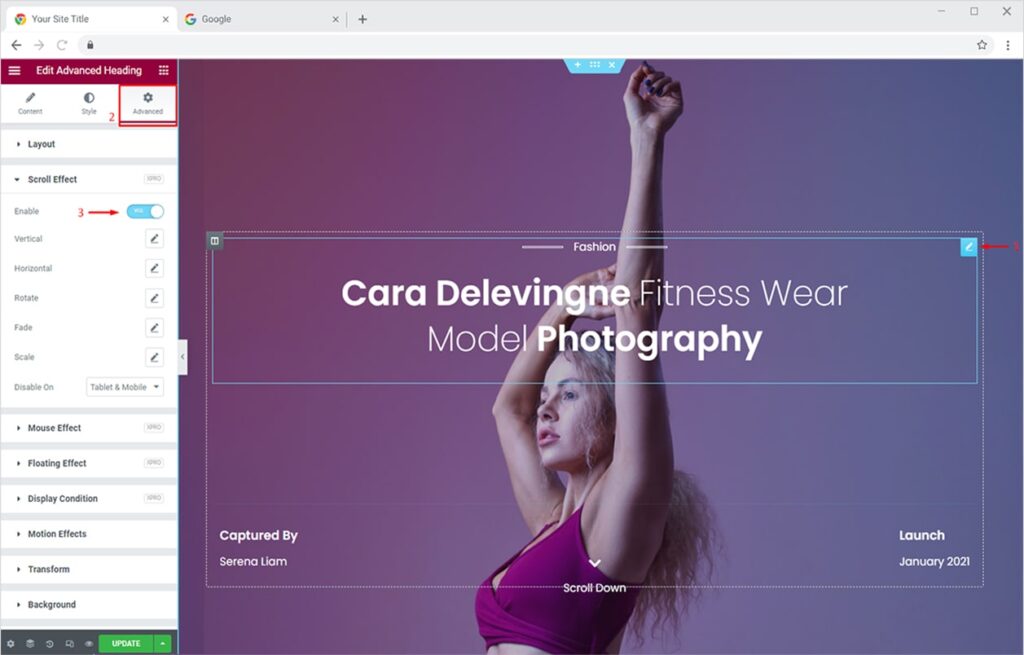
By toggling the button to Yes, you will find five types of scroll effects that can be applied to widgets, sections, and columns of your website. The five options are:
- Vertical – make elements move vertically as you scroll
- Horizontal – move objects horizontally as you scroll
- Rotate – make elements rotate as you scroll
- Fade – create a fade-in fade-out effect on the scroll
- Scale – create a zoom-in zoom-out animation for elements as you scroll
Now let’s apply each of the above Scroll Effects one by one to our elements and see the results.
Vertical Scroll Effect for Elementor
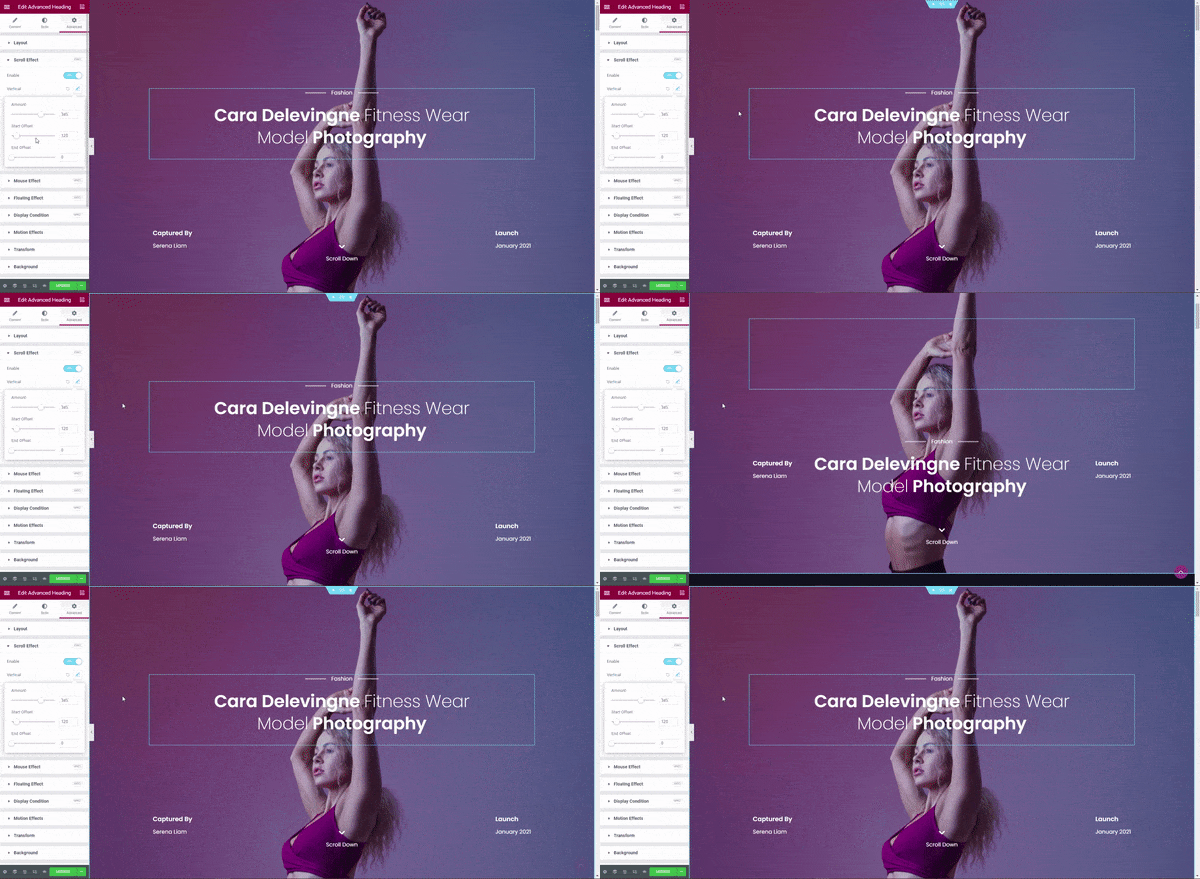
A classic parallax effect for your elements. The Vertical Scroll Effect makes your elements move at a different speed as compared to the page while scrolling. The effect starts when website visitors start scrolling from Start Offset and ends at the End Offset value set by you.
The Start and End Offset value is calculated according to the height of the visible screen area (screen size), and not to the height of the full page.
First, select the widget, section, or column you want to apply the vertical scroll effect to. Now click on the Advanced Tab and turn the Xpro Scroll Effect on.
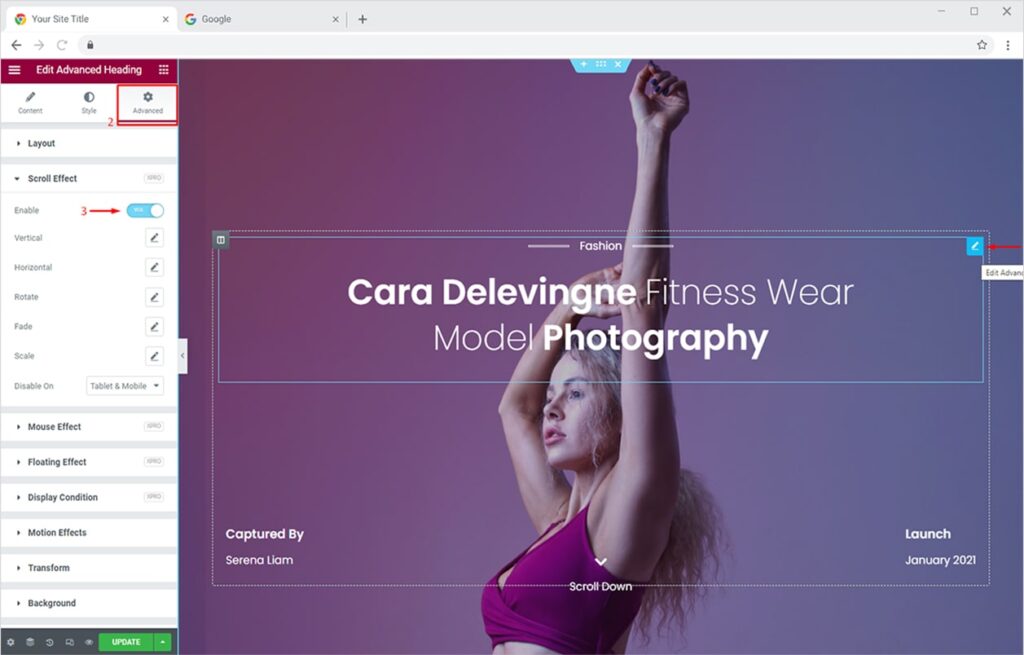
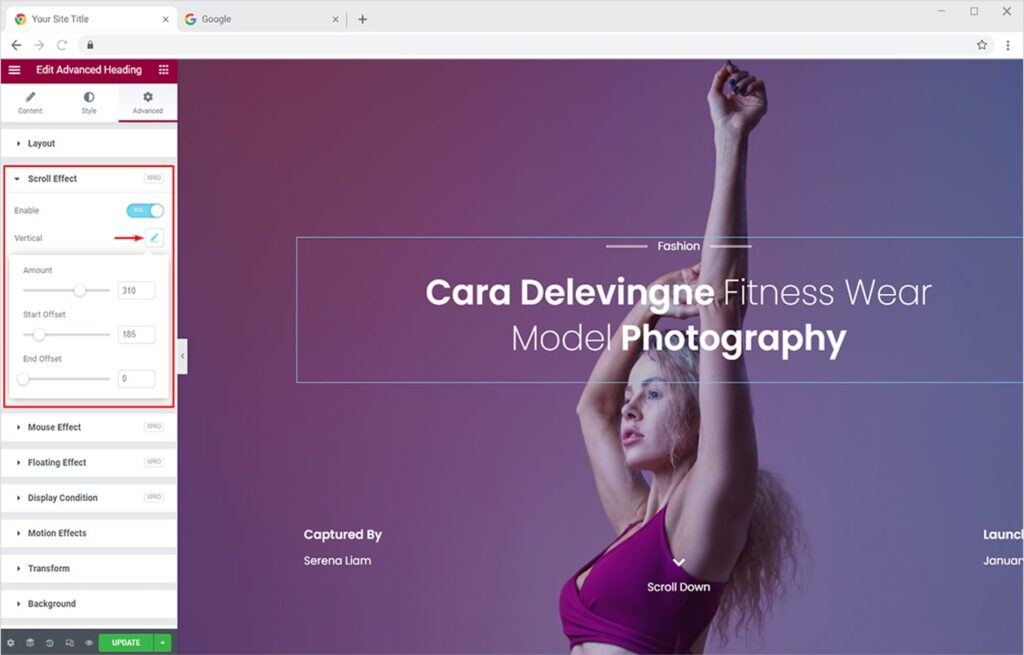
Now click on the ‘Edit Icon’ in front of the Vertical option. You will see 3 options in the dropdown table. The options are:
- Amount – the value of the scroll
- Start Offset – where to start the effect on the visible screen area
- End Offset – where to end the effect on the visible screen area
Set the duration as per your liking to create a beautiful vertical scroll effect for your element.
Setting the right amount of scroll, start & end offset values will move your element like this on scroll.
Useful links: Free Theme Builder for Elementor and 50+ Free Elementor Addons
By Xpro Elenmentor Addons
Horizontal Scroll Effect for Elementor
The Horizontal Scroll Effect makes your elements move along the x-axis when the visitor scrolls the page up and down accordingly. The only difference between horizontal and vertical scrolls is that the elements move left or right instead of up or down. Let’s try this amazing scroll effect for your Elementor website now.
First, select the widget, section, or column you want to apply the horizontal scroll effect to. Now click on the Advanced Tab and turn the Xpro Scroll Effect on.
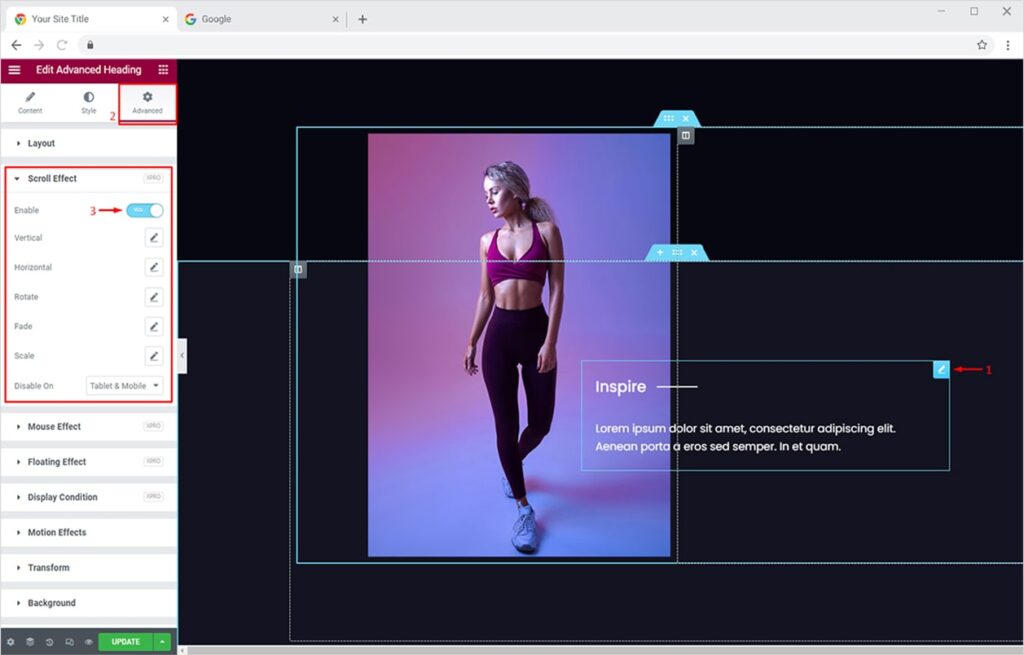
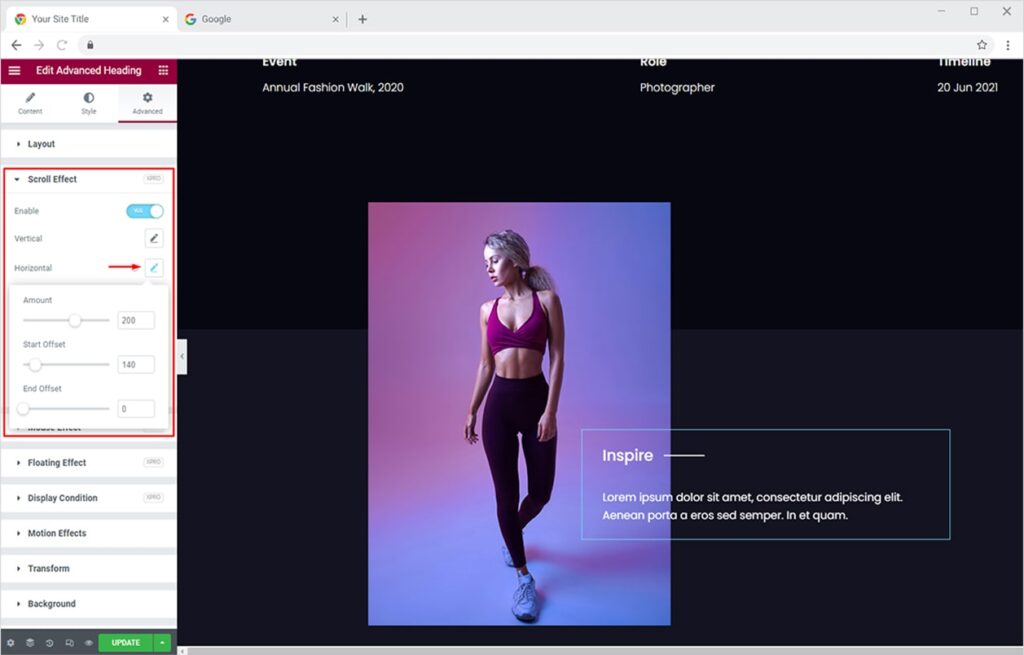
Now click on the ‘Edit Icon’ in front of the Horizontal option. You will see 3 options in the dropdown table. The options are:
- Amount – the value of the scroll
- Start Offset – where to start the effect on the visible screen area
- End Offset – where to end the effect on the visible screen area
Set the values as per your liking to create a beautiful horizontal scroll effect for your element.
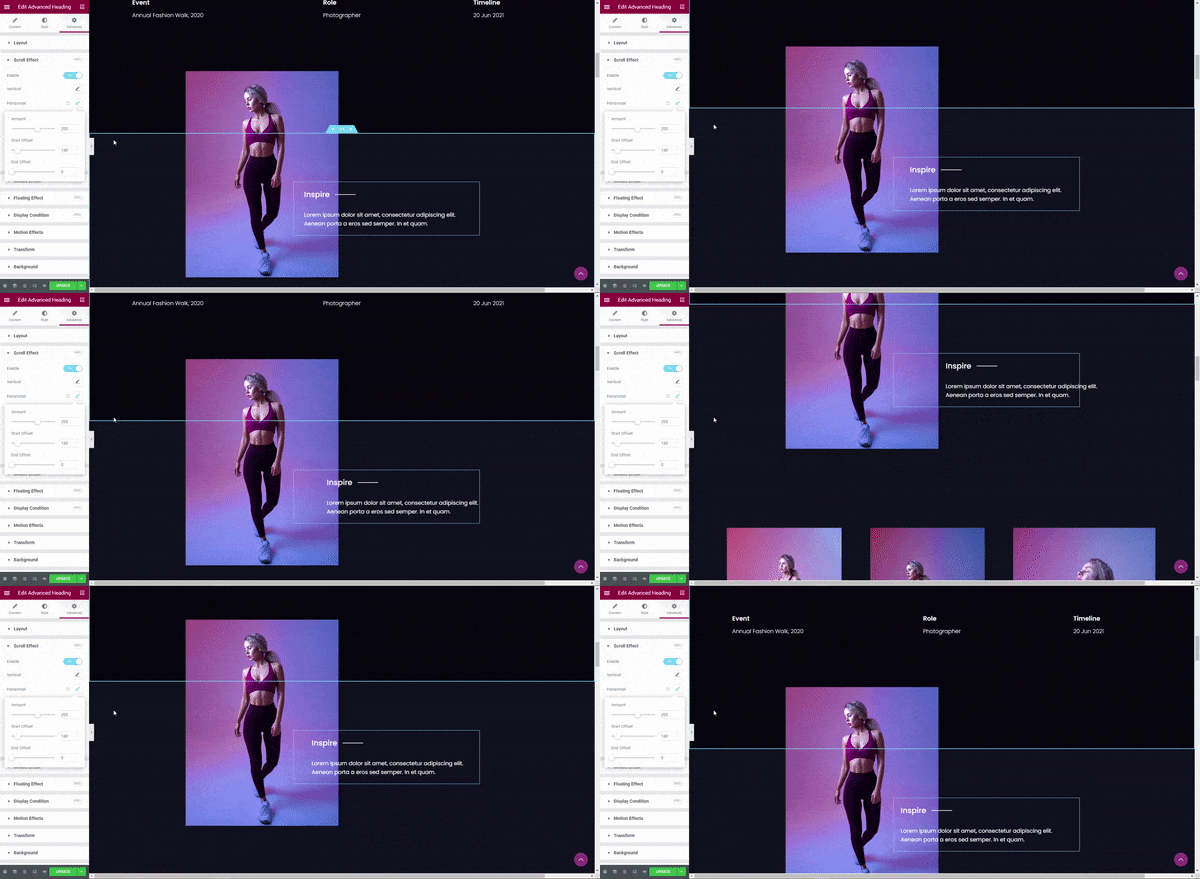
Here’s the output of the horizontal scroll for this specific element.
Rotate Scroll Effect for Elementor
Rotate Scroll Effect sets any element to rotate left or right as the user scrolls up or down the page. The elements rotate in a beautiful way creating an attractive overall UI for the site visitors. You can set the rotation’s direction either clockwise or counterclockwise. Let’s start by enabling the feature first.
Select the widget, section, or column you want to apply the rotate scroll effect to. Now click on the Advanced Tab and turn the Xpro Scroll Effect on.
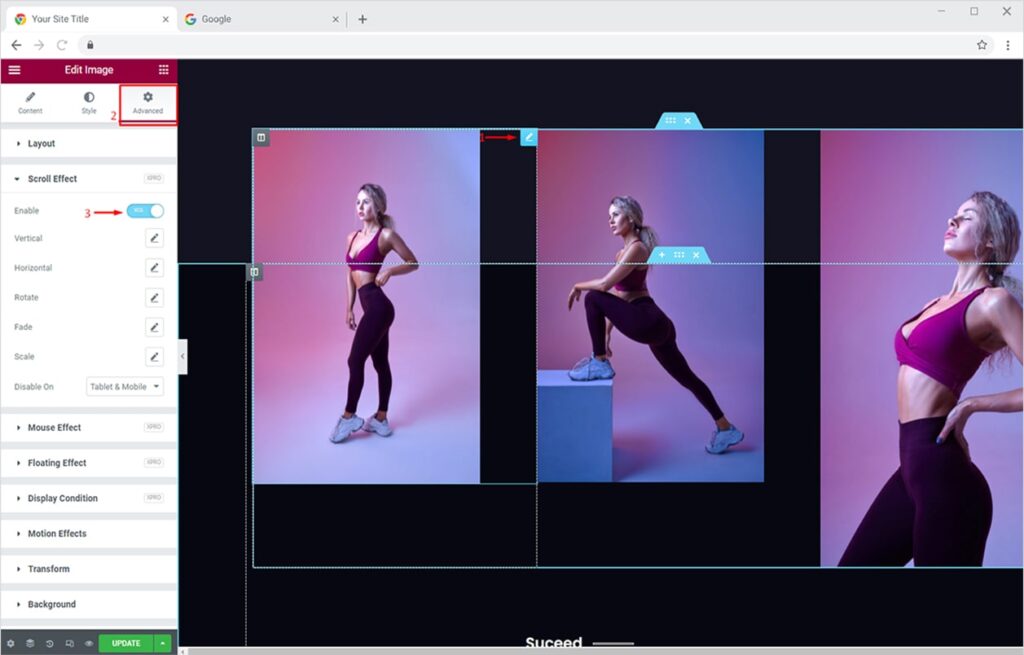
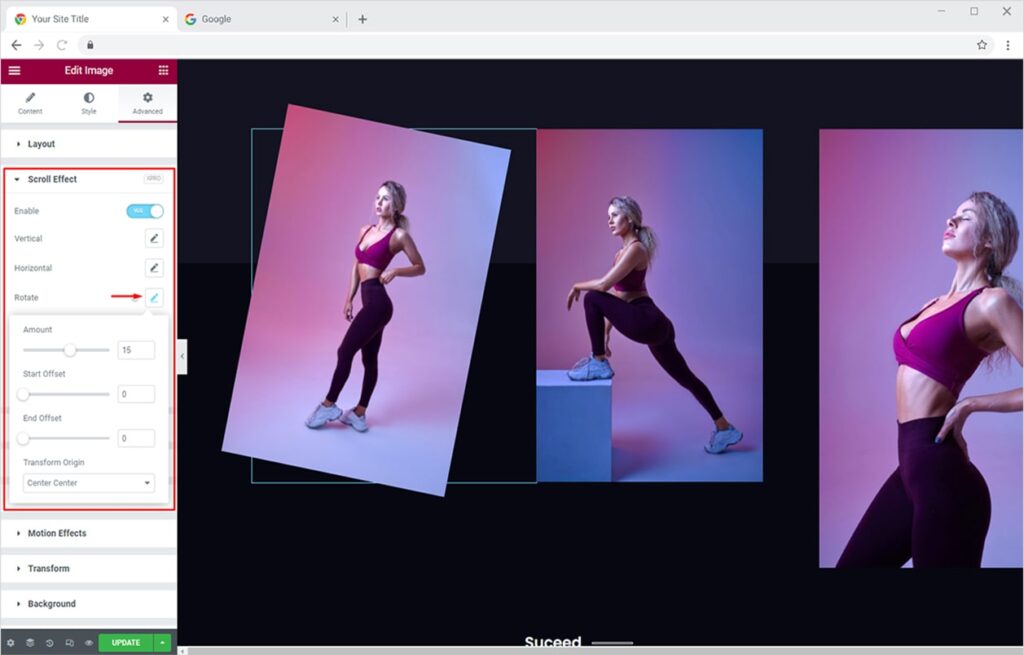
Now click on the ‘Edit Icon’ in front of the Rotate option. You will see 3 options in the dropdown table, the options are:
- Amount – the value of the rotation scroll
- Start Offset – where to start the effect on the visible screen area
- End Offset – where to end the effect on the visible screen area
Set the values as per your liking to create a tempting rotate scroll effect for your elements.
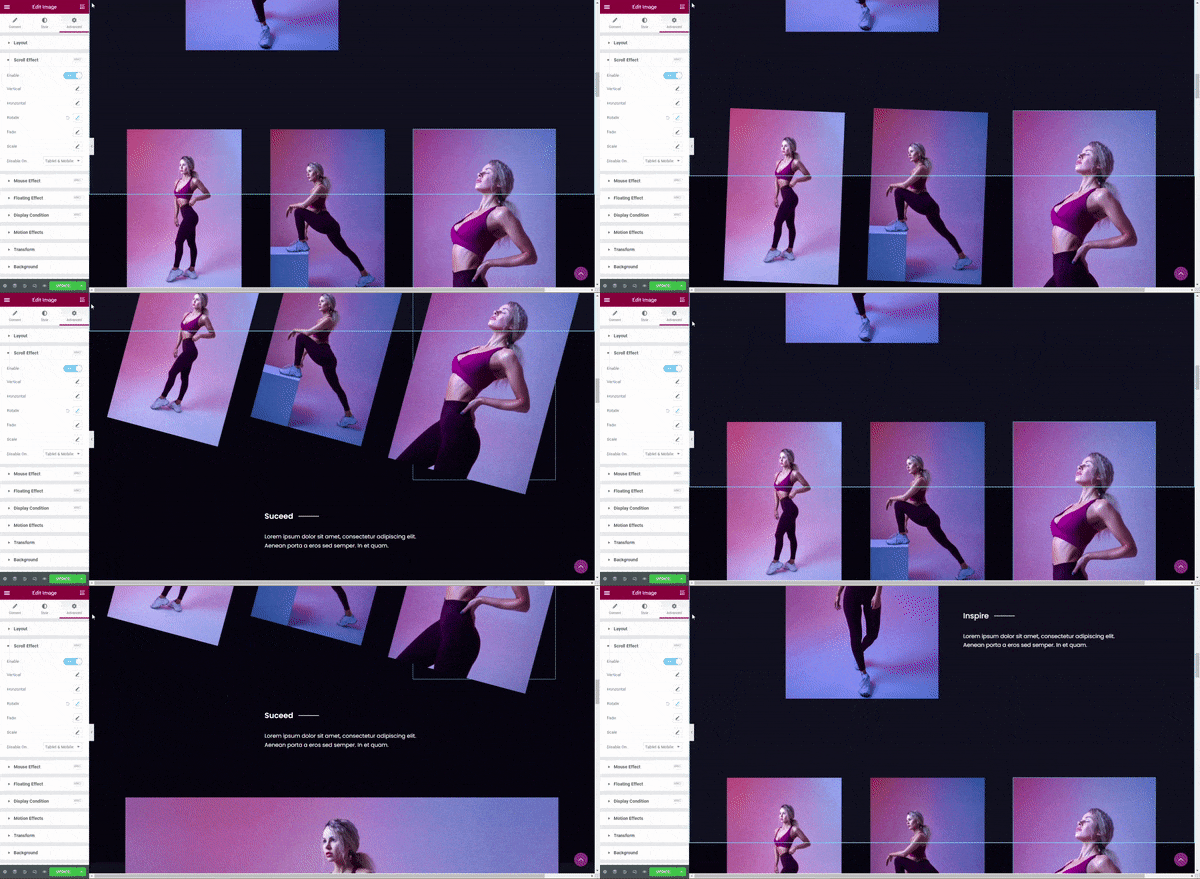
Here I’m applying the rotate scroll on all 3 images one by one. The output can be seen below:
Fade Scroll Effect for Elementor
The Fade Scroll Effect lets you gradually make elements fade in or fade out depending on the visible screen area and site visitor’s scroll. The feature also lets you set the opacity of the element on both the start and end of the scroll. Let’s start by enabling the feature first.
Select the widget, section, or column you want to apply the fade scroll effect to. Now click on the Advanced Tab and turn the Scroll Effect on.
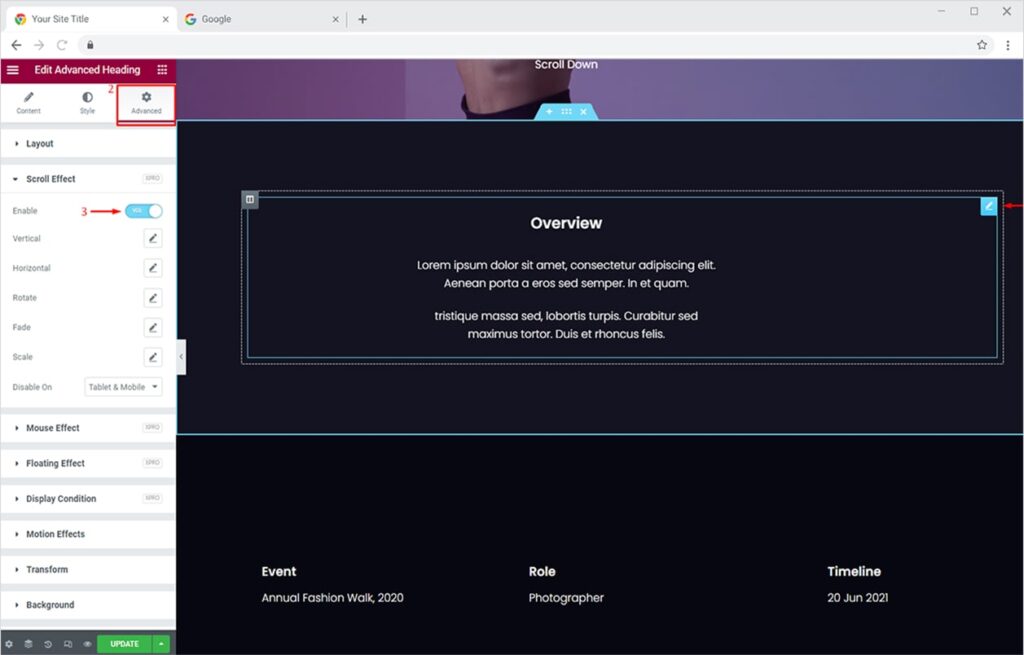
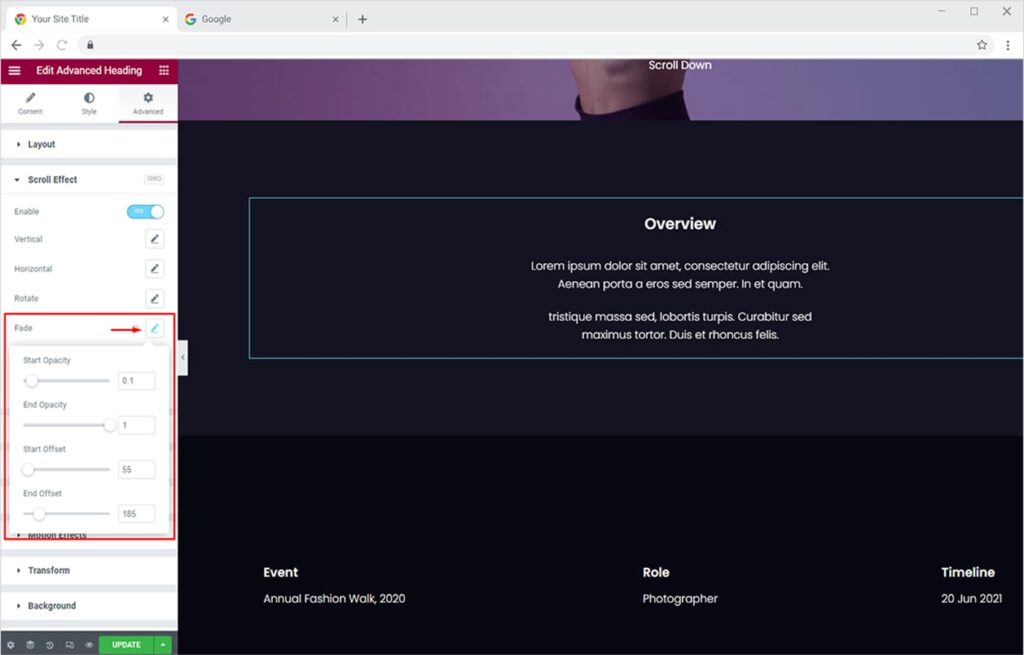
Now click on the ‘Edit Icon’ in front of the Fade option. You will see 4 options in the dropdown table:
- Start Opacity – the opacity value of the element at the start of the scroll
- End Opacity – the opacity value of the element at the end of the scroll
- Start Offset – where to start the effect on the visible screen area
- End Offset – where to end the effect on the visible screen area
Set the value of opacity as per your liking to create an exciting fade effect for visitors.
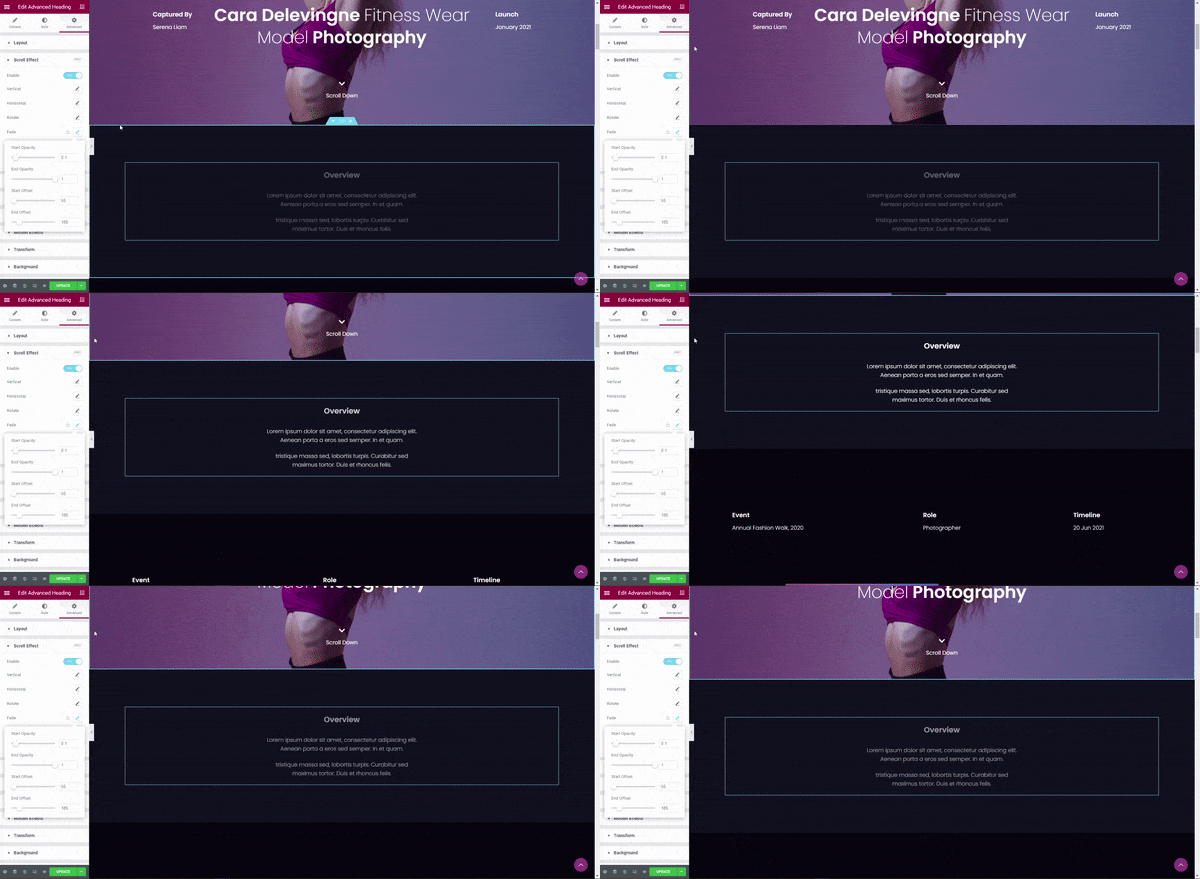
Here, I’ve created a fade effect for the heading widget. The output can be seen live while editing.
Scale Scroll Effect for Elementor
Scale scroll effect for Elementor creates a beautiful zoom in and zoom-out effect for your elements. You can add this effect of any widget, section, or column as per your needs. Let’s start by enabling the feature first.
Select the widget, section, or column you want to apply the scale effect to. Now click on the Advanced Tab and turn the Scroll Effect on.
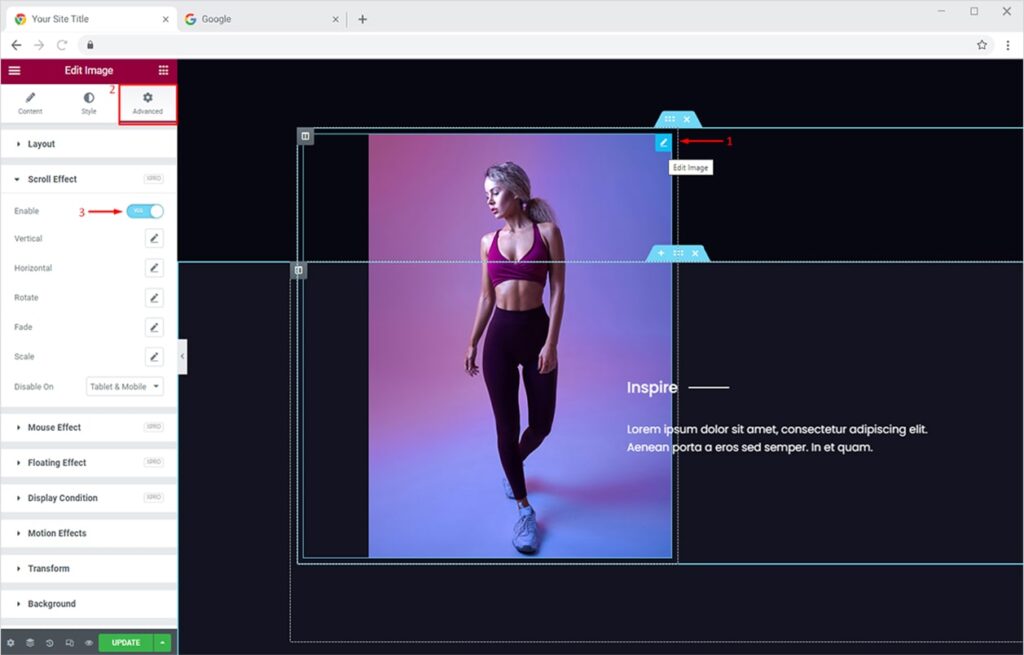
Now click on the ‘Edit Icon’ in front of the Scale option. Here you will see four options to tweak your element scaling. The options are:
- Start Scale – the scale value of the element at the start of the scroll
- End Scale – the scale value of the element at the end of the scroll
- Start Offset – where to start the effect on the visible screen area
- End Offset – where to end the effect on the visible screen area
Set the value of scale effect as per your requirements and create an interactive scaling effect for site visitors.
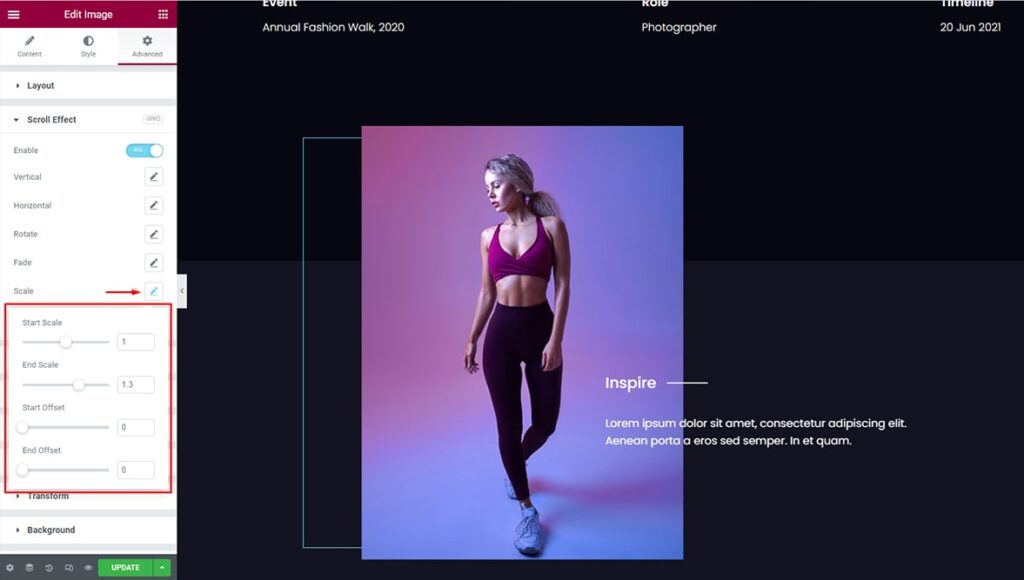
Here I’m applying the scale effect on the image. The output can be seen via live editor:
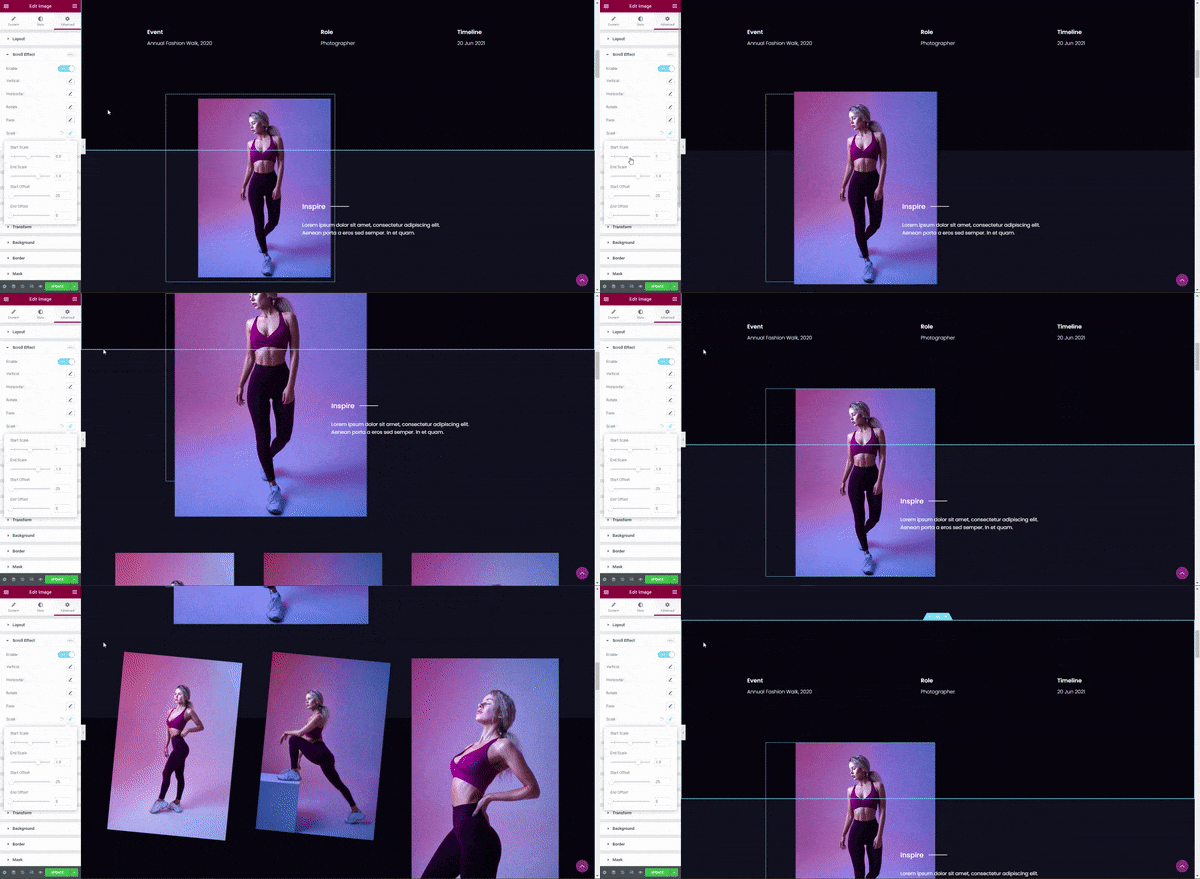
Best On Scroll Effects for Elementor Websites
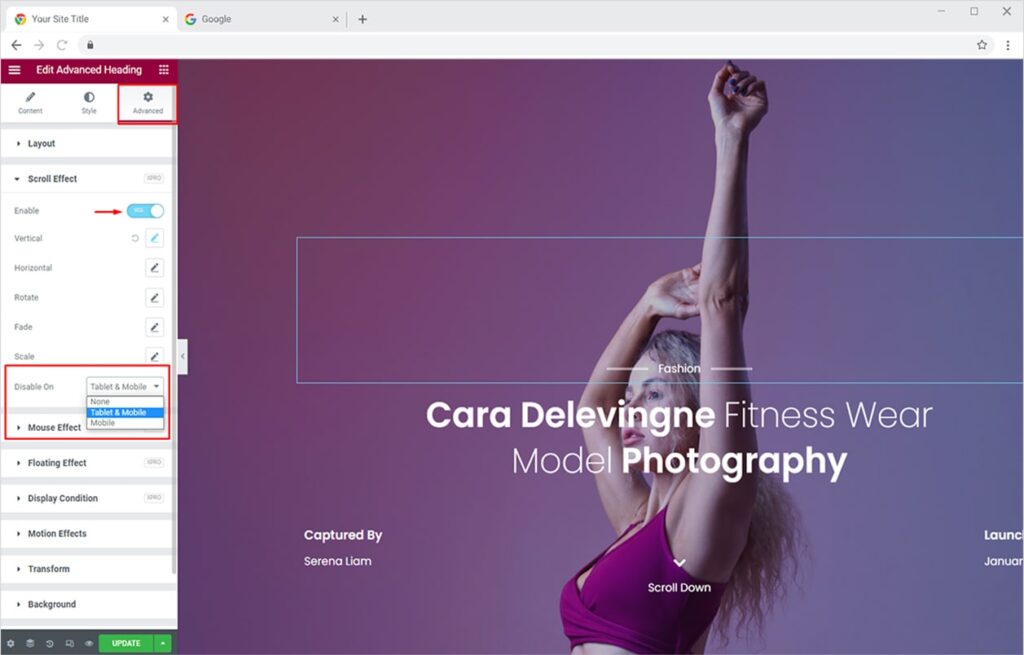
Sometimes you want to apply Scroll Effect only for desktop devices and not for mobile/tablets. This can easily be done using our Xpro Scroll Effect for Elementor. Simply use the option ‘Disable On’ to set your device priority for the scroll effect. Here you’ll see three options in the dropdown.
- None – Scroll effect will be applicable on all display devices
- Tablet & Mobile – Scroll effect will be disabled for both mobile & tablet devices
- Mobile – Scroll effect will be disabled on mobile devices only
After applying beautiful vertical, horizontal, rotate, fade, and scale effects to different elements, your final output would surely leave site visitors in awe.
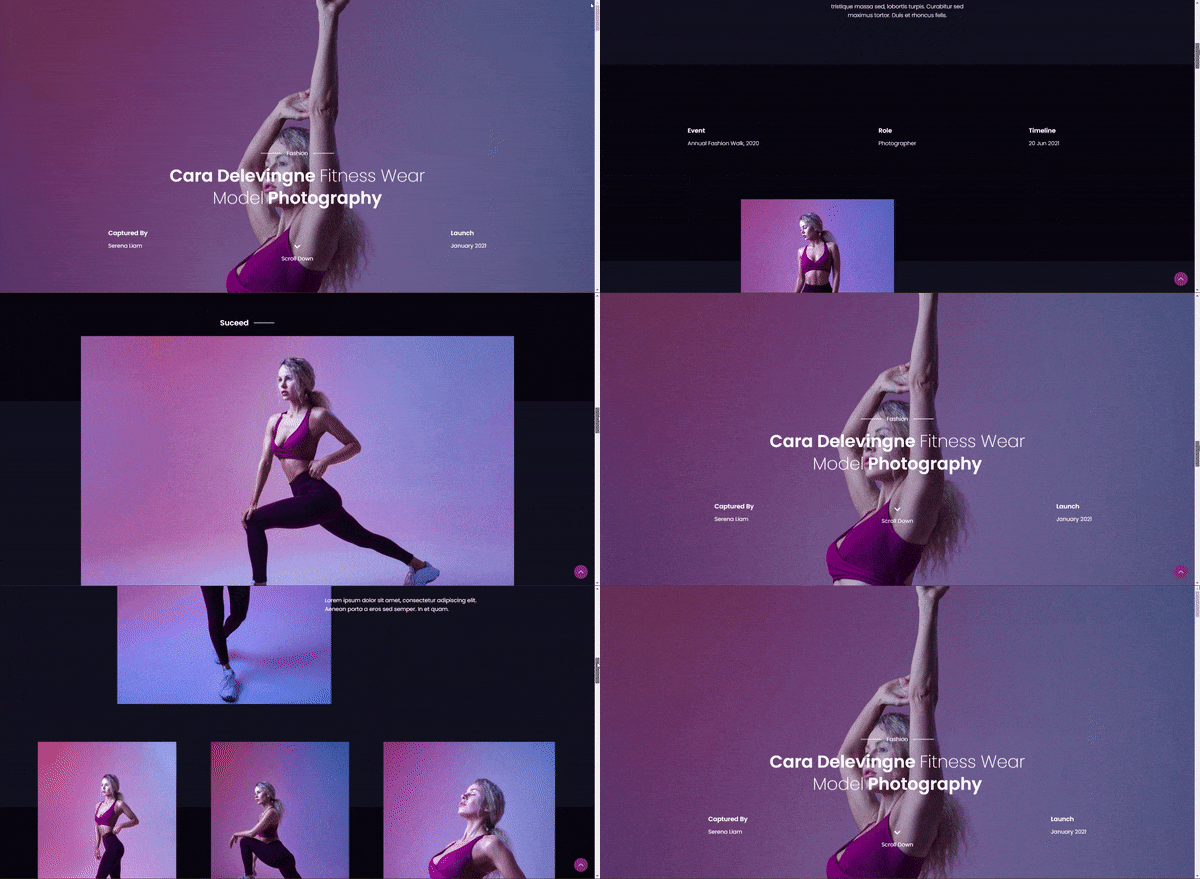
Best Elementor Scroll Effect Extension
Xpro Elementor Scroll Effect truly adds magical scroll effects to your content. The features enable you to add animations on all touchpoints and bring your content to life without any custom CSS. It’s now easier than ever to attract users with each scroll and make them fall in love with your website.
You can also add amazing floating effects to your website for Free. Simply view our detailed guide on how to add floating effects to the Elementor website to get started. Also, quickly add an exciting Background Parallax Effect for Elementor.
I hope you have a better understanding of the scroll effect now. You can view all of our unique Elementor Extensions & Features and start building amazing websites for free.