Xpro Elementor Addons consist of a wide range of widgets that can be used by developers to create an appealing website. Post Grid by Xpro Elementor is another widget offering that can display the arrangement of your posts to visitors. Beautifully utilize and show the post and lead websites user to their desired location.
Xpro Post Grid for Elementor helps you display the important posts, products, or pages in a grid so that the visitors view the grid and click and open a post. Beautifully design the widget with the wide customization options available. Choose a background, style content, and edit the meta. The widget can be displayed the way you want.
How To Install Xpro Post Grid Widget for Elementor
Requirement
You need to install and activate the Free version by Xpro Elementor Addons. If you already have the plugin installed, just make sure the Post Grid Widget is ‘Enabled’, so you can find it in the Elementor editor.
To enable the widget, simply follow these steps:
Step 1
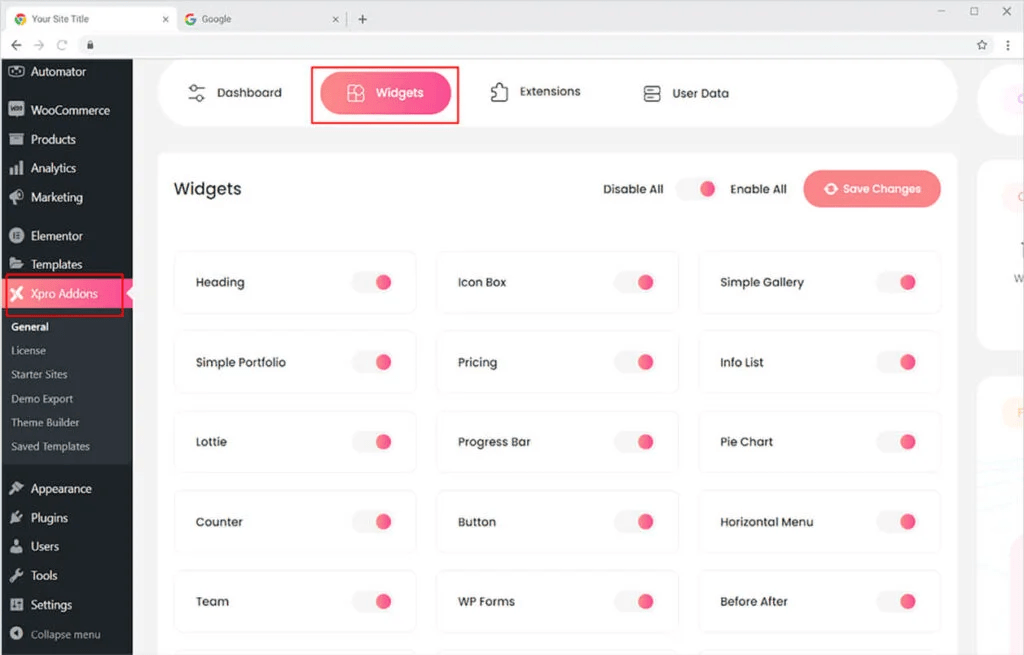
Click on the Xpro Addons option available on the WordPress Dashboard Menu.
Step 2
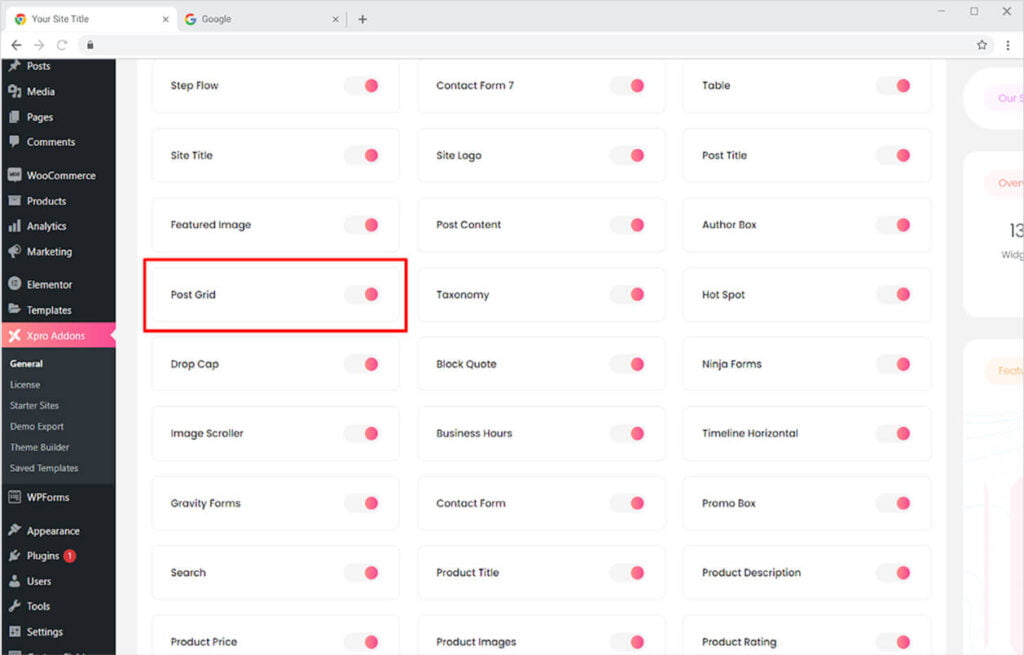
From the Xpro Addons Dashboard, click on the Widgets Tab, find the Post Grid widget, and finally, toggle the button ON to enable it.
How To Use Xpro Post Grid for Elementor
Arrange posts, products, or pages by utilizing the query and selecting what you want to show your website’s visitors. Choose any of the given ten layouts that you believe will look suitable for your website. Customize content, meta, author, and overall display of the Post Grid.
Step 1
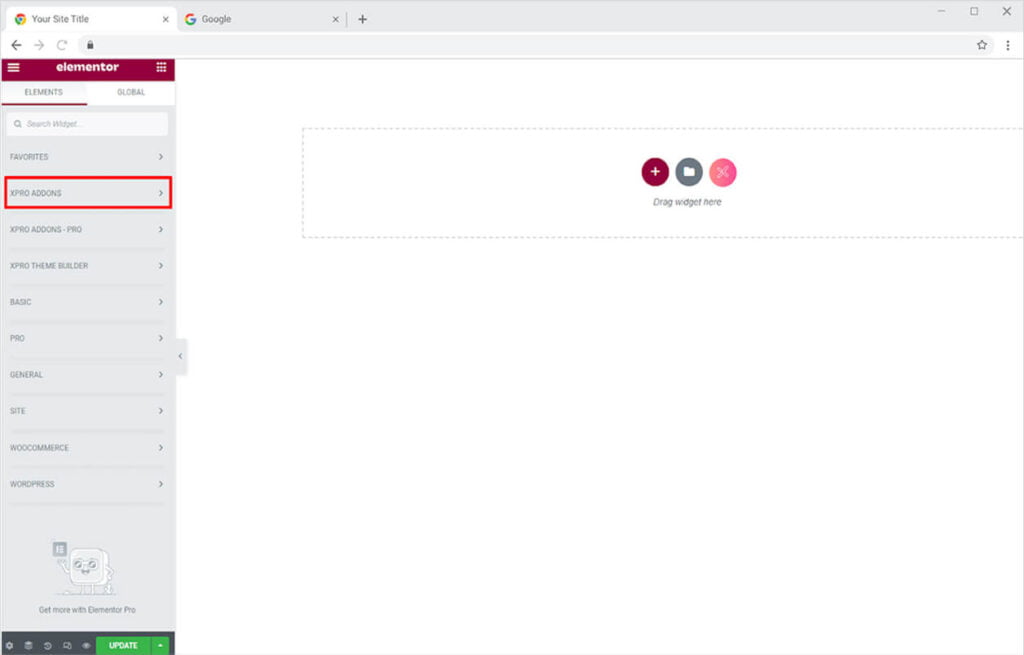
Click on the Xpro Addons section available in the Elementor Editor.
Step 2
From the Xpro Addons section, simply drag’n’drop the Post Grid widget on your desired page location.
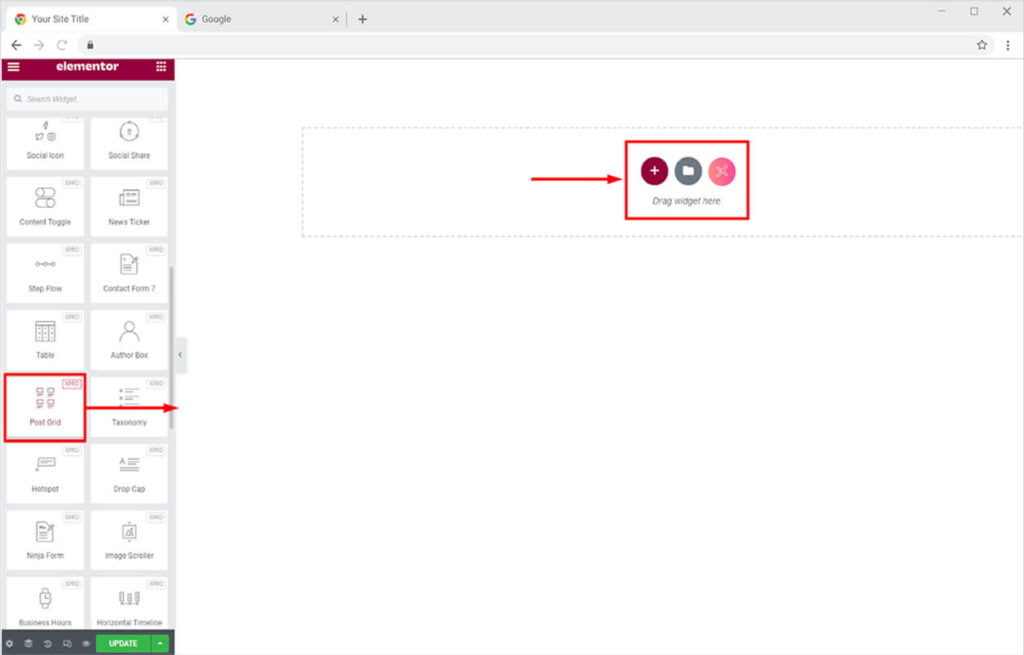
The widget default view will dynamically show the posts that you have posted on the website.
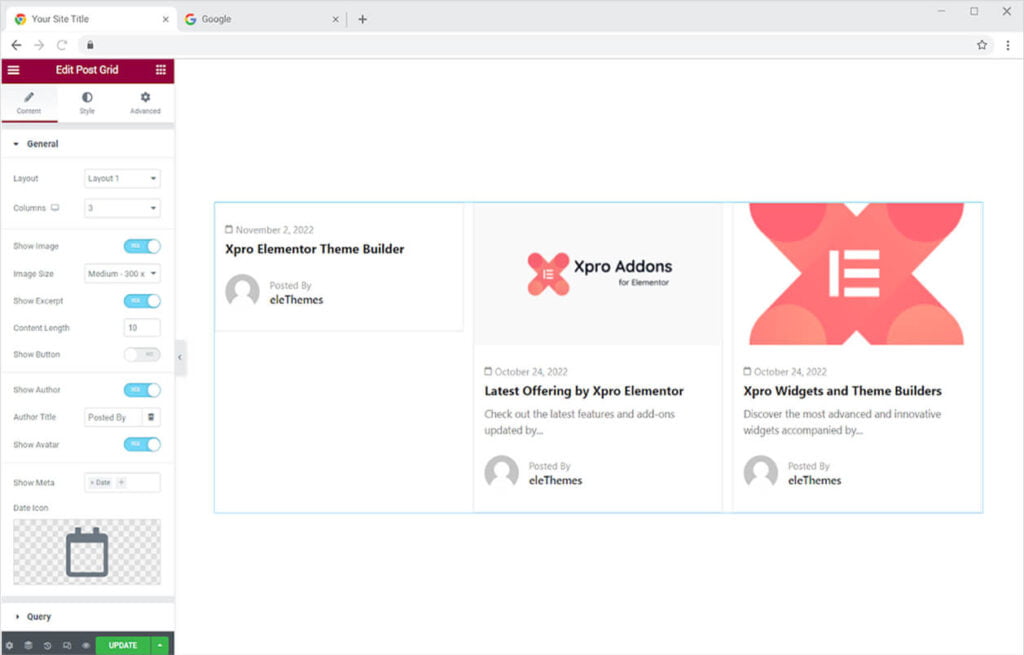
Content Section
How to Change the Layout of the Xpro Post Grid for Elementor
The general menu of the Content Section displays ten options for the layout from where you can select a layout of your choice.
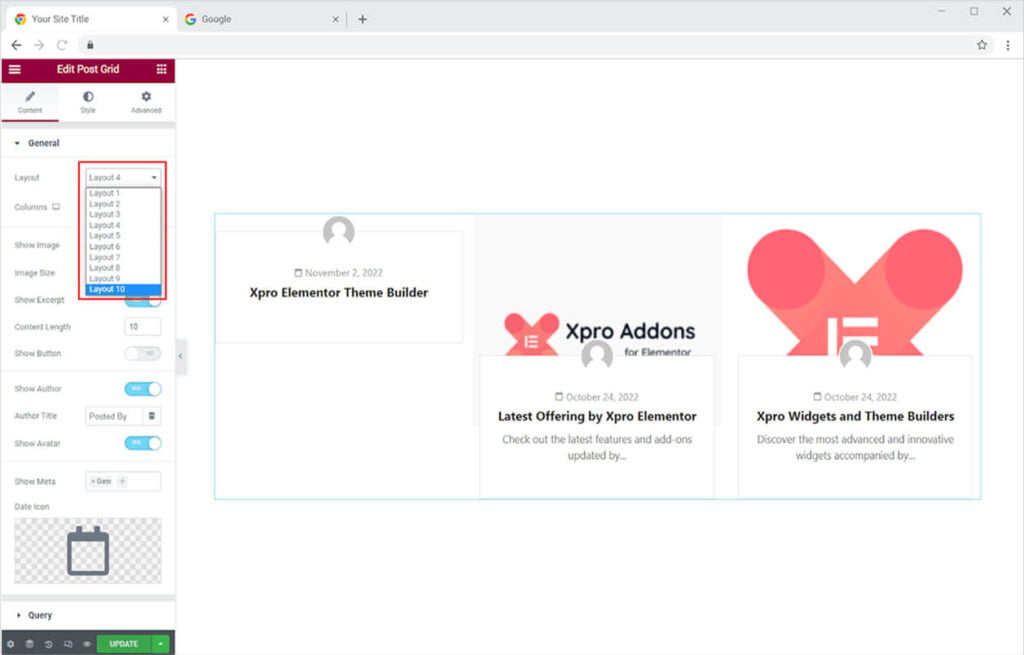
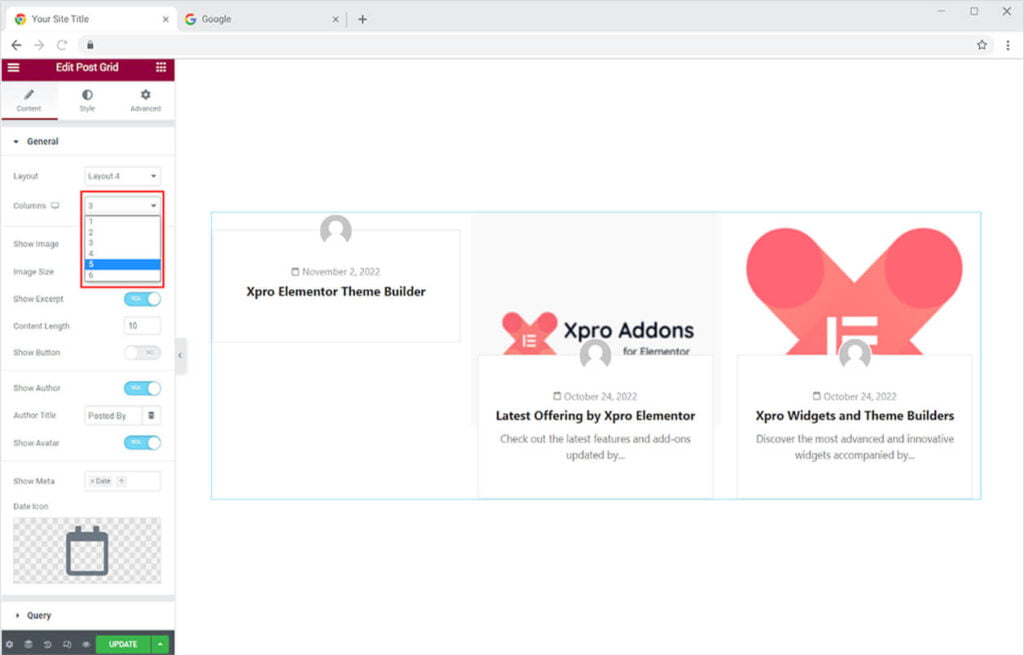
Select how many columns you want to add to the post grid. Click on the column bar to select the number of columns you want.
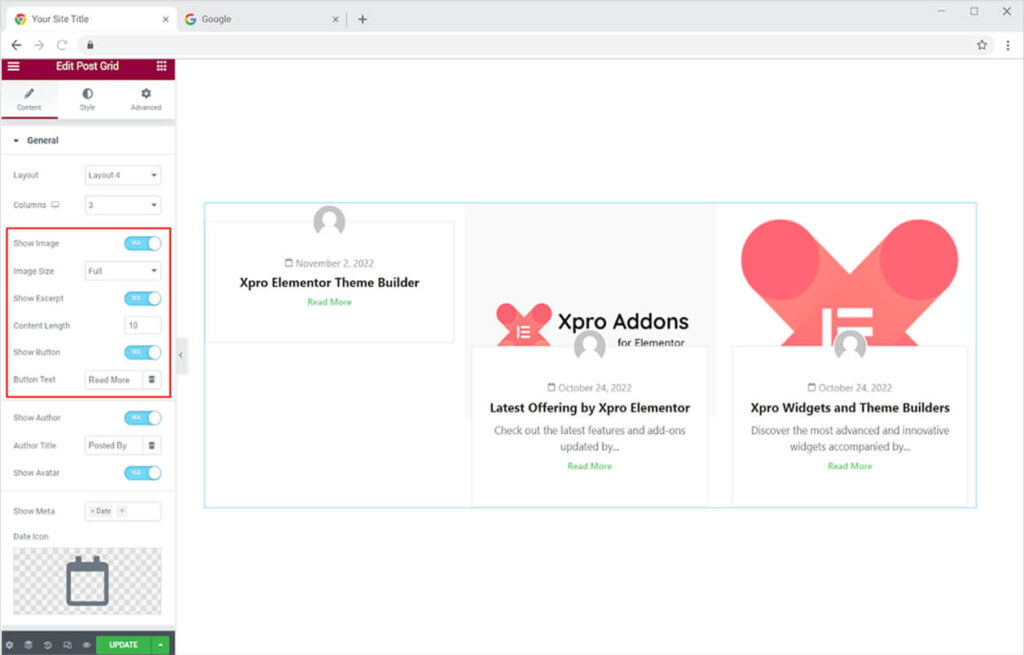
Allow or disable the widget to show images in the display. If you have chosen to include images then select the size for it. You also have the choice to include a description and adjust its length. Furthermore, allow the image to display to a button in the post grid which will be linked to the actual post. You can change the text for the button.
Moreover, include the author that posted the post to the website. Allow adding his picture. You can change the text for the title.
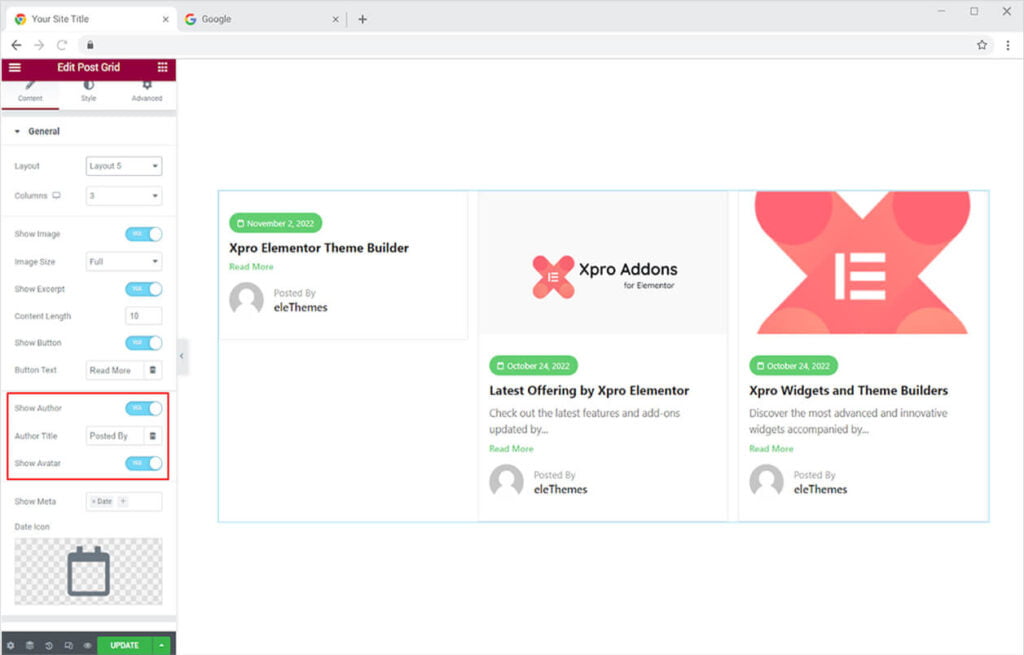
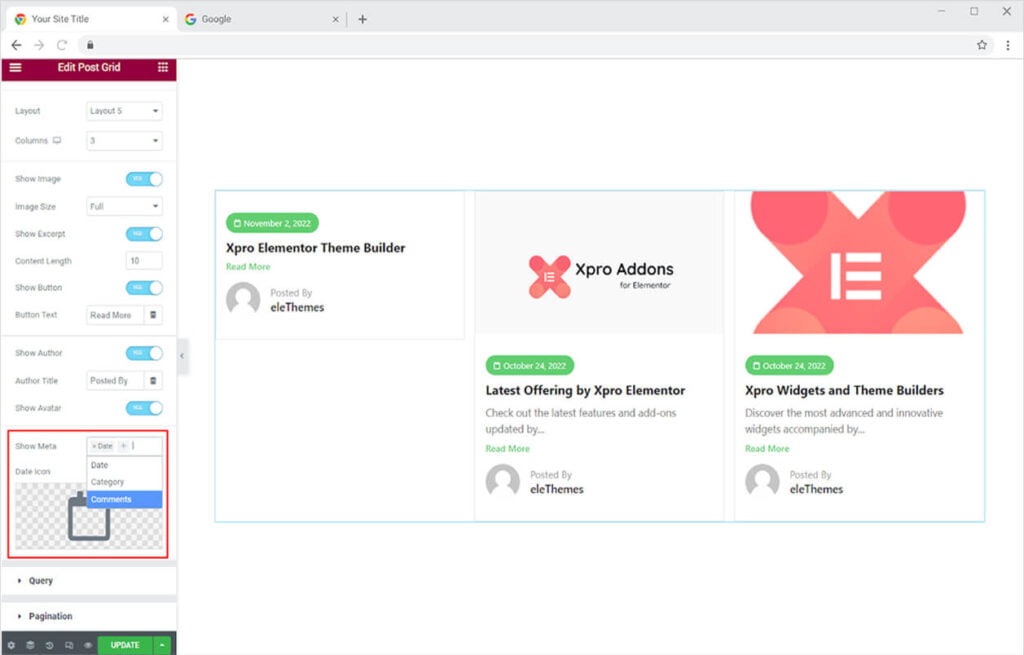
In addition, you can allow meta to be displayed in the widget. The meta is used to show the date of posting, comment, and categories. You can include any meta you want.
How to Edit the Query in the Xpro Post Grid widget
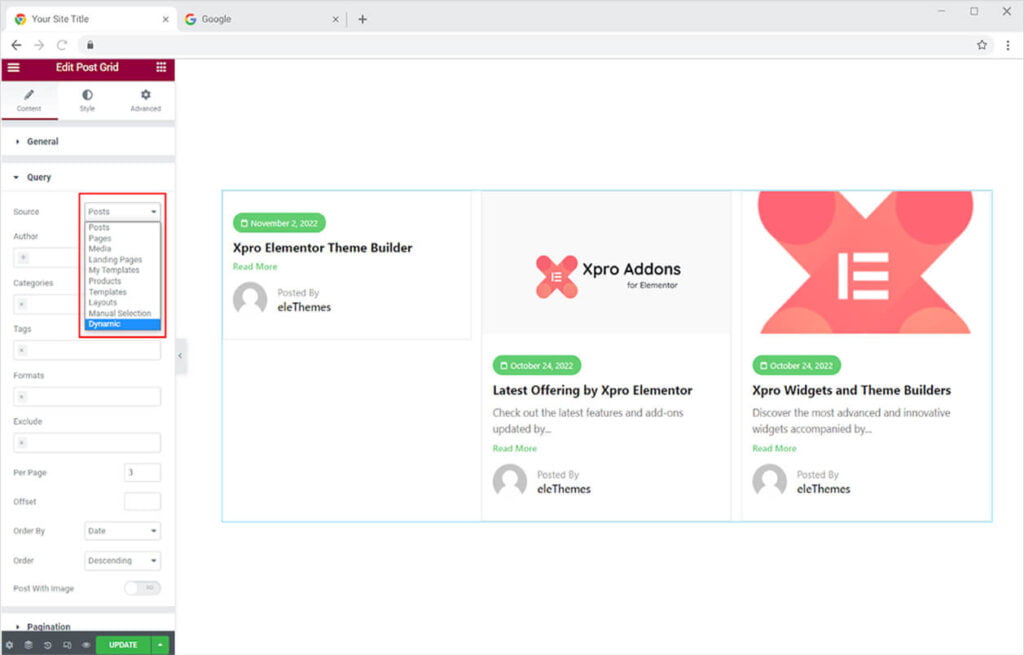
First, choose the source of the posts that will be displayed in the post grid. Click on the source’s drag-down menu to select the location from where the postings will be displayed.
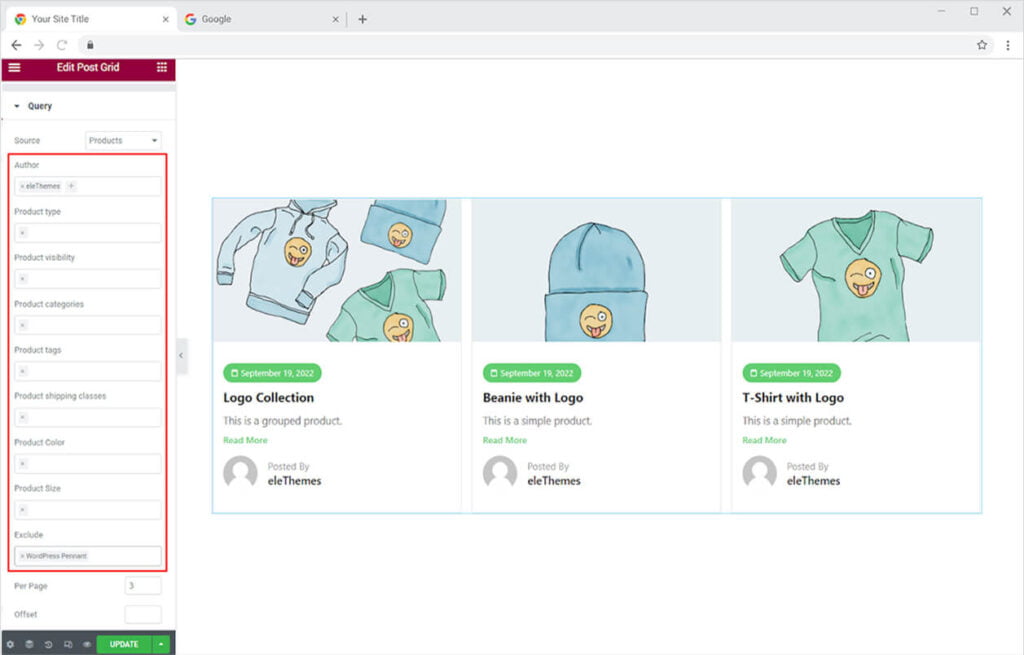
From the below bars, you can edit the post that you want to include in more depth. The bars below change depending on the source you choose. Mostly these bars ask you for the author name whose posts you want to include, categories, and exclude the posts that you do not wish to include. Utilize these bars to adjust the post type.
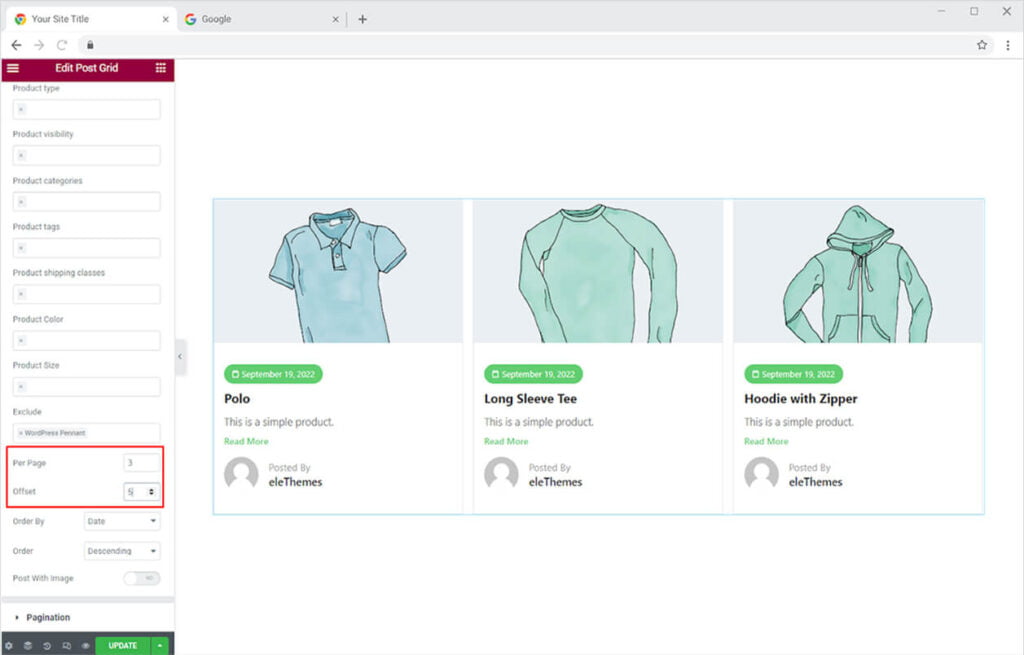
Select how many posts you want to be displayed in the Post Grid widget. The offset option in the Content Section allows you to move forward in the posts and find the arrangement that you initially want to display.
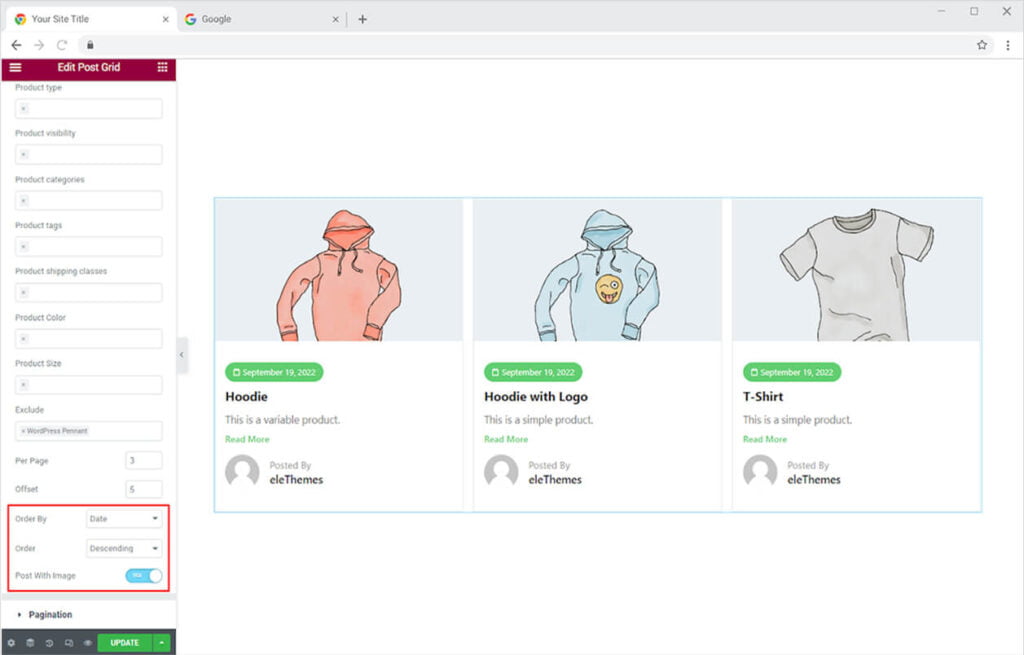
Select the order of the display from the Order drag-down menu from where you have the option to order the display with date, Post ID, Author name, and many more. In the below option, you can select the descending or ascending order for posts. Furthermore, enable the option to only include the Posts with images.
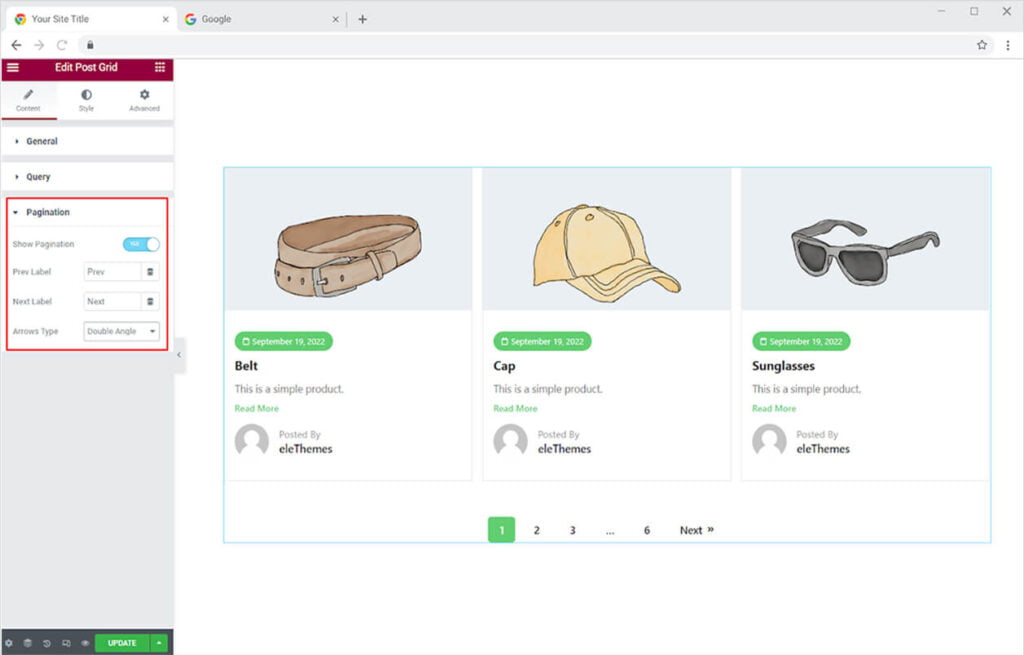
Allow the widget to display pagination which shows the option to move forward and backward to view more posts. Edit text for the previous and next options. Select an arrow that will be displayed with the next and previous text.
How To Style Xpro Post Grid for Elementor
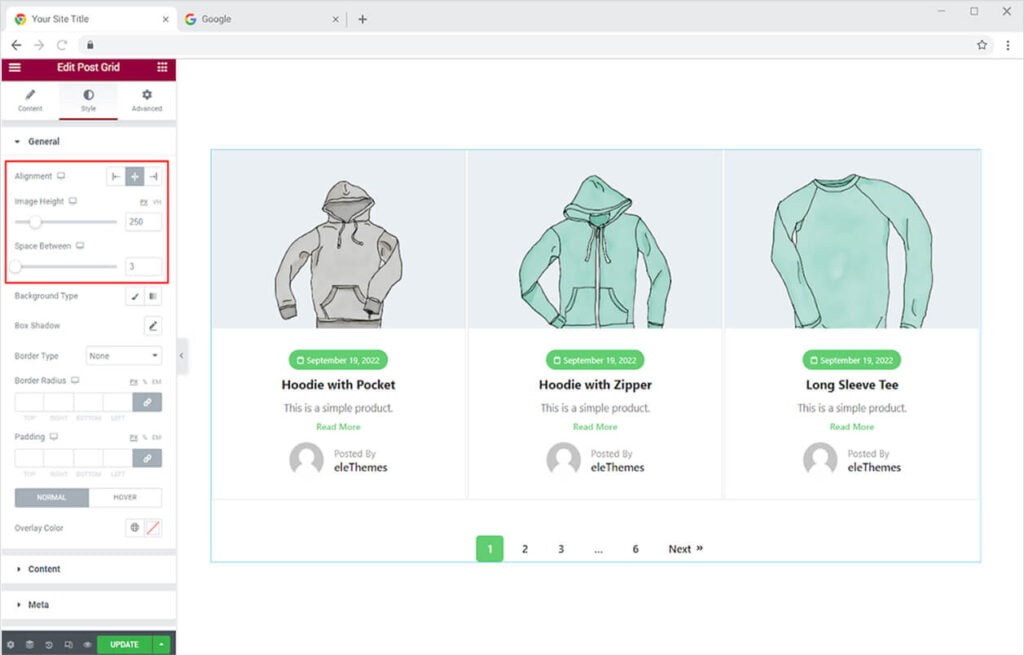
Position and set the alignment of the content in the boxes to left, right, or center. Adjust the height of the image and the space between each post.
Add a classic or gradient color to the background. Furthermore, you have the option to design a shadow from the shadow box.
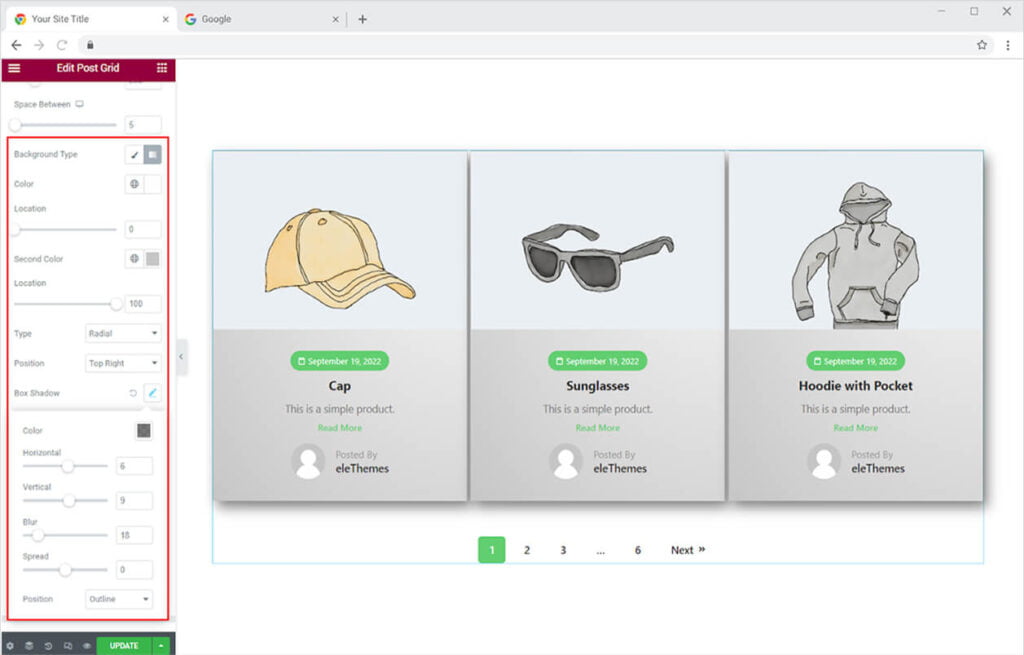
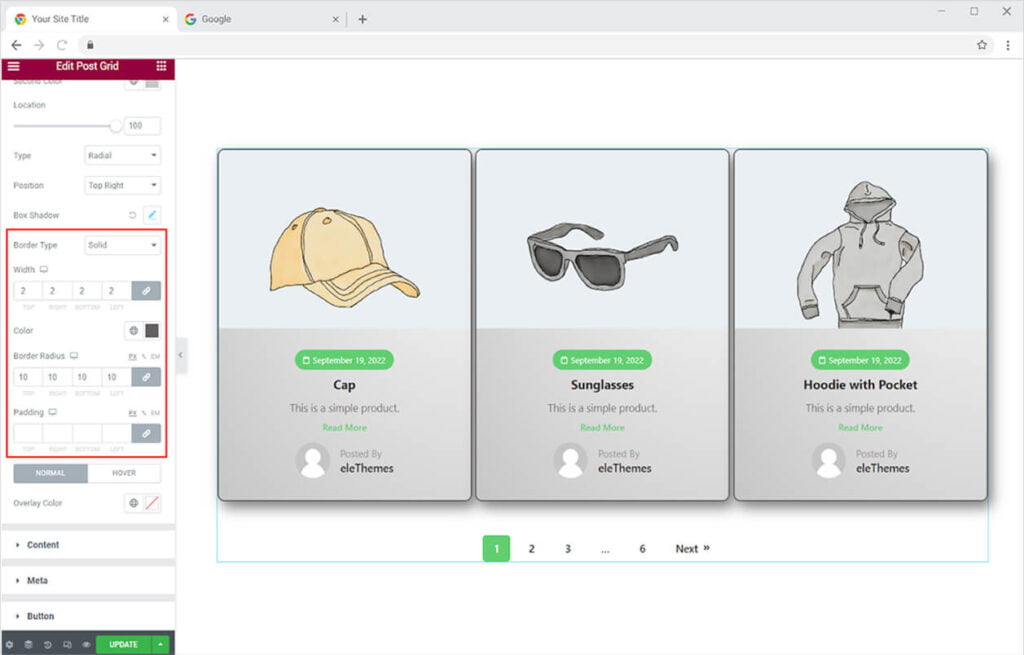
In further editing, you have the option of choosing between solid, double, dotted, dashed, and grove border types. You can change the color, radius, and padding for the border.
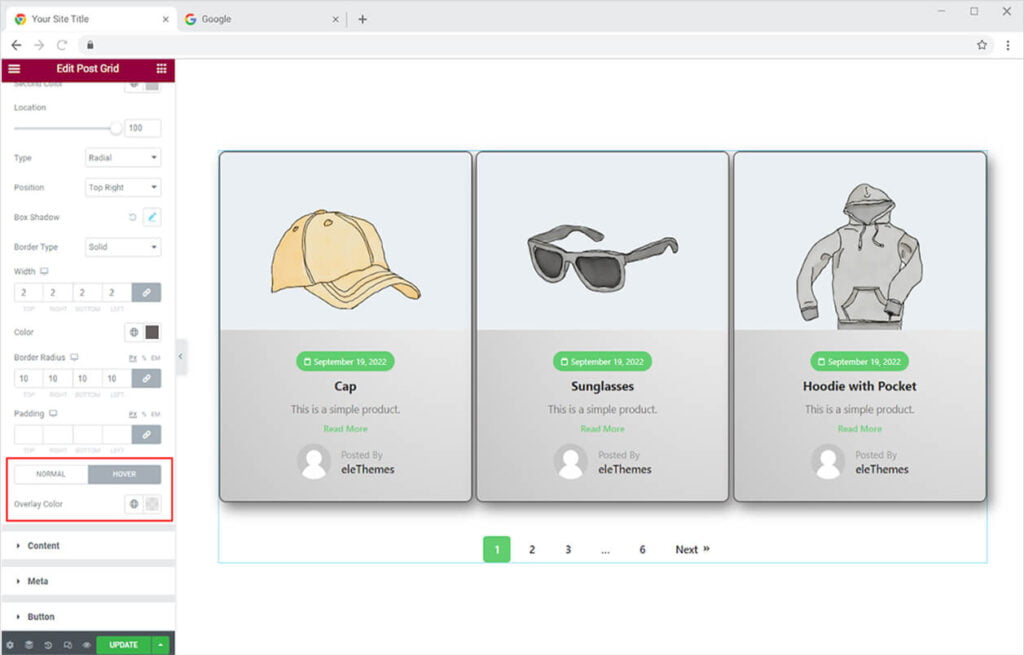
Give an overlay color to the widget for its normal and hover state.
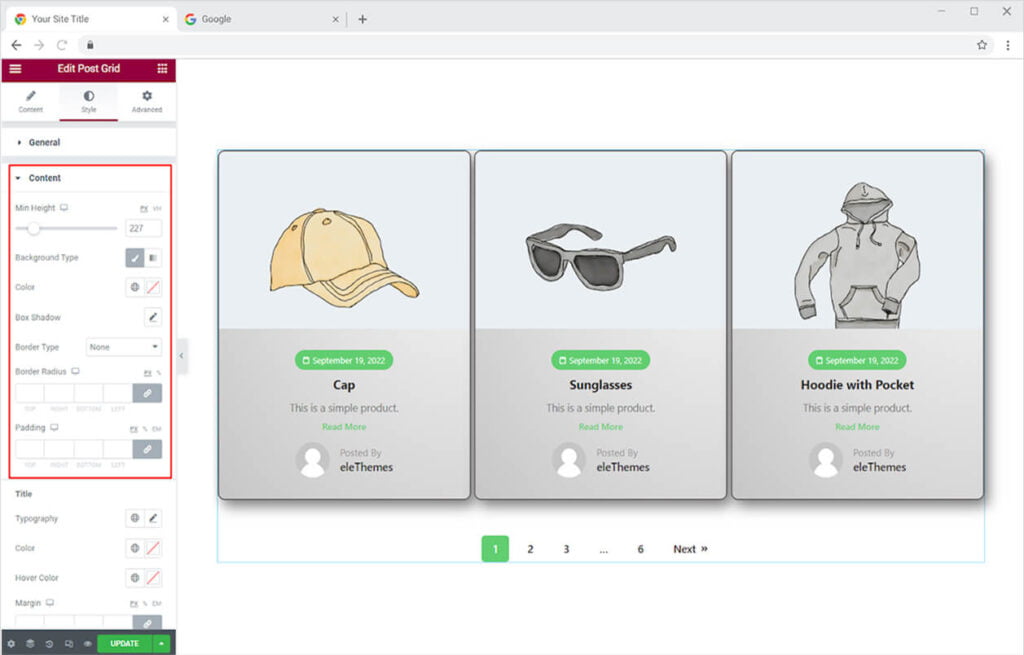
How to Style the Content in the Xpro Post Grid
Adjust the height of the content box and include a background for the content box. You have the option to include classic or gradient colors. Add a shadow box and make a border just for the content box.
Style the title by changing its typography and selecting a font, changing size, editing style, etc. Color the text for normal and when the user drags the mouse above it. Set its margin to other content.
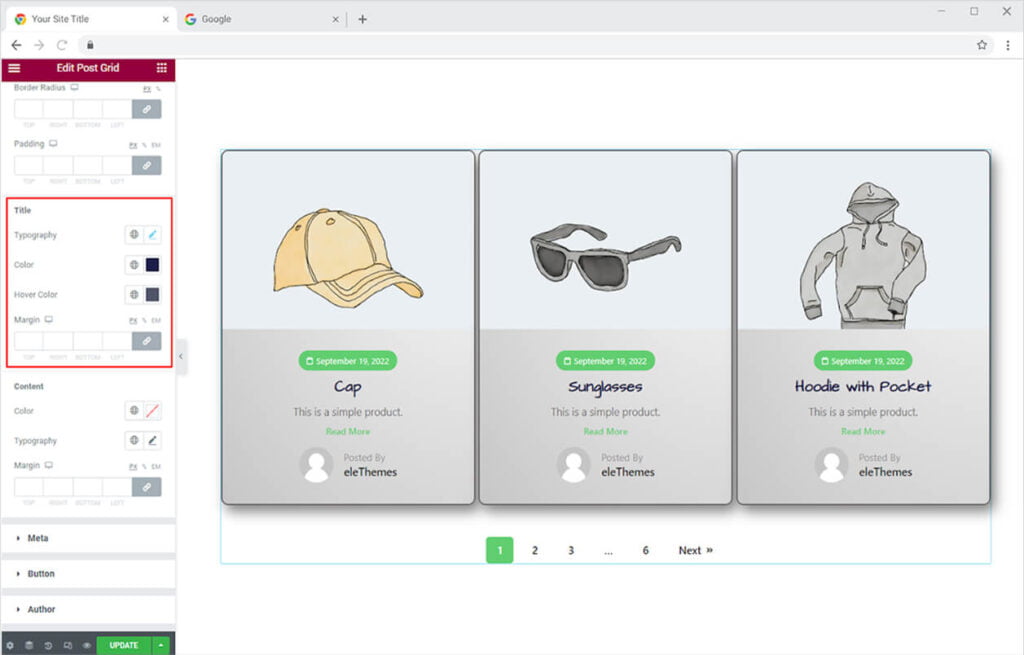
Apply the same styling options to the content in the description and change its appearance.
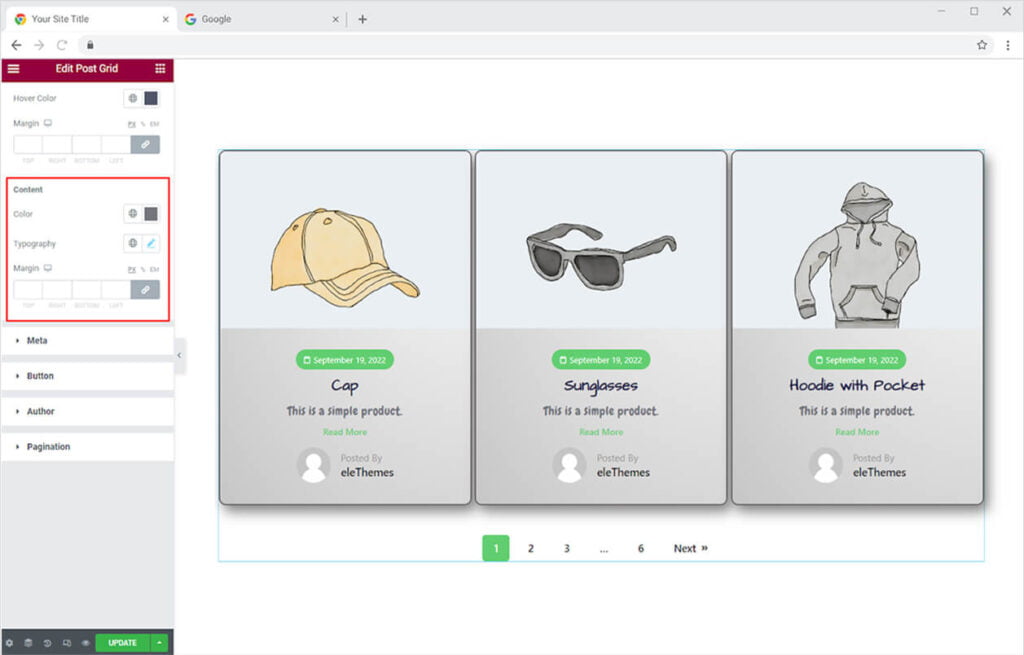
From the meta section, you can style the appearance of the meta. Change the typography of the text in the meta from the typography menu. If you have added more than one meta then you can set space between them. Color the text and background. Make a border and style it as well.
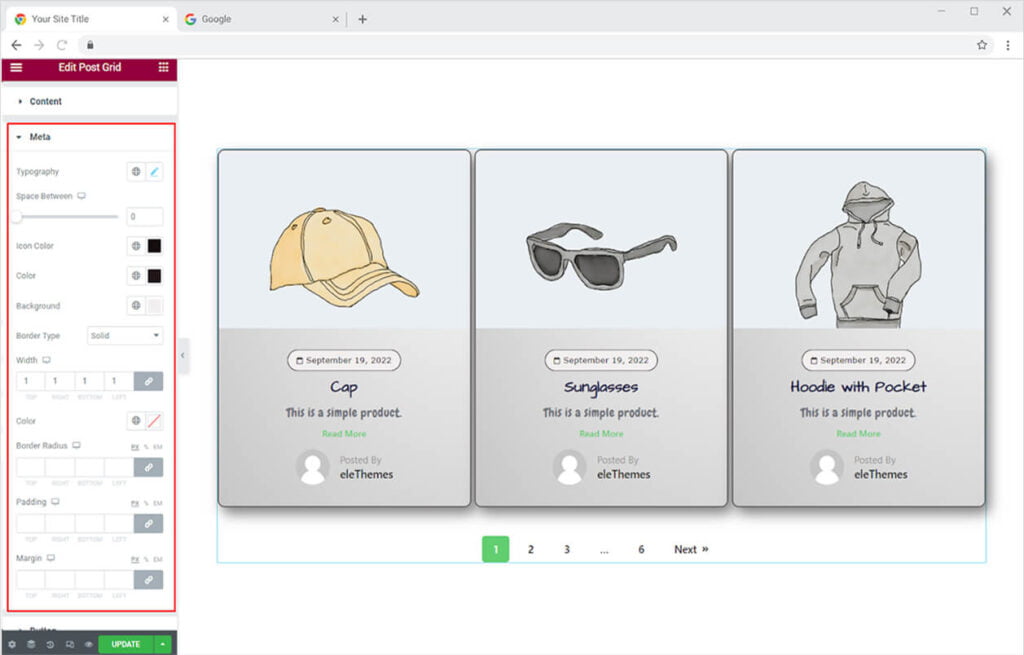
Just like the above-mentioned features, apply the same customizations to the button in the widget. Style the typography, text color for normal and hover, and add a border.
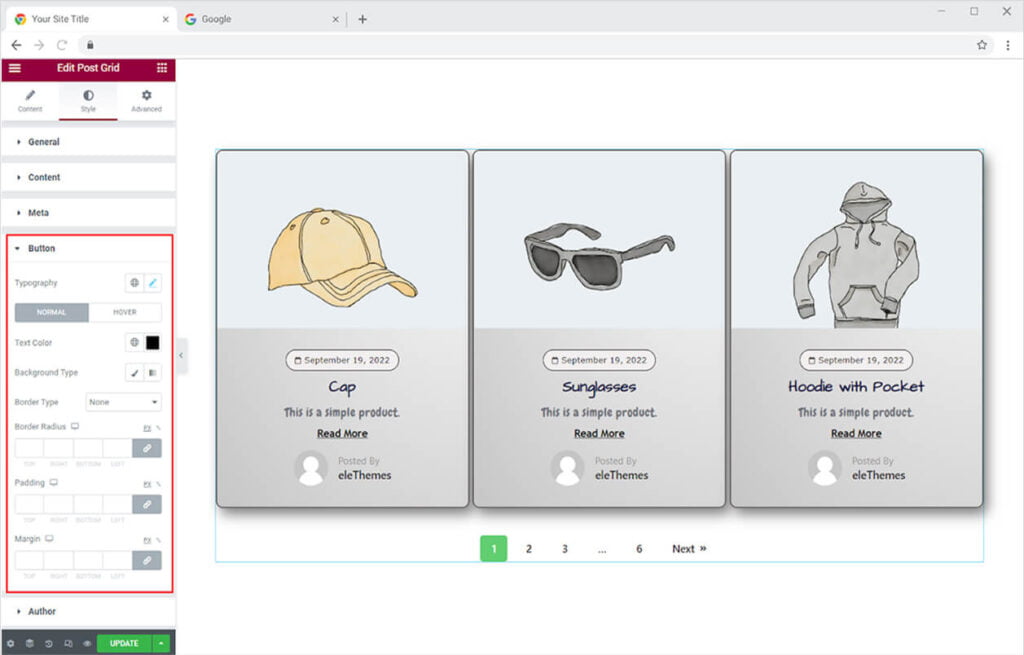
Manage avatar size and make space between text and image. If you want, you can include a border to the image and customize it as well.

Style the title and name of the Author by changing its typography, color, and margin.
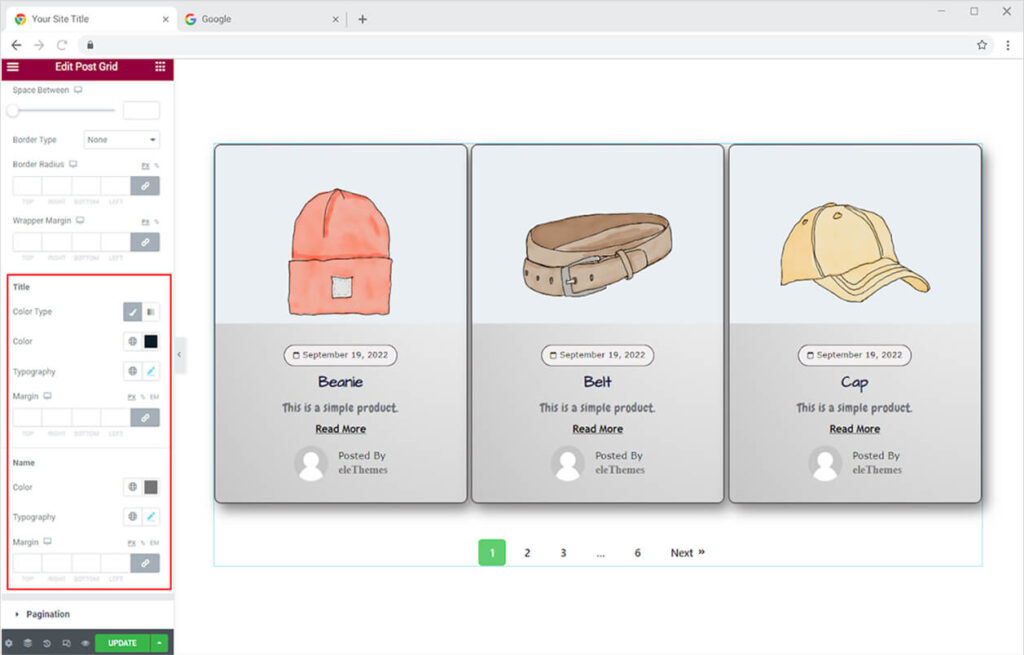
How to Style the Pagination in the Post Grid Widget
Last but not the least, customize the appearance of the navigation below. Change the typography and make it suitable for your website layout. Adjust its alignment and make space between each number. Make a border for each number if you want and style their width, radius, padding, and margin.
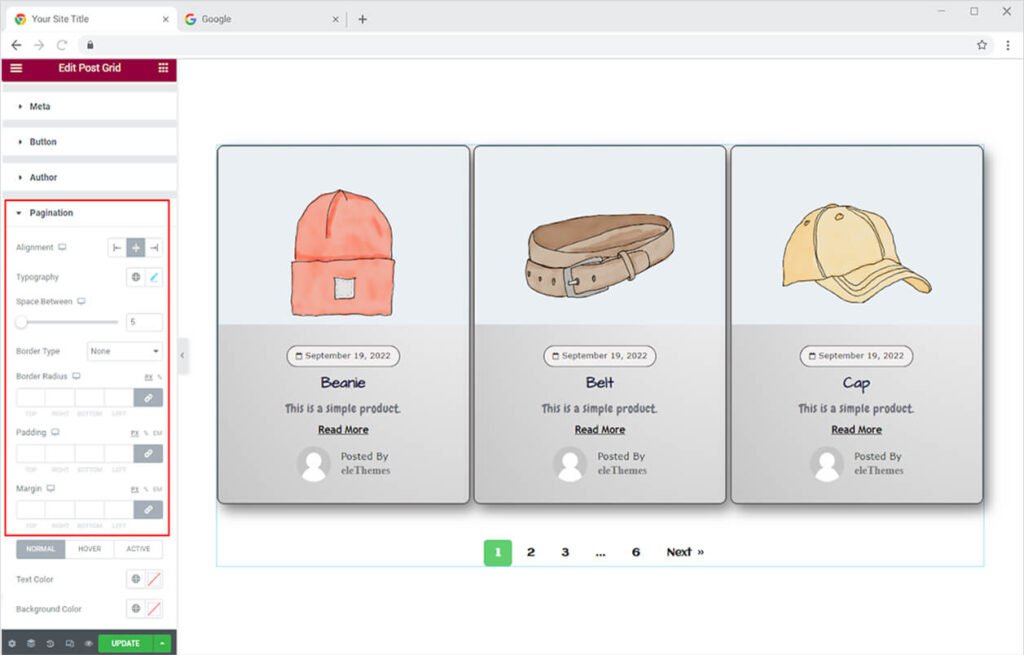
In the end, you have the option to color the numbers and their background. You can color this for normal, hover, and active which means color the number that is opened.

Best Post Grid widget for Elementor
This was all from our Elementor Post Grid widget by Xpro. We hope you have a thorough understanding of the functionality and features of this powerful Xpro Elementor widget. Make full use of this widget to create a beautiful post list and gather more visitors. Check out our premium Elementor Post Carousel widget to create an attractive post view on your website. Combine this Post List widget with our Info List for Elementor and instantly drive more traffic.
Xpro Elementor Addons offer a wide range of widgets, Elementor theme builder, and templates that help designers develop an attractive site. Check out our 50+ free Elementor addons, which are enough to create a professional WordPress website.