How to Install Image Sroll Widget for Elementor
Xpro Image Scroll widget for Elementor is another amazing FREE widget that lets you delight your site visitors by adding attractive images with scroll effects, overlays, custom badges, and much more. The widget allows you to showcase your favorite images in a vertical or horizontal scroll which will eventually take your website experience to the next level.
The Elementor Image Scroll Widget offers unlimited customizability options for full control over the styling and hover options. You can get more creative by adding 57+ image masks to make the most attractive image scroll layout for your Elementor sites. Xpro Elementor Image Scroll is an easy-to-use free widget for creating functional image scrolls on your WordPress website with custom scroll speed and overlay effects.
Let’s take a closer look at how you can fully utilize this incredible widget.
Requirement
You need to install and activate the free version of Xpro Elementor Addons. If you already have the plugin installed, just make sure the Image Scroll Widget is ‘Enabled’ from the Xpro Elementor Addons dashboard. , so you can find it in the Elementor editor.
To enable the widget, simply follow these steps:
Step 1
Click on the Xpro Addons option available on the WordPress Dashboard Menu.
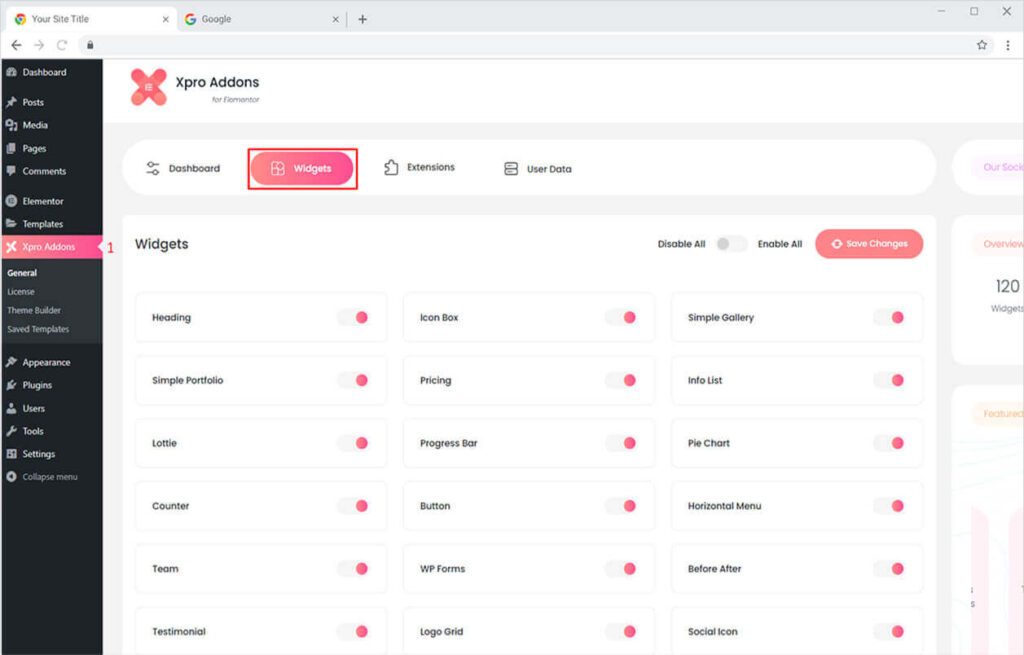
Step 2
From the Xpro Addons Dashboard, click on the Widgets tab, find the Image Scroll Widget, and then toggle the button ‘ON’ to enable it.
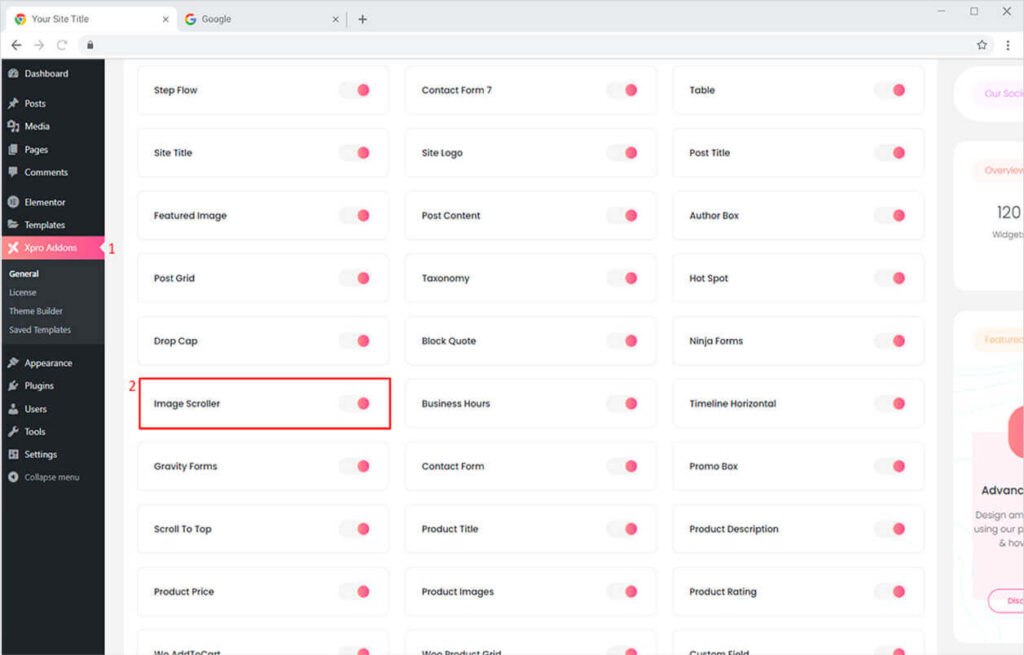
How to Use Xpro Image Scroll Widget for Elementor
Our Image Scroll widget is a handy tool that allows you to easily showcase your favorite images in a vertical or horizontal scroll. This lets your visitors witness the full frames by manually scrolling them. This simple-to-use widget allows you enhance the user experience by adding an image scroller in the reverse direction with a custom speed. So let’s get started.
Step 1
Click on the Xpro Addons section available in the Elementor Editor.
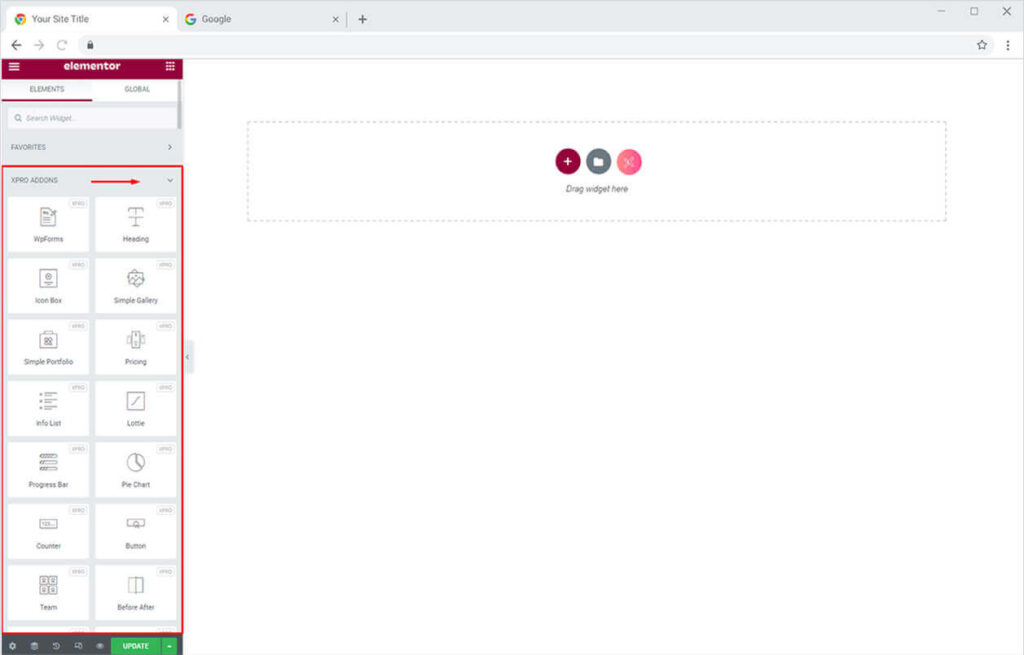
Step 2
From the Xpro Addons section, find the Image Scroll widget, and simply drag’n’drop it on your desired page location.
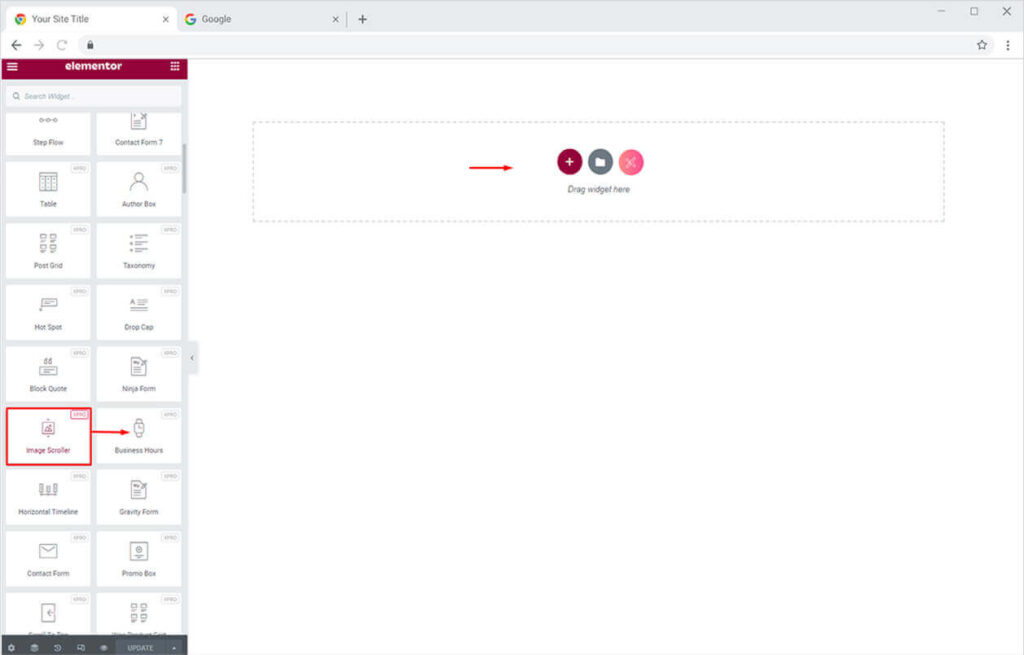
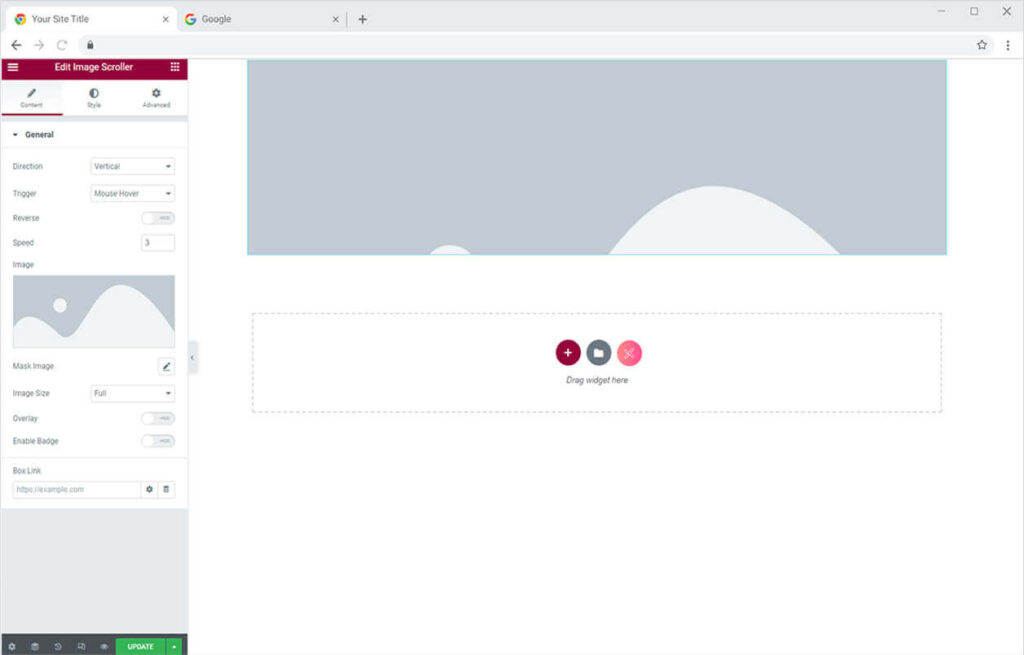
This is the default view of our Xpro Elementor Image Scroll widget.
How to Add Image in Xpro Image Scroll Widget for Elementor
Start from the General Section in the Content Tab. At first, you can select the direction of the scroll. You can either choose vertical or horizontal. Then you will select the trigger indicator for the scroll. You will also have 2 options for that “Mouse Hover & Mouse Scroll”. You can also reverse the scroll animation effect and set the time of scroll duration.
Finally you will insert the image from the choose image option.

How to Add Mask to Images in Elementor Image Scroll Widget
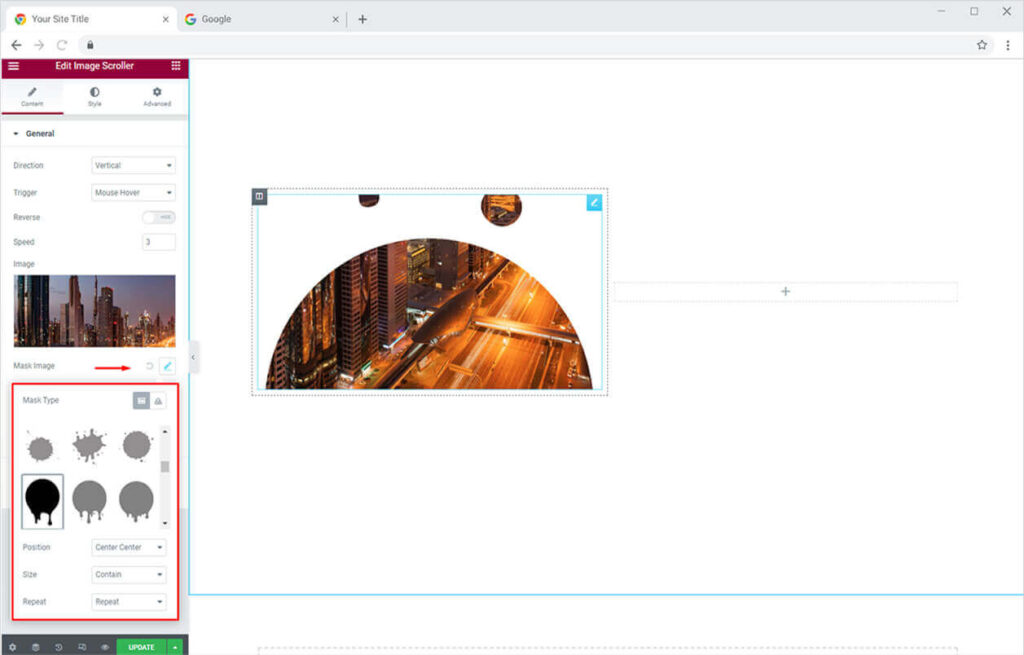
A unique feature is that you can also add a mask to the images using the Xpro image scroll widget. Simply click the Mask Image icon available in the section. From the drop-down menu, you can choose from 57 masks preset or add your own custom shape. You can also set the mask’s position, size, and repetition.
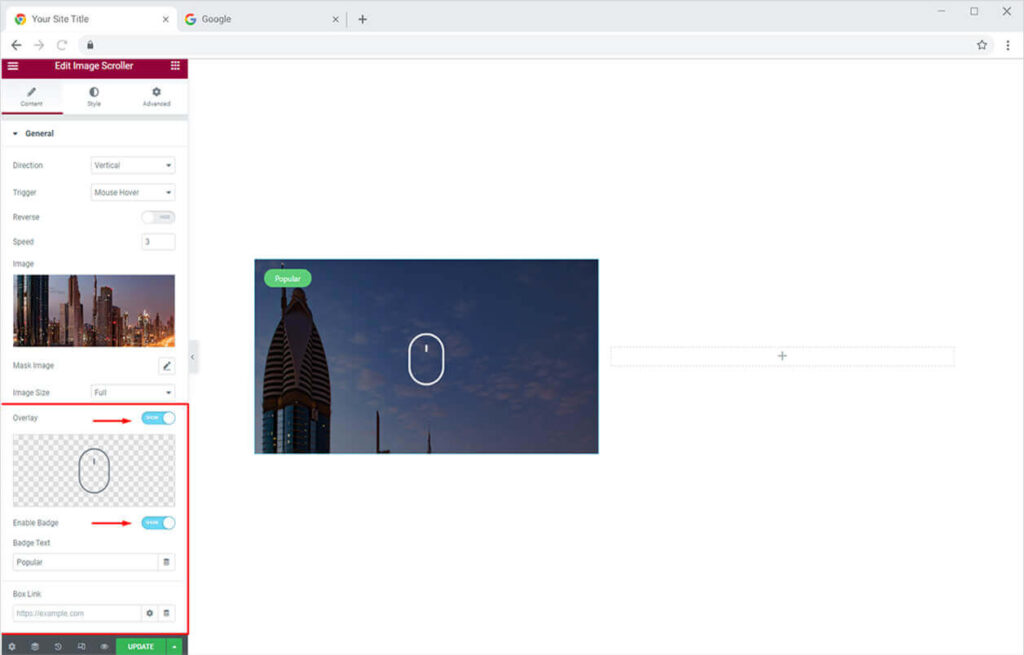
After that, you can enable/disable the Overlay option. If you enable the Overlay option you can add any icon of your choice from the icon library or upload your own custom SVG.
After that, you can enable the Badge option. Once you enable it you can add any text to it.
At last in this section, you can add a link to the image scroll box for a more detailed page.
Try our free Elementor Theme Builder to customize the default WooCommerce product and category templates.
By Xpro Elementor Addons
How to Style Elementor Image Scroll Widget
Now let’s style the image scroll widget to make it look more attractive on the website. You can design your Image Scroll widget with the following options from the Style tab:
- Customize the height of the image scroll box
- Adjust the overlay of the image scroll box
- Add CSS filters
- Add up to 10 unique blend options
You can perform all of these settings for the hover mode as well just by shifting from normal mode to hover mode.

How to style Overlay in Elementor Image Scroll Widget
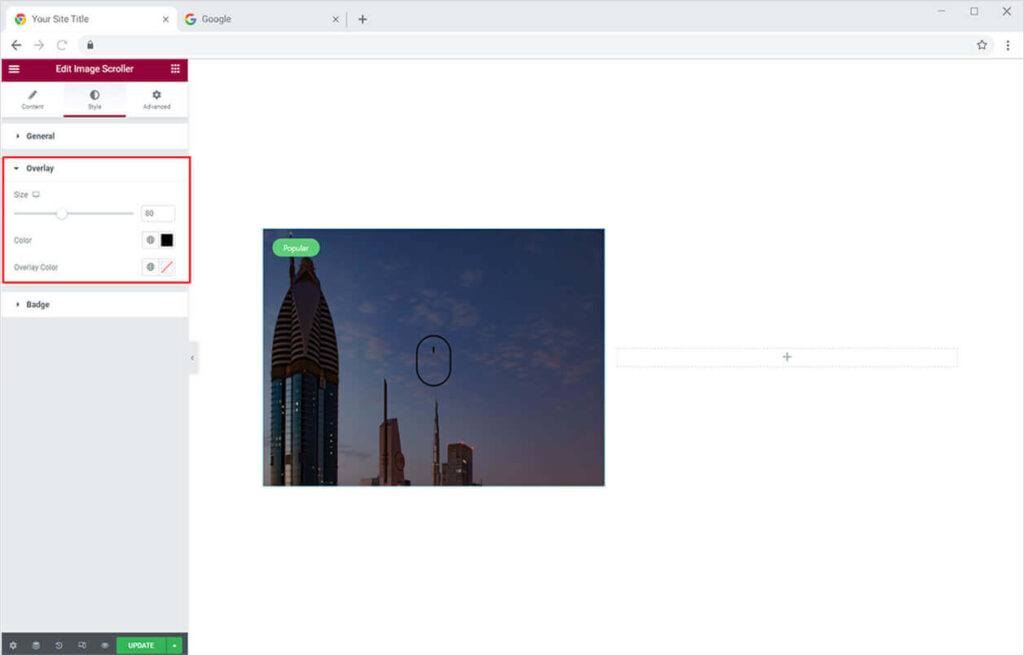
Head towards the Overlay Section. Here you adjust the size of the added icon. Add color to the icon and its overlay.
How to Style Badge in Elementor Image Scroll Widget
Once the badge text is added from the Content tab, you can then fully design it from the Style tab. Under the dropdown of the Badge Section, set the position of your badge (9+ options available), customize the typography, change the text color, add a background color, set a border of your choice, or add a box shadow. There’s so much to play around with. You can also manually set the position of the badge from the Offset option.
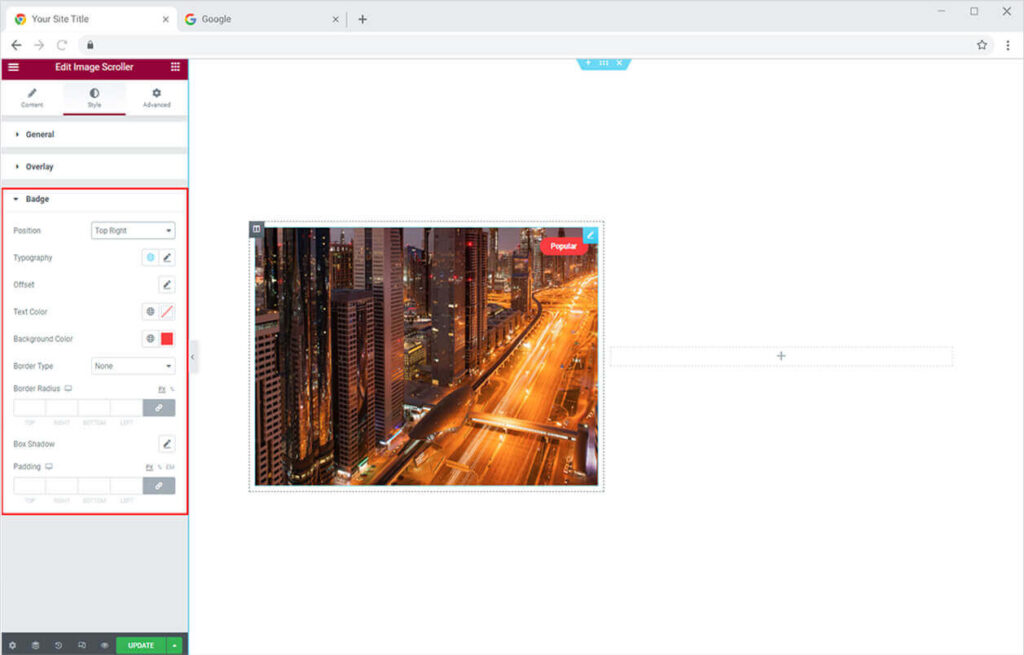
At last, I have also added an image with a horizontal scroll in the other column. So the final result will look something like this on your Elementor site.

Best Image Scroll Widget for Elementor
That is all from our image scroll widget for Elementor. We hope now you have a better understanding of how to fully utilize our easy-to-use Image Scroll widget and add amazing vertical and horizontal scroll effects to your image. This widget is best for delighting your site visitors by adding attractive images with scroll effects. If you want to explore and add more attractive best free Elementor widgets then check our complete list of free Elementor widgets and download our free Elementor addons now.
Xpro Elementor Addons offer a wide range of widgets, Elementor theme builder, and templates that help designers develop an attractive site. Moreover, check out our other promising widgets, like the promo box for Elementor to showcase highly engaging promo boxes to get instant sales through your website. Simply add a featured image with our Elementor Featured Image widget. Moreover, our Xpro Elementor Addons lets you add floating effects on almost all widgets. Head over to our detailed guide on How to Add Floating Effect for your Elementor WordPress website.