How to Install Elementor Icon Box Widget
Xpro Icon Box Widget for Elementor is a powerful FREE widget to showcase your services and useful information delightfully. You can add beautiful hover effects, badges, custom icons, and background styles to present your content in an enticing way. Add eye-popping titles, descriptions, and hover animations to instantly give a sleek look to your content. You can add a link to the detailed pages of icon box offerings. The Icon Box widget for Elementor comes with 13+ hover animations, an Xpro library with 300+ icons, and a lot of customization options
Requirement
You need to install and activate the Free version by Xpro Elementor Addons. If you already have the plugin installed, just make sure the Icon Box Widget is ‘Enabled’, so you can find it in the Elementor editor.
To enable the widget, simply follow these steps:
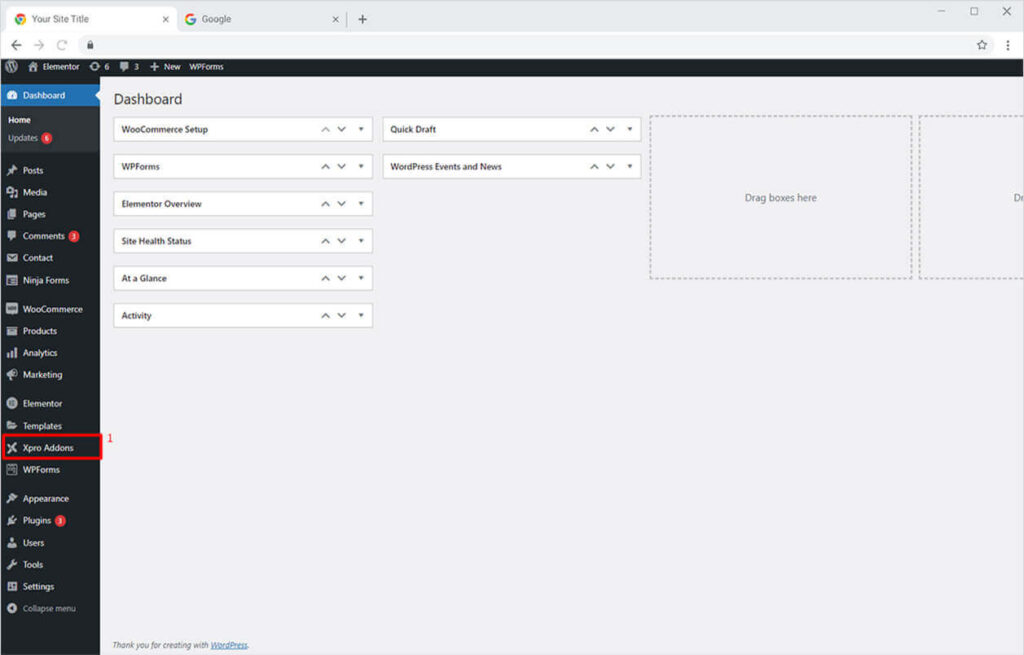
Step 1
Click on the Xpro Addons option available on the WordPress Dashboard Menu.
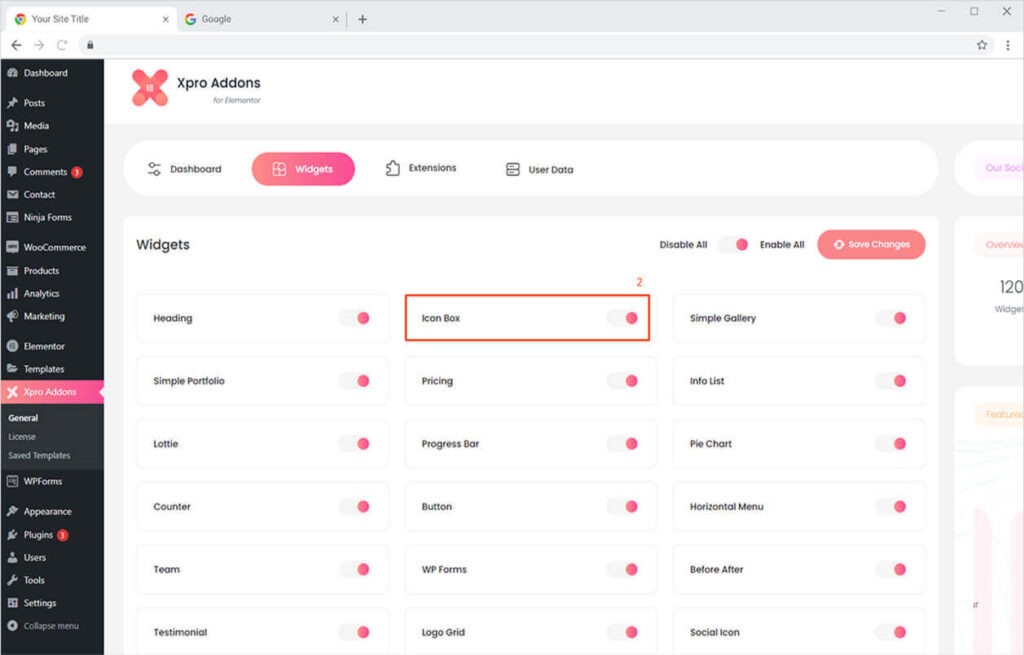
Step 2
From the Xpro Addons Dashboard, click on the Widgets Tab, find the Icon Box widget, and finally, toggle the button ON to enable it.
How to Use Xpro Icon Box Widget for Elementor
Icon boxes are the best way to instantly grab your site visitor’s attention and direct them to any detail page of your website. You can create eye-catchy icon boxes for your websites in minutes with our modern widget. It’s simple, FREE, fun, and time-saving! Here’s how to use this amazing Elementor Icon Box widget.
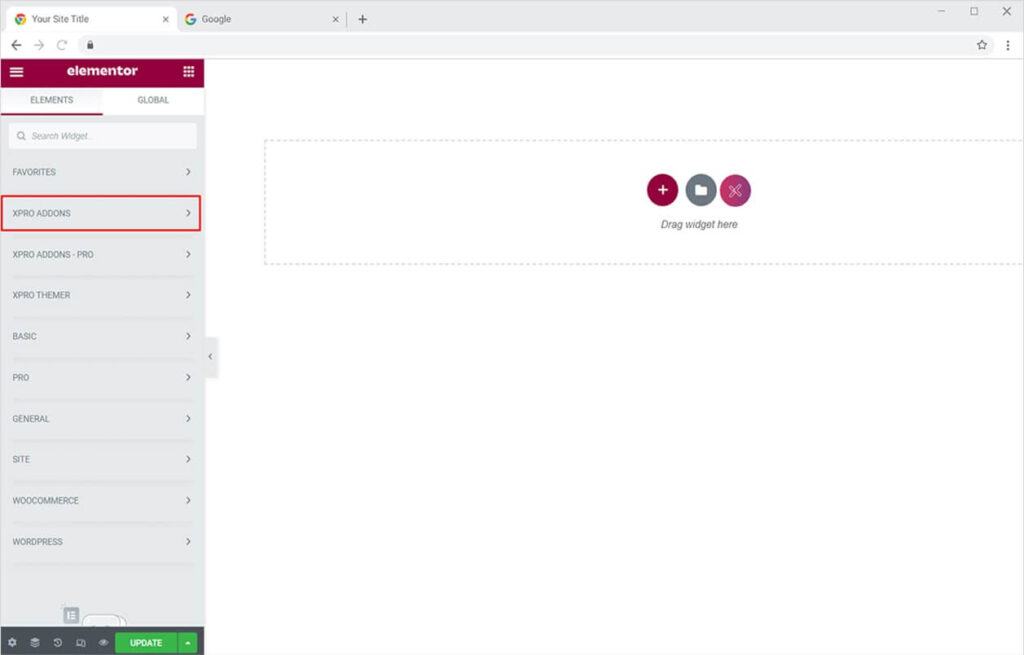
Step 1
Click on the Xpro Addons section available in the Elementor Editor.
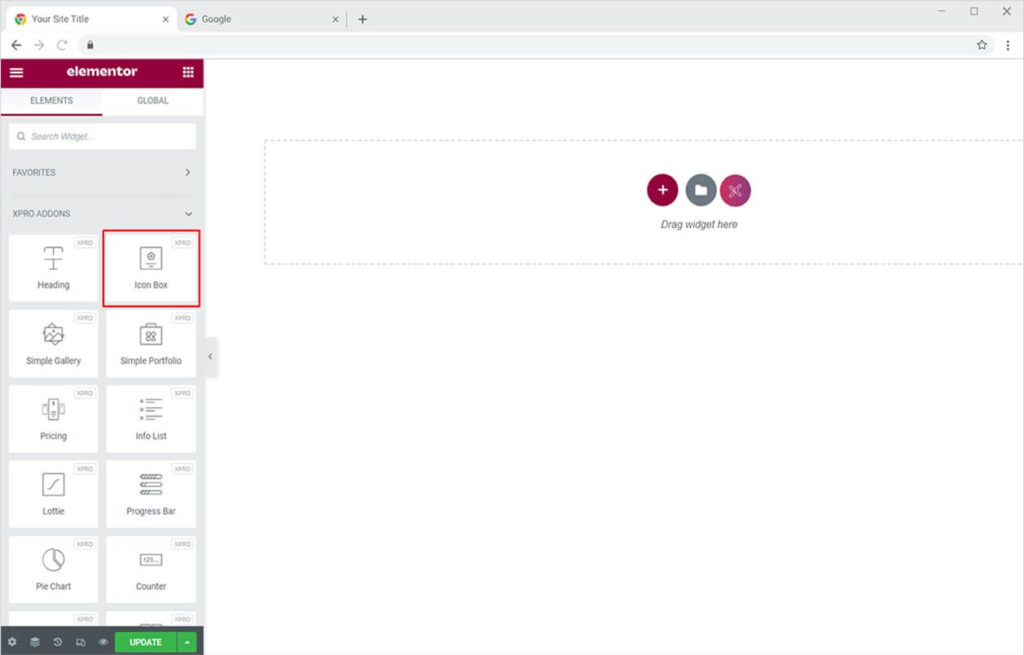
Step 2
From the Xpro Addons section, simply drag’n’drop the Icon Box widget on your desired page location.
How to Add Content to Your Icon Box Widget
Our Icon Box widget for Elementor lets you design your icon box information the way you want. You can create highly converting icon boxes containing your product/services’ USP and key features. Thus, giving your site visitors a unique personalized experience. Let’s try those features!
Step 1
Drag and drop the Icon Box widget on the desired page.
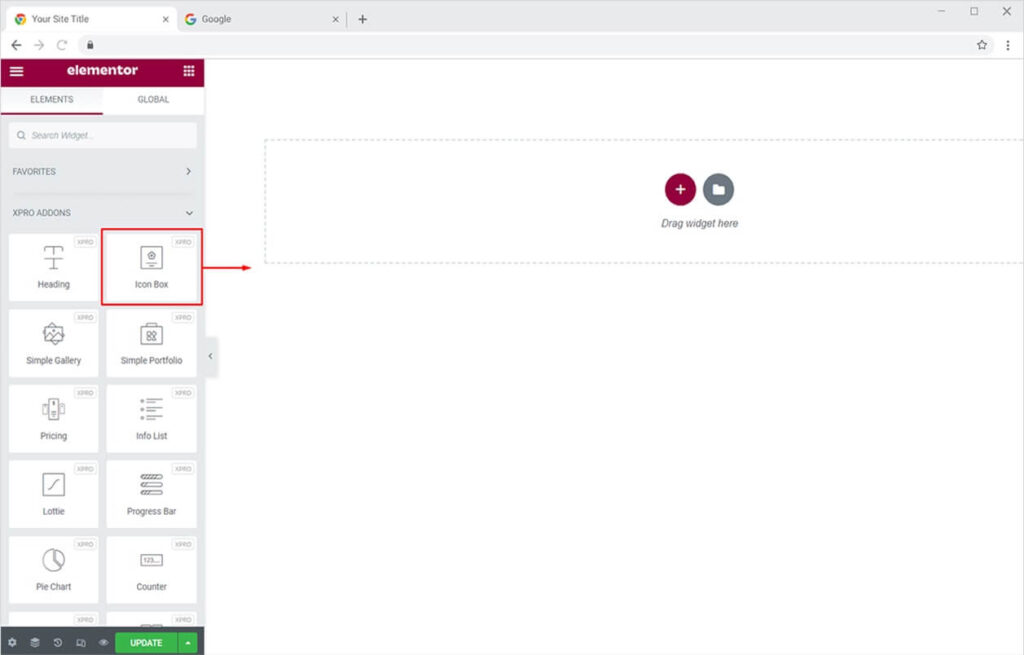
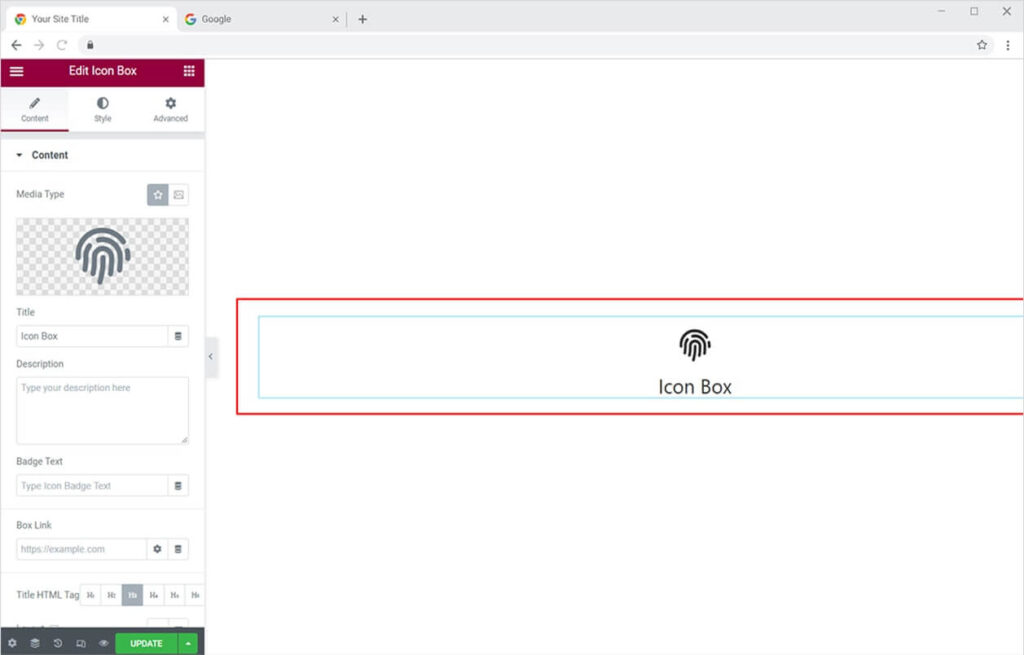
The default view will be something like this:
Step 2
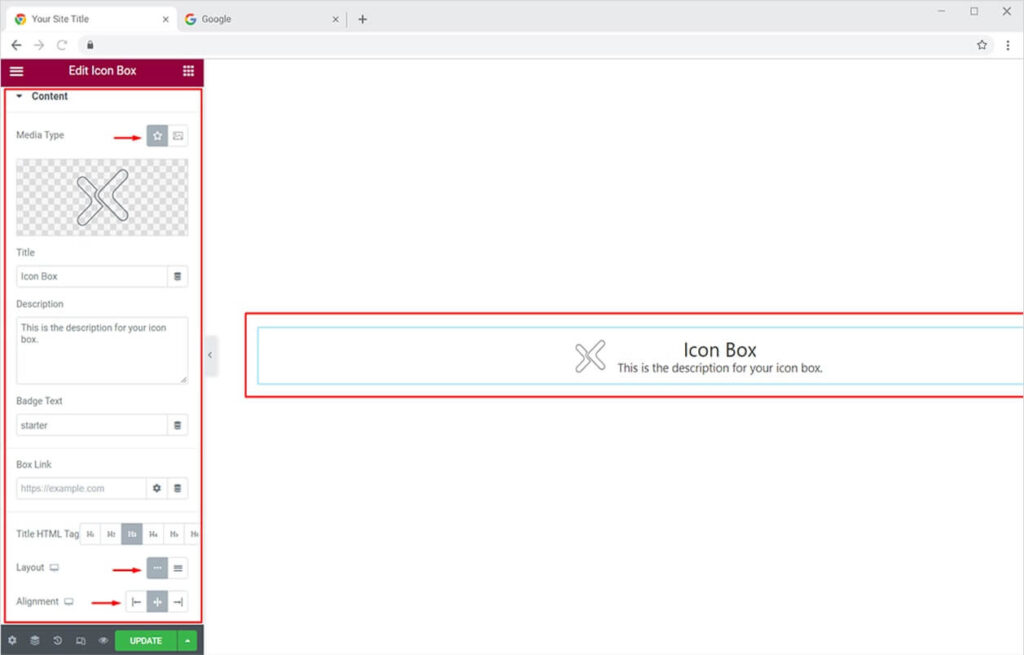
In the Content section, you’ll see multiple options like media type, title, description, badge text, box link, and more. Choose the icon or image of your choice or upload your custom SVG from the Media Type section. There are 300+ icons available in the Xpro Icon Library or you can choose any from the Font Awesome icons. Now, enter the title and description for your icon box. You can also add a badge and a link to the entire box. After this, simply set the desired HTML Tag for your heading, set alignment and layout (block or inline).
Check our best alternative of Elementor Pro to customize default theme templates for your websites.
By Xpro Elementor Addons
How to Add Icon or Image and Style It in Icon Box Widget
Add a beautiful media type (icon or image) in your icon box and provide a seamless user experience. Icons or images convey a meaningful message to your site visitors about the content. To add a media type, first, you need to visit the Content section and select the type of media. Choose from an icon or image, you can also add a GIF as an icon from the image option. Here we will stick with an icon as the media type.
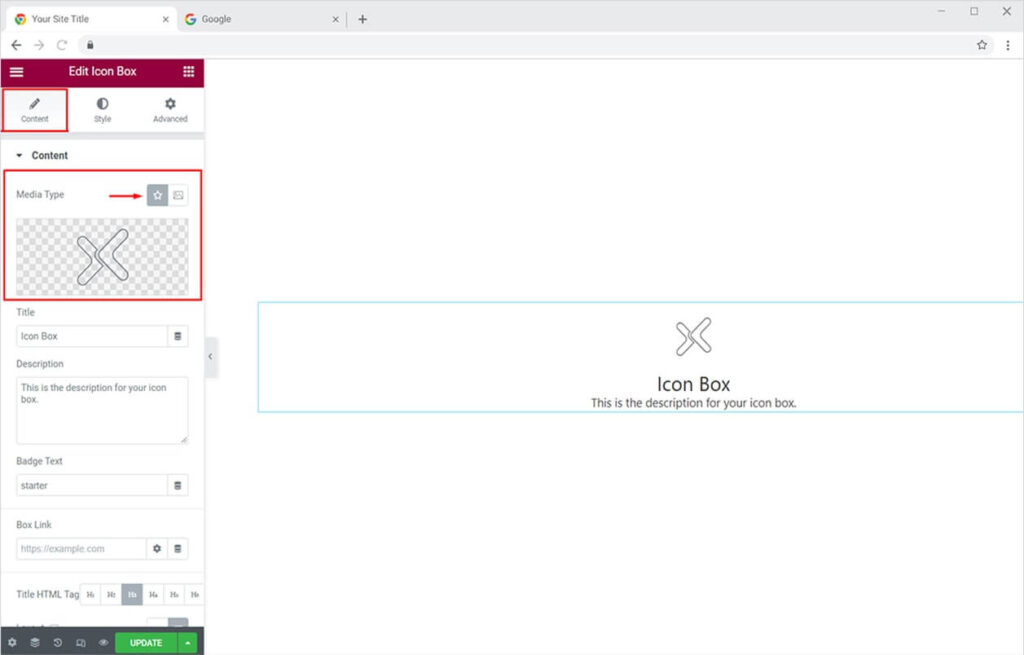
Once the icon is added, go to the Style Section to design your icon beautifully. Set custom size and color for the icon and border to it. You can choose any color of your choice as border color, just like we did here:
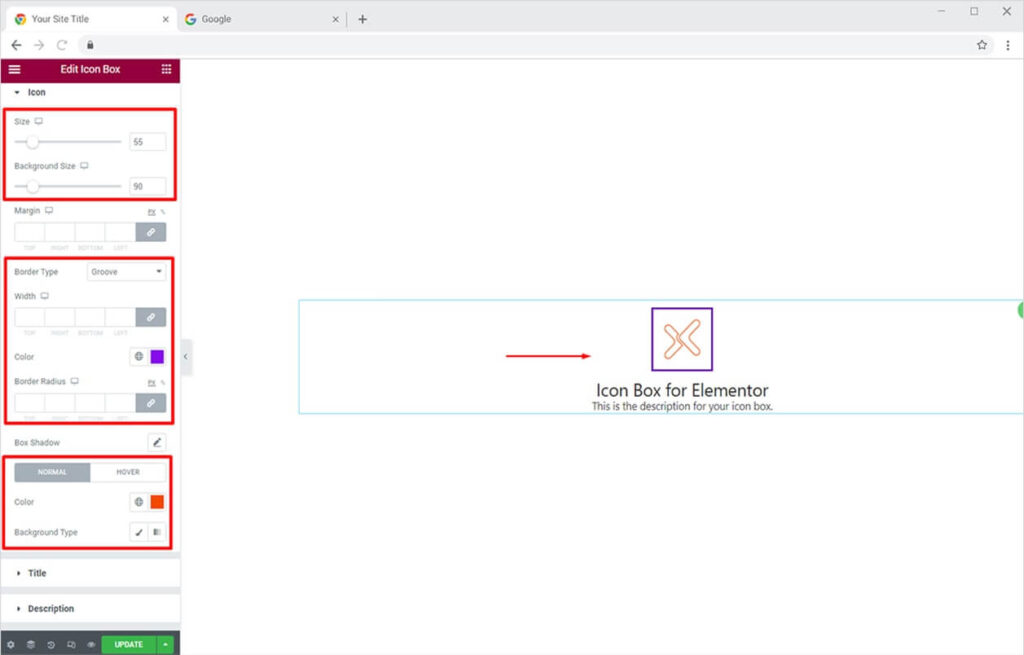
You can play around with your creativity and add a background type to the icon along with a box shadow, just like this:

How to Add Hover Animations to Your Icon Box
Once you have added the icon for your icon box, you can apply any of the premium 13+ hover animations to give a pleasant experience to your site visitors. To do this, go to the Style section and click on the Hover tab. Now select the animation type and set the transition duration as per your liking.
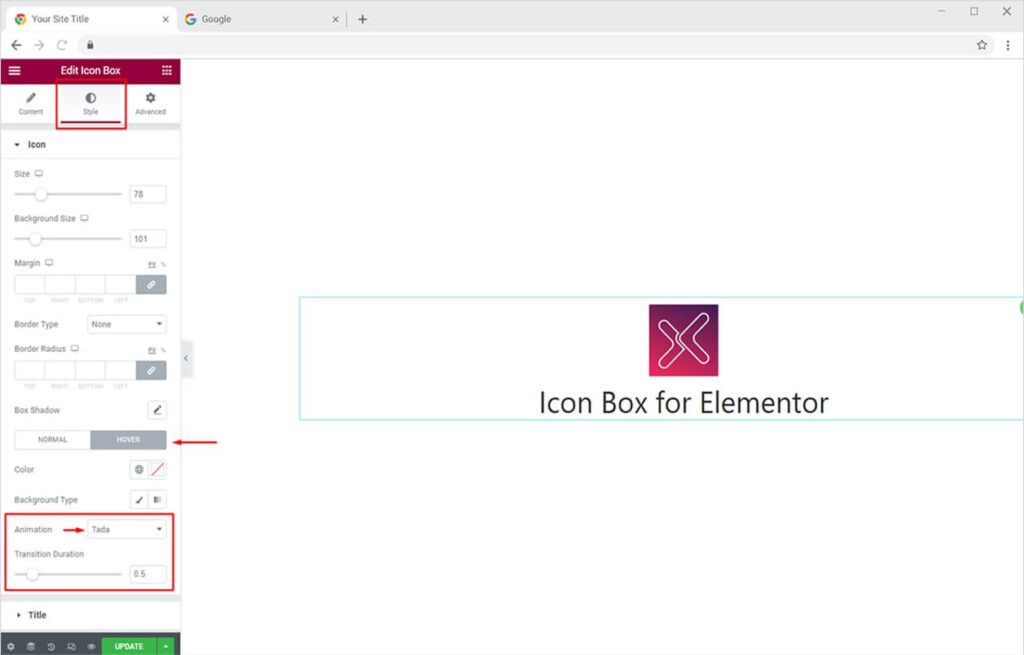
The final output will be an amazing icon that animates on hover.
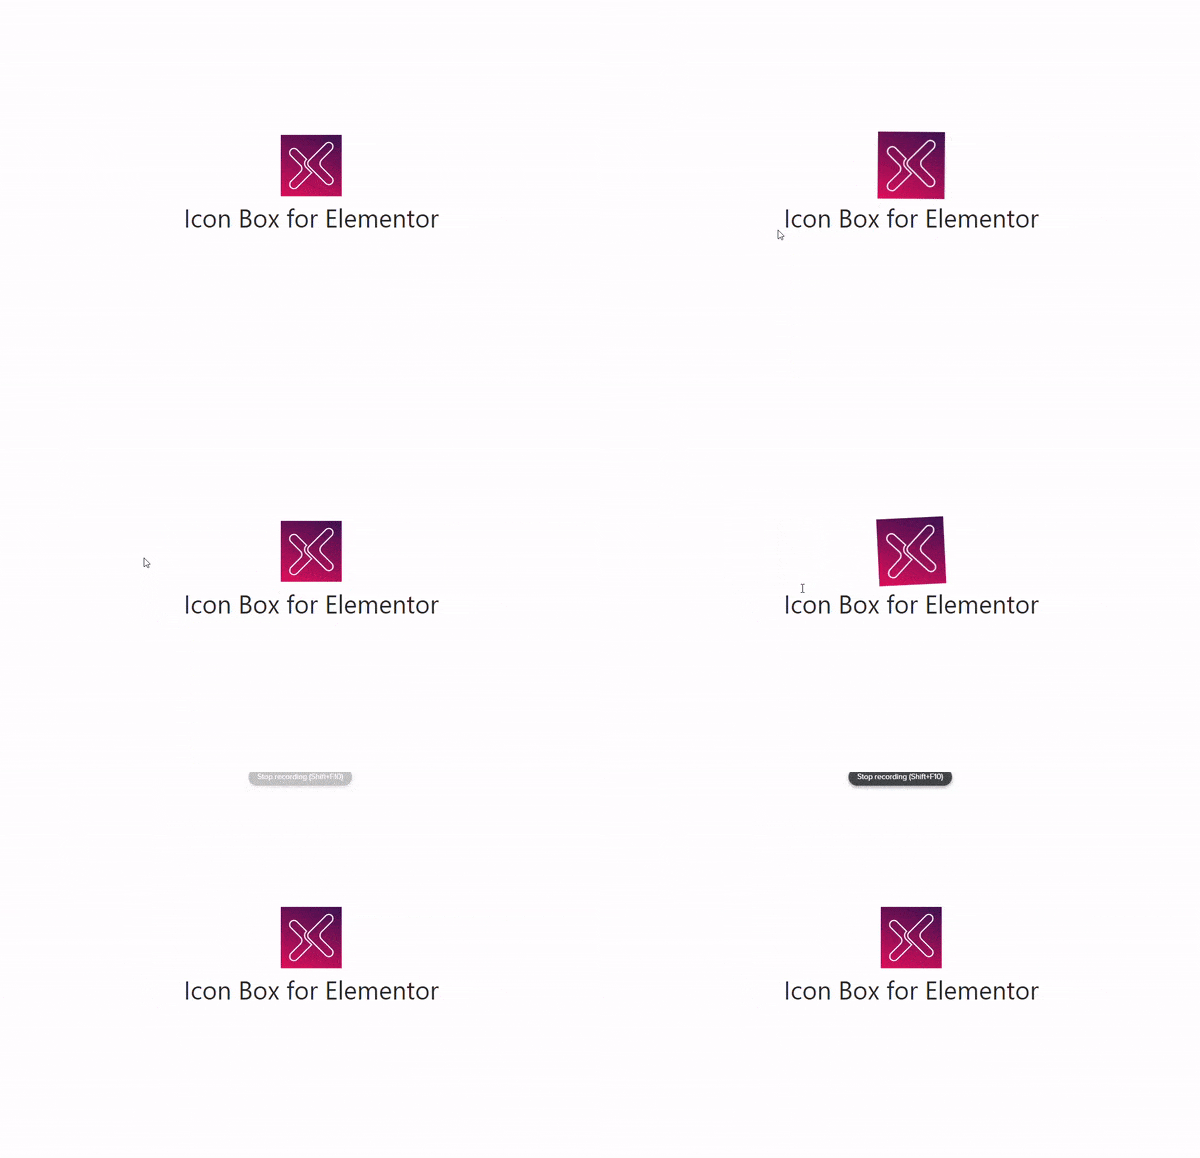
How to Add & Style Badge Text for Your Elementor Icon Box
Give your icon box a more sleek look by adding a Badge to it. First, you need to enter the text from the Content Section. Go to the Content section and enter your relevant text in the Badge Text field.
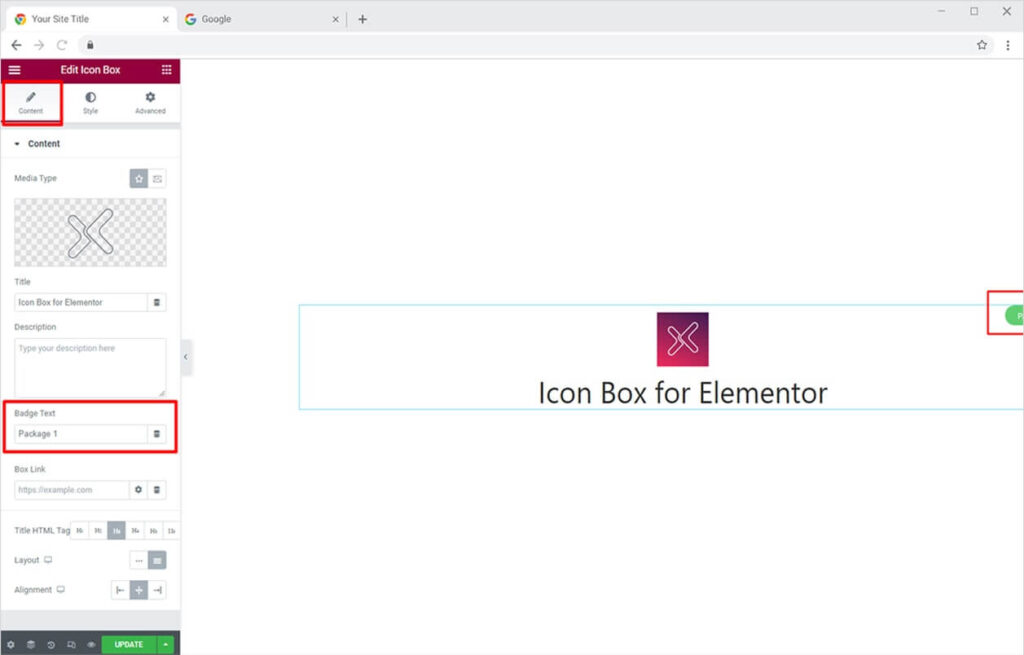
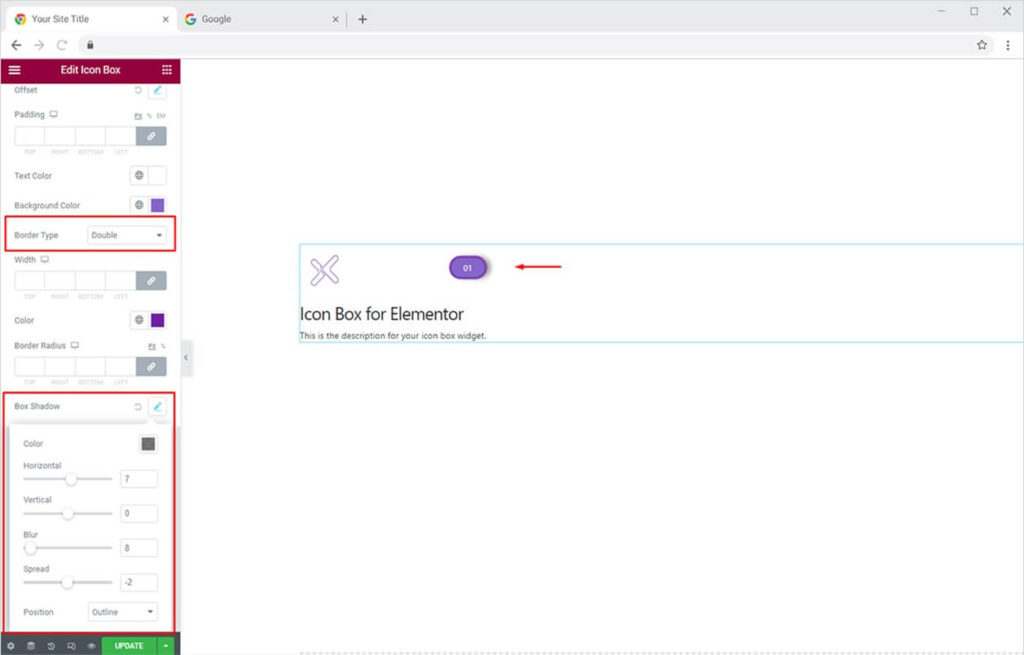
Once the badge text is added from the Content section, you can then fully design it from the Style section. Under the Badge dropdown, set the position of your badge (9+ options available), customize the typography, change the text color, add a background color, set a border of your choice, or add a box-shadow. There’s so much to play around with. You can also manually set the position of the badge from the Offset option. Let’s try some options now.

You can also apply a border (5+ options) to your badge and set its custom color too. Also, play around by applying a box shadow to your badge. You can set the box-shadow position as outline or inset, the blur ratio, spread, and much more. The result would be something like this:
How to Style Title and Description of Your Elementor Icon Box
Just like we animated the icon on hover, we can change the color of the Title and Description of the icon box. This is an advanced feature that lets you present a captivating experience to visitors on all touchpoints. Let’s see how we can do this.
Add your text in the Title and Description field available in the Content Section.
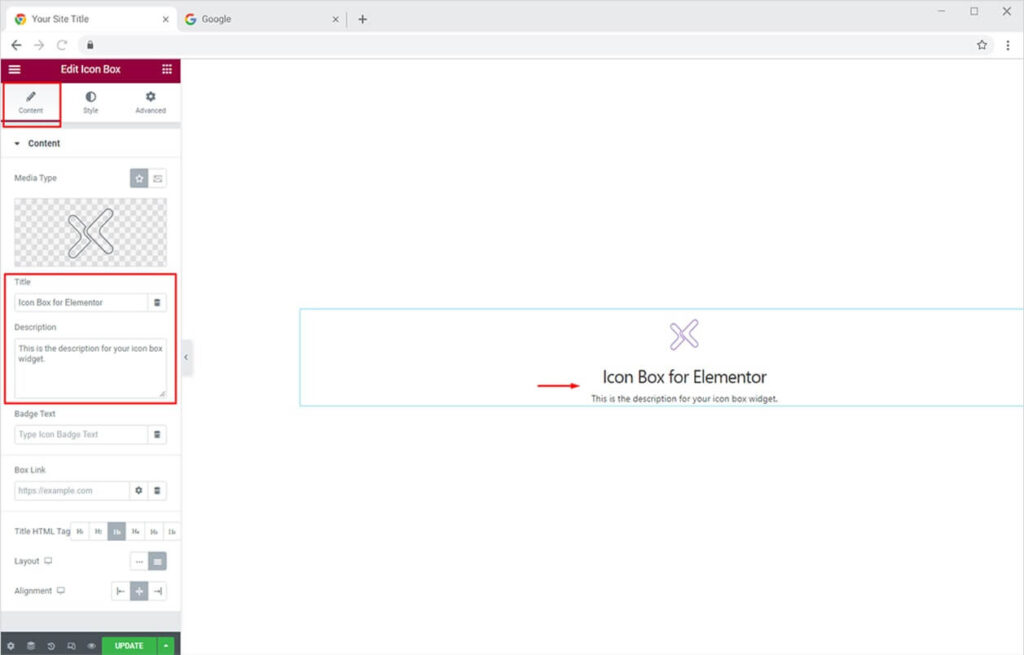
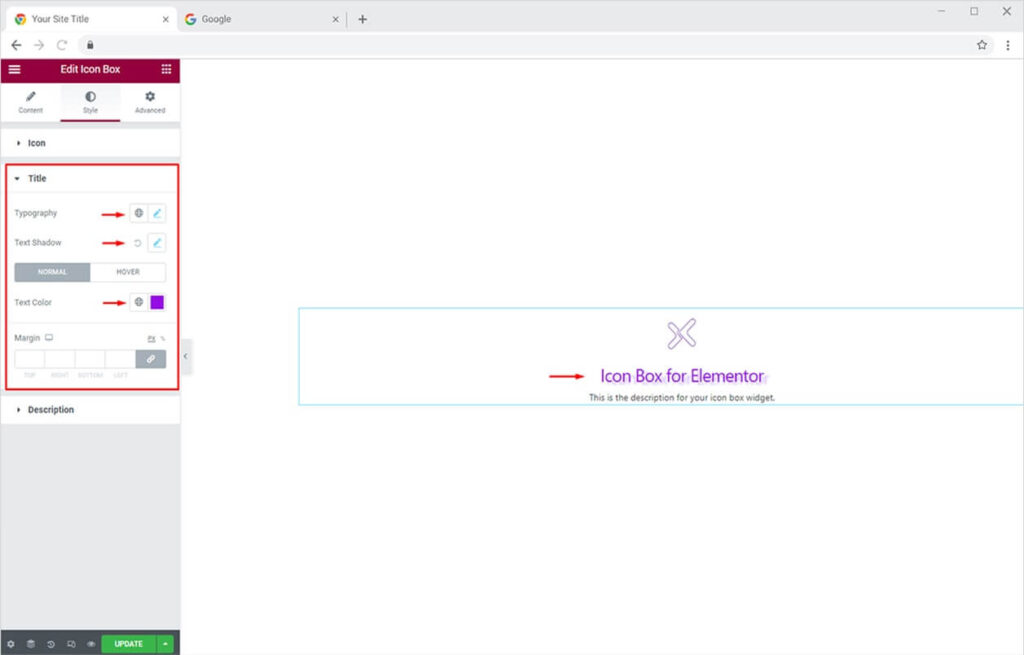
Now you can fully design your Title and Description of the Icon Box from the Style Section. In the Title dropdown, you can change the typography, add shadow, and can change the text color of the title as per your liking.
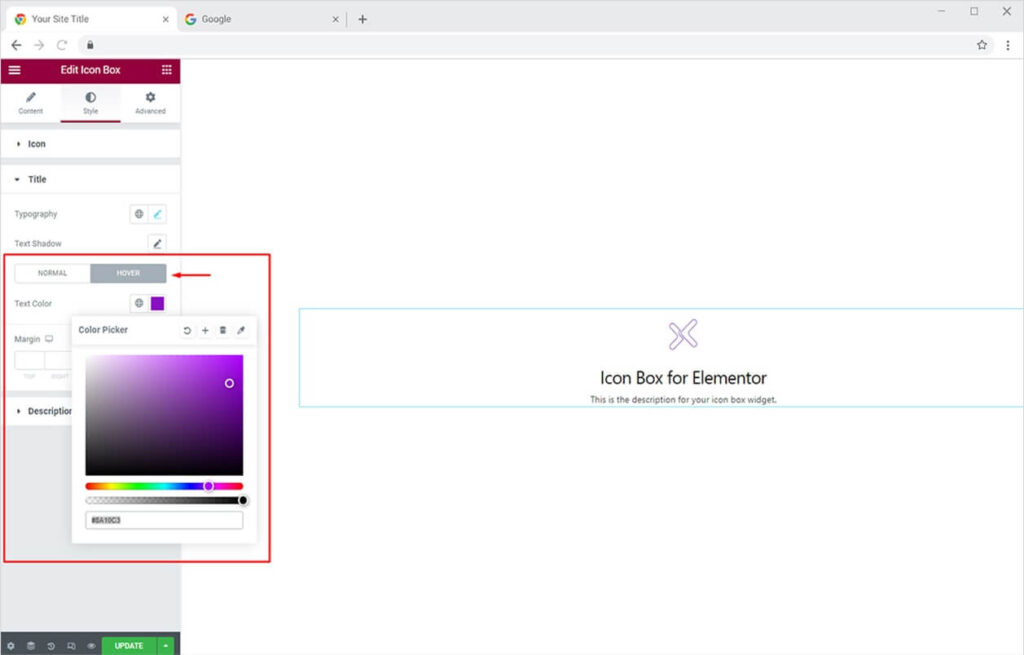
You can also add color to the Title that would reflect every time someone hovers over your icon box.
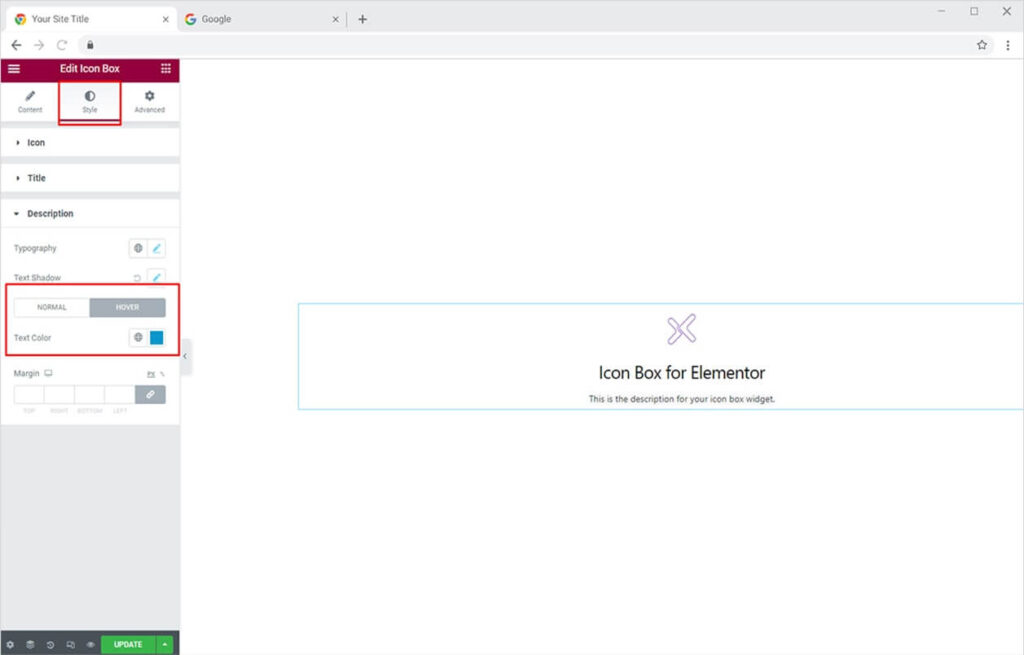
Similarly, you can add a hover color to the description too. Follow the same steps as above after opening the Description dropdown from the Style section.
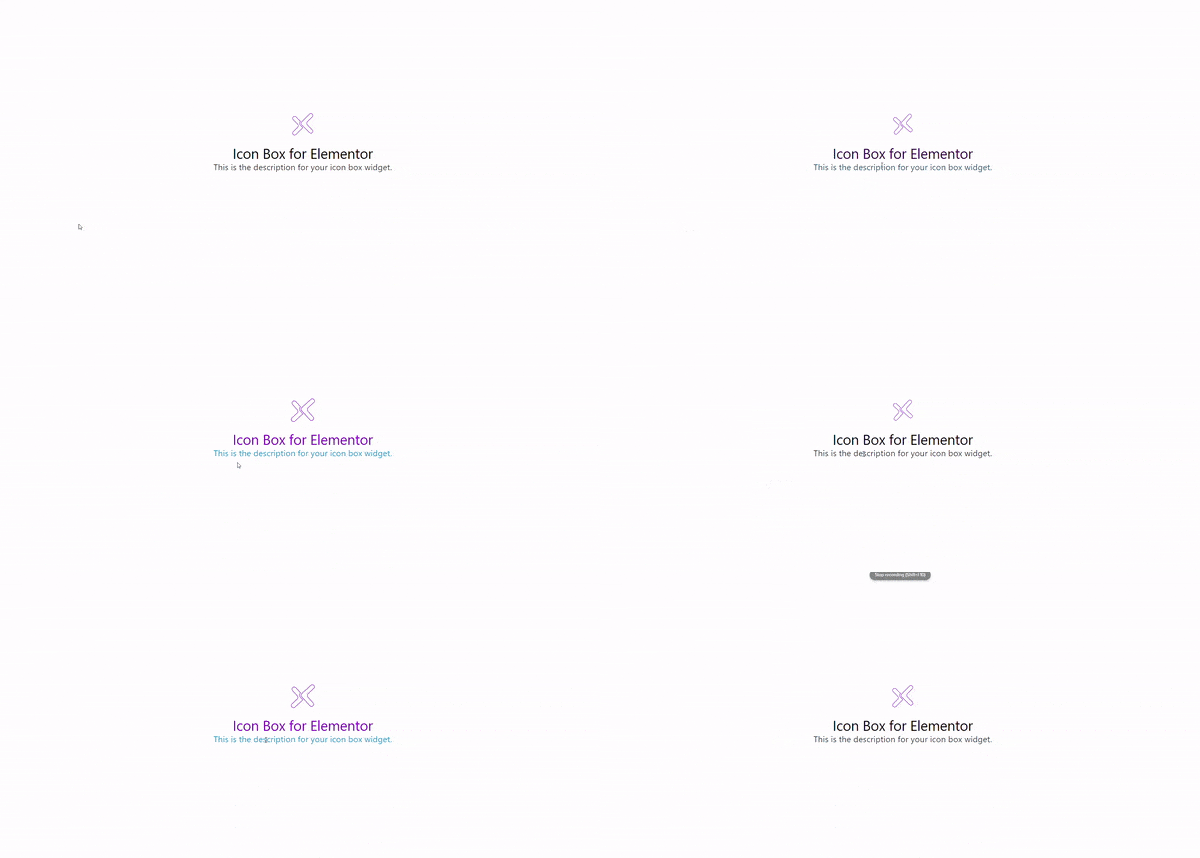
The final result would be something like this:
How to Apply Floating Effect on Your Icon Box Widget
Xpro Elementor Addons lets you add floating effects on almost all widgets. Head over to our detailed guide on how to add Elementor floating effect for your WordPress websites.
That’s it from the Icon Box widget. Head over to Xpro Elementor Advanced Heading Widget and explore more exciting features/effects for the headings of your website.
Xpro Elementor Addons offers an extensive set of widgets, features, and theme pages to assist you in creating an appealing website without the need for technical coding. Xpro provides over 50 free Elementor widgets to assist you in creating a WordPress website. If you want to explore and add more appealing Elementor widgets, view our whole collection of Pro Elementor widgets and download our Pro Elementor addons right now.