How to Install Elementor Business Hours Widget
Xpro Business Hours Widget for Elementor is another amazing FREE widget in our Elementor Addons that allows you to showcase your working hours in the best way possible. The widget offers a gradient background, separator, customize colors, infinite styling for even and add & much more. Xpro’s free business hours widget is the easiest way to add a crisp detailed working hours table on your WordPress site.
Moreover, our Elementor Business Hours Widget offers unlimited customizability options with full control over the styling and hover options to make the most creative and attractive business hours table for your Elementor sites. Xpro Elementor Business Hours is an easy-to-use free widget for creating a functional and attractive business hours table on your WordPress website. Let’s take a closer look at how you can fully utilize this incredible widget.

Requirement
You need to install and activate the free version of Xpro Elementor Addons. If you already have the plugin installed, just make sure the Business Hours Widget is ‘Enabled’ from the Xpro Elementor Addons dashboard. So, you can find it in the Elementor editor.
To enable the widget, simply follow these steps:
Step 1
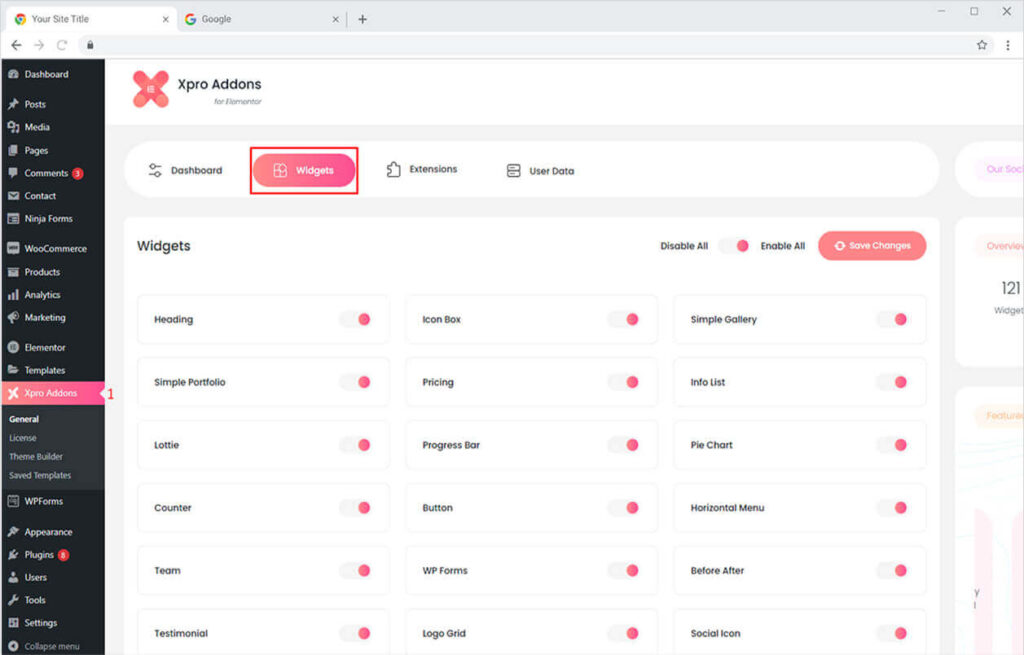
Click on the Xpro Addons option available on the WordPress Dashboard Menu. Now from the menu that appears toggle towards the Widget Tab.
Step 2
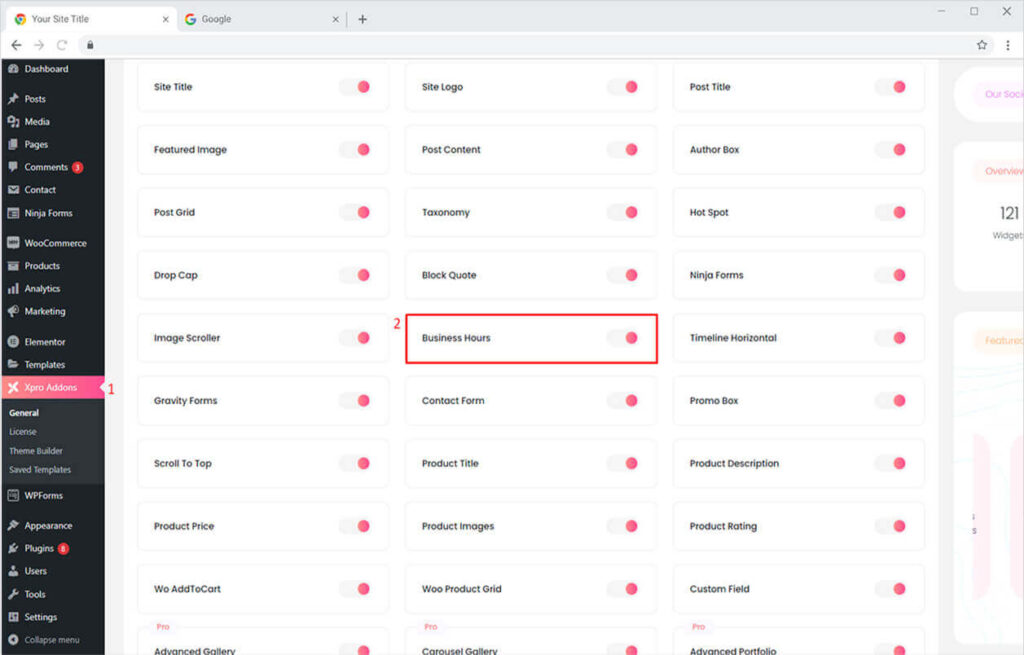
Scroll down the Widgets tab of the Xpro Addons Dashboard, to find the Business Hours Widget, and then toggle the button ‘ON’ to enable it.
How to Use Elementor Business Hours Widget by Xpro
Our Business Hours widget is a handy tool that allows you to creatively add your working hours, days, and appointment timing with custom colors and pleasing hover effects to delight visitors on your Elementor website. You can now easily showcase your social media presence using our Business Hours Widget. This simple-to-use widget allows you to create an impressive business hours table in a matter of time. So let’s get started.
Step 1
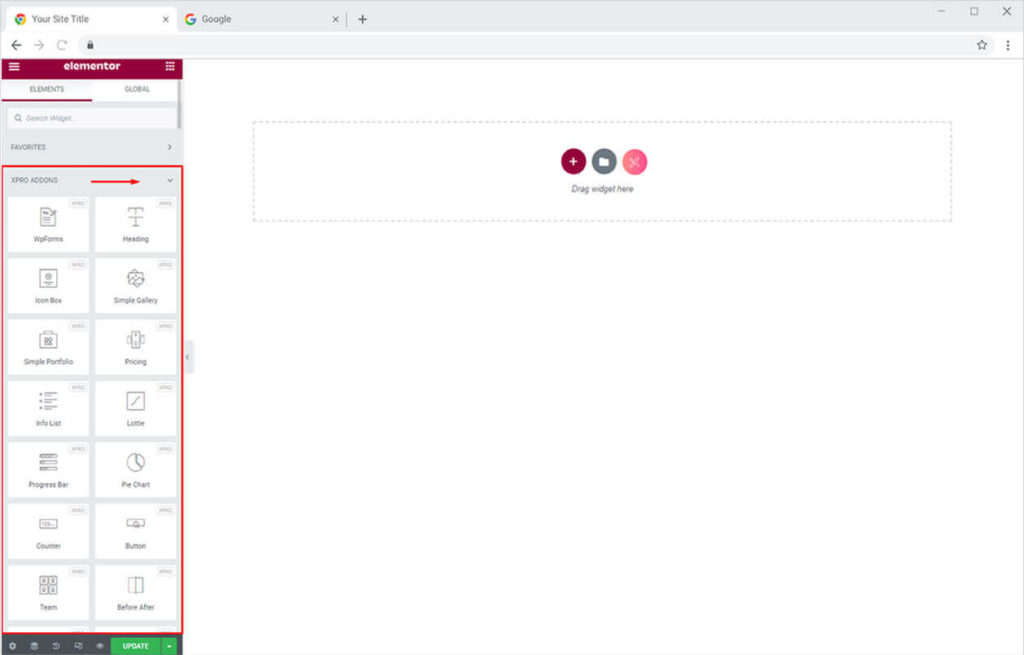
Click on the Xpro Addons section available in the Elementor Editor.
Step 2
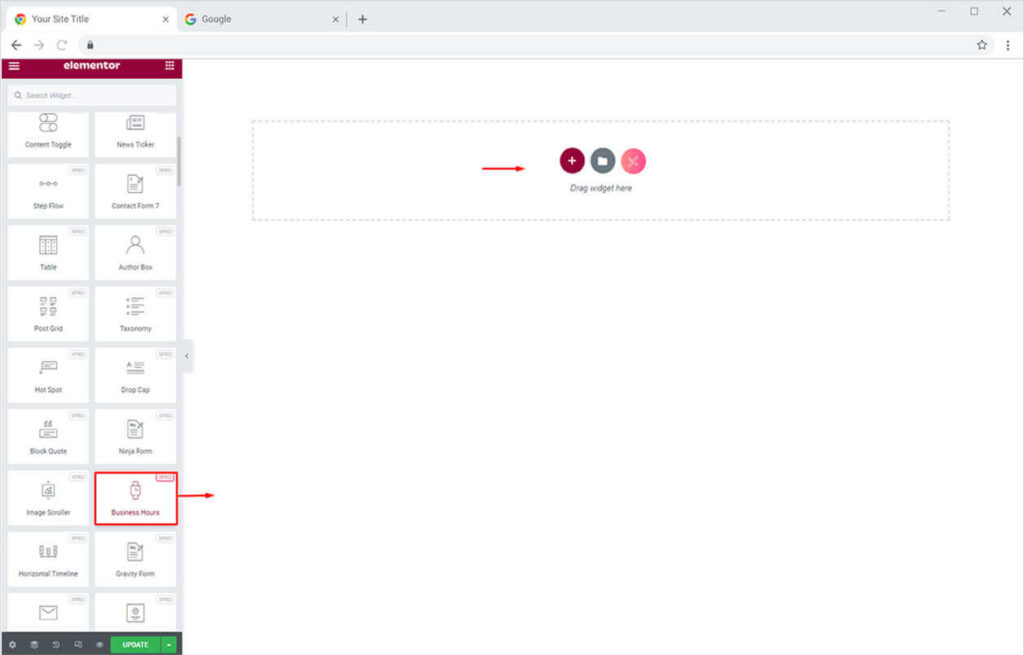
From the Xpro Addons section, find the Business Hours widget, and simply drag’n’drop it on your desired page location.
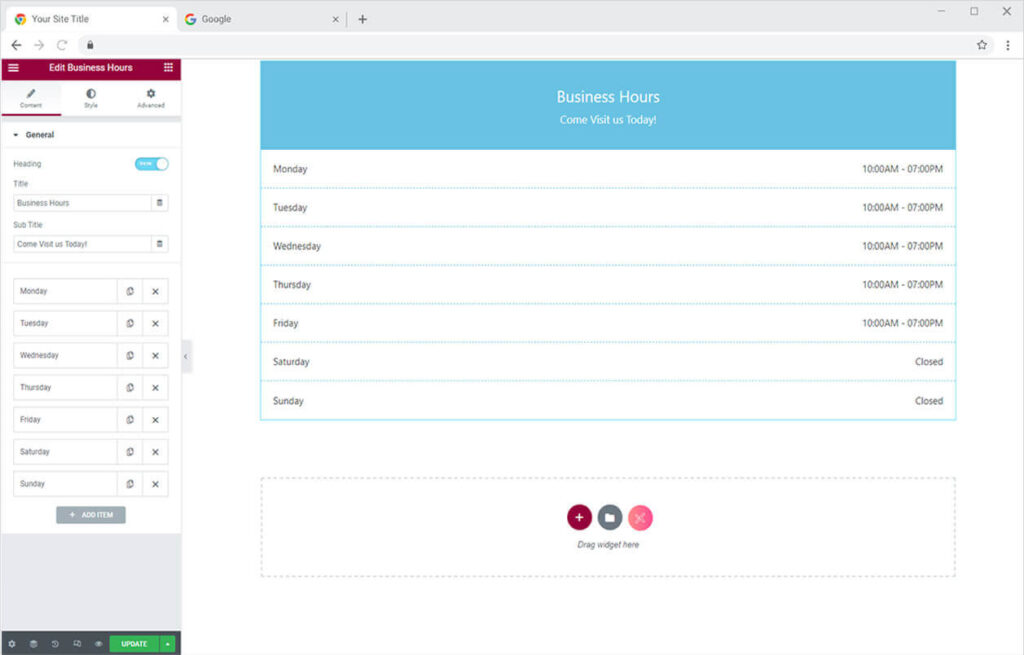
This is the default view of our Xpro Elementor Business Hours widget.
How to Add Heading in Business Hours Widget for Elementor
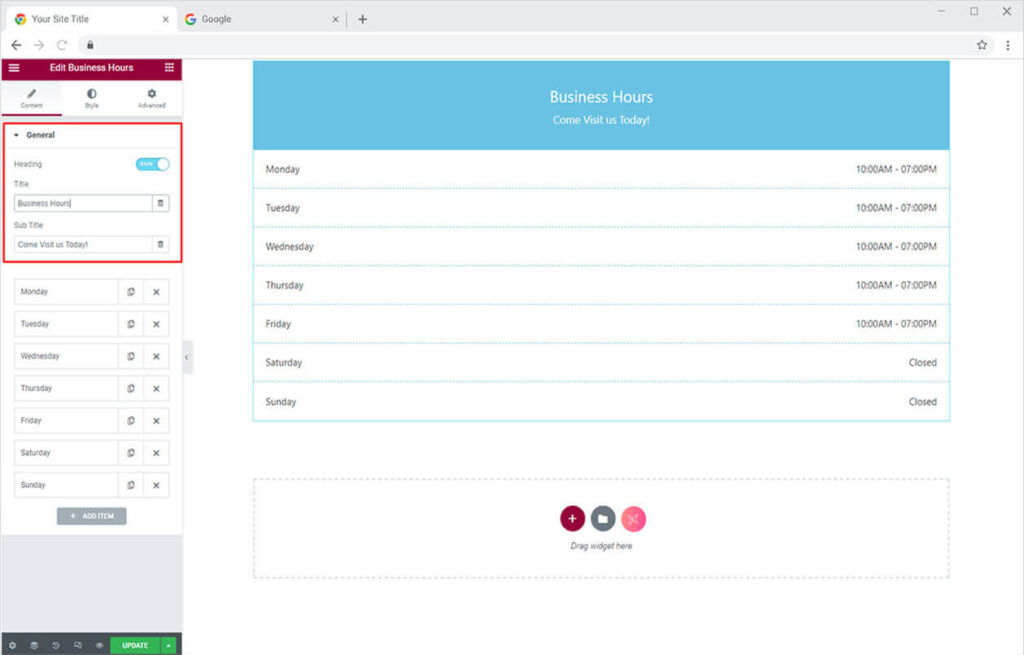
Start from the General Section in the Content Tab. Here you can add the title and a subtitle to your working hour’s table. However, you can also show/hide the heading option as well.
How to Add Business Hours in Elementor Business Hours Widget
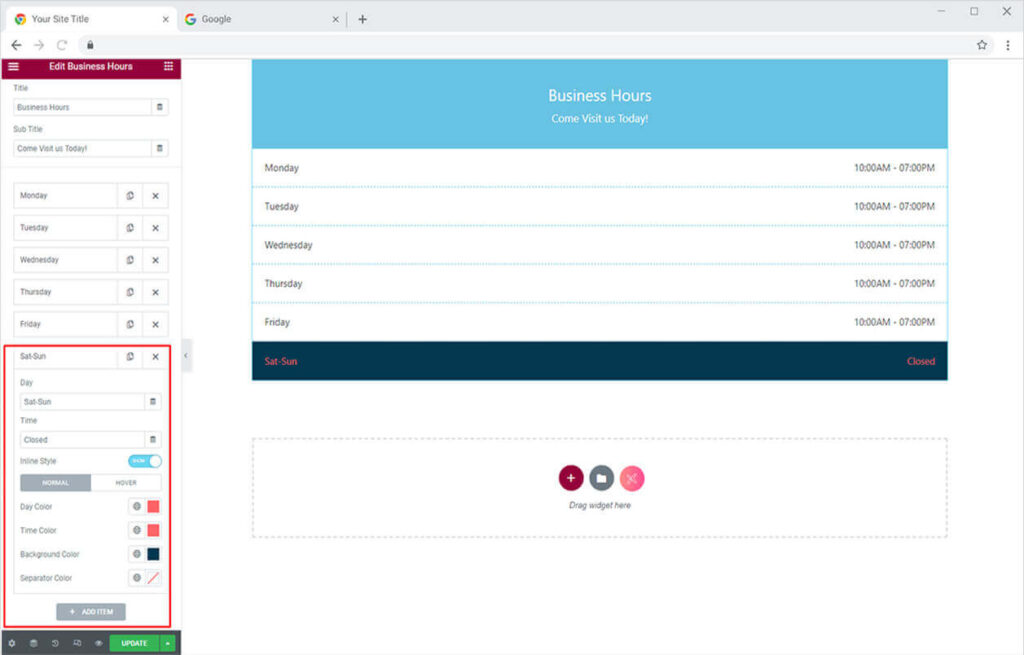
Click on any of the default options and from the drop-down menu that appears. You can give the name of the days and set working hours, days, and appointment timing. Enable the ‘Infinite Style’ option to style the color of the day, time, background, and separator separately for the specific day.
This will allow you to separately style the business hours of every day the way you want. You can also style the color for hover mode from here as well to make it more appealing.
Try our free Elementor Theme Builder to customize the default WooCommerce product and category templates.
By Xpro Elementor Addons
How to Style Heading in Business Hours Widget for Elementor
Once you are done with adding content, now it’s time to style the business hours table to make it look more attractive on the website. Design your Business Hours widget with the following options from the Style tab:
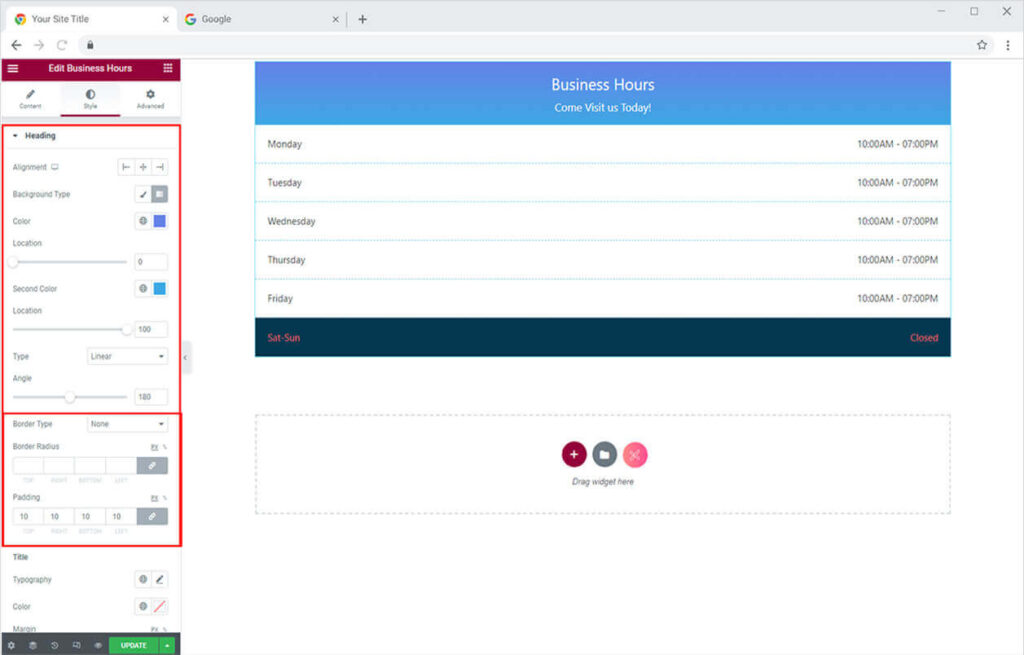
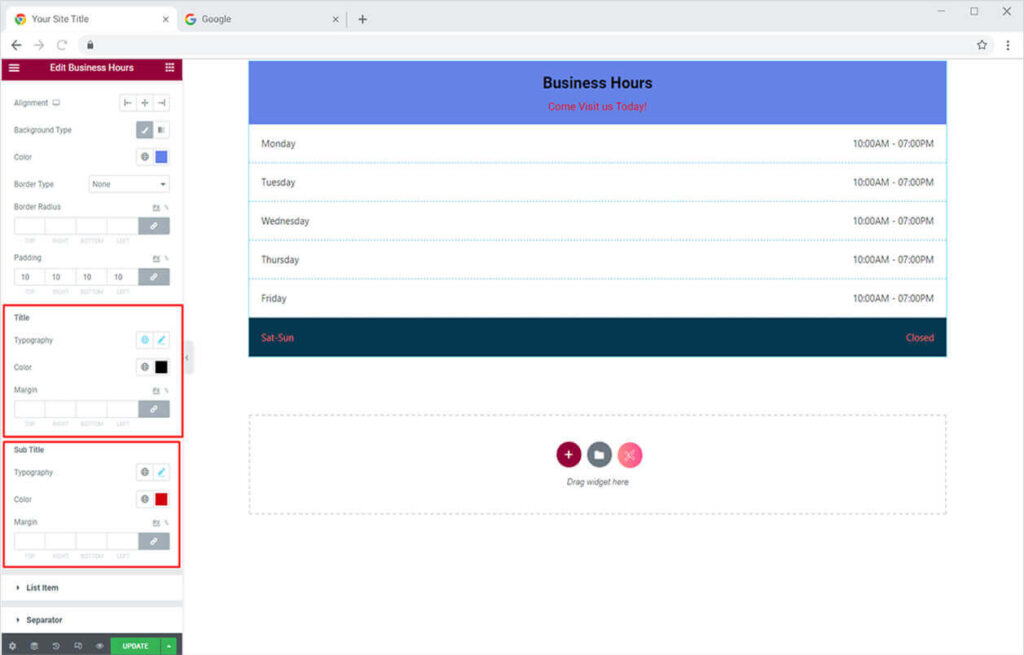
Move towards the Heading section under the Style tab. Here you can adjust the alignment of your heading. You can also add a solid or gradient background to the heading. Moreover, in this section, you can also add a border with a custom color and radius.
How to Style the Title & Sub Title in Business Hours Widget for Elementor
By staying in the Heading section, you can easily change the typography, color, and margins of your selected title and sub-title individually.
How to Style Business Hours in Elementor Business Hours Widget
Head towards the List Item Section under the Style Tab. At first, you can adjust the alignment of the hours and day and then change the typography of the business hours.
After that, you can adjust the color, day, hours, and background separately for the even-odd section. However, in this section, you can also add a border to your business hours table.
Note: If you want to style every section individually, head back towards the Content Tab and click any of the added options and turn on the “Infinite Style” option and style them the way you want.

How to Add & Style Separator in Elementor Business Hours Widget
Simply head towards the Separator Section under the style tab. Here you can add a vertical and horizontal separator and adjust its size. You can also style this separator separately for the even and odd section.
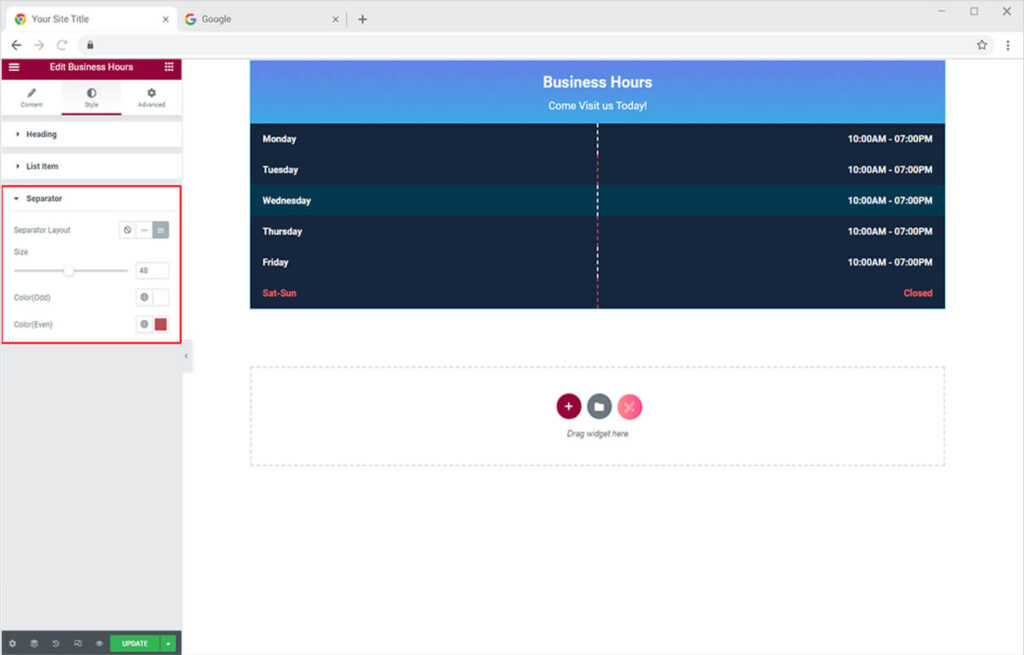
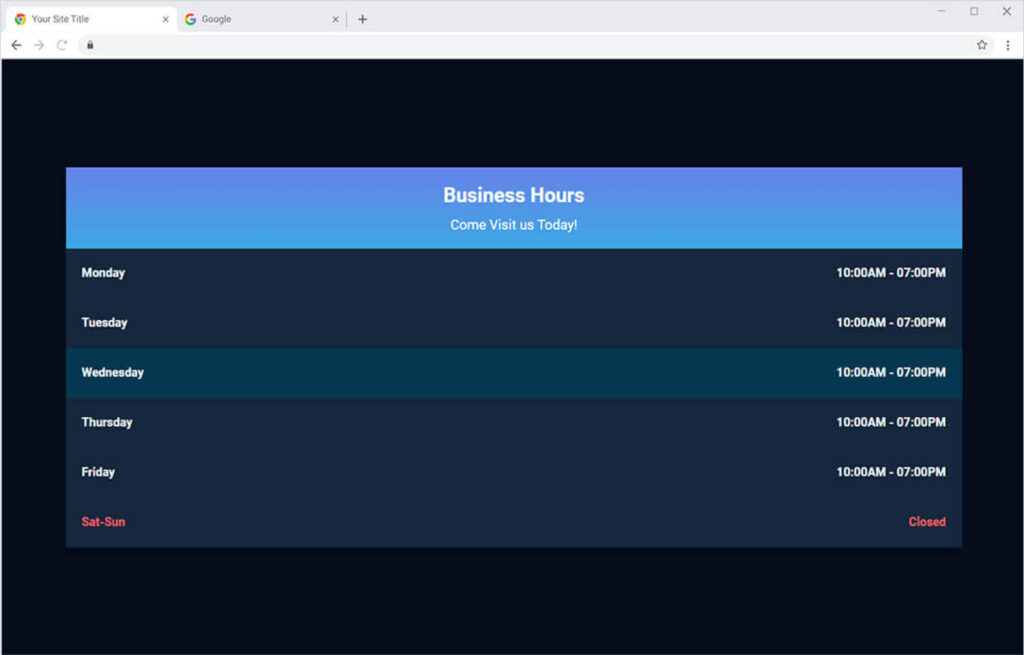
Your business hours table will look something like this on the website after you add a nice background to it from the layout option of the column.
Best Business Hours Widget for Elementor
That is all from our Business Hours Widget for Elementor. We hope now you have a better understanding of how to fully utilize our easy-to-use Business Hours widget to decently present your working hours, days, and appointment timings on your website. This widget is best for distinguishing between your working hours and holidays. If you want to explore and add more attractive Elementor widgets then check our complete list of free Elementor widgets and download our free Elementor addons now.
However, if you are looking to add the most trending gallery to your site. Head over to the Xpro Elementor Advanced Gallery widget to add a supreme gallery to your WordPress websites.