Woo Add to Cart Widget
Woo Add to Cart widget is what website users need to purchase your product. The Elementor WooCommerce widget by Xpro comes with Add to Cart button that allows the users to include product into their virtual shopping cart with a single click. After selecting a product to purchase, it is the first step of the customer buying process in the online store. A buyer initiates his purchase by clicking on the button provided by the widget. After adding the product to the cart, a customer will move forward to the payment process. However, the functionality of this widget is not limited to this.
Add to Cart widget by Xpro WooCommerce allows you to display product variations, swatches, and stock along with the add to cart button. Further, you can customize the widget layout to your liking. Xpro Elementor understands the importance of an e-commerce website and provides all the widgets needed to create an appealing business website. In order to use the Xpro WooCommerce widgets you must have installed the WooCommerce plugin in your WordPress.
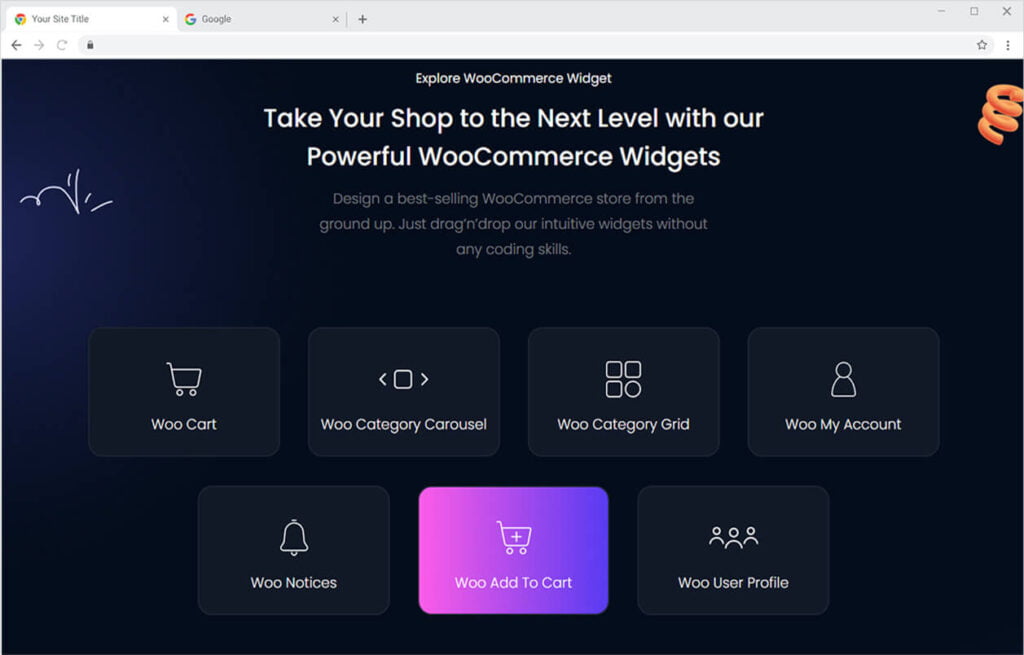
How to Install Xpro Woo Add to Cart widget for Elementor
Requirement
You need to download and activate the WooCommerce plugin. Also, you need to install and activate the Free version of Xpro Elementor Addons. If you already have the plugin installed, just make sure the Woo Add to Cart Widget is ‘Enabled’ from the Xpro Dashboard so that you can find the widget in the Elementor editor.
To enable the widget, simply follow these steps:
Step 1
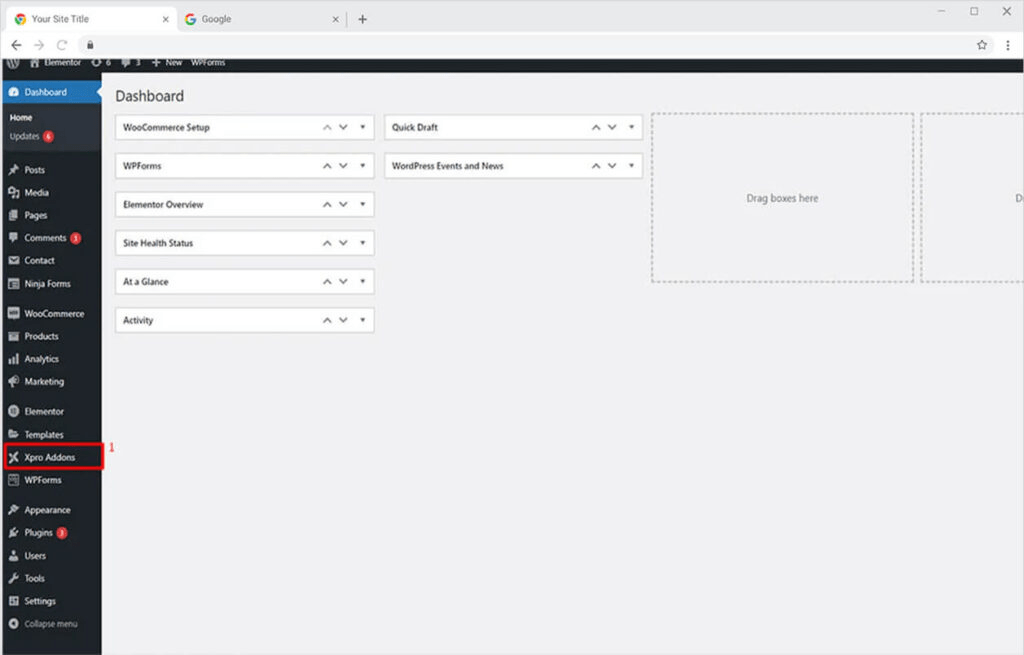
Click on the Xpro Addons option available on the WordPress Dashboard Menu.
Step 2
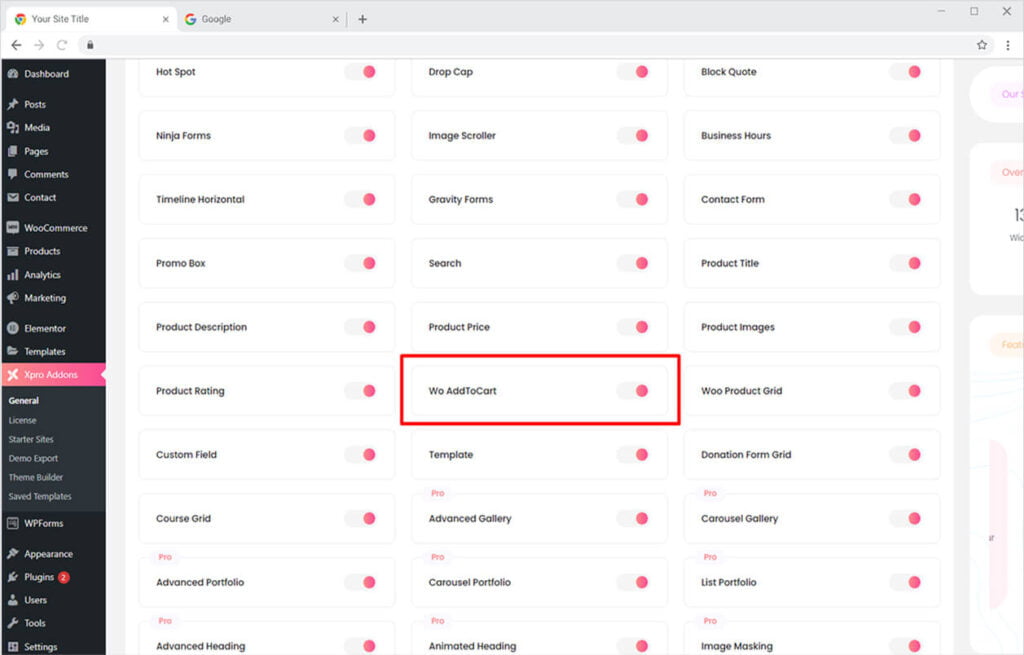
From the Xpro Addons Dashboard, click the Widgets Tab, find the Woo Add to Cart widget, and finally, toggle the ON button to enable it.
How To Use Xpro Add to Cart widget for Elementor
Elementor Woo Add to Cart widget is an important addon for your product webpage layout. It helps you display the variation of a single product available. You can add color, size, etc to the product variation. You can also include stock information to assist consumers and yourself in understanding the availability of products remaining in your inventory. You need to have the WooCommerce plugin installed to add all this information to their dashboard.
A quantity input button is provided in the widget from where customers can select the number of products they want to purchase. And of course, the Add to Cart button will be displayed in the widget which will move the customers to the next process.
Step 1
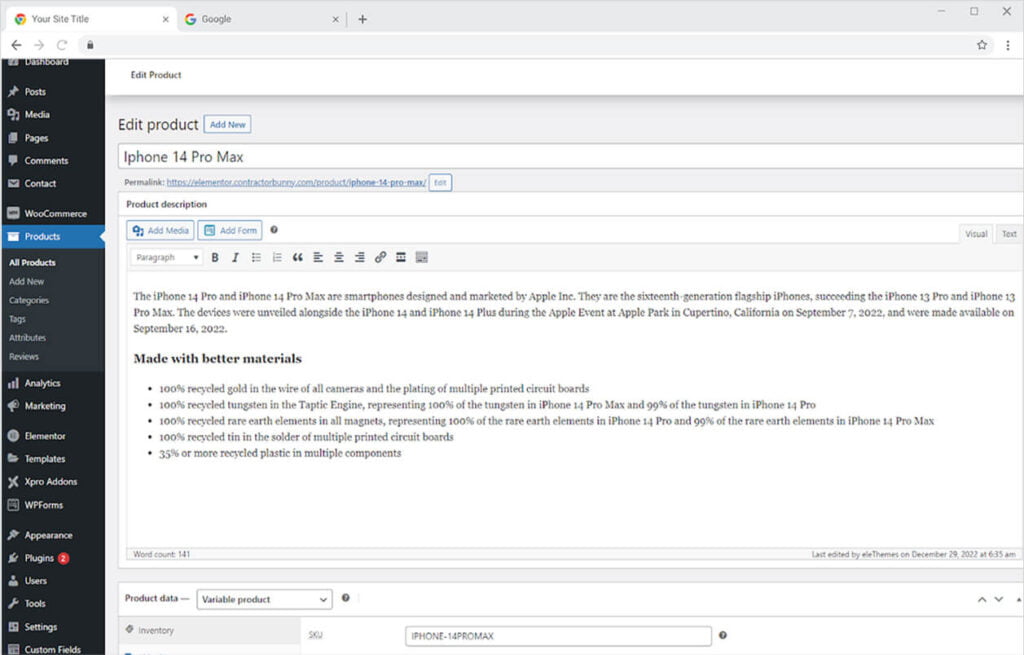
Create a product in the WooCommerce Product tab and add product attributes, variation, and stock.
Step 2
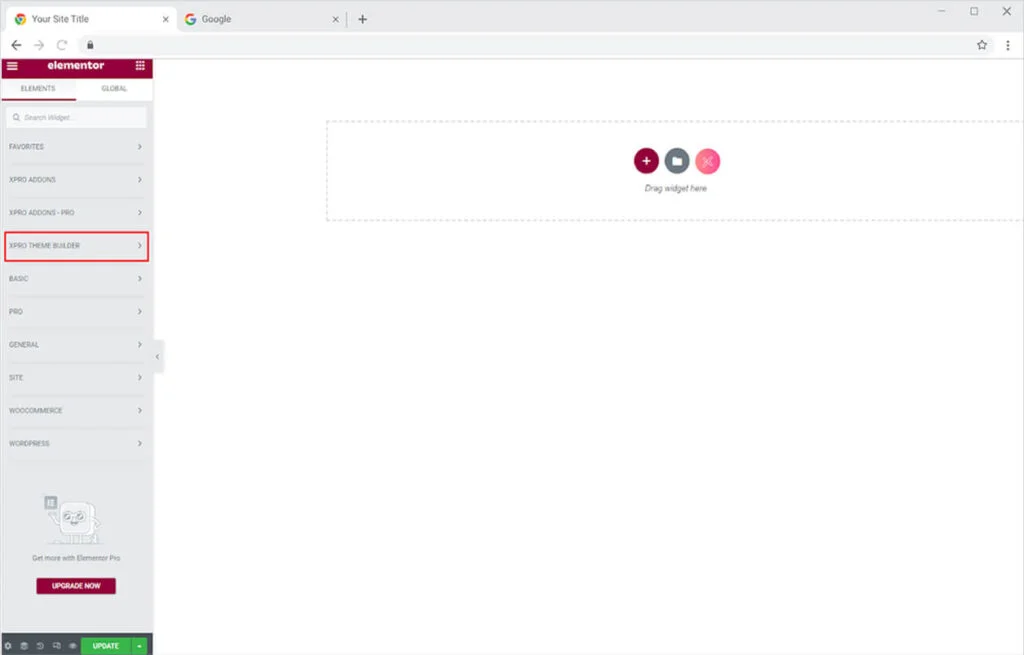
Open the Elementor Editor and click on the Xpro Theme Builder section.
Step 3
From the Xpro Theme Builder section, simply drag’n’drop the Woo Add to Cart widget on your desired page location.
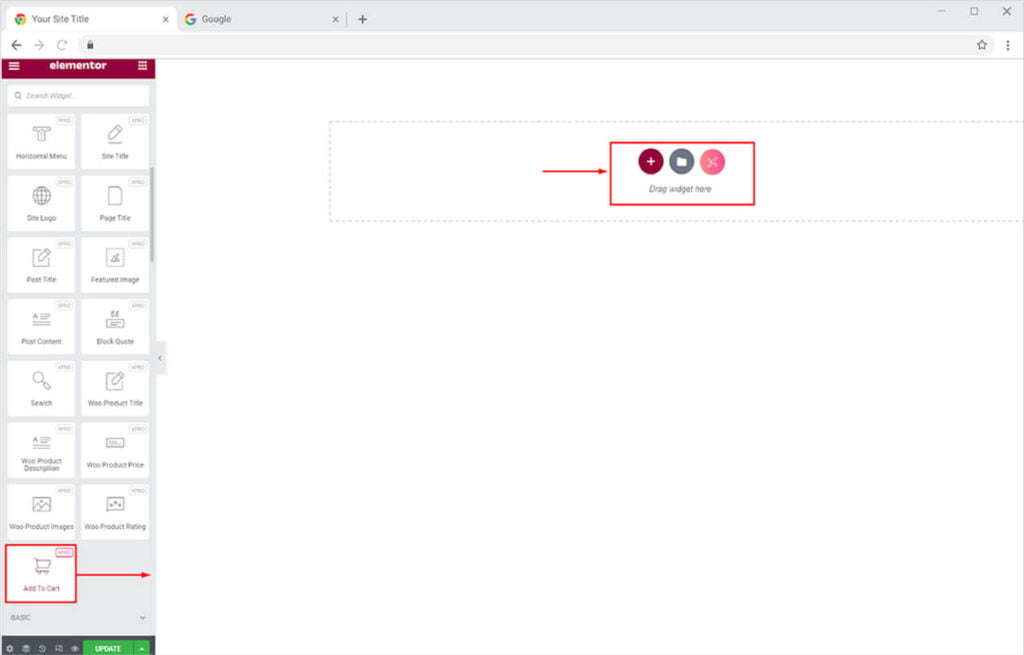
This is the default view of the product when you drop it into the Elementor page. Remember, the widget display will only show a dummy text on the Elementor page. To view the result, click on the preview.
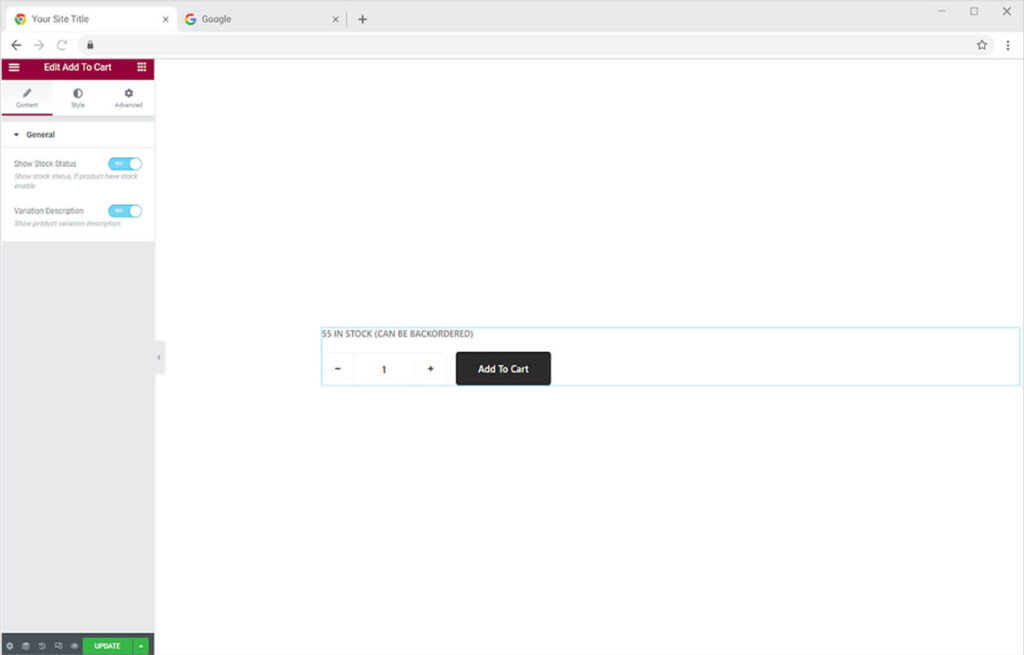
Content Section
From the Content Section, you have the option to allow the widget to display product variation and stock status. Toggle on and enable the option that you want to display in the product layout.

How To Style Woo Add to Cart Widget
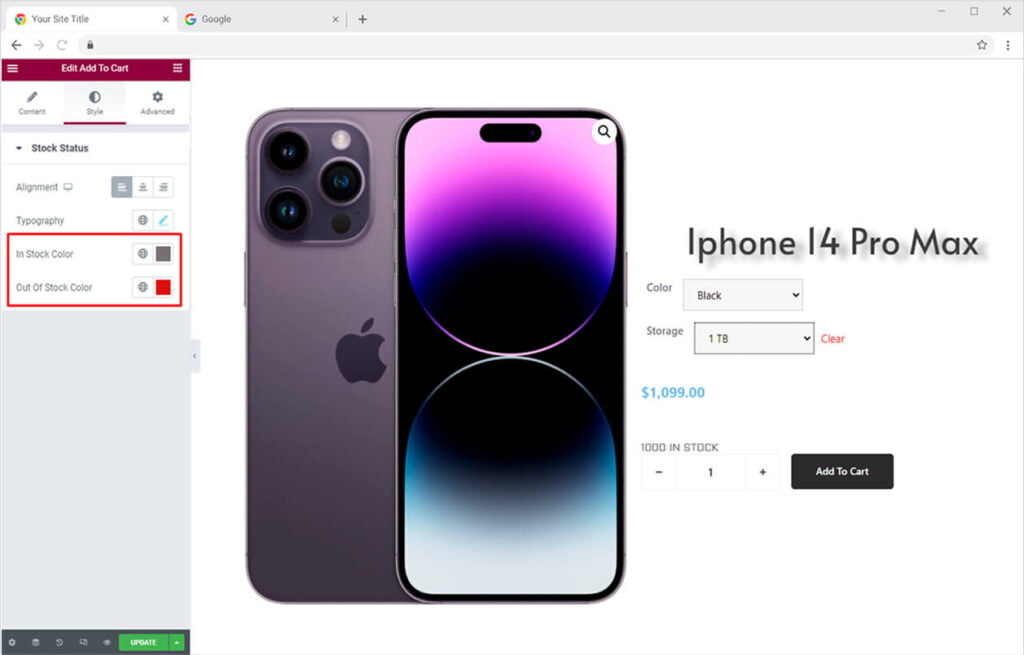
In the Style Section, the first menu for Stock Status allows you to style stock information. You can select the alignment of stocks to left, right, or center. Style the text with a typography box from where you can change the font, size, word spacing, and much more.

Choose the color for the text when the product is in stock and out of stock.
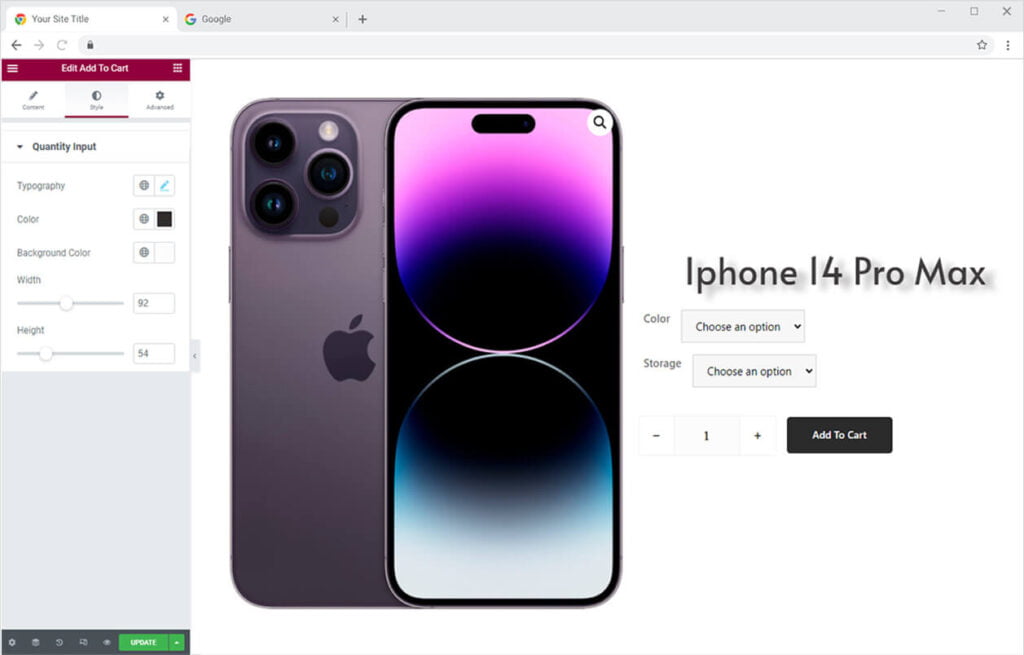
The next section for quantity input allows you to customize the layout of the quantity box. Here you can style the typography, add text and background color, and adjust the size with height and width options.
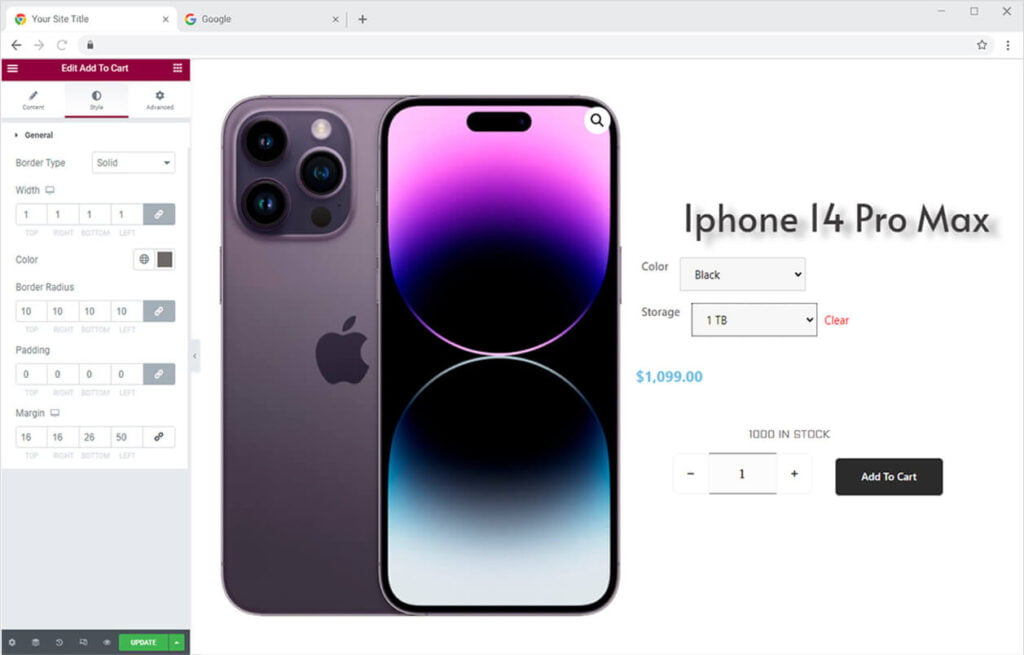
Furthermore, you can add a border by choosing a border type. The choices you have for the border are solid, double, dashed, dotted, and grove. You can change the border color, width, and radius. Moreover, adjust the space with the margin and padding option.
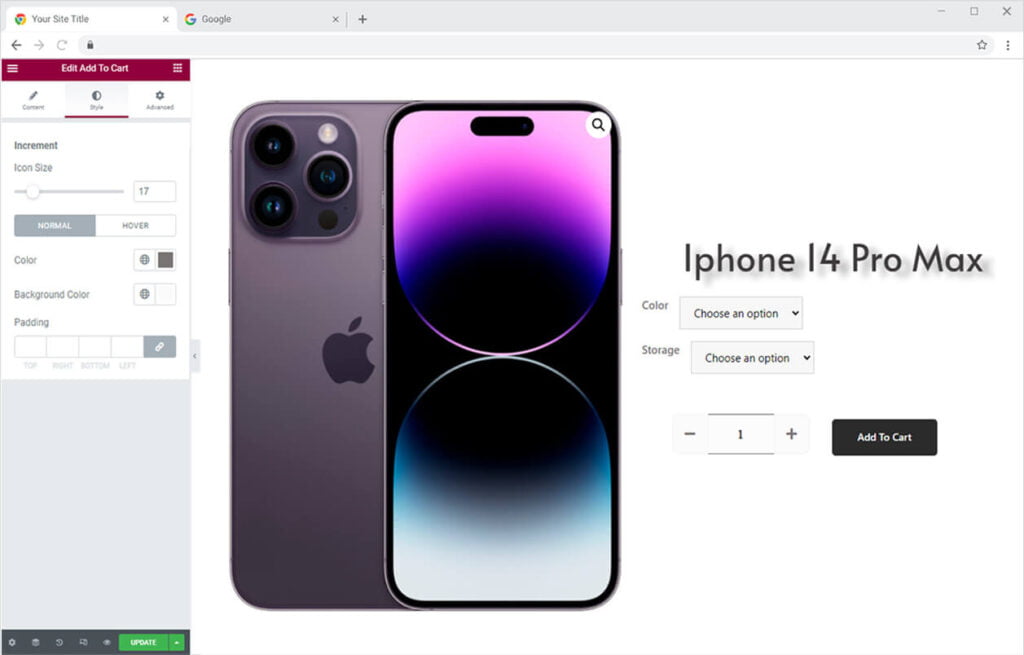
For increment – plus and minus icons – you can style it from its given section. Adjust the size of the icon and include color for text and background for their normal and hover state.
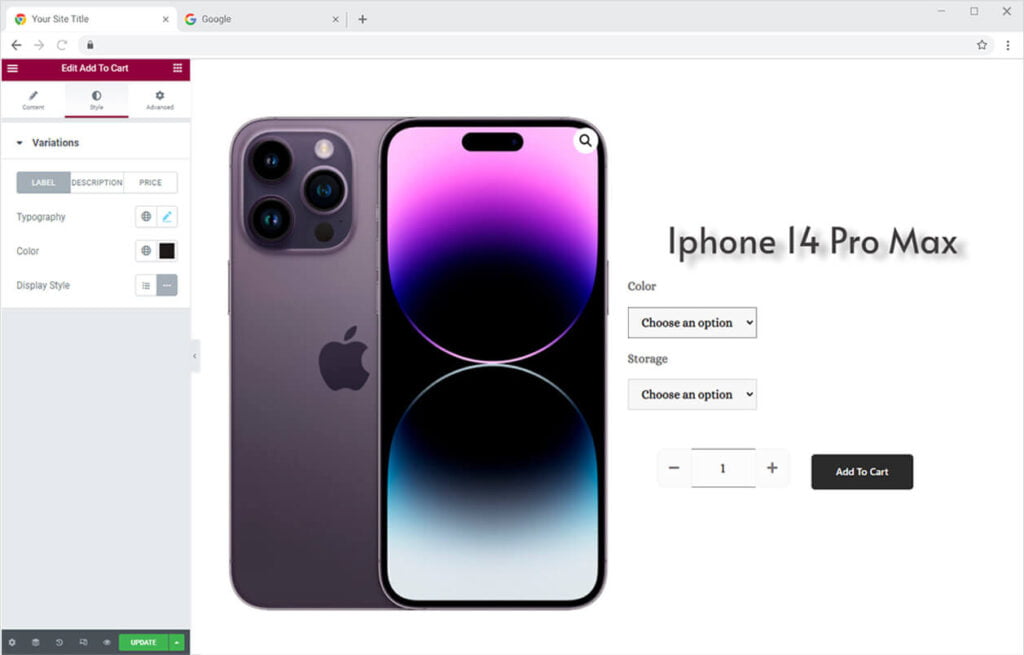
The next menu for variation allows you to customize the product variation display. Personalize the label, description, and price separately. For the label, you can style its typography, color, and display style to inline or block.
For description, you can customize the typography, color, and margin.
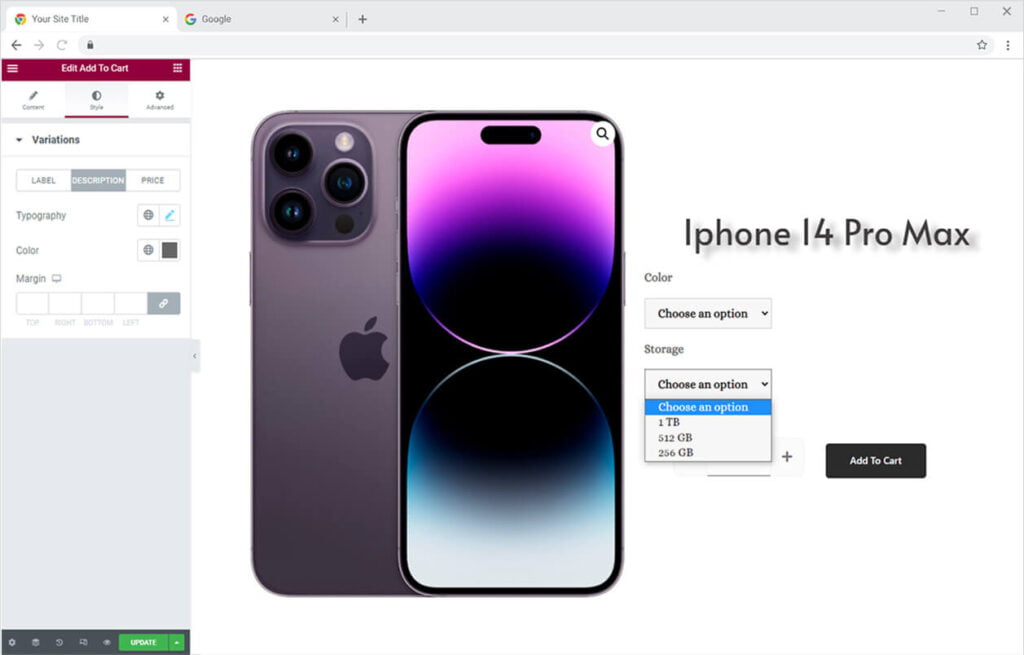
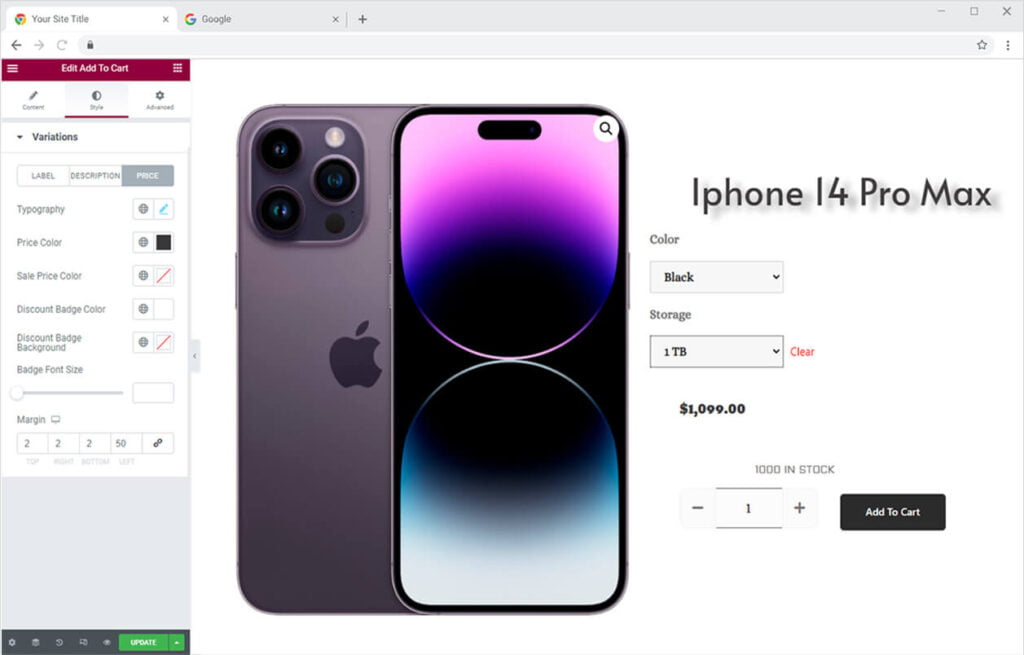
For the price in the variation, you can customize its typography and color. If you offering any discount then you have the option to add the color for the sale price, discount badge, and badge background. Furthermore, you can change the size of the badge.
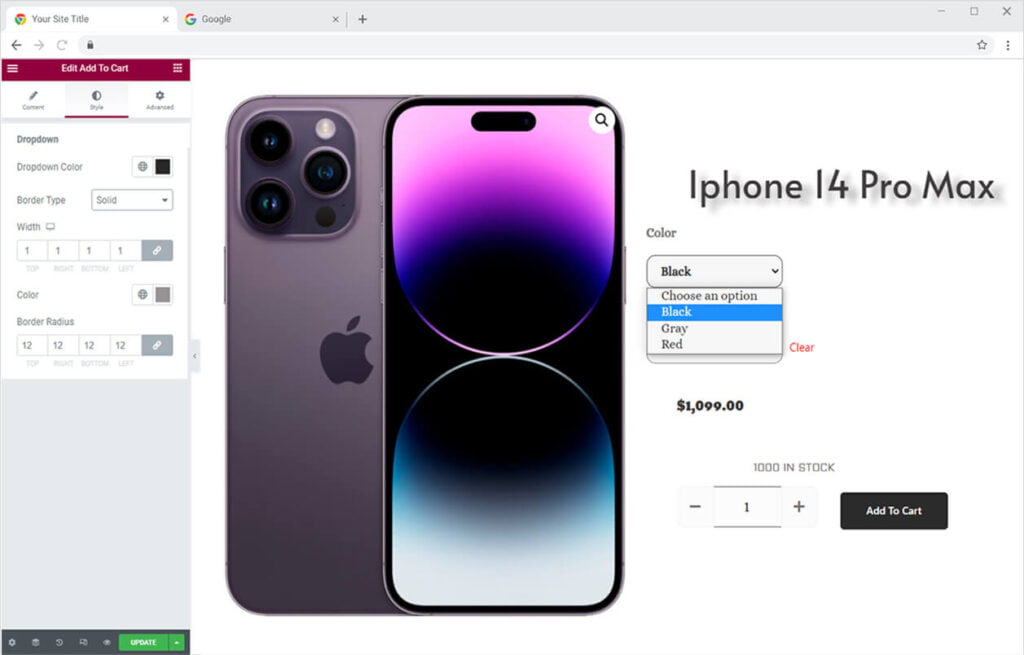
Personalize the drop-down menu by coloring the text and making a border around it. Further adjust border width, radius, and color.
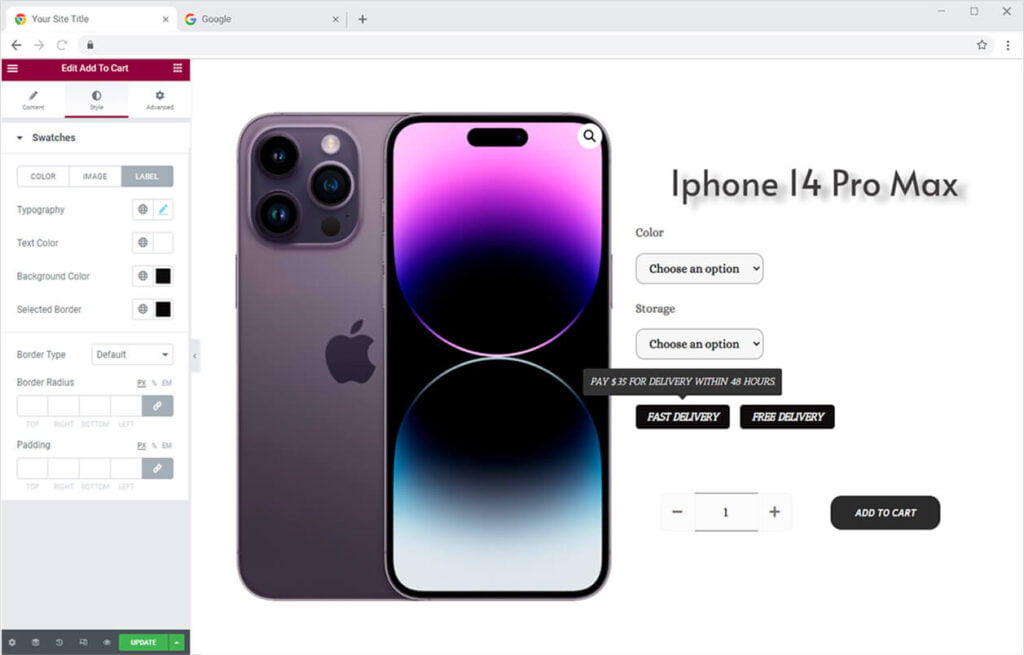
If you have included any swatches then you can customize them as well. For color, image, and label swatches you have separate tabs to edit them.
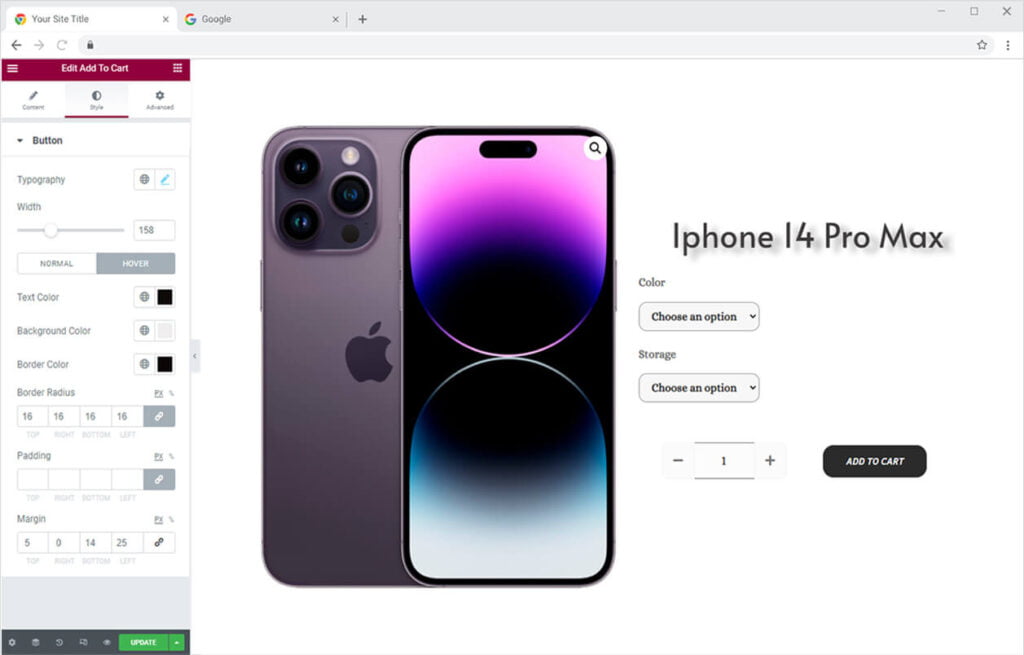
At last, we have the button menu from where you can customize the button layout. Style the typography and width of the button. Color the text and background for normal and hover displays. Make a border and adjust the radius, padding, and margin.
Best Woo Add to Cart Widget for Elementor
We hope you fully understand the functionality and complexity of this Xpro widget. Utilize this WooCommerce widget to create an appealing product layout. Moreover, if you want to add more amazing and trending features to your websites. See the list of the best Pro Elementor Widgets.
Xpro Elementor Addons offer a wide range of widgets, Elementor theme templates, and features that help you develop an attractive site. Check our 50+ free Elementor widgets which are enough to create a professional WordPress website. If you want to explore and add more attractive Elementor widgets then check our complete list of Pro Elementor widgets and download our Pro Elementor addons right now.