Introduction
Xpro Elementor Theme Builder lets you customize every layout of your WordPress theme. It is fully integrated and works seamlessly with popular themes like Hello, Xpro, GeneratePress, and Astra. You can create custom layouts for your blog archives, post types, WooCommerce products & categories, search page, 404 pages, and much more using the front-end or backend editor. You can personalize your WooCommerce store experience by changing the default layout and tweaking it as you please. The free Elementor theme builder offers a massive library of pre-built Page Templates, Headers, Footers, and Blocks which you can easily import and get your site live in no time.
There’s more to what you can customize with our powerful Free Elementor Theme Builder, You can fully customize header, footer, singular (404, single post, single page, single product, cart, checkout, account), archive (blog post, categories, tag archive, author archive), and much more. There’s no limit to what you can customize, it’s all up to your imagination. Let’s design what you love by exploring our easy-to-use guides for Xpro Elementor Theme Builder.
Understand the Layout of Xpro Elementor Theme Builder
Using Xpro Elementor Theme Builder, you can design & customize each theme part from both front-end and back-end dashboards. Our best Elementor theme builder allows you to create custom templates from the backend. Or you can simply toggle the plugin on from the Xpro Addons dashboard and customize templates from the front-end. You can:
- Build a new or customize pre-built header and footer
- Edit theme parts like archive pages (blog post, categories, tag archive, author archive)
- Customize a theme’s single post or single page templates (single post, single page, single product, cart, checkout, account)
- Design a theme’s search page format and layout
- Customize a theme’s 404 page format and layout
- Get complete control over WooCommerce store layout
- Design WooCommerce product pages
- Manage display conditions and user roles
Now let’s first understand the basic layout of Xpro Elementor Theme Builder from the front & backend both and what features it has to offer. First, you need to install and activate the plugin, only then you will be able to edit each theme part from the front end.
Remember, you also need the free version of Xpro Elementor Addons to use our theme builder plugin. After activating the plugin, you’ll be able to see the Xpro Addons section on the sidebar of your WordPress Dashboard. Let’s see how you can use our free Elementor theme builder from both ends:
- Backend Layout of Theme Builder
- Front-end Layout of Theme Builder
Back-end Layout of Xpro Elementor Theme Builder
Our free Elementor theme builder offers you the flexibility to customize theme parts using the backend dashboard too. The backend editor has an easy and simple to use interface to assist you in quickly customizing header, footer, singular, and archive layouts for your WordPress website. Let’s see how you can use Xpro Elementor Theme Builder from the backend.
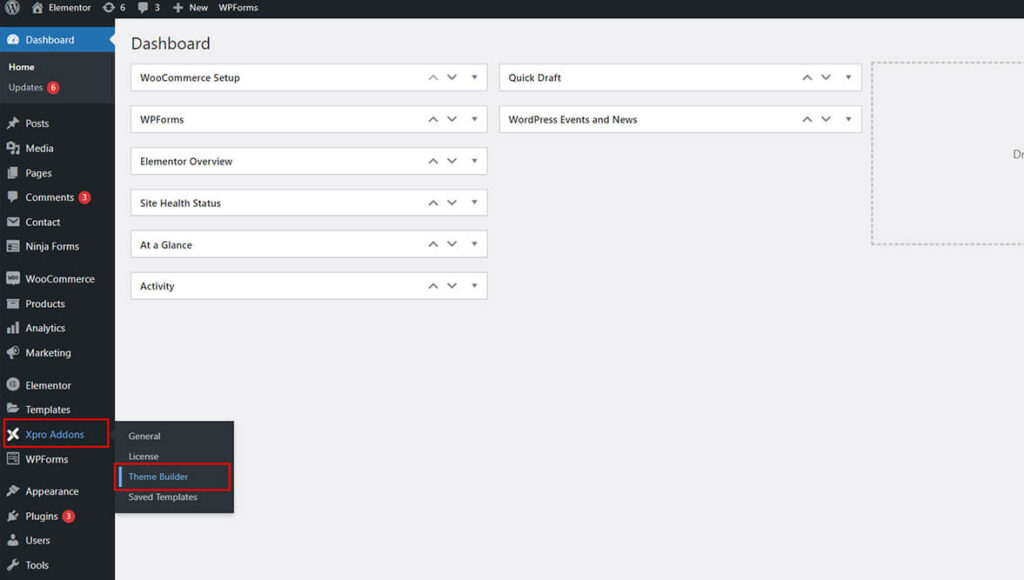
You need to install and activate the Xpro Elementor theme builder from WordPress. Once activated, click on the ‘Theme Builder’ option from the dropdown menu of the Xpro Addons.
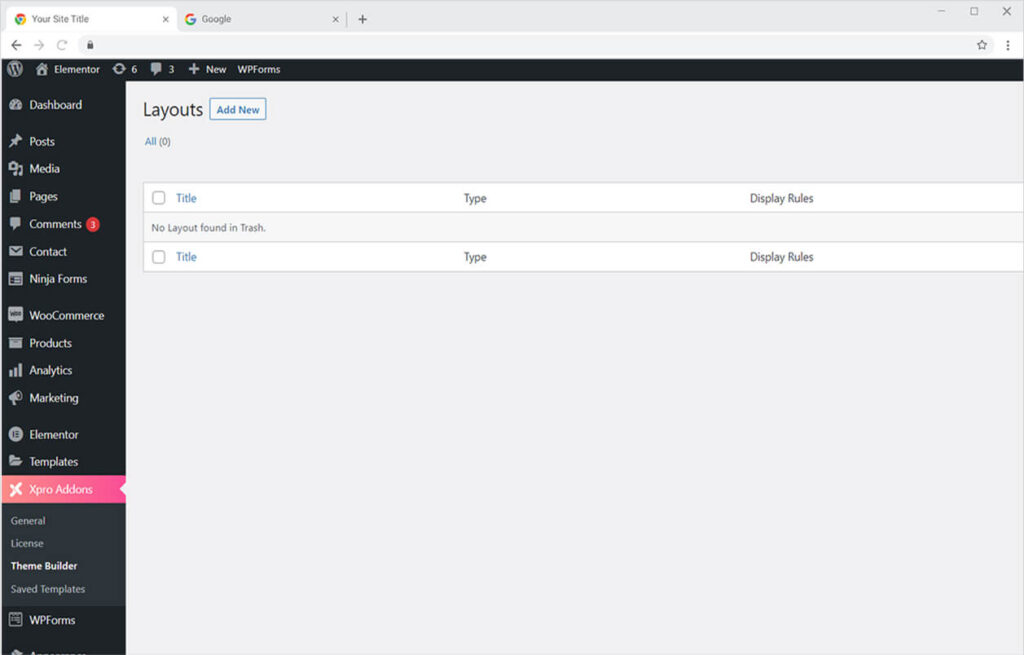
This is the default backend layout of Xpro Elementor Theme Builder. You will see all layouts here.
Click on the ‘Add New’ button to create a new layout. Simply enter the name of the new layout from the ‘Add Title’ option and choose the type of template from the ‘Xpro Theme Builder Option’.
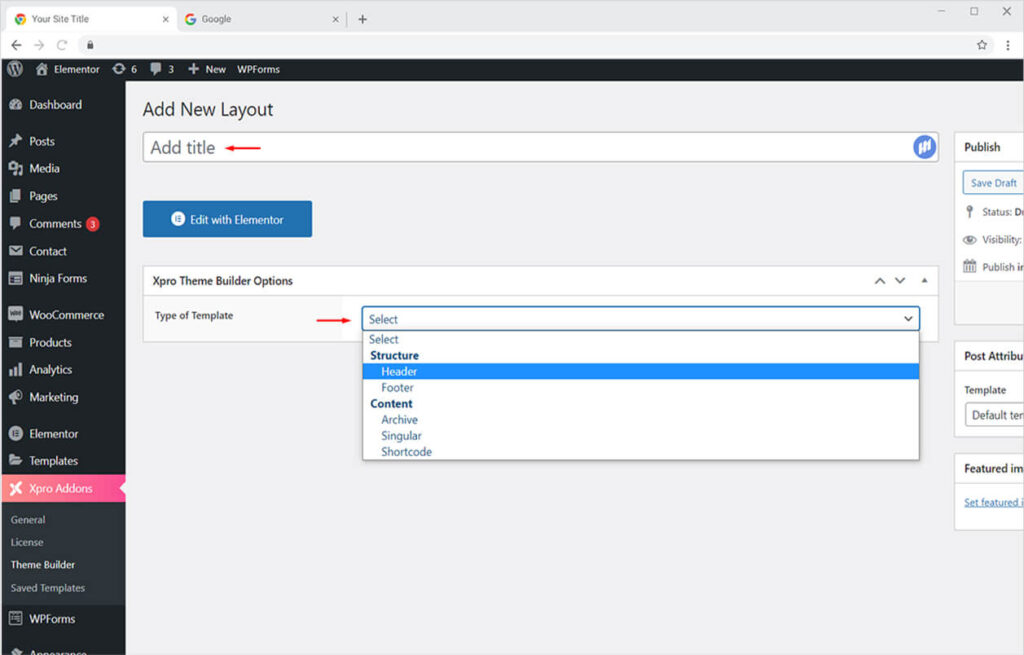
For demo purposes let’s click on the ‘Header template’ to see the available options. You get multiple options to customize your header template using the free Xpro Elementor Theme Builder.
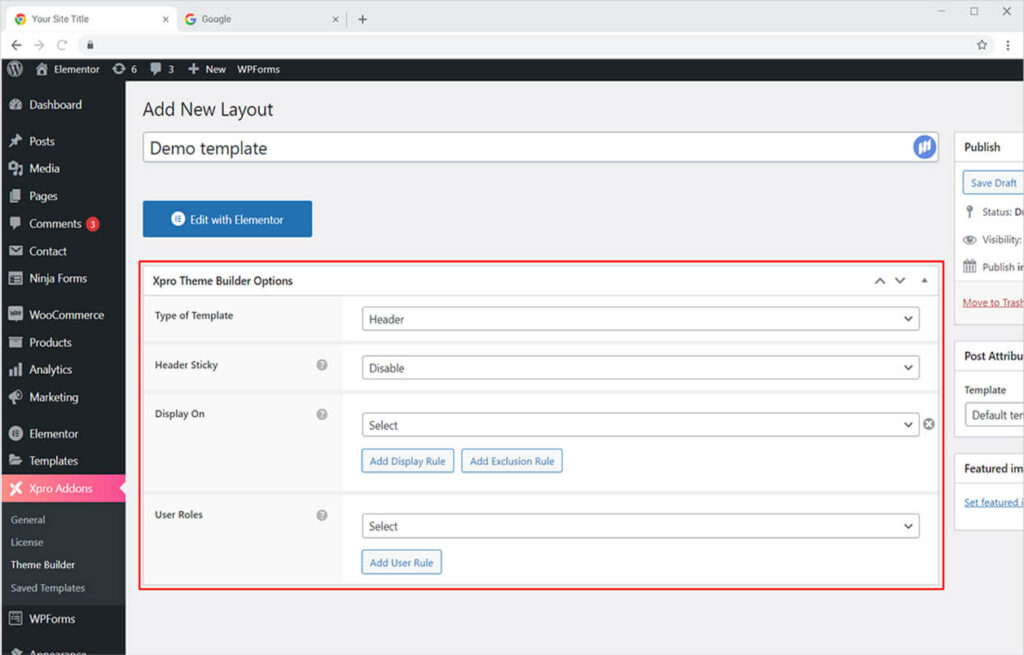
The options are:
- Header Sticky – To create a sticky header
- Display On – Selection locations on which this template should appear
- User Roles – customize who should see this template
Once you have finalized your setting, click on the ‘Edit with Elementor’ button to edit your template.
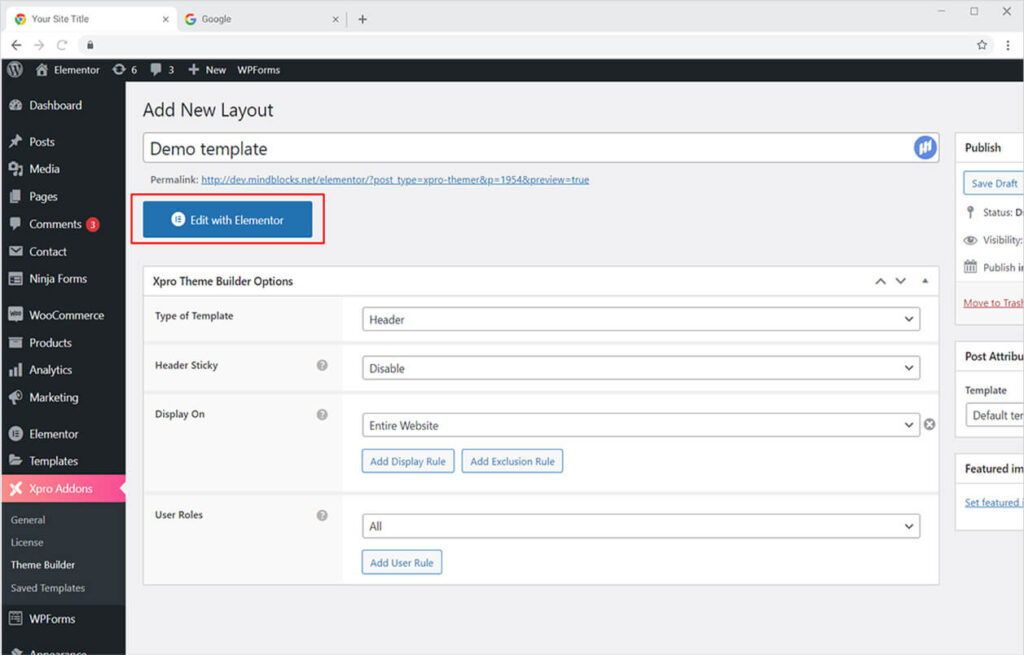
You will be redirected to the Elementor editor from where you can easily create a new header template using Free Xpro Elememtor Widgets.
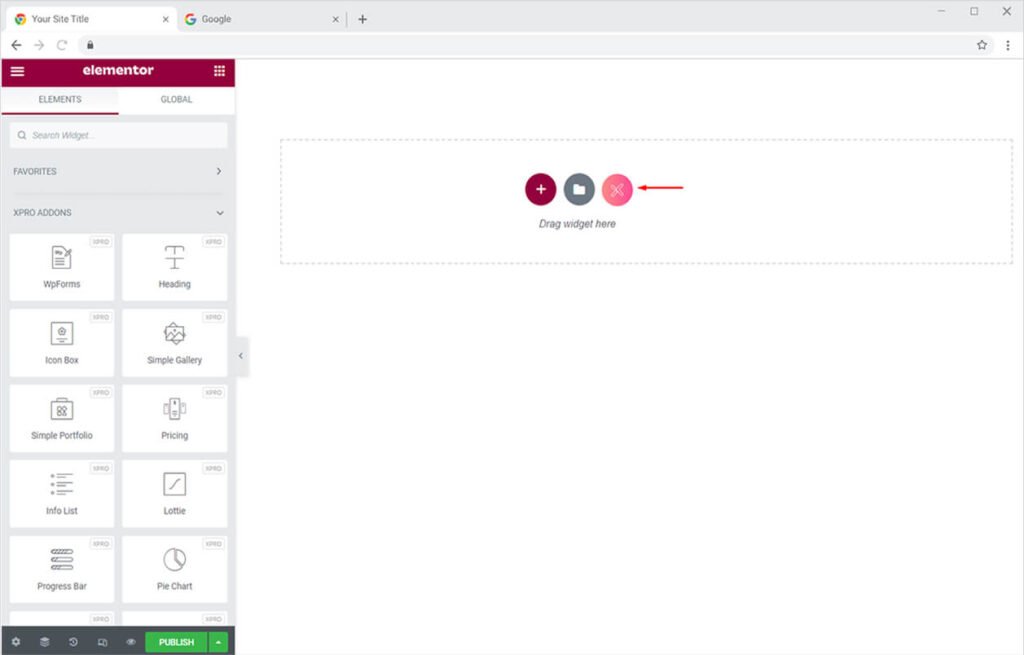
You can also choose any of our pre-built header layouts from the Xpro library by clicking the Xpro icon from the Elementor editor. Once clicked, you will see multiple block templates, simply click on the filter option and choose ‘Header’. You will see all pre-built header layouts for Elementor.
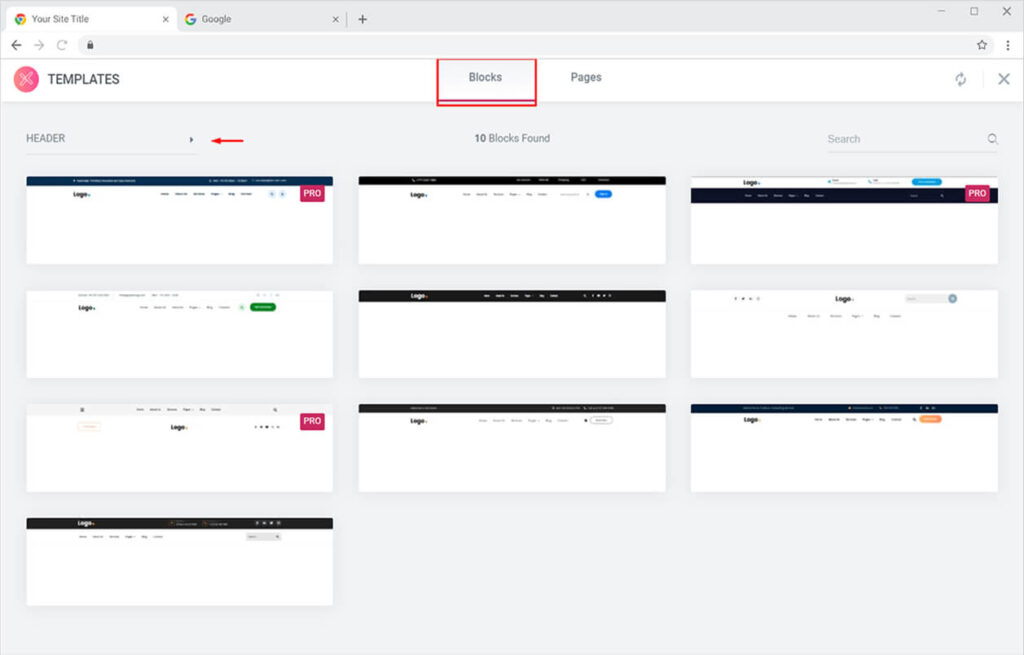
Choose any of the free templates and insert them into your layout. The output will be like the one below. You can then customize the header layout as you want.
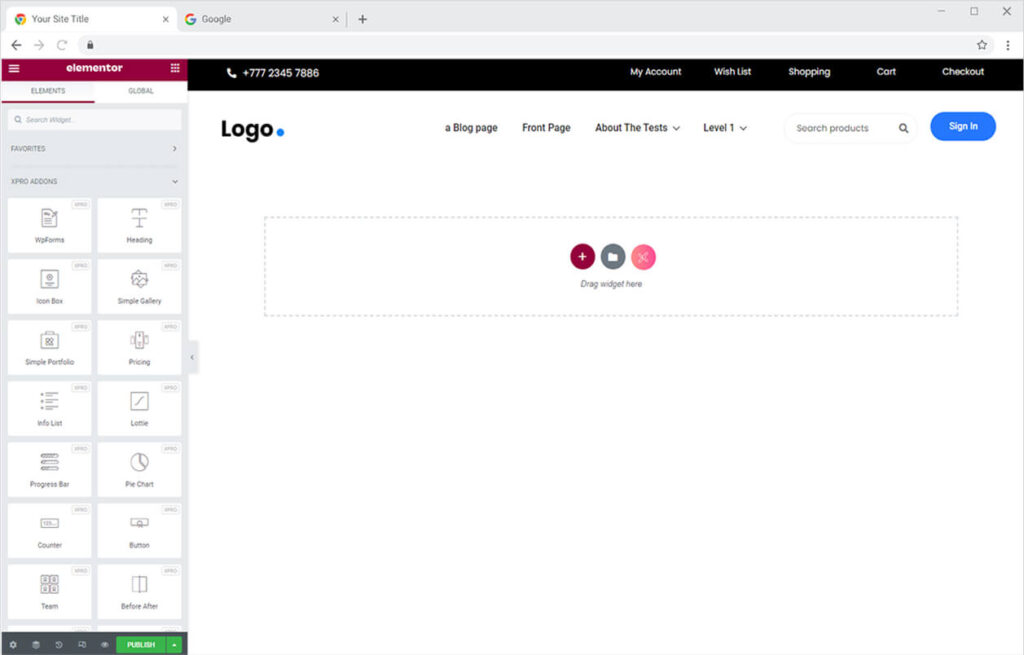
This is all from the backend layout of our free Elementor theme builder.
Front-end Layout of Xpro Elementor Theme Builder
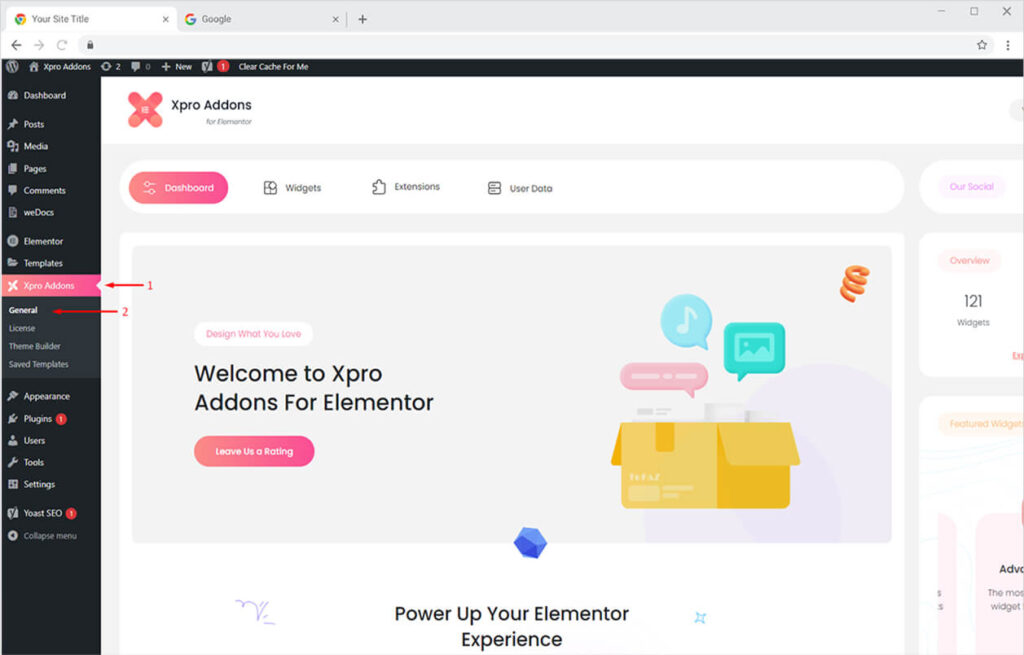
First, you need to enable the frontend theme builder panel from the Xpro Addons dashboard. To do this, simply login to your WordPress dashboard and open the ‘General’ tab option available on the sidebar.
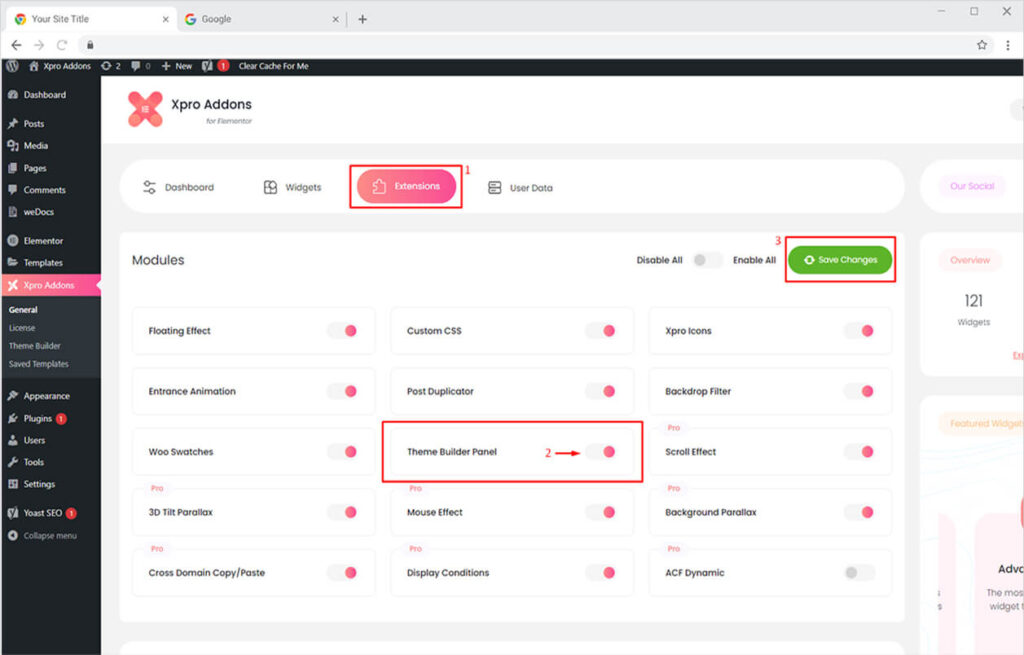
Go to the ‘Extensions’ tab and simply turn on the ‘Theme Builder Panel’ option. Finally, click on the ‘Save Changes’ button to update your settings.
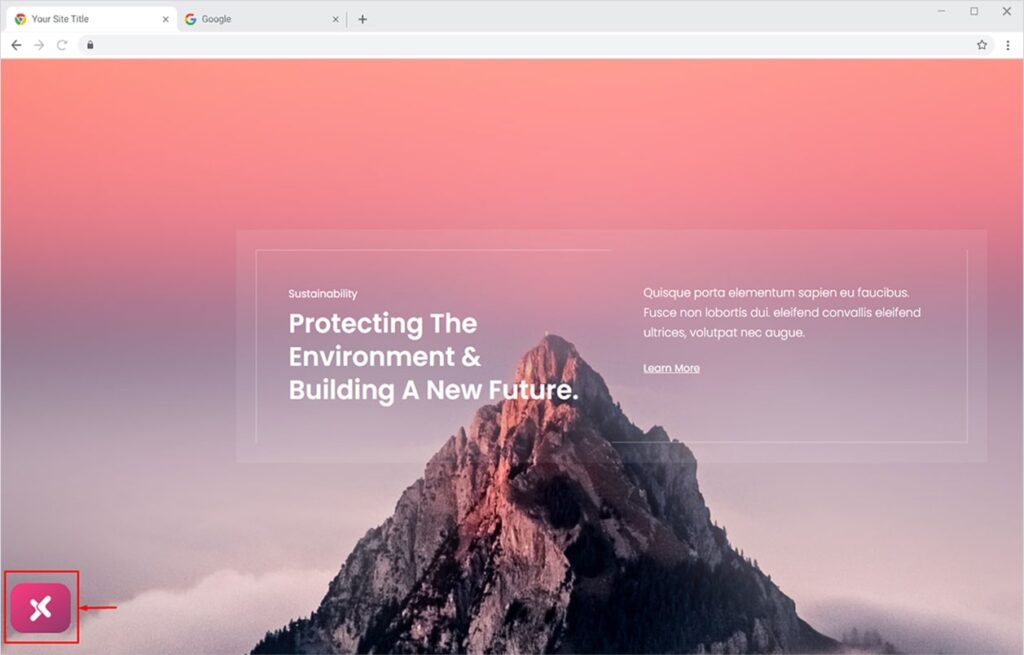
Now open the page/post you want to edit. You will see the Xpro icon on the bottom left corner, click on it and the front-end Theme Builder dashboard will pop up on the page.
This is the default front-end view of Elementor Theme Builder Free.
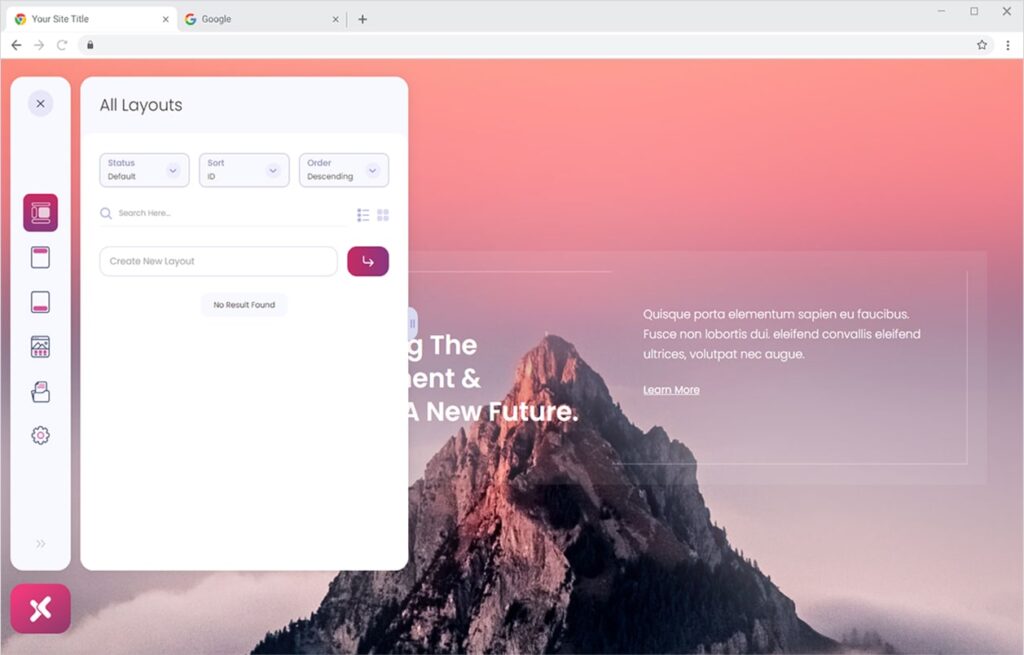
Now let’s explore each option of the Theme Builder. To enhance your dashboard view, simply click and drag the ‘Drawer’ option to maximize the dashboard view at your convenience.
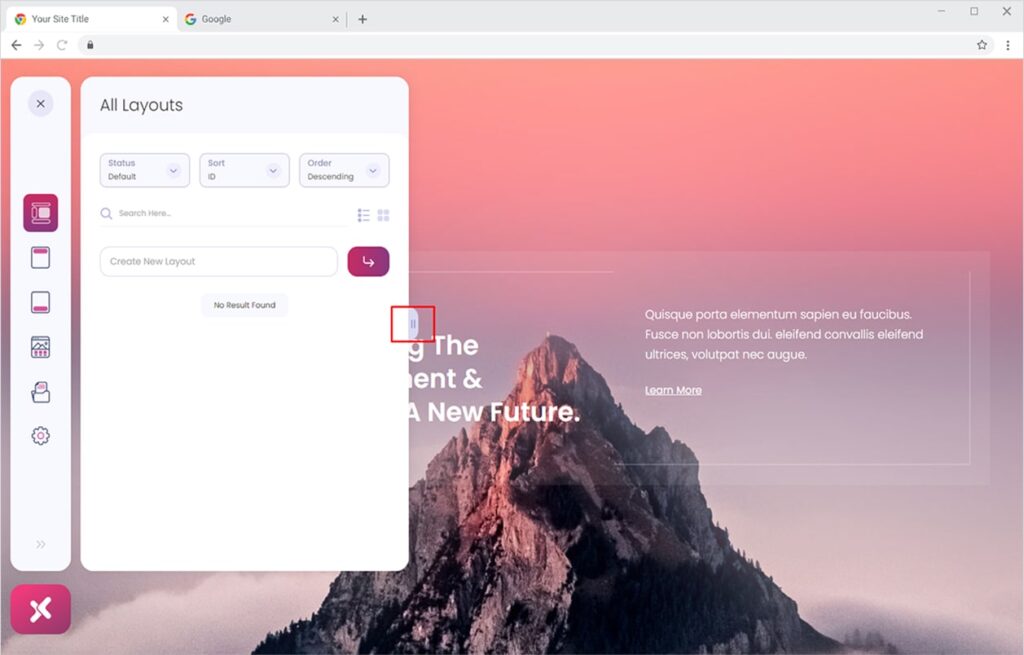
You can also ‘Expand’ and ‘Collapse’ the dashboard menu as you like. The complete layout names would appear if you expand the menu. In the same way, you can click on the icon again to collapse the menu.
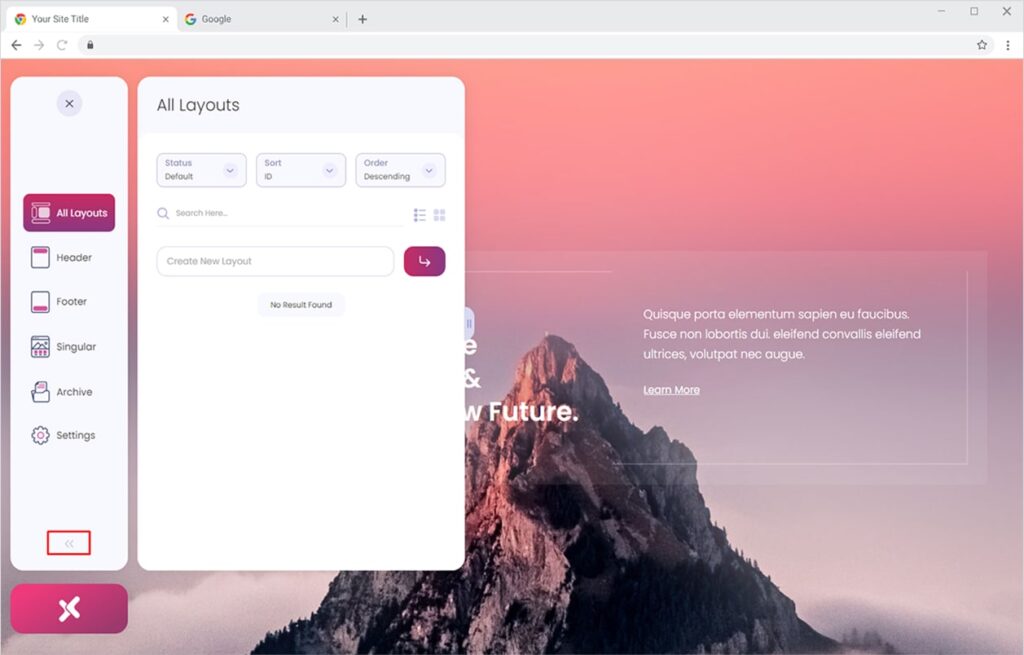
Now let’s discuss the default view. On the left side, all site parts/layout are visible and once you click on a specific layout type, its detail view will appear on the right panel. By default, ‘All Layouts’ is open and visible. All available options are Header, Footer, Singular, Archive, and of course the Settings.
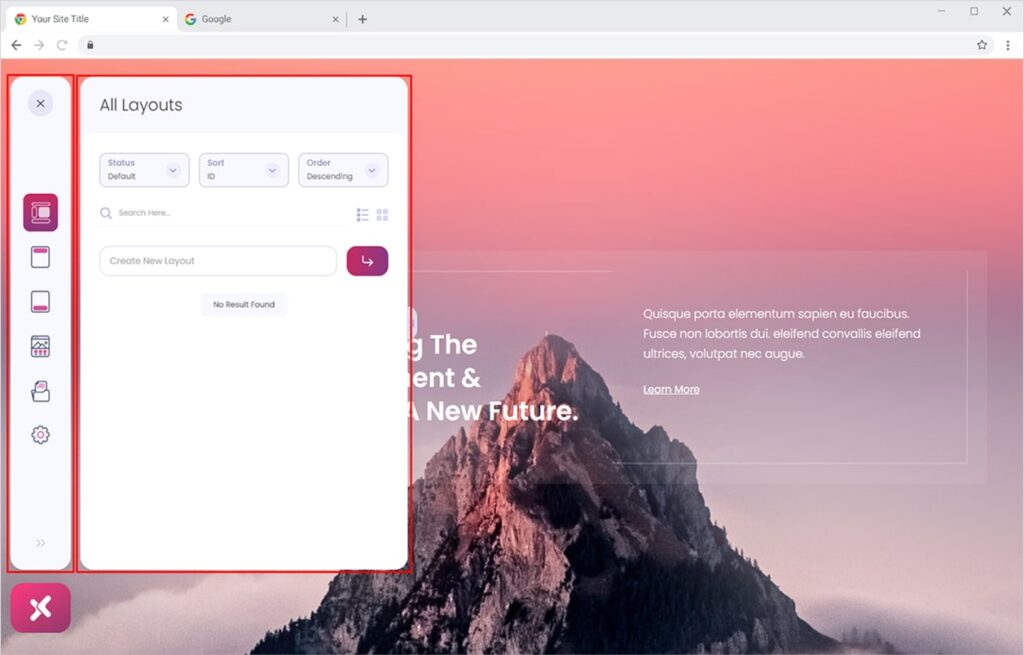
‘All Layouts’ showcases your custom-created layouts for any site part. It has the following features:
- 3 filters for layouts; Status, Sort, and Order
- Search Bar to simply type and search for any layout
- Option to create a new layout
Let’s create a new layout and assign its type from the All layouts section. Simply type the name of your layout in the ‘Create New Layout’ field and click the Enter button.
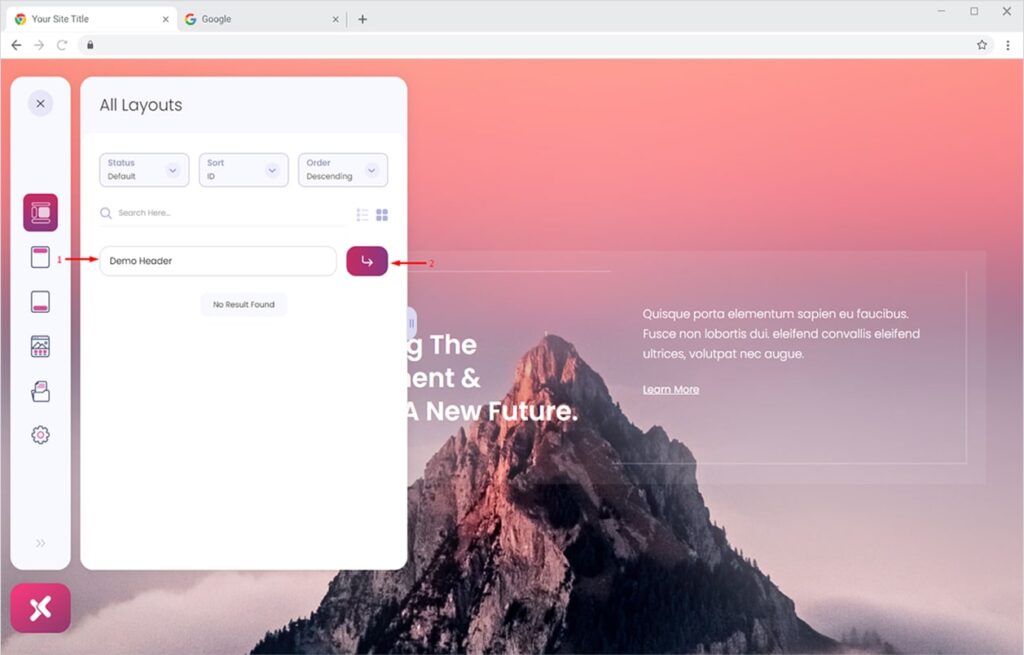
On clicking the enter button, your layout will be available in the ‘All Layouts’ section like this:
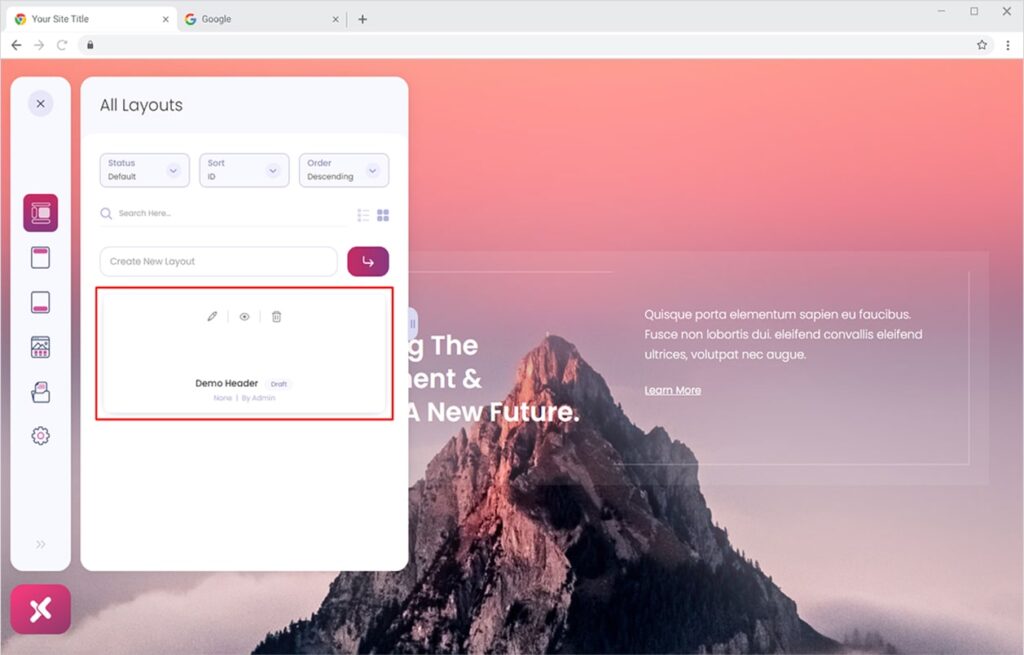
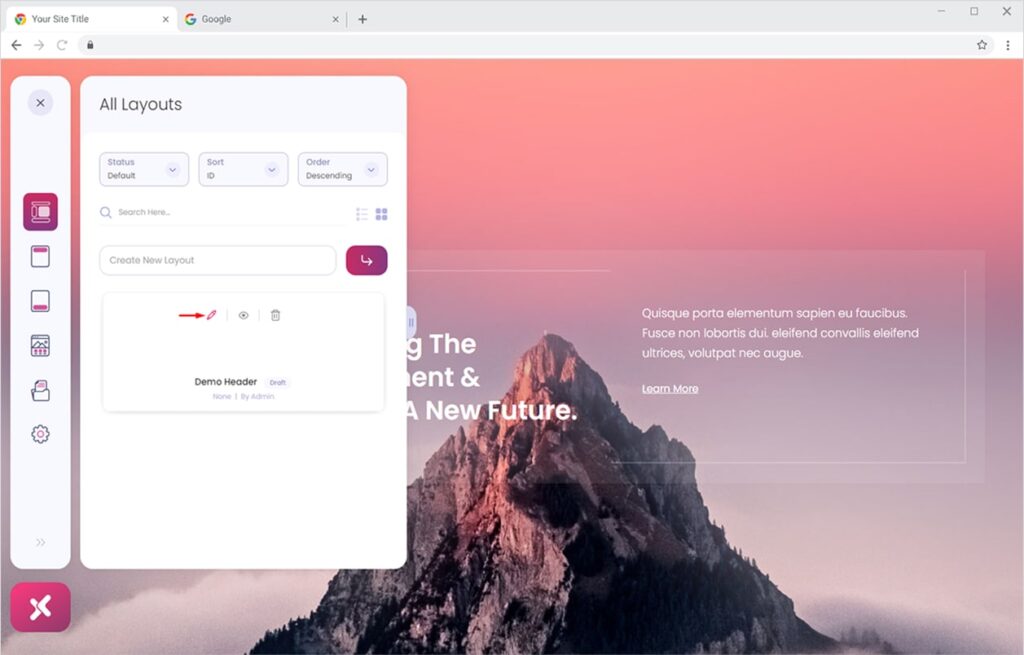
Click on the edit icon to assign Type to your new layout.
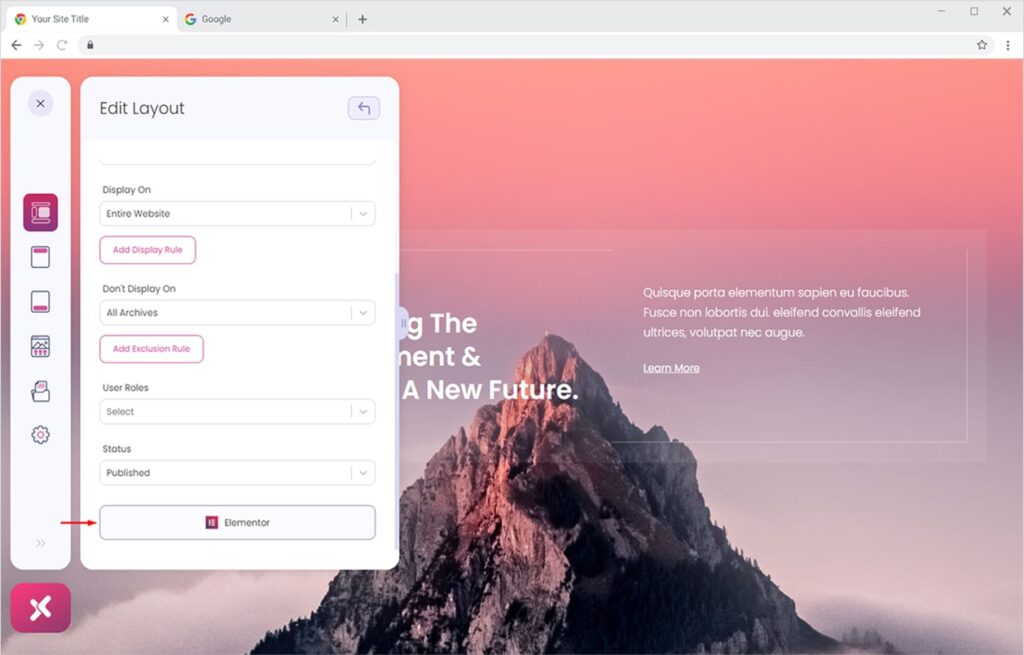
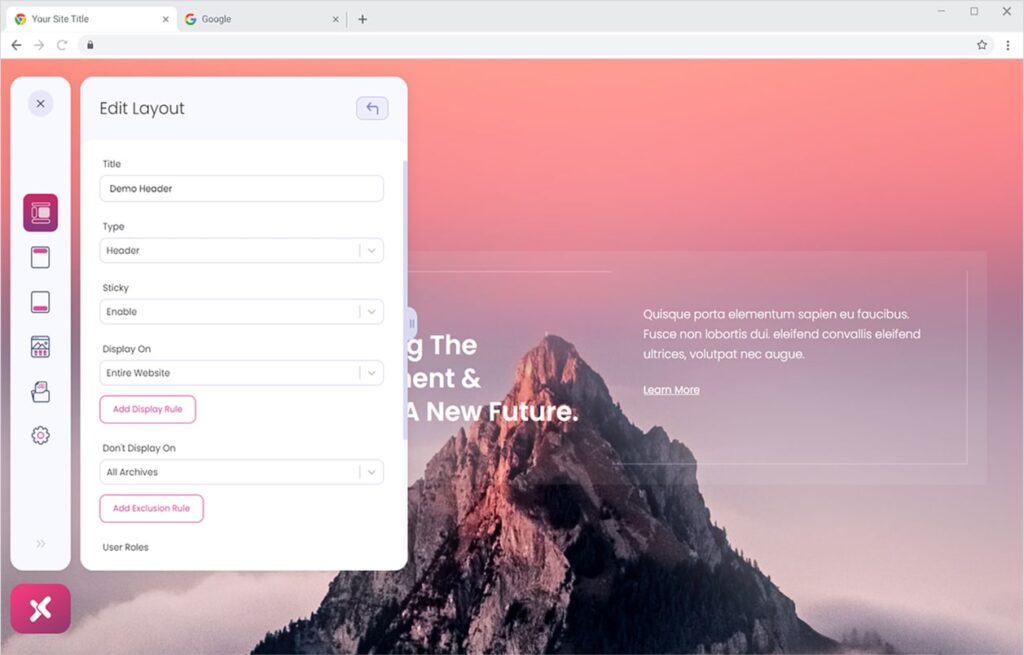
Here we can change the title of our layout and assign it to any site part. Here I have assigned it to the Header part from the Type option. You can set your header layout as Sticky, assign specific Display Conditions, and set User Roles.
Now click on the update button.
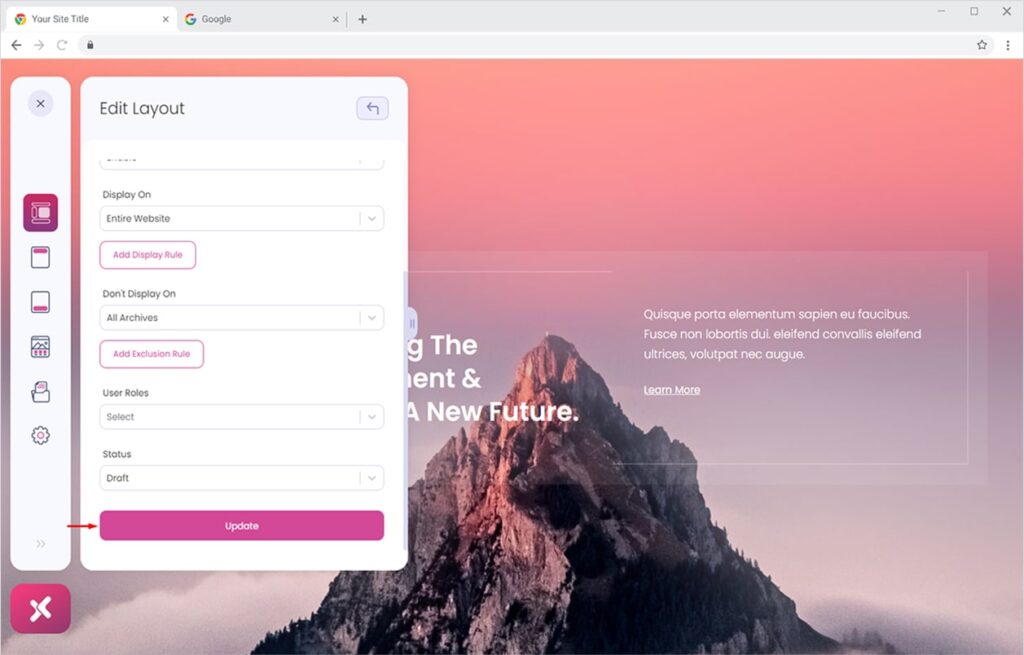
The settings will be updated and then simply open the Elementor Editor by clicking the Elementor button.
