Table of Contents
Have you ever struggled to present different pricing plans, product features, or anything else in grid or table format in one single space without overloading your website visitors? You can include everything on a single page, but putting everything in the same place may result in clutter and confusion. But don’t worry; we have the solution for you. We will introduce the Xpro Elementor content switcher widget (or content toggle) here.
Using the content switcher widget for the elementor, you can display two different types of content with less scrolling time.
This comprehensive guide will explore the reasons for using the content switcher widget and its functionalities. Also, we’ll check out its use cases and learn how it can transform your web design efforts.
So, let’s get started!
What is a content switcher/toggle widget in Elementor?
The Elementor content switcher widget is also known as the content toggle. It lets you combine multiple content sections into a single, well-organized layout.
The Xpro content switcher for Elementor comes with dynamic functionality. So, you can easily customize the layout and style of the content by using pre-made templates, content, or images. Furthermore, you can also add any other Elementor widgets in the toggle primary and secondary content areas.
This widget not only improves the user experience by making information readily accessible but also keeps your website clean and visually attractive.

Difference Between Content Toggle/Switcher and Accordion?
We will discuss the differences between the content switcher and accordion elements.
| Content Toggle/Switcher | Accordion |
| • Content Switcher allows users to toggle between two different sets of content. • It can be used to present multiple sections or versions side-by-side. • A single button or tab controls the visibility of content. Toggles between showing and hiding specific content. • Quick and straightforward interaction. • Suitable for side-by-side comparisons or showcasing two different categories. | • Accordion allows content to be organized in a stack, with only one section visible. You can reveal or hide the content within a section by clicking its header. • It can be used for multiple sections with individual titles. • Sections can be collapsed or expanded individually. • Suitable for conserving space and presenting information in a focused, collapsible manner. |
| Use Cases: Suitable for simple on/off visibility of a block/section, which includes a pricing table (annually or yearly), product features (latest or older), or anything else in a table or grid format. | Use Cases: It is well-suited for situations where you have a list of items or topics and want to provide users with a concise and collapsible view. It includes FAQs, lists with expandable details, tutorials, documentation with collapsible steps, and long content sections. |
Why use the Content Switcher widget for Elementor?
The Content Switcher widget for Elementor lets you organize content in a user-friendly way. It saves space on your website by letting users switch between different content pieces (like text, images, or pricing tables) using tabs or buttons. This is also perfect for comparing products, showing product features, or presenting content in a clean and interactive format.
Here we’ll further explore the Elementor content switcher:
- Simplified Content Presentation:
Content switcher/toggle simplifies the presentation of information by allowing users to toggle the visibility of specific content sections. It may be useful in preventing users from receiving too much information at once.
- Space Optimization:
The content switcher/toggle widget allows you to highlight key information or features. You can display multiple pieces of information at the same time. It keeps your layout clean and concise, especially on small screens.
- Dynamic Content Display:
Content Switcher is a dynamic widget that allows you to display different content sets within the same space. You can add any Elementor widget (including the pricing table widget, icon box, etc.), saved templates, or more. For example, you can create a homepage with tabs for “Latest News” and “Featured Products” to help users quickly access different types of content in a single space.
- Customization Options:
The content switcher/toggle widget in Elementor comes with customization options. It allows you to customize the appearance, and style of the toggle to match your website’s design and branding. Additionally, you can select the layout for toggle by using the Xpro content switcher widget for Elementor.
- Reduced scrolling fatigue:
The Elementor Content Switcher widget can minimize scrolling fatigue by displaying sets of content in a single space. Users can quickly access different content by minimizing the need for continuous scrolling. It can help to create a more comfortable and user-friendly browsing experience without the frustration of navigating through lengthy pages.
- Enhanced User Interaction:
It is a great widget for managing space on your website. Instead of displaying all content simultaneously, use toggles to display new information. It can keep your website layout clean and organized.
Use Cases of Elementor Content Switcher Widget
Here we will explore some real-time use cases for displaying the elementor content switcher widget.
Product Comparisons:
An e-commerce website can use a content switcher widget to display various features and benefits of a product within the same space on the product page. Users can navigate to the toggle button to check the various sets of information without having to scroll across the screen.
For example, an electronics store uses a content switcher to display detailed specifications and features of different smartphone models. Tabs labeled with each smartphone model allow users to switch between product descriptions easily.
Pricing Tables:
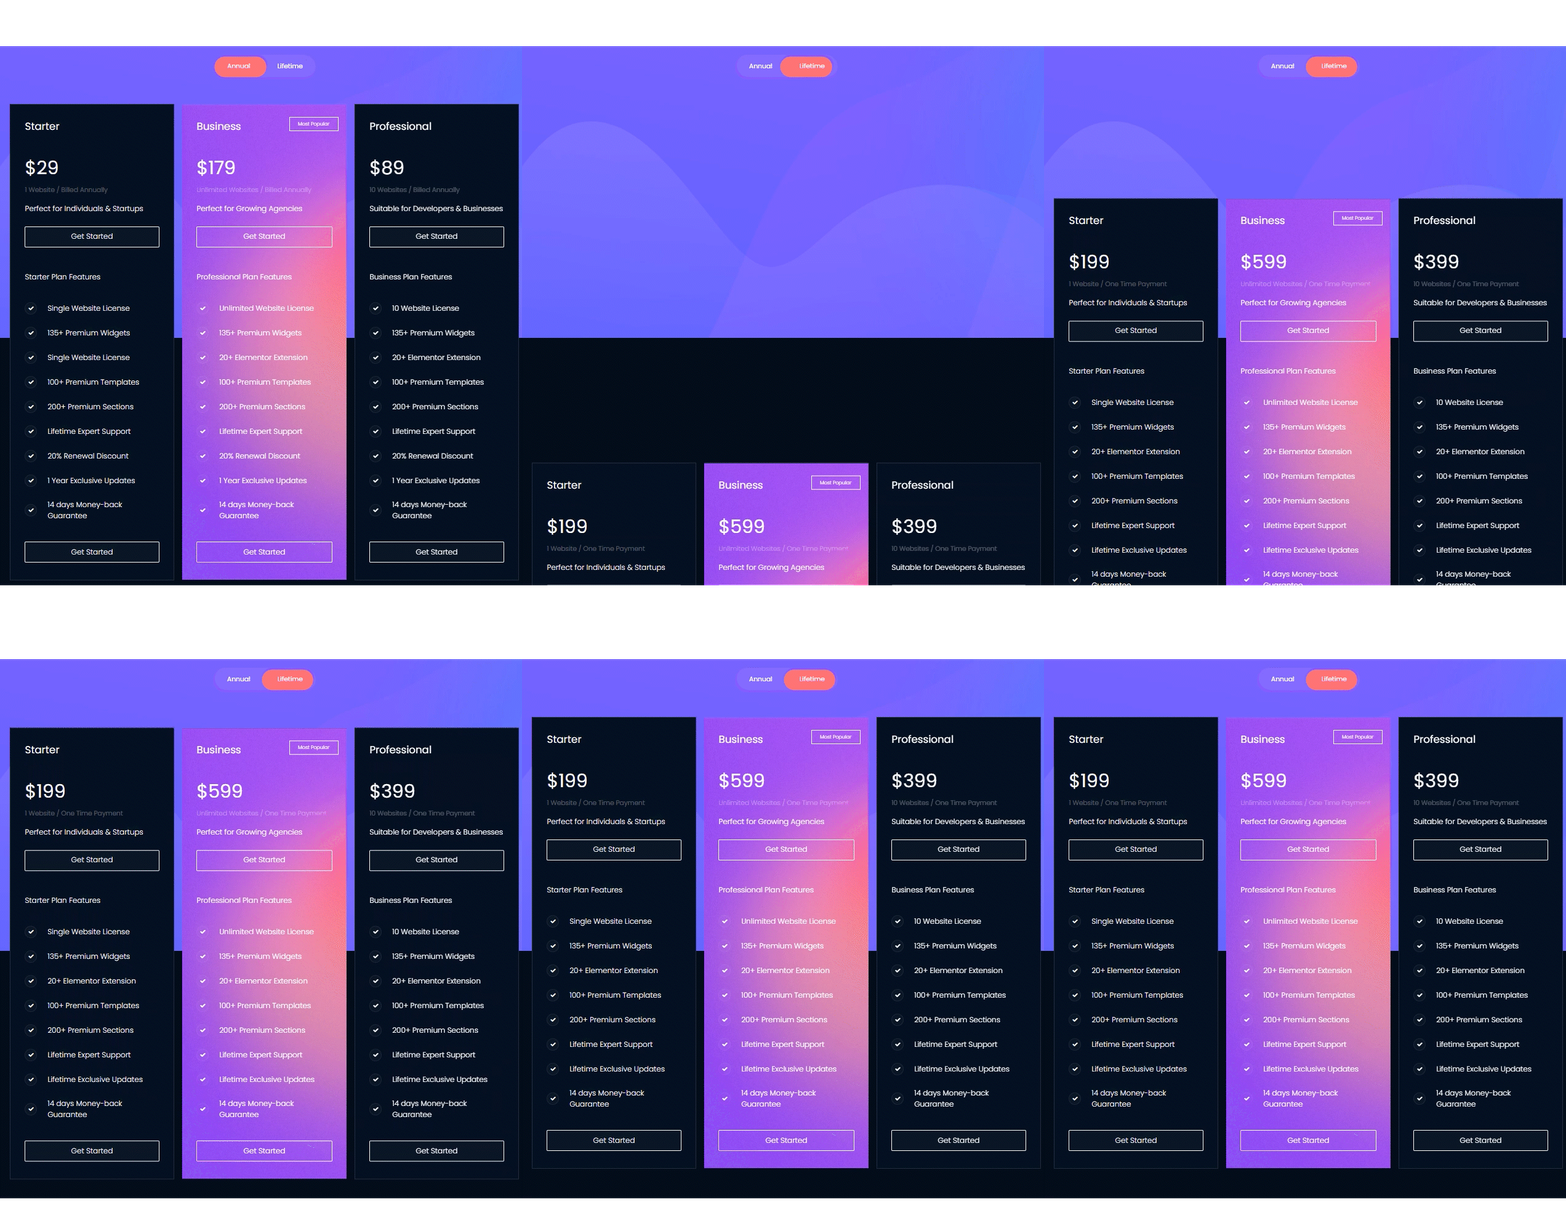
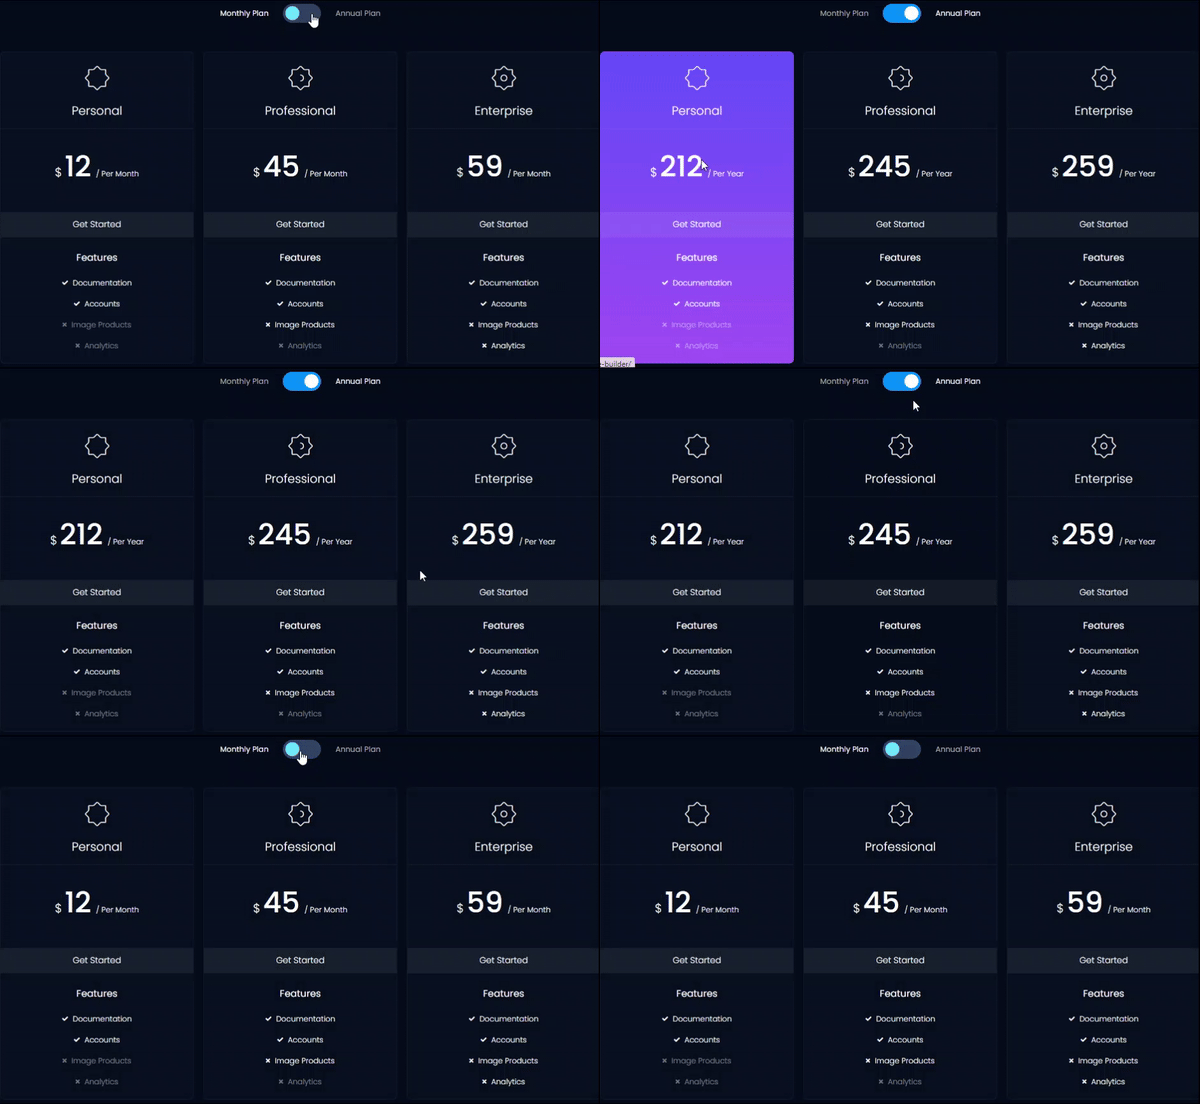
Businesses that have subscription-based services with different pricing plans to meet various user needs. They can display their pricing plans on the website in a clear and organized manner by using the content switcher widget in elementor. It allows users to easily compare different plans and choose the one that best suits their needs.
For example, a software company uses a content switcher to present its subscription plans (Basic, Pro, and Enterprise). Each tab showcases the features, pricing, and benefits of each pricing plan, simplifying decision-making for potential customers.

Product Features Comparison (Latest & Older)
Different online stores can effectively showcase their product features and simplify comparisons between the two versions.
The Content Switcher widget is often used to highlight the new features introduced in the latest version and compare them with the existing features in the older version. It provides users a clear understanding of the product’s continued development and improvements over time.
For example, you are launching a new smartphone with upgraded camera capabilities and enhanced processing speed. To highlight the latest and older features, you can use the switcher widget to create a comparison table of the new and older smartphone models.
Image and Video Galleries:
You may want to showcase a combination of images and videos as a portfolio. The Content Switcher can switch between different media types for the same project.
For example, if you want to showcase a new clothing item, you can use the Switcher Widget to display high-resolution product images from different angles. Additionally, include a short video showcasing the item in action, giving users a more comprehensive view.
How To Use Content Switcher/Toggle Plugin in Elementor?
When it comes to adding a content switcher widget to Elementor, you do not have to spend money on it because Xpro offers a free content switcher widget for Elementor. It comes with the free version of the Xpro Elementor Addon.
Requirements:
Here are some requirements you need to check before getting started to make sure everything goes smoothly.
- Elementor Page Builder – FREE
- Xpro Elementor Addons – Free
OK, now let’s move on to install and activate these plugins.
Step 1: Install and activate the plugin.
To get started with the plugin installation step by step, go to the Plugins section within your WordPress dashboard.
Click on Add New Plugin, then search for and install both the Elementor and XPro Elementor Addons one by one. Once installed, activate both plugins, as you can see in the reference video.
If you already have the plugin installed, simply enable the Content Switcher Widget from the Xpro Elementor Addons dashboard to see it in the Elementor editor.
Step 2: Enable the Content Switcher Widget
To enable the widget, follow these steps:
- Click on the Xpro Addons option in the WordPress Dashboard menu.
- Navigate to the Widgets Tab, find the Content Toggle Widget, and then toggle the button ‘ON’ to enable it.
Step 3: Create a New Page or Edit Existing Page:
- After enabling the widget, navigate to the pages section in the WordPress dashboard.
- Create a new page or edit an existing one where you want to add a content switcher widget.
In my case, I will be creating a new page, as shown in my tutorial video.
Step 4: Drag & Drop the Content Switcher Widget in Elementor:
- Find the Content Switcher widget in the Elementor Widget panel.
- Drag and drop the widget onto the area where you want to display the content switcher and look at the default view of our Xpro Elementor Content Toggle widget.
After dragging and dropping the widget, let’s move on to configure it.
Step 5: Configure the Content Switcher:
Two different sections serve different content types: Primary and Secondary.
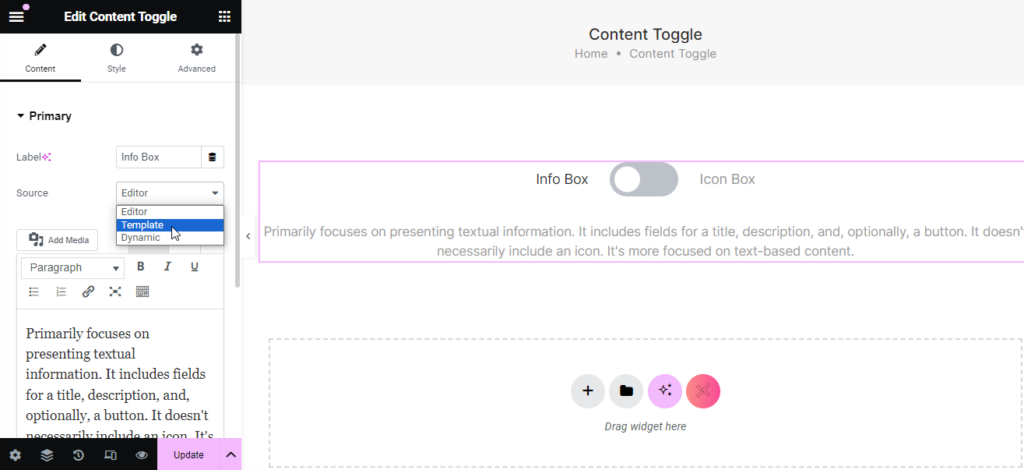
To start with, add a title to the primary toggle, and then choose the source type from the dropdown menu. There are three available source types to add content: Editor, Dynamic, and Saved Templates.

- Editor Source Type: Select this if you want to include simple text in your switch toggle.
- Saved Templates Source Type: Choose this if you have pre-designed saved templates that you want to showcase using the switcher widget.
- Dynamic Source Type: If you want to integrate a different Elementor widget with dynamic functionality, choose the dynamic source type.
In this guide, I’ll try to cover these three types of sources for your better understanding.
Source Type 1: Editor
- First, we’ll set up the primary section and label it “Info Box.”
- Choose the source type as “Editor” to showcase simple text without requiring extra design elements or dynamic features.
- Add the description content in the primary section, as shown in the image below.

- Next, configure the secondary section and label it “Icon Box.”
- Select the same source type we selected for the primary section, and include the description content.
Ok, now let’s move on to the template type.
Source Type 2: Template
For template source type, we’ll start by adding a template to our saved templates within the WordPress dashboard.
Suppose you already have a pre-designed theme/page template, but you specifically want to display one section to showcase two distinct types of columns in a switcher format. Or maybe you want to add the same section on multiple pages. In this case, you can select the ‘template’ source type and display the saved templates.
To do this, save both sections of the theme as a template. After that, we’ll get both templates individually, placing one in the primary column and the other in the secondary column within the content switcher widget to quickly switch from one tab to another.
Here, you can see the tutorial video that I’ve recorded for your reference.
Got it?
Now, let’s move on to the dynamic source type.
Source Type 3: Dynamic
- In this dynamic source type, you can add any Elementor widget, whether it’s a pricing table, accordion, simple gallery widget, video gallery, or more.
Here’s how it works:
Conclusion:
That’s all! Hopefully, you got all the information related to the content switcher widget. We have explained the content switcher widget, its functionality, reasons to use it, and use cases. Additionally, we have explained the key difference between the content switcher widget and the accordion widget in the elementor.
Thank you for staying with me till the end.
If you have any questions related to the content switcher widget for elementor (also known as the content toggle widget), please let us know in the comment section.
Apart from that, if you want to add more advanced functionality to your elementor website, buy the Xpro Elementor Addons premium version and get access to the 140+ premium elementor widgets, 25+ extensions for elementor, 300+ elementor templates, themes, and more.
How do I toggle sections in WordPress?
Using the Xpro free Switcher widget for Elementor, you can toggle your sections in WordPress. First, you will save the desired sections as a saved template and display them by selecting the source type ‘template’ within the Xpro content switcher widget. In this blog post, I’ve explained how you can configure the content switcher widget.
How do I add a toggle button?
The toggle button is part of the Content Toggle or Switcher widget. When you add this widget to Elementor, it comes with options for configuring the toggle button. You can customize the button text, style, and alignment. This button is what users interact with to show or hide content sections (primary and secondary).
