Introduction
Our Elementor Theme Builder Free lets you customize each site part of your website for FREE. It full integrated and works seamlessly with popular themes like Hello, Xpro, GeneratePress, and Astra. You can create custom single layouts for post types, WooCommerce single product, search page, 404 pages, and much more. You can elevate your online store experience by changing the default layout and customizing it as you please. Now you can create custom templates that determine the layout of your website’s static pages and blog posts for FREE.
The default single post layout of most of the themes is quite boring and you might want to change and customize it to match your vision. This was previously only possible with the Pro version of Elementor but now you can design your own single post/page using FREE Elementor Theme Builder. You can fully customize singular post/page like 404, single post, single page, single product, cart, checkout, account, and much more. There’s no limit to what you can customize, it’s all up to your imagination.
There’s no need to deal with any shortcode, no more going back and forth the WP backend, you can seamlessly create single posts/pages right from the live front-end dashboard of Xpro Elementor Theme Builder. Some salient features of creating singular layouts using Xpro Theme Builder are:
- Fully integrated with WooCommerce
- Pick display locations as you like
- Create attractive designs on the go from live dashboard
- Assign custom user roles and much more
Let’s learn how to create a FREE header for your WordPress website.
How to Use Xpro Elementor Theme Builder Free to Design a Single Post
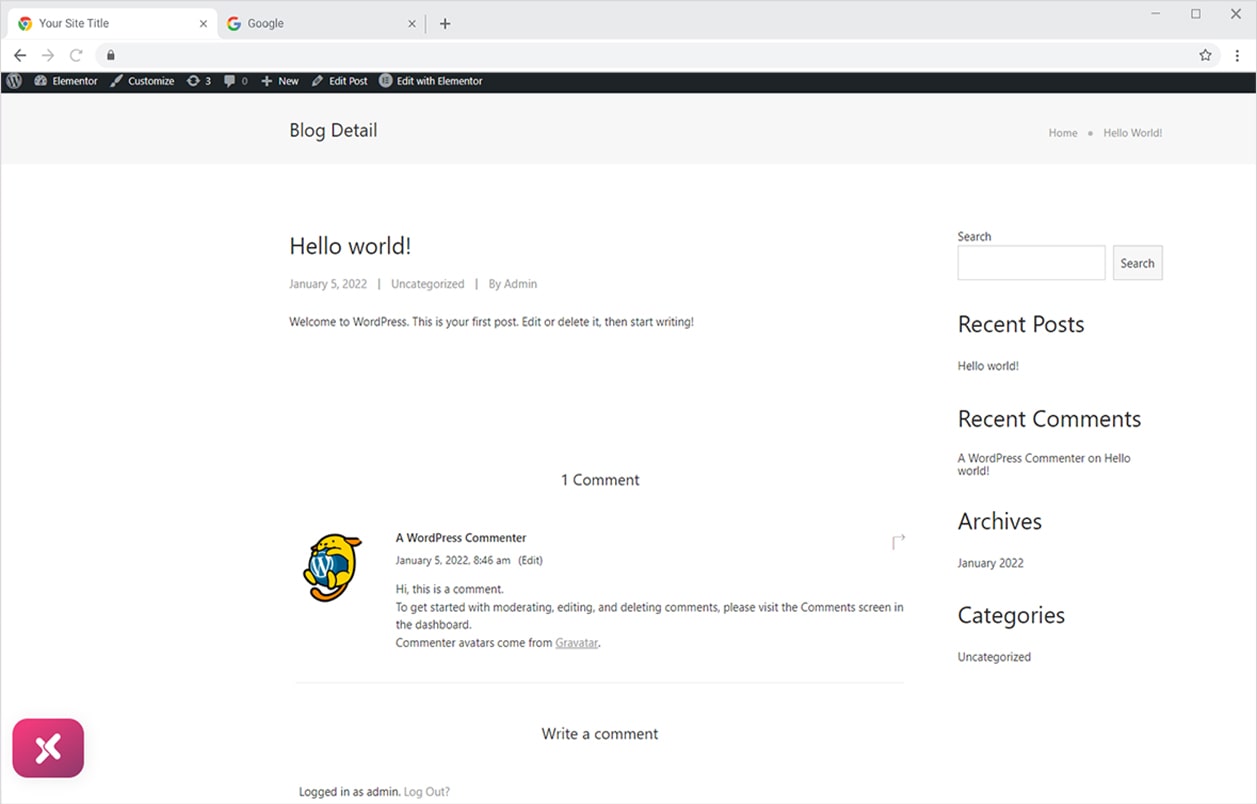
First, we are going to see the default Single Post Layout of a WordPress theme. It can be different for different themes but mainly it’s based on the same layout. For this, simply login to your WordPress Admin Dashboard and view any default post type from the All Posts option. This is the default ‘hello world titled post.
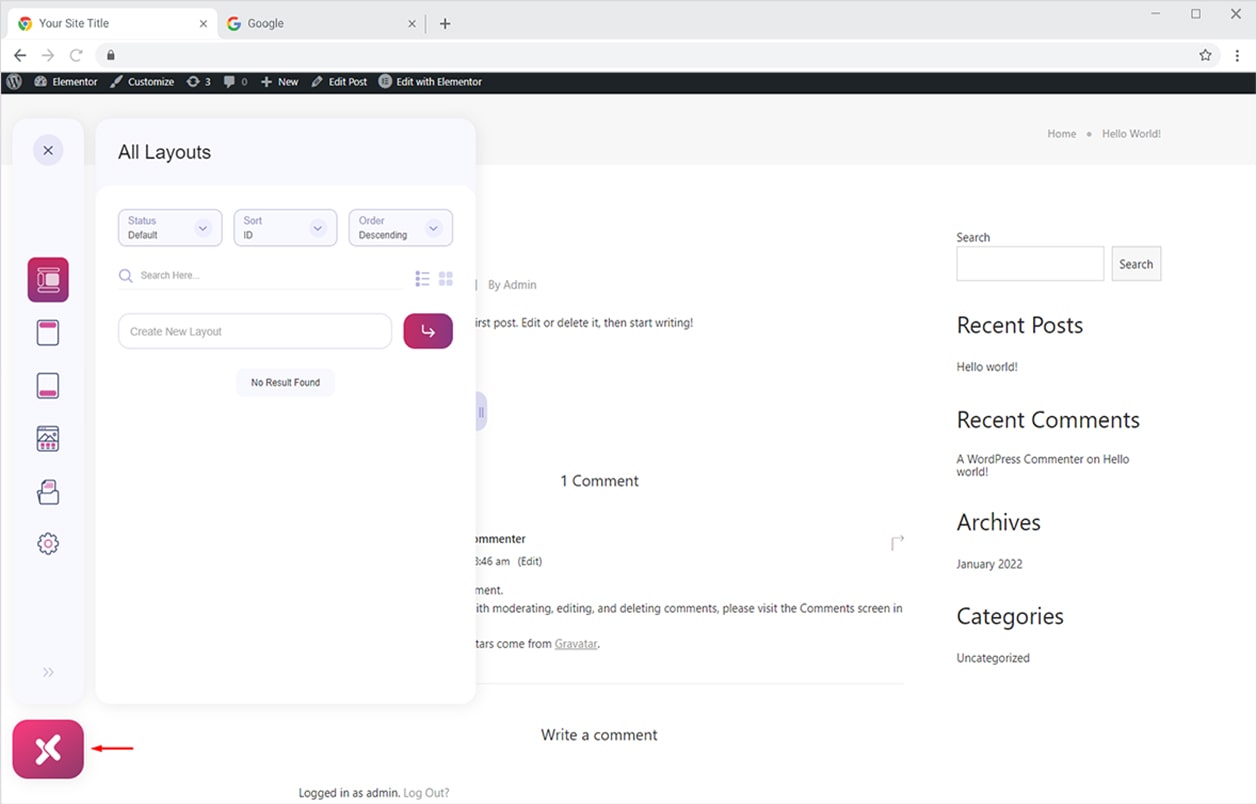
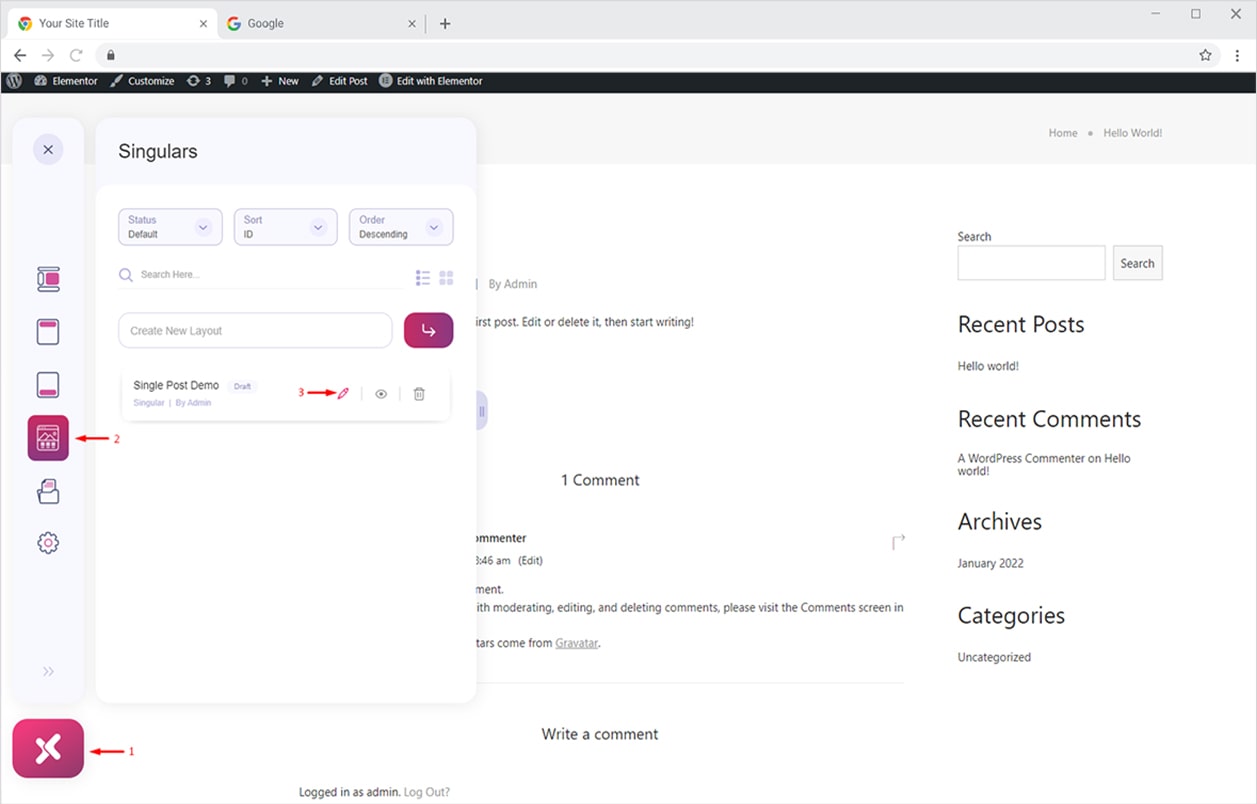
Remember, you need to install and activate our FREE Elementor Theme Builder to create a single post/page. Click here to view the installation guide. On the front-end, you will see the Xpro Elemetor Theme Builder icon on the bottom left side of your page. Click on it and a dashboard will open up for you.
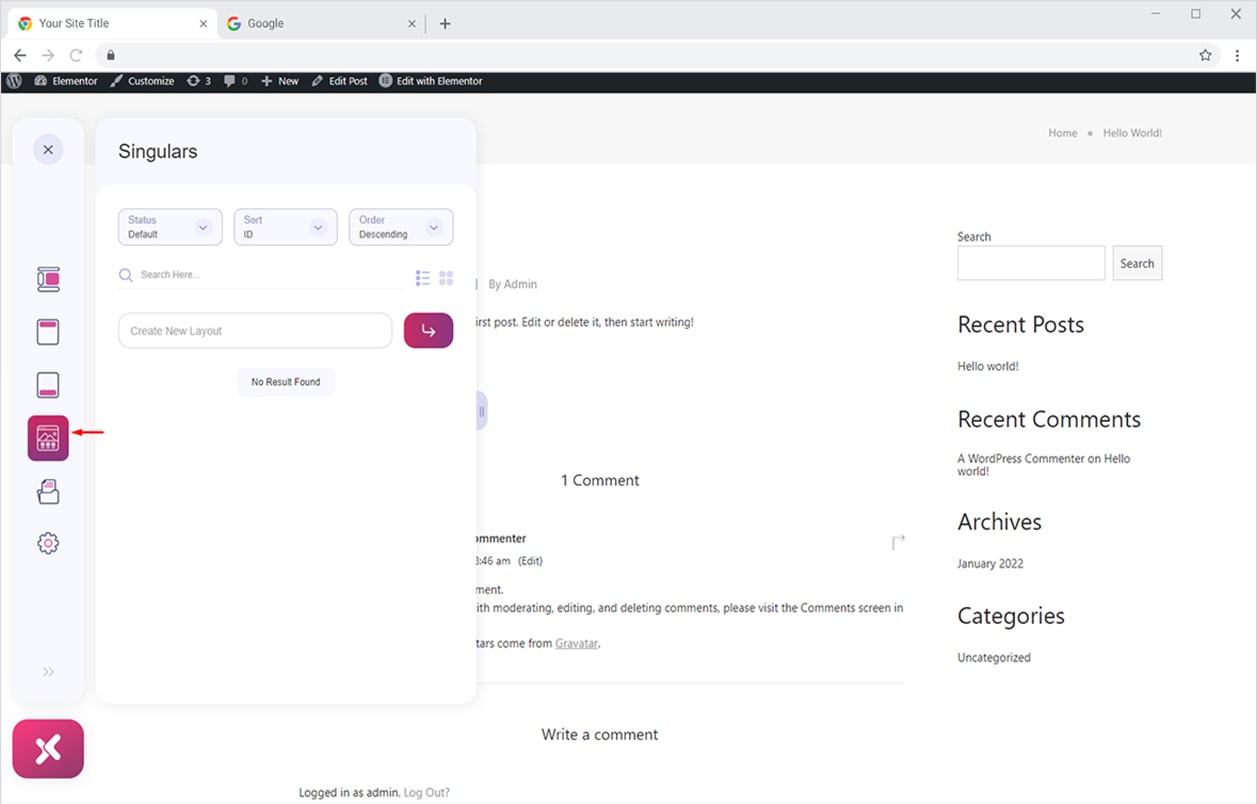
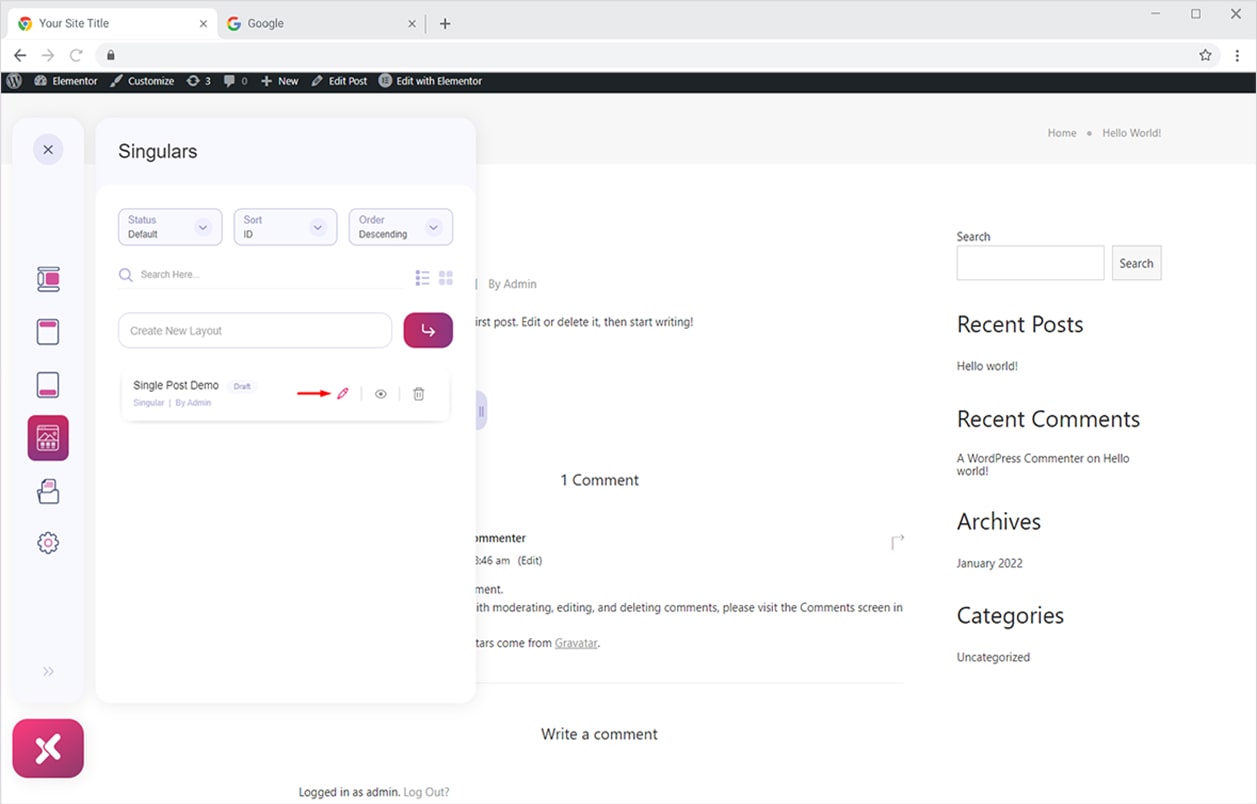
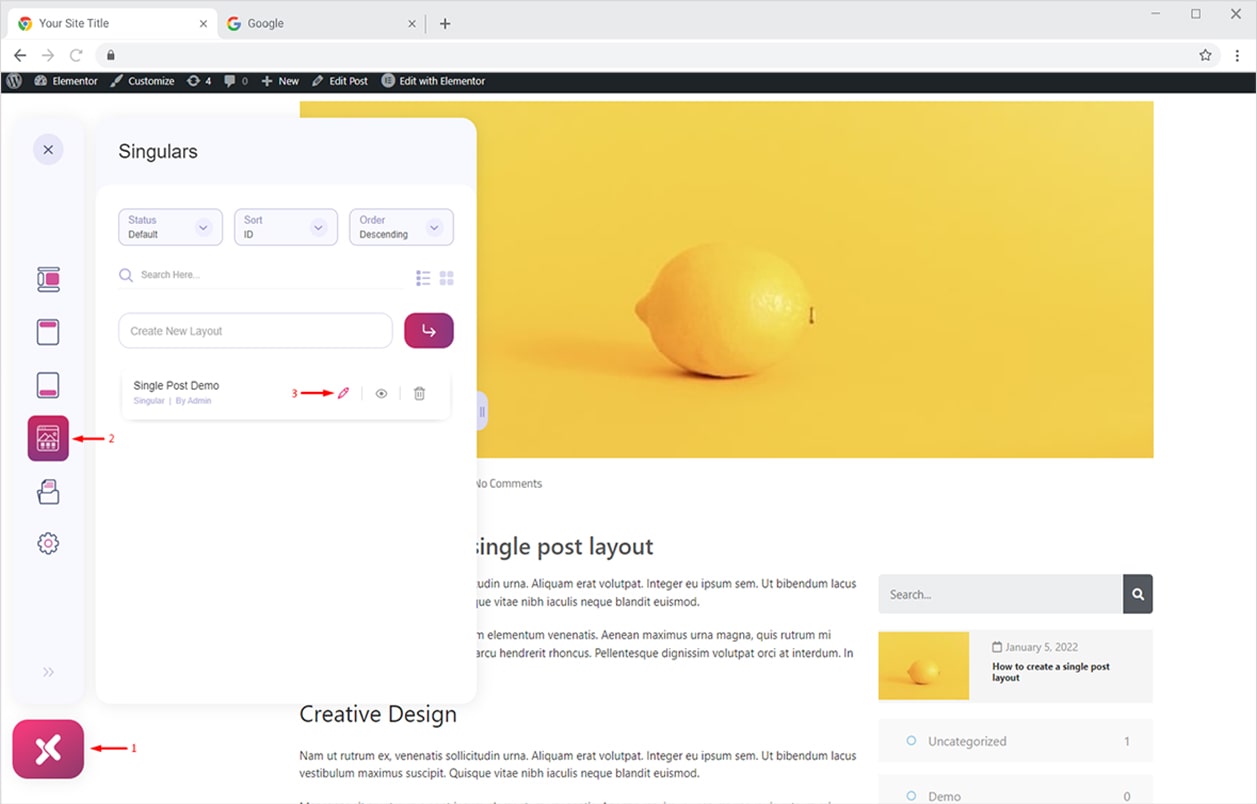
Now simply click on the Singulars option to create a new Single post/page or edit an existing one. Here we will create a new single post layout so that we can replace the existing ordinary-looking layout.
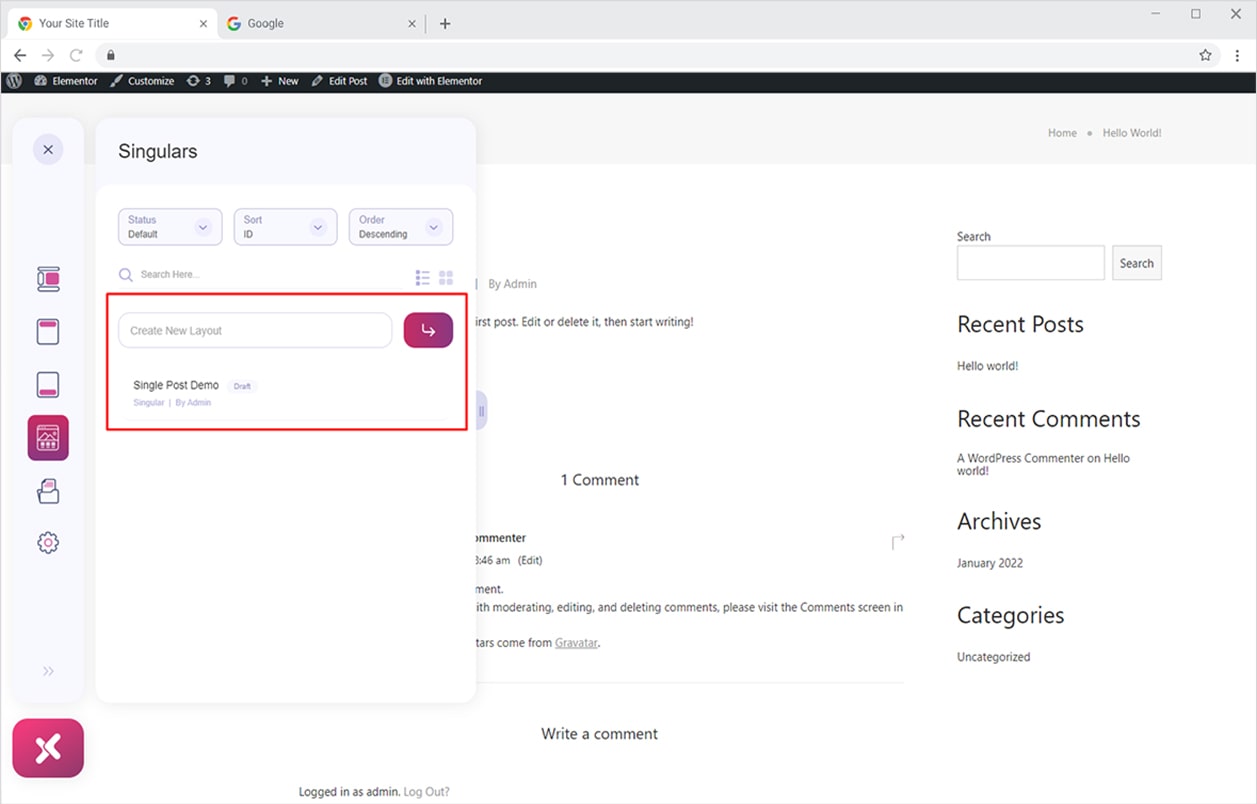
Type the name of your new Singular Layout and press Enter. Your new layout will be available to Edit.
Simply Hover over the new Singular Layout you just created and click the Edit Icon to customize the settings of your Singular Layout.
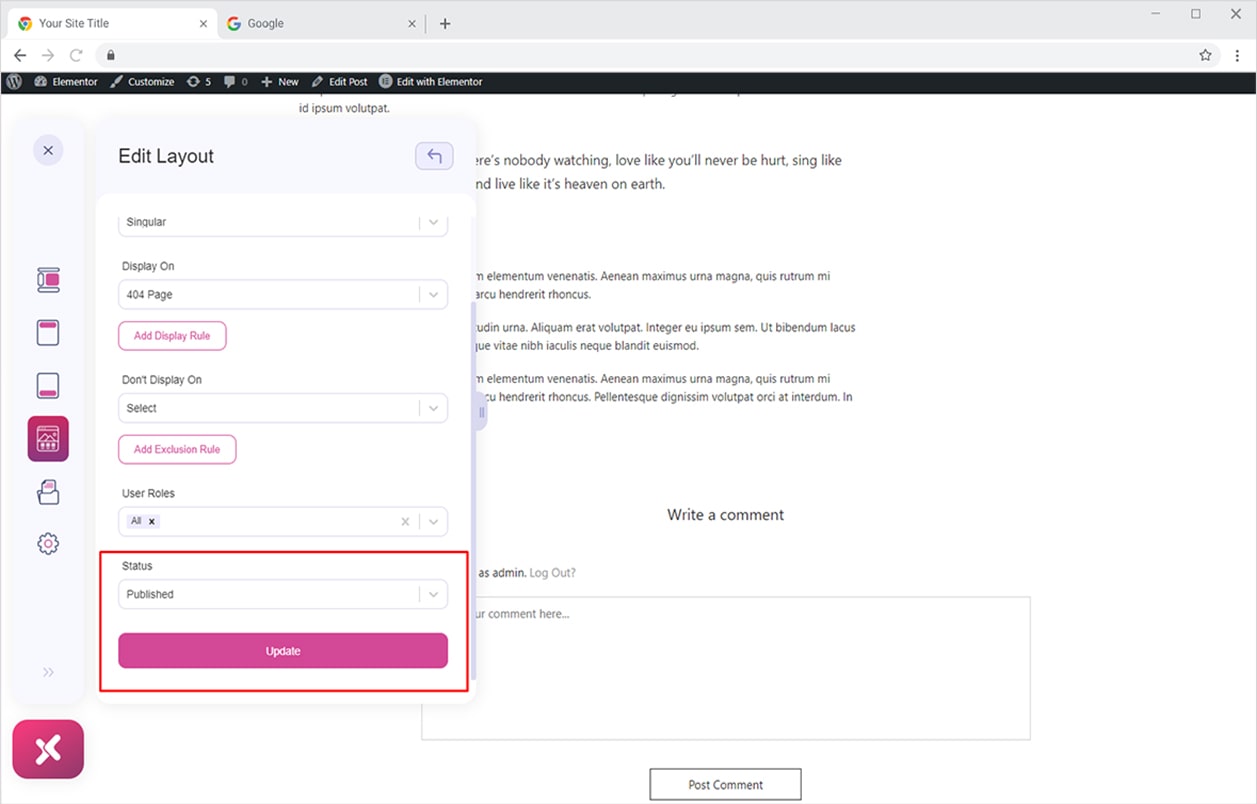
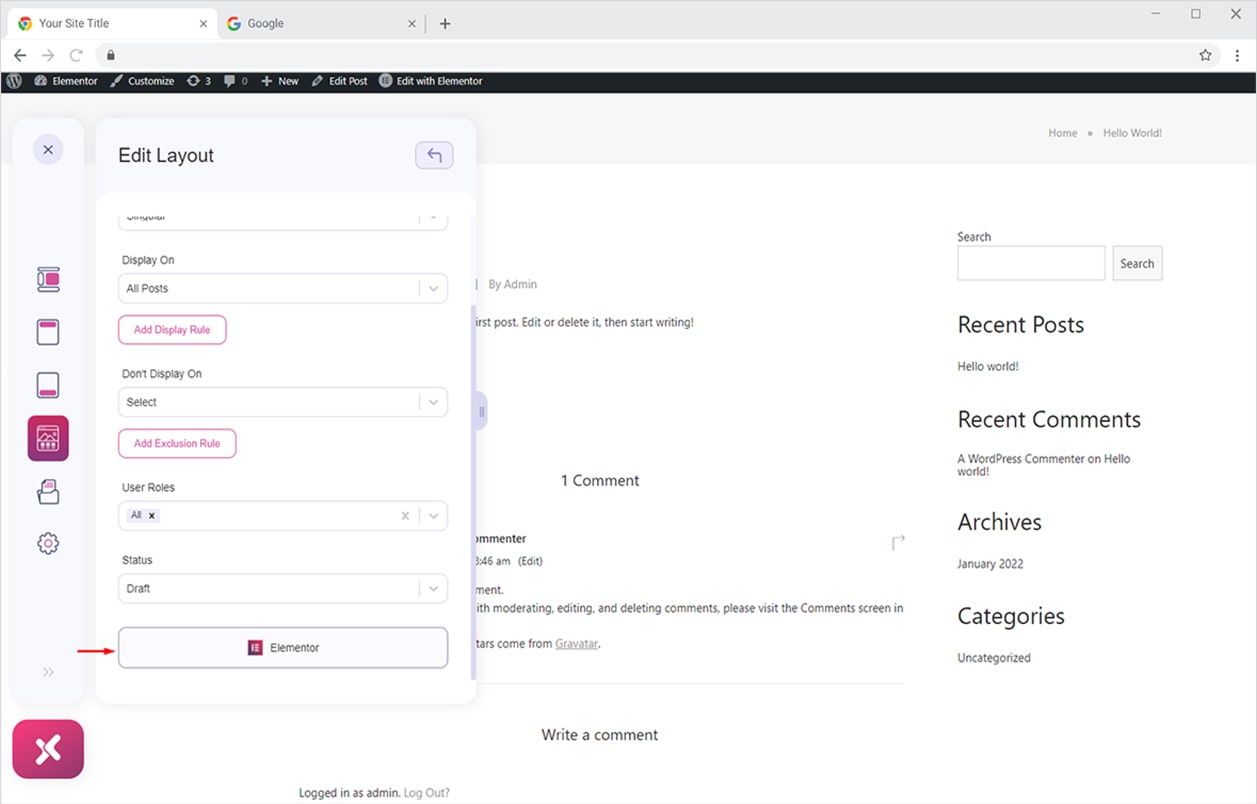
Here you can change the Title of your Singular Template, set Display Conditions, User Roles, and Status of the layout. Whenever you make a change, don’t forget to ‘Update’ your settings otherwise it won’t work for you. Remember, you need to change the Status of your singular layout to ‘Published’ from the Status option.
You can now easily customize or create a new singular layout from scratch using any Xpro Elementor Theme Builder widgets. Simply click on the Elementor button to get started.

Moving forward, in the next part I will explain how you can create a single post template from scratch using Xpro Elementor Theme Builder.
How to Create a Custom Single Post for Your WordPress Website using theme builder for Elementor
Let’s create a single post template from scratch using Xpro Elementor Theme Builder. But first, let me explain what they are. Singular templates display one item at a time. For example, one post, one page, or one instance of a custom post type.
A Singular template can be used to display the following:
- A page
- A blog post
- A WooCommerce product
With Xpro Elementor Theme Builder, you can create any of the above-mentioned custom singular templates for FREE. The robust theme builder gives you two options to design custom singular templates:
- You can design a new Singular Layout from the scratch using Xpro Elementor Addons.
- You can simply import any of the premium pre-built Single post/pages and WooCommerce Single Product Template to quickly add a professionally designed Singular Layout to your website.
Remember, Xpro Elementor Theme Builder is fully compatible with popular Elementor themes like Xpro, Hello, GeneratePress, and Astra. Moving forward, let’s design a single blog post using Xpro Elementor Theme Builder. Simply click on the Theme Builder Icon, move to the Singulars Layout section, and edit an existing layout or create a new one.
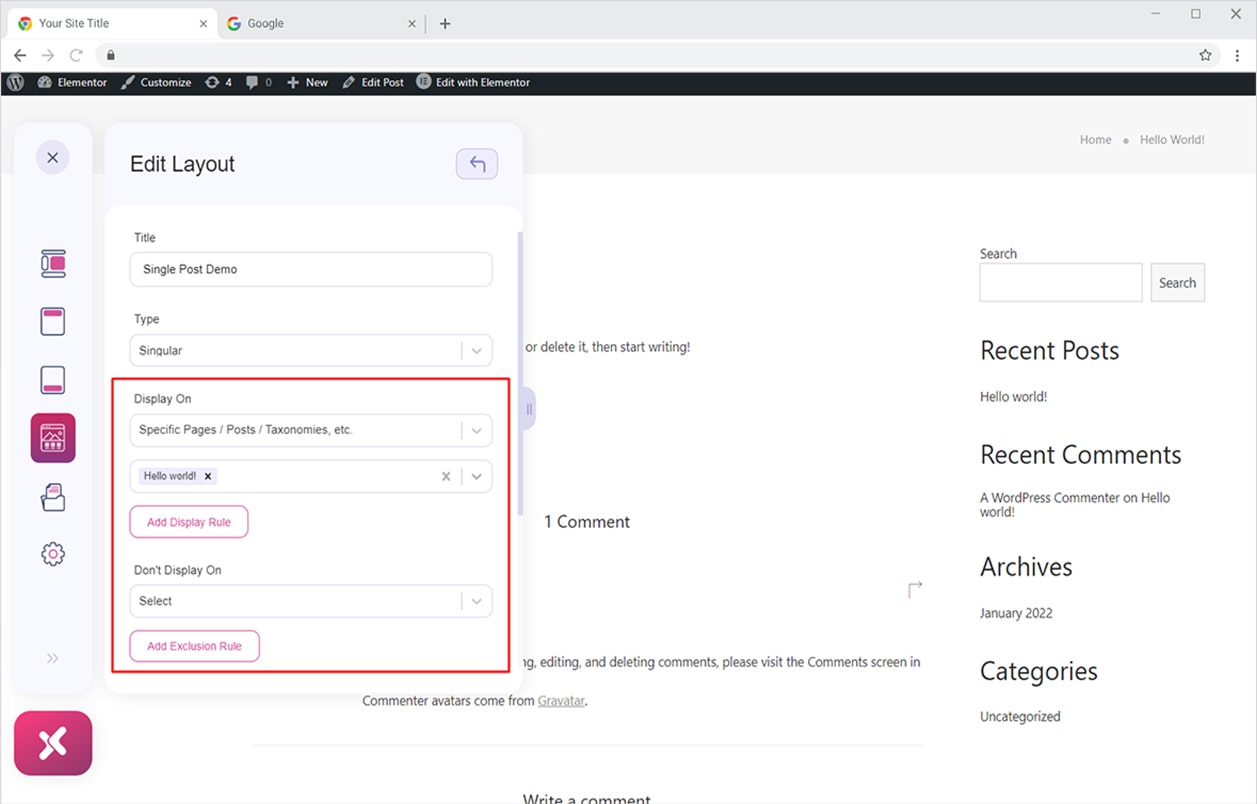
Set the Display Conditions, set user roles, and much more. Here I am going to set the Display On option for my current post ‘hello world!’. Simply scroll to the bottom of the Display On dropdown and select ‘Specific pages/Posts/Taxonomies etc.’ Now type of click and search for the single post you want this template on.
Remember, you can apply the singular template to:
- All Post Types
- Posts
- Pages
- Any Custom Post Types present on your site
Similarly, you can set rules from the Don’t Display On option to hide your Singular Layout on a specific page/post.
Finally, click on the Elementor button to edit your Singular layout.
As I mentioned earlier, you can create a singular layout from scratch or simply insert one of the pre-built Xpro Singulars Templates to quickly add a professional single post/page/WooCommerce product page on your website. Here I am going to create a custom single blog post layout using Xpro Elementor Addons.
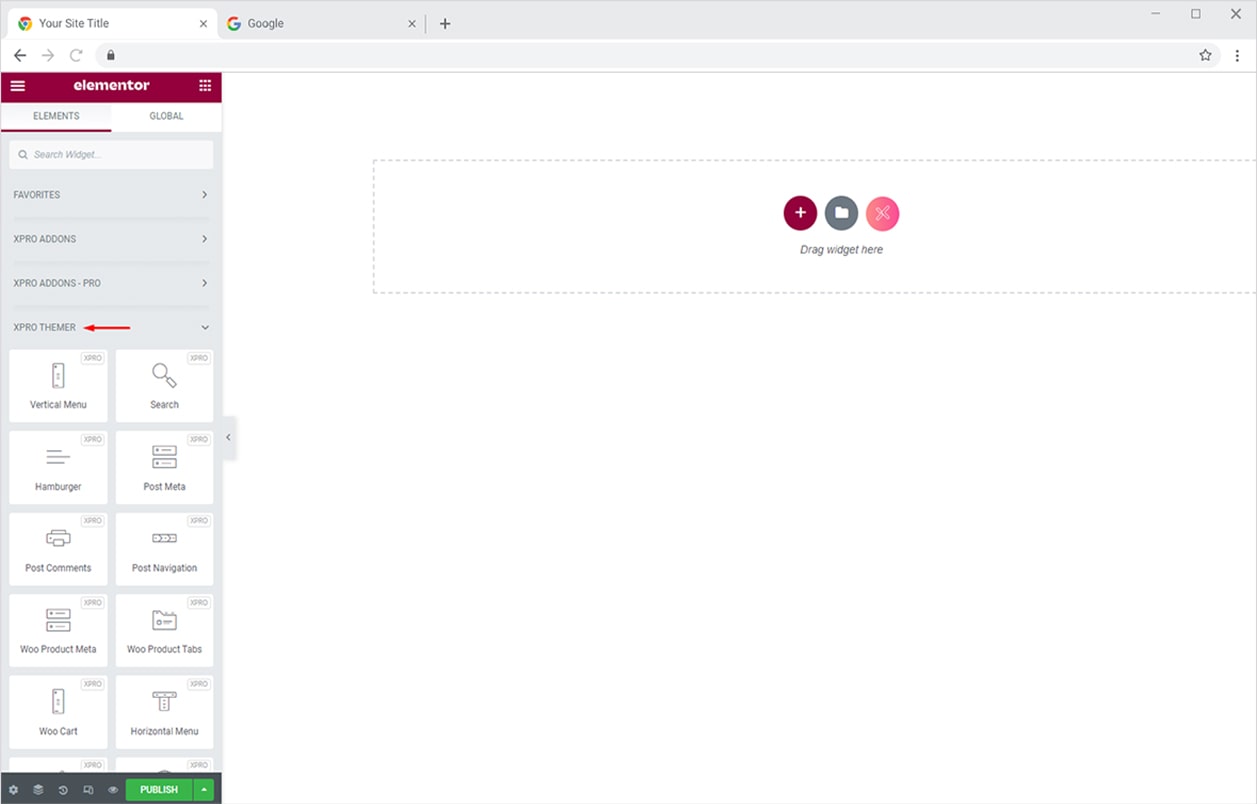
Now once you click on the Elementor button from the Xpro Theme Builder Dashboard (as above), you will be redirected to a new tab with Elementor Editor opened on it.
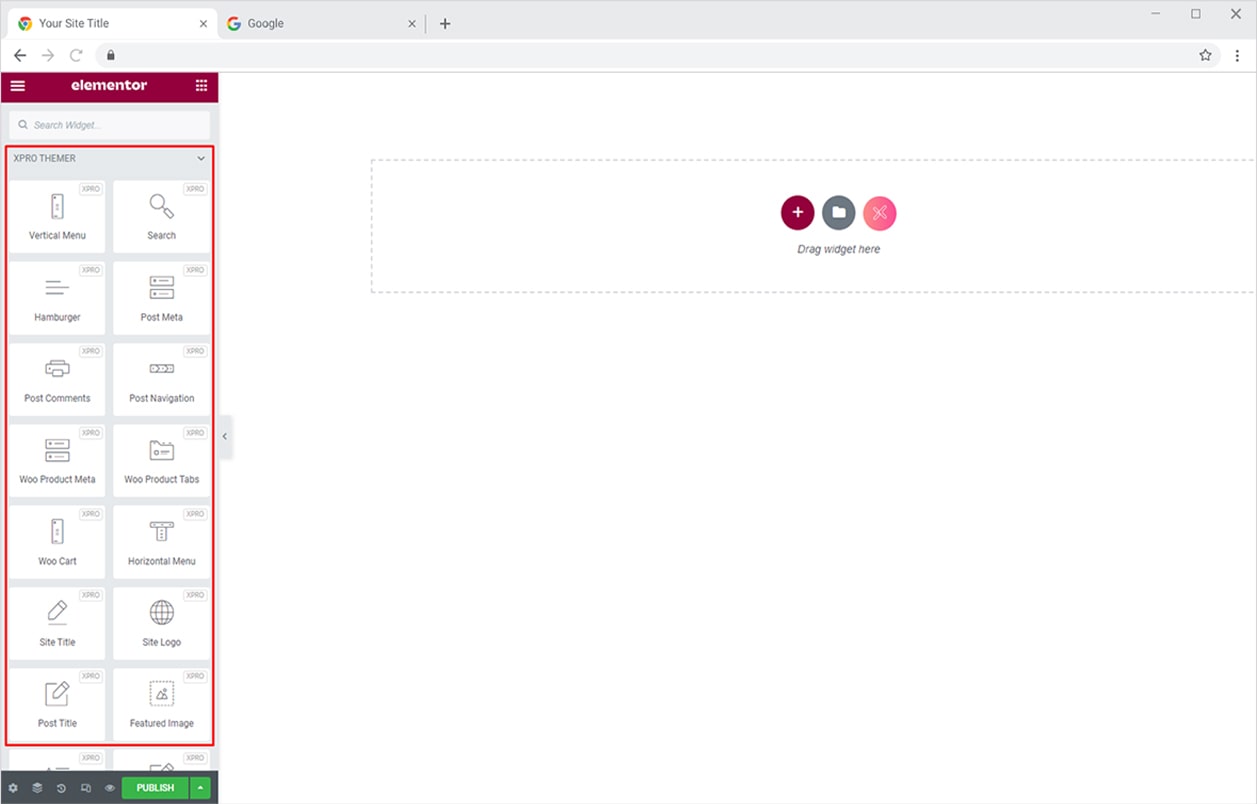
Click on the Xpro Themer section available in the widgets menu.
Now simply drag and drop the Xpro Themer widgets to create a stunning post layout for your website. You can use powerful widgets like Post Meta, Post Comment, Post Title, Post Content, Featured Image, and many others.
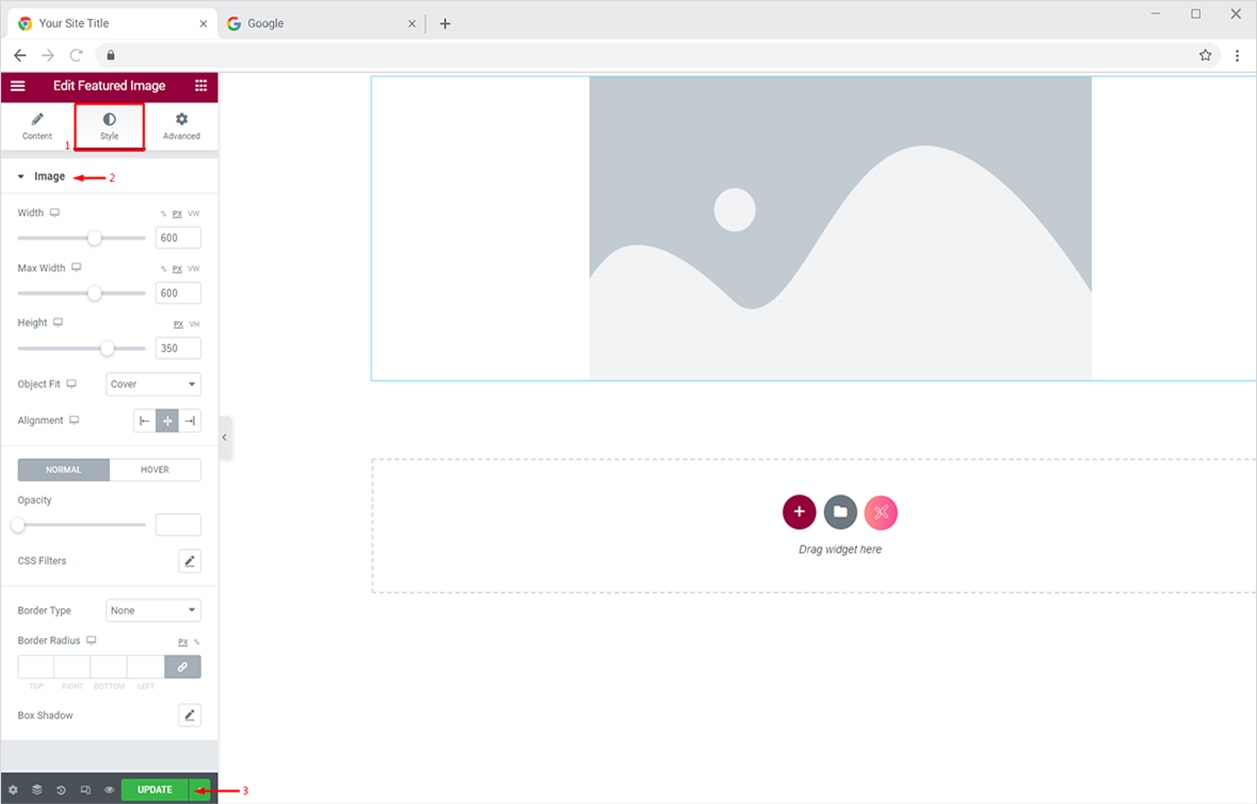
Let’s first add a Featured Image for this specific single post. Simply drop the Featured Image widget into your desired location.
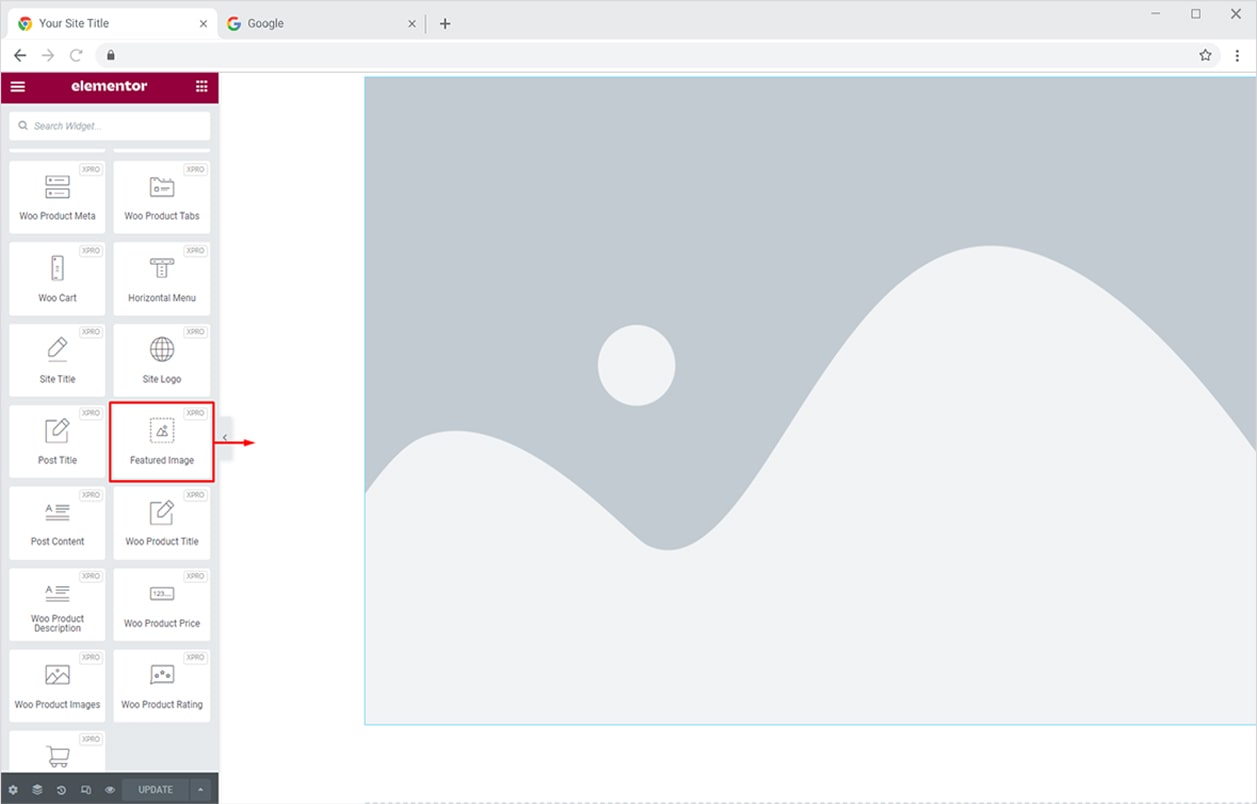
Set custom image height and width from the Style tab and set Object Fit as you like. After applying your desired settings, simply click on the update button present on the bottom left side.
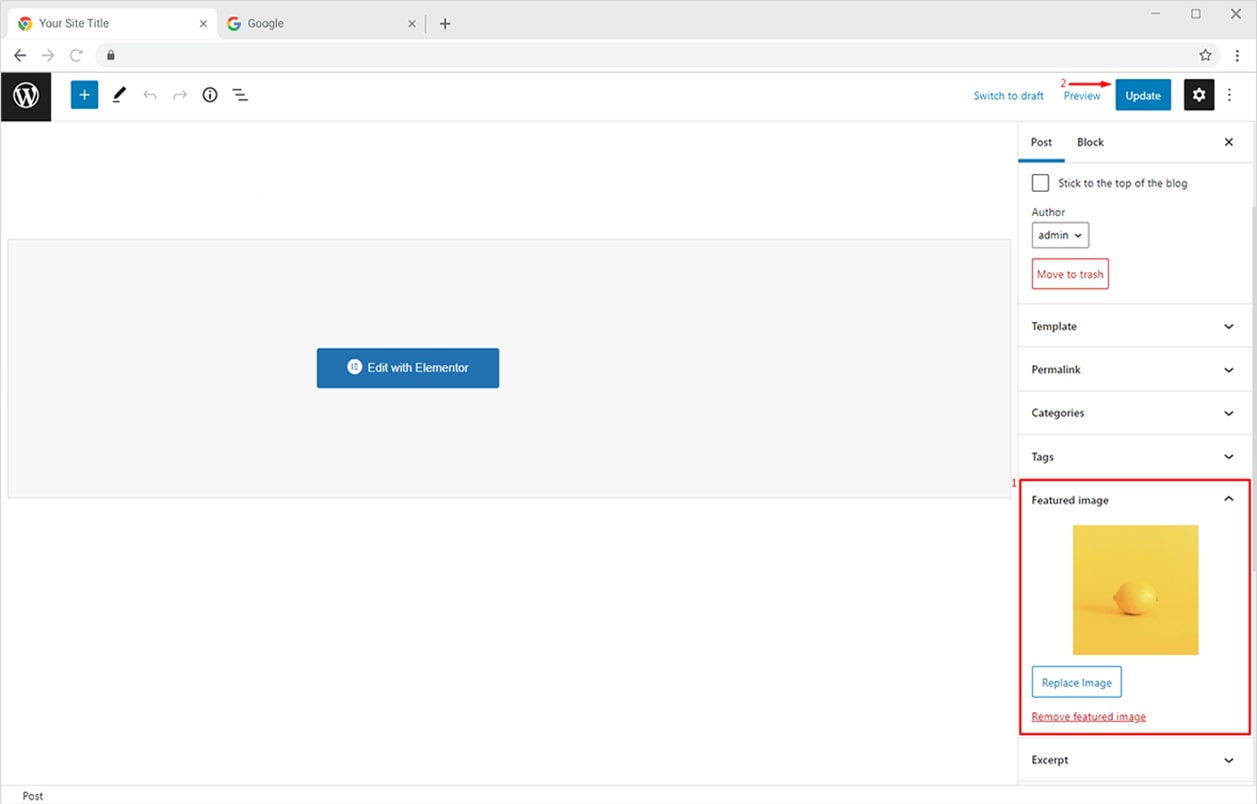
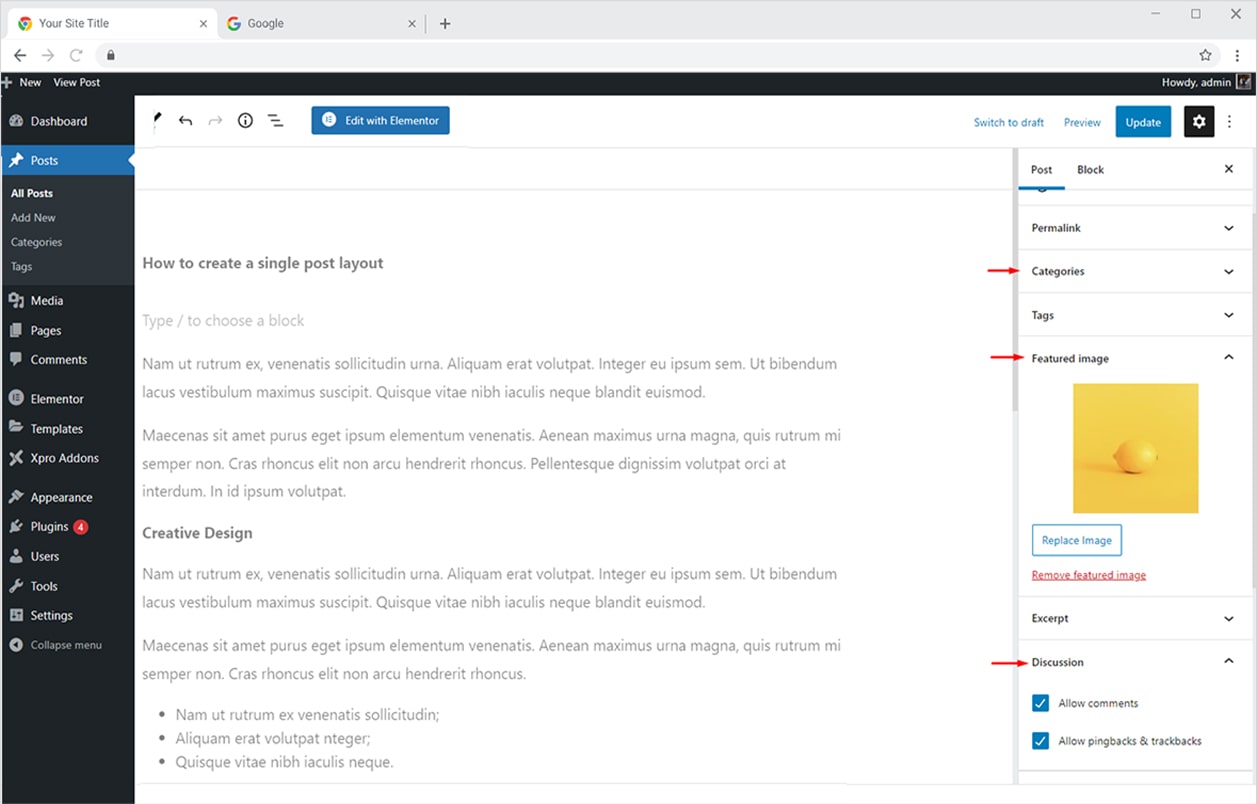
Now from the WP dashboard, open this specific post and add a featured image to it. The widget will automatically fetch that featured image.
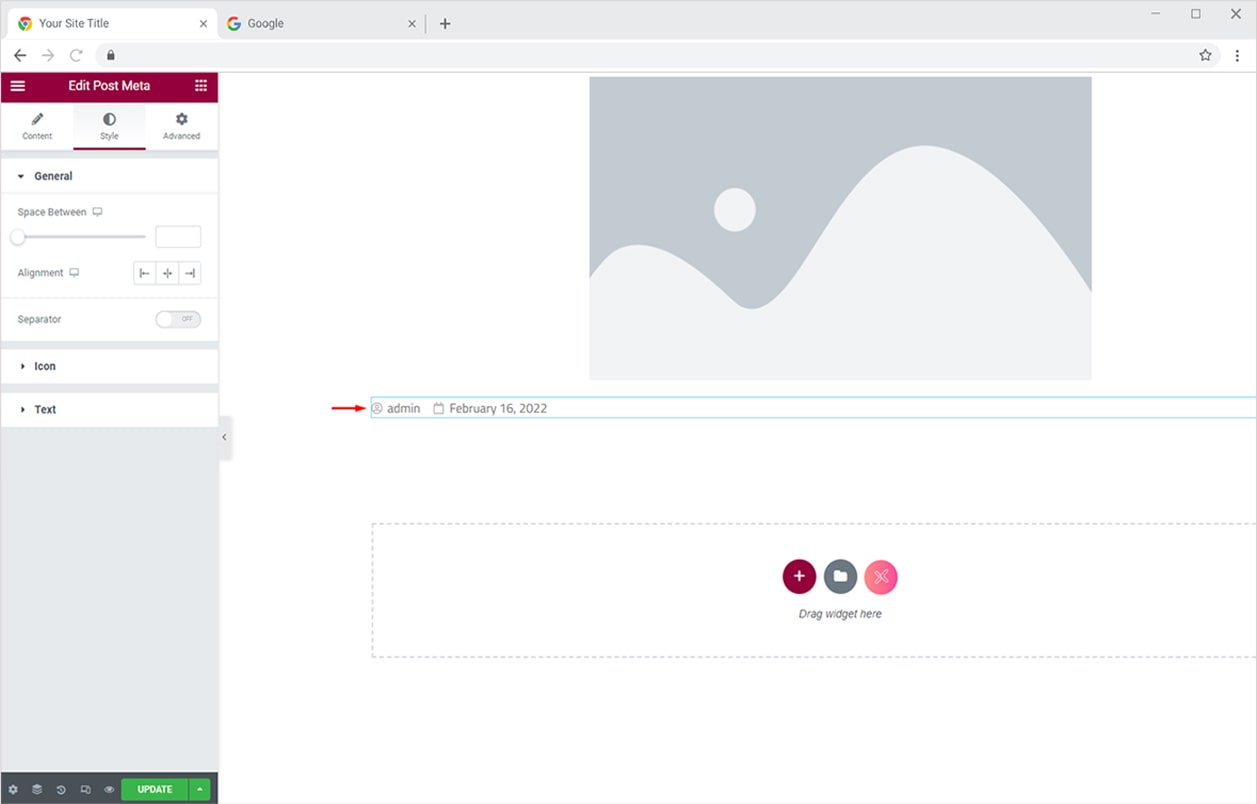
Let’s add other Xpro Themer widgets to complete our new single post layout. I have added the ‘Post Meta’ widget now. You can style it from the Style tab as you like.
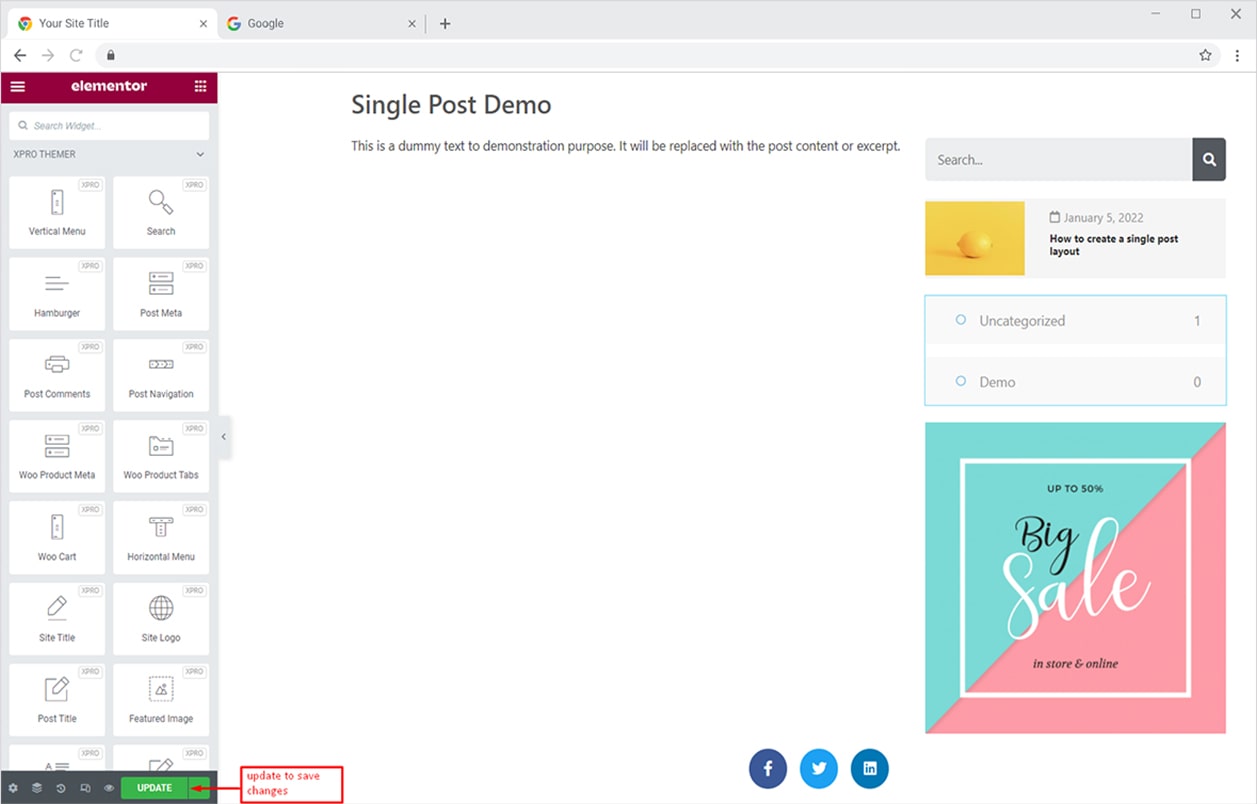
Similarly, add any other widget you like and complete your single post layout. Your imagination is the only limit here. I have created a custom layout of my liking, here it is:
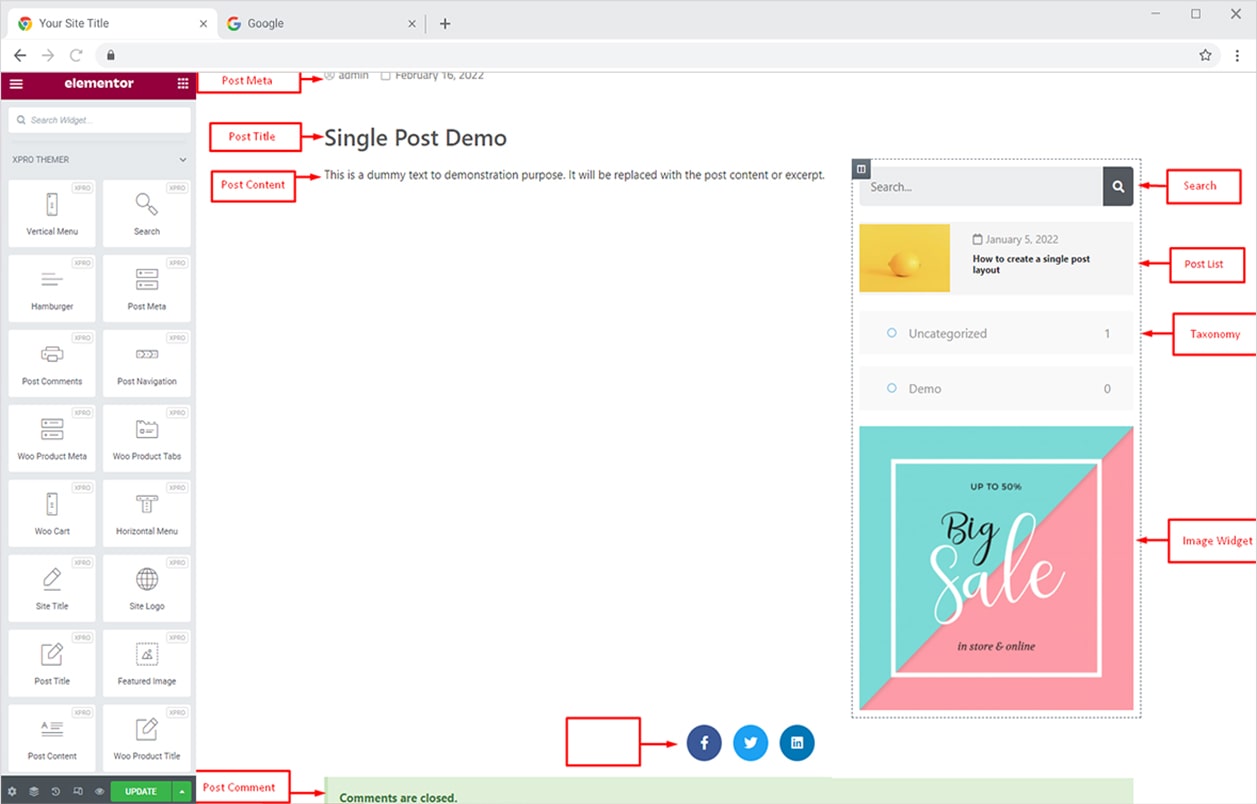
Here, I’ve mentioned all widgets used to create this awesome layout. You can create your own single post layout as you wish using a mixture of Xpro Themer widgets and Xpro Addons.
Once you’ve finalized your layout from the Elementor Editor, simply click on the Update button. Your changes will be saved and the layout will be updated.
Remember your post content needs to be populated from the WP dashboard. To do this, simply open the specific post and add your content in Blocks. You can choose or upload Featured Image, add/choose a category for the post, turn comments on/off right from the editor.
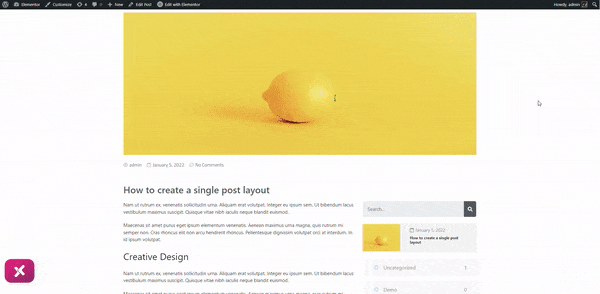
Simply update your settings and view the post. Your custom layout and content changes will reflect on the live post.
How to Set Display Conditions for Single Page/Post using Xpro Elementor Theme Builder
You may want to keep the same single post layout for all of your blog posts and sometimes you may want different layouts for different blog categories. For this, you have to assign a singular layout to a specific post, page, or custom post type. This can be easily done with our Free Theme Builder For Elementor. It gives you the complete freedom to easily customize Display Conditions right from the front-end dashboard.
To do this, simply edit the Singular Layout you want to specify these conditions for. Here, I’ll demonstrate Display Conditions for Layout titled ‘Single Post Demo’.
From the Display On option, you can make your Single Post Layout visible on All Posts, any specific post, and more. You can also add multiple display rules by clicking the Add Display Rule button.
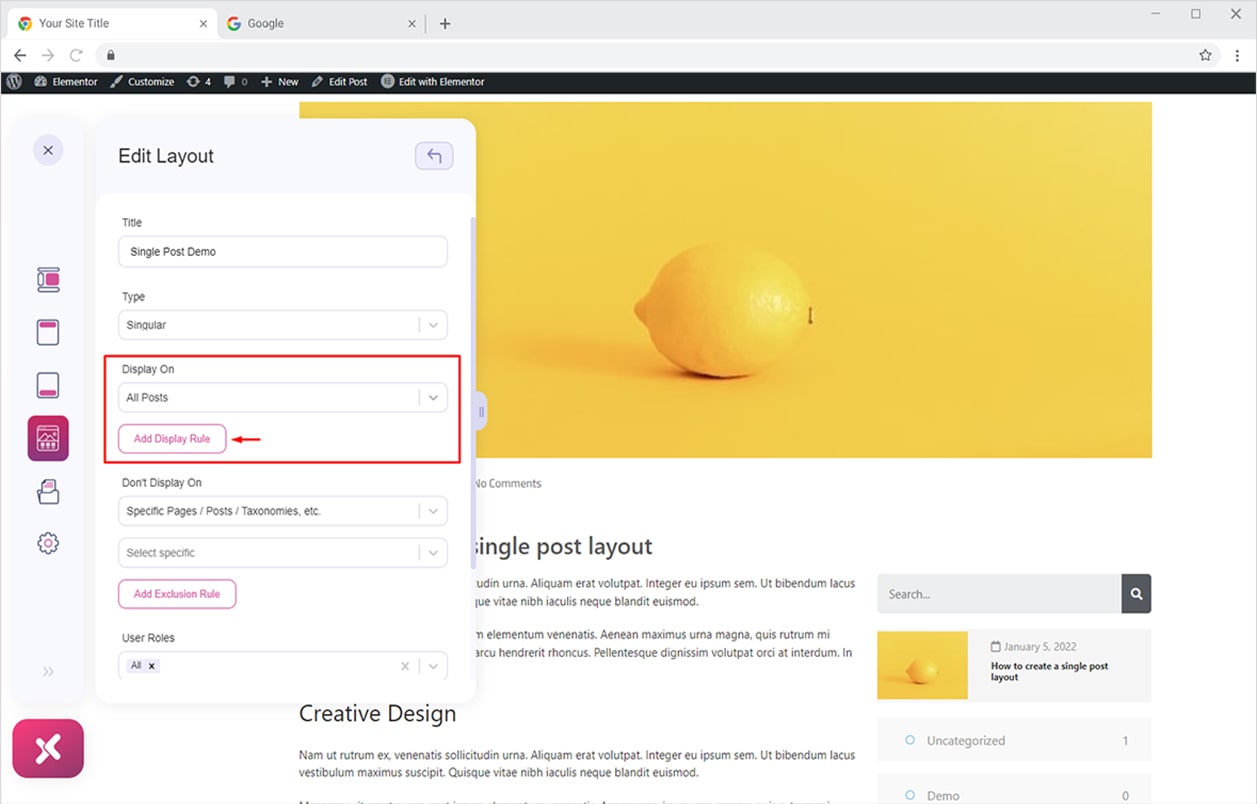
Similarly, if you don’t want this specific Single Post Layout on certain posts then simply open the dropdown menu of the Don’t Display On option and apply your exclusion rule. To do this, simply scroll to the bottom and select the ‘Specific Page / Post / Taxonomies, etc.’ option.
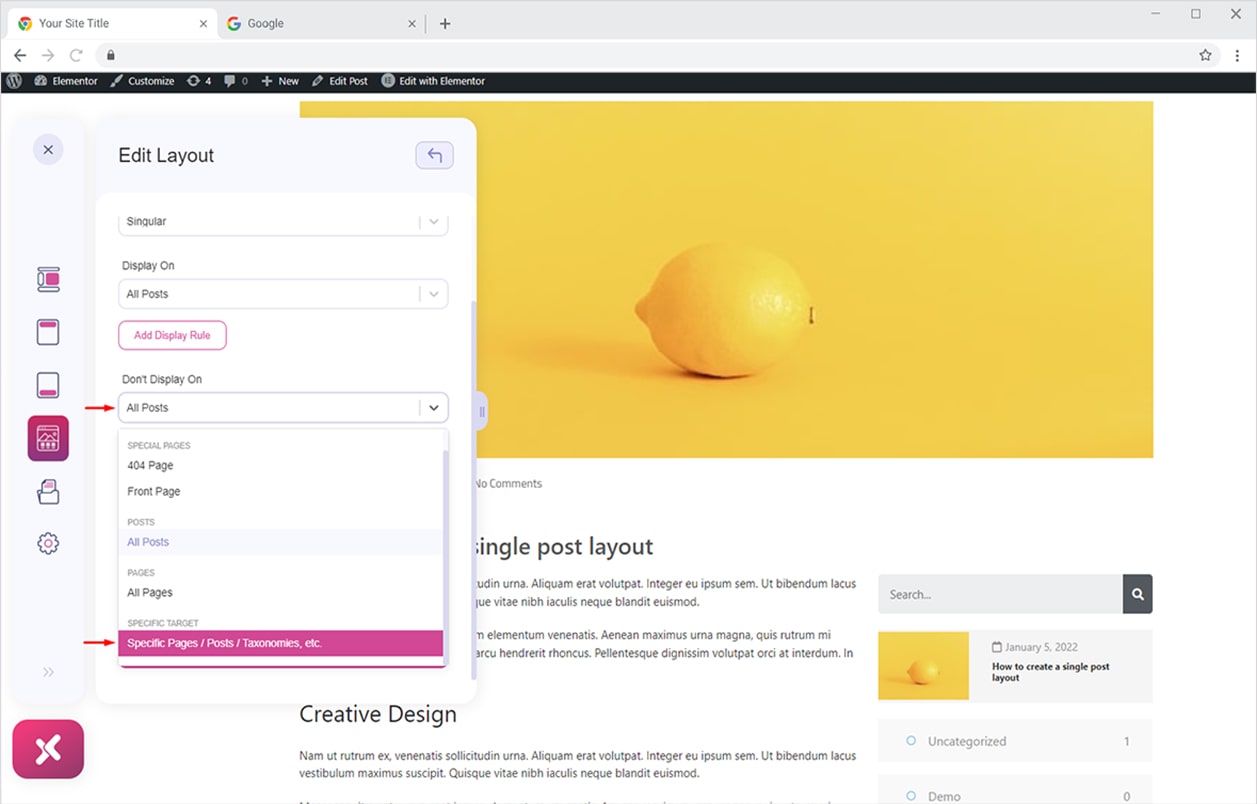
Now type or click the dropdown to select the names of the specific pages you want the Singular Layout to hide on. You can always add multiple exclusion rules by clicking on the Add Exclusion Rule button.

Finally, update your settings and your Display Conditions will be updated.
This is pretty much it from our Custom Singular Layout for WordPress guide. I hope you have a better understanding of using Xpro Elementor Theme Builder to create FREE single page/post type, WooCommerce single product, search page, 404 pages, and much more.
In the same way, you can create archive layouts for your website for free using our powerful theme builder. Check our detailed guide on creating custom archive templates using Xpro Elementor Theme Builder and instantly delight your site visitors with perfect UI.